
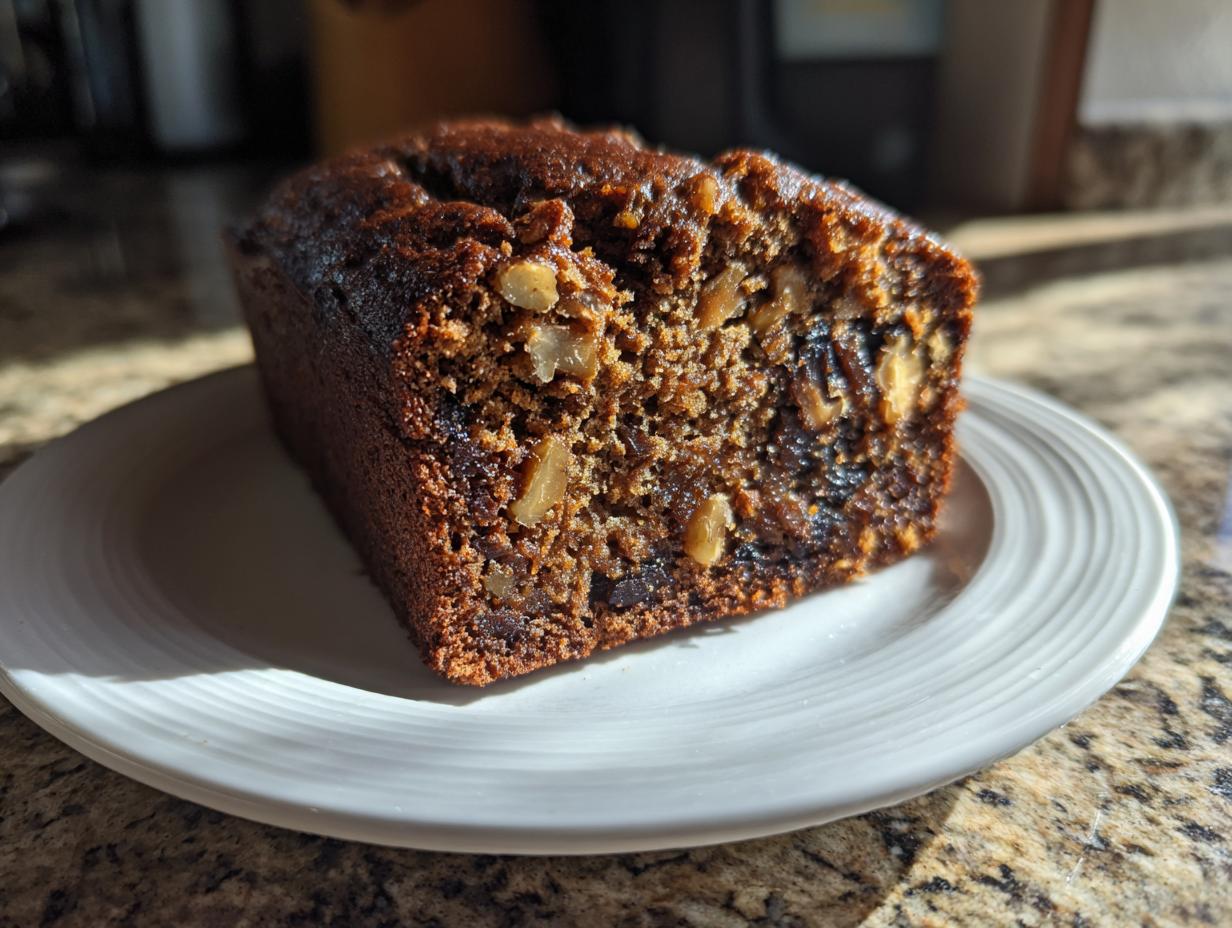
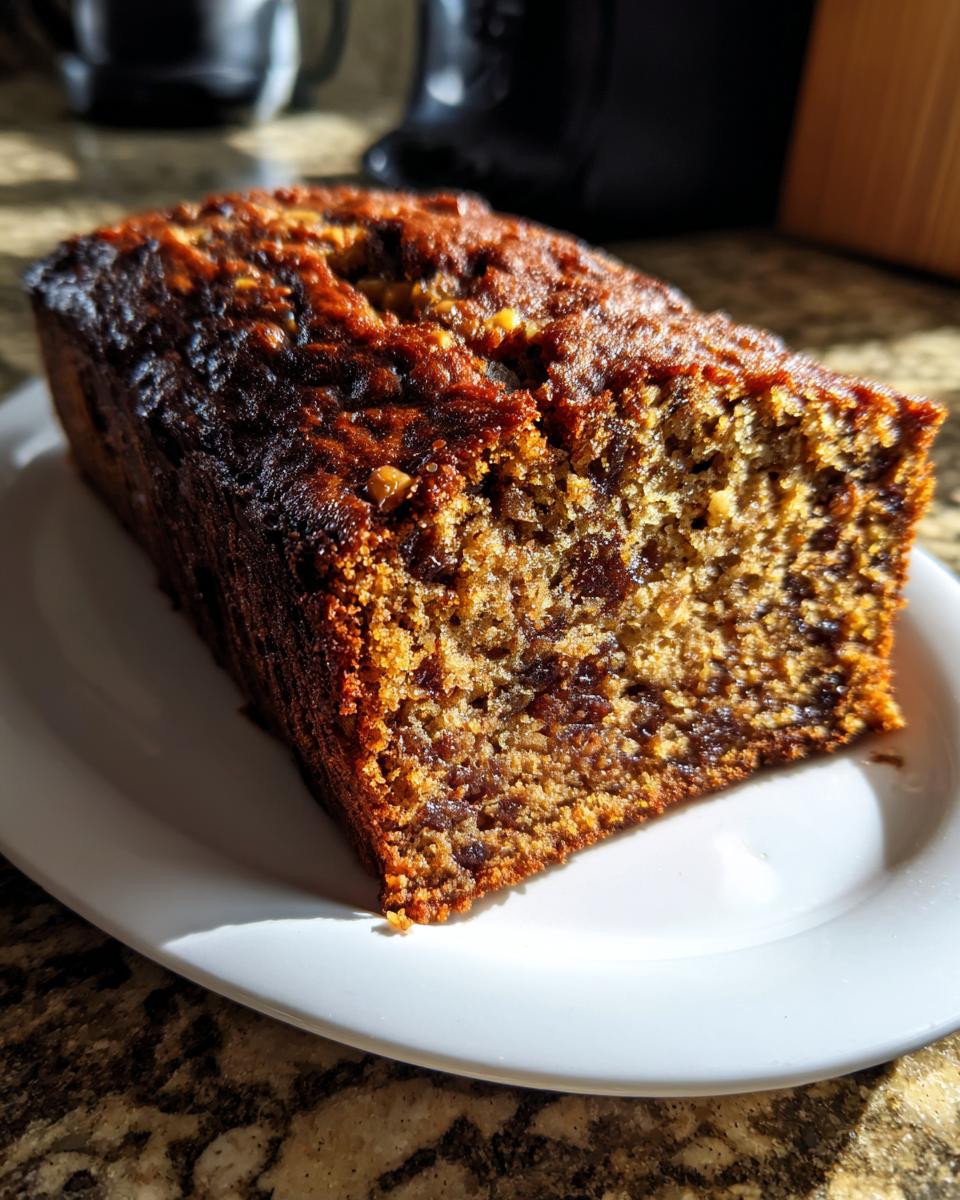
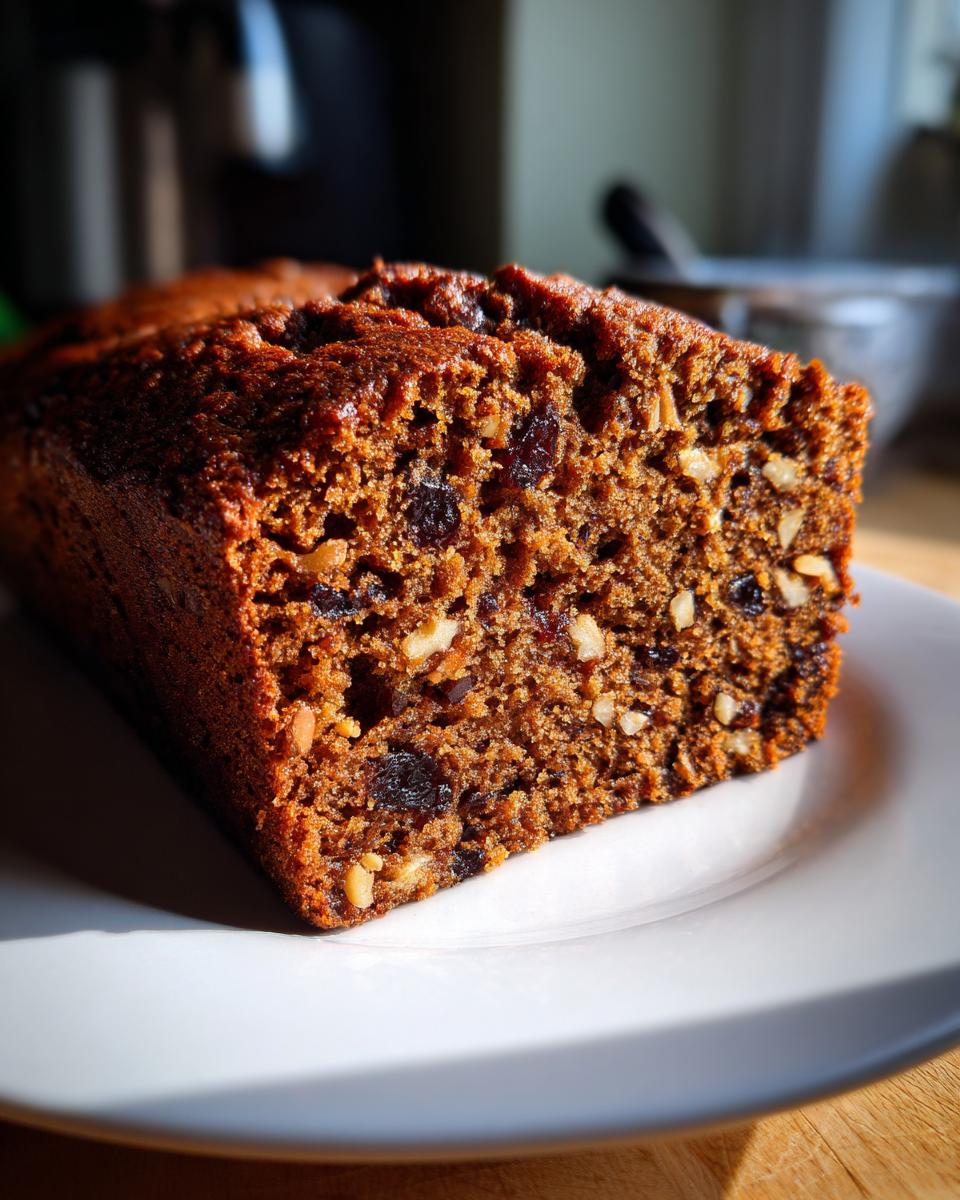
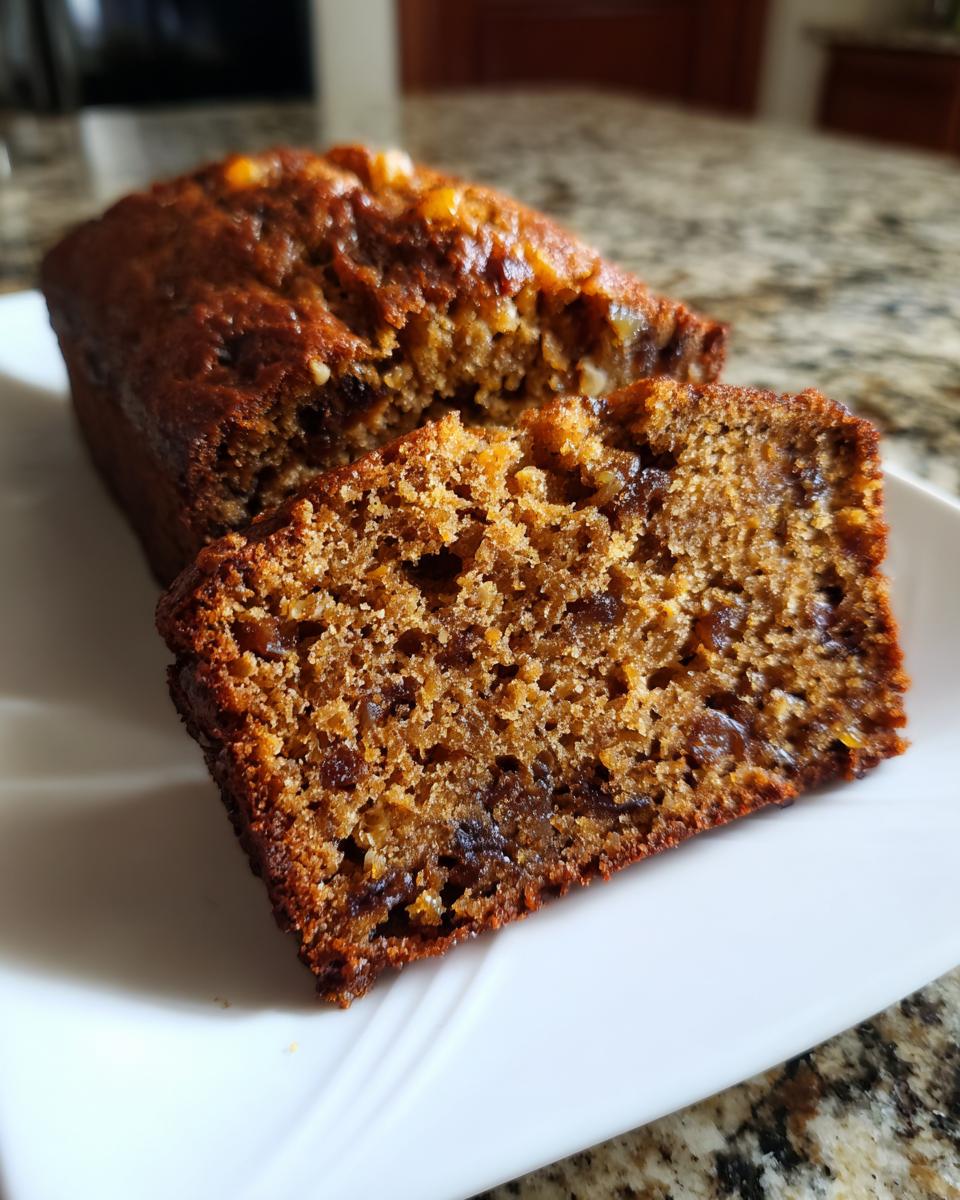
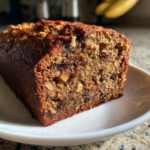
There is just something about that warm, spiced scent rising from the oven that instantly makes a house feel like home, isn’t there? I’m Jessica, and honestly, my best cooking lessons came from standing on a wobbly stool right next to my mom and grandma in our Ohio kitchen. We dealt with busy schedules, but we never sacrificed real food. That’s why I’m sharing this Old-Fashioned, Ultra-Moist Date Nut Bread Recipe. If you are tired of quick breads that turn out dry and sad, trust me—this recipe is the answer we searched for decades to find. This classic date nut bread has the sweetness of the fruit and the perfect crunch of walnuts, guaranteed. You can read more about my journey from family kitchens to modern baking challenges over on our story page.
- Why This Is The Best Moist Date Nut Bread Recipe
- Ingredients for Your Old-Fashioned Date Nut Bread
- How to Prepare Your Ultra-Moist Date Nut Bread
- Tips for Perfect Date Nut Bread Every Time
- Ingredient Notes and Substitutions for Date Nut Bread
- Serving Suggestions for Your Comfort Food Baking Loaf
- Make Ahead Bread and Storage for Date Nut Bread
- Common Questions About This Easy Quick Bread Baking
- Nutritional Estimates for Your Sweet Loaf Recipes
Why This Is The Best Moist Date Nut Bread Recipe
Okay, I know everyone claims their quick bread is the best, but I stand by this one. If you’ve ever taken a bite of something similar only to find it crumbly and dry, you know the frustration! That is *not* happening here; this is the ultimate Moist Date Nut Bread Recipe you’ve been needing.
We always aim for flavor but practicality matters too. Here is why this loaf always gets requested at our house:
- It stays ridiculously moist for days—seriously, days!
- It uses standard pantry ingredients, making it one of the most Simple Baking Recipes you can pull out anytime.
- The texture is dense enough to feel substantial but tender enough to melt in your mouth.
- It captures that perfect, nostalgic Classic Loaf Cake flavor without needing any complicated glazes.
Ingredients for Your Old-Fashioned Date Nut Bread
When I set out to create a reliable, foolproof recipe, I knew the ingredients themselves had to be quality. You don’t need fancy extracts or obscure items here; this is old-fashioned baking at its best! I always grab these staple items from my pantry before I even think about preheating the oven. Remember, when you’re making Homemade Date Bread, the quality of that main fruit really shines through.
Go ahead and gather everything up. Having it ready makes the mixing process, which is already so straightforward, go even faster:
- 1 cup boiling water
- 1 cup packed pitted dates, chopped—make sure they’re pitted, folks!
- 1 teaspoon baking soda
- 1/2 cup (that’s one standard stick!) unsalted butter, softened—this is crucial for creaming!
- 1 cup granulated sugar
- 2 large eggs
- 1 teaspoon vanilla extract
- 1 3/4 cups all-purpose flour
- 1 teaspoon baking powder
- 1/2 teaspoon salt
- 1 cup chopped walnuts (and grab a few extra for sprinkling on top if you’re feeling fancy!)
See? No fuss! This gives you everything you need for a wonderfully moist loaf. Don’t let the boiling water scare you; that’s our little secret weapon coming up soon!
How to Prepare Your Ultra-Moist Date Nut Bread
Now that we have all our ingredients laid out—and trust me, organizing first is half the battle with any Easy Quick Bread Baking—we can get this batter whipped up! First things first, we need to get that oven hot. Go ahead and preheat to 350°F (175°C). If you’re using a standard 9×5 inch loaf pan, give it a good grease and flouring; we don’t want any sticking!
The magic for this unbelievably moist date nut bread happens before anything else, so pay close attention to that date step. Honestly, this is the game-changer!
Activating the Dates for Maximum Moisture
This is my favorite non-secret secret! Place those chopped dates right into a little bowl. Then, you’re going to pour 1 cup of boiling water directly over them, and stir in that teaspoon of baking soda. Let this mixture sit for a full 10 minutes. What’s happening here is the soda is reacting with the fruit and the heat is softening them perfectly. They absorb almost all that water, which means that moisture stays locked *inside* your loaf, guaranteeing that ultra-moist texture we love.
Mixing the Batter: Avoiding Overmixing
While the dates are soaking, move on to your butter and sugar. Cream them in a big bowl until they look light and fluffy—that’s when you know you’ve incorporated enough air. Beat in your eggs one at a time, then the vanilla. In a separate bowl, whisk your dry ingredients together: flour, baking powder, and salt! Now, here is where we slow down: Add the dry mixture to the wet mixture, but only gradually, mixing *just* until you don’t see any more flour streaks. We are making a moist loaf, not a hockey puck, so absolutely no overmixing!
Finally, gently fold in those walnuts and the entire date mixture, soaking liquid and all! Pour that beautiful batter into your prepared pan. If you want a pretty top, sprinkle extra walnuts over it. Pop that in the oven and bake it for about 55 to 65 minutes. If you need to check the terms for baking safety, you can review them here at our terms, but mostly, just make sure a skewer comes out clean!
Tips for Perfect Date Nut Bread Every Time
Baking this Old Fashioned Quick Bread is supposed to be relaxing, not stressful! I’ve learned a few things over the years that make sure this Classic Loaf Cake comes out amazing, even if you’re rushing on a busy morning. Pay attention to your ingredients when they start—this matters more than you think!
First point of order: Your butter should be softened, not melted. If it’s too warm, you won’t get those beautiful tiny air pockets when you cream it with the sugar. That’s what gives the loaf its tender crumb structure. Second, when you check for doneness, rely on your senses more than just the clock. The edges of the loaf should start pulling away from the sides of the pan just slightly. That means moisture is setting up perfectly inside!
Give it that gentle poke test if you’re unsure. It should spring back nicely. Resist the urge to slice it hot, though! If you cut it while piping hot, you’ll definitely lose that amazing moisture we worked so hard to lock in!
Ingredient Notes and Substitutions for Date Nut Bread
When we talk about making the best Date Nut Loaf, we have to talk about the ingredients themselves. This recipe is designed to be straightforward—it’s part of why it’s such a reliable Homemade Date Bread—but sometimes you have to make a little switch based on what you have or what you prefer. Don’t sweat it; we can adjust!
For instance, the recipe calls for all-purpose flour, but if you’re aiming for something a bit more wholesome, try swapping out half of that white flour for whole wheat flour. I’ve done that when I’m feeling like this is a slightly more virtuous Quick Bread for Breakfast. Just use 7/8 cup of AP and 7/8 cup of whole wheat. It works perfectly without sacrificing too much tenderness!
As for the butter, I always preach using the real thing for the best structure, but if you absolutely must substitute it for margarine or a non-dairy stick, just make sure it’s cold, firm butter substitute, not the soft spreadable kind. Fat is fat in this recipe, but texture counts!
Achieving a Naturally Sweetened Bread
One of the greatest things about this recipe is how much natural sugar we get straight from the dates. Seriously, they are little flavor bombs! Because we soak them first, we’re actually hydrating the bread while boosting that inherent sweetness. This means we don’t have to rely heavily on sugar, which is why it fits perfectly into the category of a Naturally Sweetened Bread treat.
If you wanted to lean into that even more—maybe you’re serving it alongside coffee or tea—you could potentially cut back that granulated sugar by a scant quarter cup, but I warn you, it might lose just a touch of that light, fluffy lift we get from creaming the butter and sugar. I usually stick to the recipe for that perfect balance!
Serving Suggestions for Your Comfort Food Baking Loaf
Okay, your stunning, ultra-moist date nut bread is finally out of the oven and cooled enough to slice! Now the real question is: how are you going to eat it? I’ve found that the absolute best way to enjoy this is while it’s still slightly warm. The aroma just blooms when it’s heated up slightly, and that texture transforms into pure magic.
My go-to serving suggestion remains the simplest: a thick swipe of good quality, slightly salted butter melting into the crumb. It’s classic comfort, plain and simple! This loaf is hearty enough to stand up beautifully to that rich fat.
But don’t stop there! This bread is so versatile. It makes a wonderful foundation for a cozy afternoon break. We often slice it thick and serve it alongside a hot cup of coffee or a strong cup of tea—it’s perfect for those moments when you just need a few minutes of peace before tackling the next thing on the list.
For special occasions, especially around the holidays, this loaf turns into a fantastic, easy Holiday Fruit Bread centerpiece. You can leave it plain, or—if you want to get a little fancy without much effort—try topping a slice with a smear of cream cheese or maybe even a dollop of real whipped cream if you’re serving it as a simple dessert after dinner. Back when my boys were little, we even lightly toasted slices and let them dip them into warm apple cider. Speaking of tradition, if you’re looking for other wonderful holiday flavor profiles, you might want to check out this amazing recipe from The Baking Chocolatess for a similar classic date nut bread.
Honestly, though, my favorite family tradition is just cutting a huge chunk off the end of the loaf before anyone else sees it and eating it standing up while leaning against the counter. Don’t tell my husband I said that!
Make Ahead Bread and Storage for Date Nut Bread
I absolutely love being able to bake ahead, especially when things get hectic, or when I know I won’t have time to bake during the busy holiday season. This date nut bread is wonderful because it truly qualifies as a fantastic Make Ahead Bread. The flavor often deepens overnight, which is fantastic for folks who need to prep their brunch spreads the day before!
You actually don’t have to rush to eat this loaf right away. Once it’s completely cooled down—and I mean completely, otherwise you risk condensation and mold—you can wrap it up tight. I use two layers of protection: first, a good layer of plastic wrap snug around the whole loaf, and then I wrap that again in aluminum foil. This double barrier keeps any fridge or freezer odors out, which is key!
If you’re just saving it for a couple of days, the airtight wrapping is enough to keep it fresh on the counter. But if you’re planning way ahead, this loaf freezes like a dream! You can definitely freeze it for up to three months. Just thaw it slowly overnight in the fridge, or at room temperature before you plan to serve it.
Now, if you’re taking a slice straight from the fridge or freezer and want it to taste like it just came out of the oven, here’s my trick for maintaining moisture. Don’t just eat it cold! Pop that slice into the microwave for about 10 to 15 seconds. That little burst of heat warms the dates and softens the crumb again. If you want to crisp the outside just a bit, you can always put that warmed slice under the broiler for a minute—just watch it closely! That little reheat step makes all the difference.
Common Questions About This Easy Quick Bread Baking
I know when you’re tackling a new recipe, especially one you want to be perfect—like this date nut bread—you inevitably have a few lingering questions. That’s why I gathered up the ones I get asked most often by friends and family who are trying this Easy Quick Bread Baking for the first time! Hopefully, these little pointers smooth out any last-minute worries.
Is this homemade date bread freezer-friendly?
It absolutely is! Remember what I mentioned in the storage section? This loaf is sturdy and freezes beautifully. Once it’s totally cool, wrap it up tight in plastic and then foil. It lasts for about three months, making it one of the best Sweet Loaf Recipes to bake during an afternoon lull! When you want to enjoy a slice, just give it a slow thaw.
Can I substitute the walnuts with other nuts?
Yes, you certainly can use other nuts if walnuts aren’t your favorite, or if you have a nut allergy and need to substitute them entirely! Pecans are my next favorite choice in this loaf; they have a slightly buttery taste that really complements the dates. You could even use slivered almonds if you want a finer texture in your Walnut Date Loaf. Just make sure the quantity stays the same—about one cup chopped!
What is the absolute key to making sure this date nut bread stays moist?
If I had to pick just one secret—and this is why I hammered it home in the instructions—it’s the date soaking step! Pouring boiling water and baking soda directly over the chopped dates and letting them sit for 10 minutes is non-negotiable for me. This hydrates the dry fruit *before* it hits the oven, ensuring that the final product isn’t just a Classic Loaf Cake texture, but a truly moist one. If you skip that, you are missing the main trick to this Moist Date Nut Bread Recipe!
Can this recipe be adapted for Banana Date Nut Bread?
Oh, that’s a fun thought! While this specific formula is perfectly balanced for the dates, you absolutely could experiment with a Banana Date Nut Bread Variation. If you want to try it, I’d suggest reducing the initial 1 cup of boiling water slightly—maybe start with 3/4 cup—and then adding about 1/2 cup of very ripe, mashed banana into the wet ingredients when you add the eggs. Adjust your baking time up by about 5 to 10 minutes, and remember to check for doneness using that toothpick test!
If you have any other questions about measurements or techniques for this or any other recipe on the site, please don’t hesitate to reach out to our team via the Contact Page!
Nutritional Estimates for Your Sweet Loaf Recipes
Now, I totally know that when we’re baking pure comfort food like this rich date nut bread, we aren’t exactly looking for a fat-free masterpiece! But if you’re curious about what you’re serving up—whether it’s for breakfast or gifting—it’s always good to have a ballpark idea. I always tell folks here at The YumMagnet Recipe Box that you should know what you’re working with for your Sweet Loaf Recipes.
Please keep in mind, these numbers are just estimates. They are calculated based on the standard ingredients listed above, assuming an approximate yield of 10 good-sized slices. If you use different brands of butter, or if you decide to load up on those extra walnuts (which I totally support!), your final count will shift a little. You can check out our full privacy policy, but these estimates are provided without warranty, naturally!
Here is a general breakdown per slice:
- Calories: Around 285
- Fat: About 12g
- Carbohydrates: We are looking at roughly 43g
- Protein: A helpful 5g
You’ll also notice the sugar count is higher, around 25g, but remember most of that sweetness is coming naturally from those wonderful, soaked dates! That’s the beauty of relying on fruit to sweeten your baking, even in an Old Fashioned Quick Bread recipe like this one.
PrintOld-Fashioned, Ultra-Moist Date Nut Bread Recipe
Bake a classic, moist date nut bread loaf using simple ingredients. This easy quick bread recipe delivers rich flavor perfect for breakfast, snacking, or holiday gifting.
- Prep Time: 15 min
- Cook Time: 60 min
- Total Time: 75 min
- Yield: 1 loaf (about 10 servings) 1x
- Category: Quick Bread
- Method: Baking
- Cuisine: American
- Diet: Vegetarian
Ingredients
- 1 cup boiling water
- 1 cup packed pitted dates, chopped
- 1 teaspoon baking soda
- 1/2 cup (1 stick) unsalted butter, softened
- 1 cup granulated sugar
- 2 large eggs
- 1 teaspoon vanilla extract
- 1 3/4 cups all-purpose flour
- 1 teaspoon baking powder
- 1/2 teaspoon salt
- 1 cup chopped walnuts (plus extra for topping, optional)
Instructions
- Preheat your oven to 350°F (175°C). Grease and flour a standard 9×5 inch loaf pan.
- Place the chopped dates in a small bowl. Pour 1 cup of boiling water over the dates and stir in the baking soda. Let this mixture sit for 10 minutes. The dates will soften and absorb the water.
- In a large bowl, cream together the softened butter and sugar until light and fluffy. Beat in the eggs one at a time, mixing well after each addition. Stir in the vanilla extract.
- In a separate medium bowl, whisk together the flour and baking powder, and salt.
- Gradually add the dry ingredients to the wet ingredients, mixing just until combined. Do not overmix the batter.
- Gently fold in the chopped walnuts and the date mixture (including any remaining liquid).
- Pour the batter into the prepared loaf pan. Sprinkle a few extra chopped walnuts over the top, if desired.
- Bake for 55 to 65 minutes, or until a wooden skewer inserted into the center comes out clean.
- Let the bread cool in the pan for 10 minutes before turning it out onto a wire rack to cool completely. Slice and serve warm with butter for the best flavor.
Notes
- For an extra moist loaf, you can substitute half of the all-purpose flour with whole wheat flour.
- This homemade date nut bread freezes well. Wrap the cooled loaf tightly in plastic wrap and then foil before freezing for up to three months.
- Serve this comfort food baking loaf warm with butter or cream cheese for a satisfying breakfast or snack.
Nutrition
- Serving Size: 1 slice
- Calories: 285
- Sugar: 25g
- Sodium: 210mg
- Fat: 12g
- Saturated Fat: 4g
- Unsaturated Fat: 8g
- Trans Fat: 0g
- Carbohydrates: 43g
- Fiber: 2g
- Protein: 5g
- Cholesterol: 55mg