
You know that feeling? You’re settling in with a big bowl of pasta, or maybe you’ve just made a killer spinach dip, and you realize you have nothing warm and buttery to dip into it with. I used to get so frustrated running out to grab pricey restaurant breadsticks, but not anymore! That craving for that iconic, soft, and perfectly garlicky pull-apart experience led me straight back to my roots. Here at The YumMagnet Recipe Box, my whole mission—the very reason I started this thing—was to take those treasured family flavors and rework them for our busy modern lives. These breadsticks? They seriously rival any famous chain you can think of. Forget store-bought frozen dough; we’re making the real deal, the soft and chewy Olive Garden Copycat Breadsticks, and I promise they are easier than you think. If you want to know more about how we adapt recipes for modern life, check out our story here. Let’s get baking!
- Why This Homemade Breadsticks Recipe is Your New Go-To
- Essential Ingredients for Perfect Breadsticks
- Step-by-Step: Making Easy Breadsticks Dough
- Shaping and Baking Your Restaurant Style Breadsticks
- Crafting the Signature Garlic Parmesan Breadsticks Topping
- Tips for Success with Homemade Breadsticks
- Serving Suggestions for These Appetizer Bread Sticks
- Storage & Reheating Instructions for Leftover Breadsticks
- Frequently Asked Questions About Making Breadsticks
- Estimated Nutritional Data for Your Homemade Breadsticks
Why This Homemade Breadsticks Recipe is Your New Go-To
I hear you. You want that amazing, fluffy texture you get at your favorite Italian spot, but you don’t have all day to wait around for dough to proof. That’s why I love this particular Homemade Breadsticks Recipe so much. We’ve streamlined the process to deliver those famous results without the wait you see in older recipes. This really is a fantastic Quick Bread Recipe if you’re patient enough for that initial rise!
The payoff is huge: unbelievably Soft Breadsticks that are tender inside but still have that satisfying, slightly chewy pull when you tear them apart.
Achieving Restaurant Style Breadsticks Texture
The secret to hitting that perfect restaurant style texture isn’t really a secret; it’s just technique! Don’t skimp on the kneading time—that 5 to 7 minutes really develops the gluten so you get those beautifully long, Chewy Breadsticks instead of crumbly snacks. Pair that with letting the yeast foam up properly at the start, and you’ve already won half the battle!
Essential Ingredients for Perfect Breadsticks
When we talk about making truly amazing breadsticks at home, we have to respect the basics. You don’t need a pantry full of fancy flours or imported spices here. This ingredient list is basic, which is why getting the details right—especially the temperature—is so crucial for that copycat texture. Remember, this is essentially a simple dinner roll dough that gets stretched out and smothered in garlic butter, so the dough itself needs to shine!
For the dough, you’ll need your warm water, active dry yeast, granulated sugar to feed the yeast, all-purpose flour (good old dependable stuff!), salt, and vegetable oil. That’s it for the base! For the flavor explosion that makes these smell like heaven, you need the butter, minced garlic, Italian seasoning, more salt, and Parmesan cheese.
Now, listen closely about that water temperature. If it’s too cold, your yeast sleeps, and you wait hours for nothing. If it’s boiling hot, you kill your yeast instantly. We are aiming for 110°F. Trust me, using a quick read thermometer makes all the difference between a quick rise and a giant disappointment!
Ingredient Notes and Substitutions for Your Breadsticks
We use standard all-purpose flour here because it gives us that fantastic balance of structure and tenderness. If you are out of vegetable oil, canola works just fine, or even melted coconut oil if you aren’t worried about a slight change in flavor profile. Just make sure you measure it correctly!
The garlic situation is customizable depending on how much time you have. I call for four cloves of fresh garlic minced, and honestly, that’s the best for potent flavor because it mixes right into the melted butter. If you are in a major pinch, you could use about 1 teaspoon of garlic powder mixed into the butter instead, but you’ll notice the difference in depth. Fresh garlic wins every single time for these buttery breadsticks!
Step-by-Step: Making Easy Breadsticks Dough
Okay, now we get into the fun part—making the dough for these Easy Breadsticks! This is where we lay the foundation for that wonderful, soft texture. We are following the first four steps here, and the whole process moves pretty quickly until the dough needs to rest.
First, you need to wake up your yeast. Combine your warm water (remember that 110°F sweet spot!), the yeast, and the sugar in a big bowl. Don’t touch it for about ten minutes. This is honestly the most important trust exercise you’ll have with this recipe!
Once you see that lovely foam on top, stir in your oil and salt. Then, start slowly dumping in the flour. When you first add the flour, you’ll get what I call ‘shaggy dough.’ I still remember standing on that stool in my mom’s kitchen, looking at that lumpy mess and thinking, ‘Oops, I added too much flour!’ But that’s normal! Don’t panic or add more liquid. Just keep working it until it starts pulling away from the sides of the bowl.
Next up is the kneading for your Homemade Dough Recipe. Turn that shaggy bit onto a floured surface and knead it hard for a good five to seven minutes until it feels smooth and elastic. After that, just tuck it into an oiled bowl, cover it up, and let it go to its happy place in a warm spot. It needs to double in size, usually about an hour and a half. Resist the urge to poke it constantly!
Activating the Yeast for Soft Breadsticks
I can’t stress this enough for getting those amazing Soft Breadsticks: the yeast activation step is non-negotiable! This is your proof that the yeast is alive and ready to work its magic, which creates those nice air bubbles that keep the final breadstick light and chewy. If you wait the full five to ten minutes and nothing happens—no foam, no bubbles, just sad water—your yeast is dead, and you need to start over with a new packet. It saves you an hour of waiting for dough that simply won’t rise.
Shaping and Baking Your Restaurant Style Breadsticks
Now that we have a beautifully rested, puffy dough, it’s time to get these beauties into shape! This is where we go from ball of dough to glorious, long, Restaurant Style Breadsticks. First things first: crank that oven up! You want it nice and hot at 400°F (200°C). Since these are baked quickly, that high heat is important for getting that outside crust just right without drying the inside out.
Make sure you have a big baking sheet lined with parchment paper. Seriously, don’t skip the parchment paper here. When the butter melts and drips, it can really burn onto a bare pan, and parchment makes cleanup a breeze! Gently punch the air out of your dough—it’s a satisfying moment, I promise. Then, divide your dough evenly into 16 pieces. I usually eyeball it, but if you’re feeling precise, using a kitchen scale keeps them all the same size.
Roll each piece out until you have a long strip, probably about 10 to 12 inches! Don’t worry if they look a little uneven; that’s part of the homemade charm. Lay them out on your prepared sheet, giving them a little space so they don’t fuse together while baking.
Into the oven they go! The magic part is how fast they bake. We are looking for just 10 to 12 minutes. You want them lightly golden—not dark brown! If you let them go too long, they lose that signature soft quality we worked so hard for. Keep an eye on them. Once they look done, pull that sheet out immediately. And don’t forget; you should read our terms of use before sharing your gorgeous baking photos!
Crafting the Signature Garlic Parmesan Breadsticks Topping
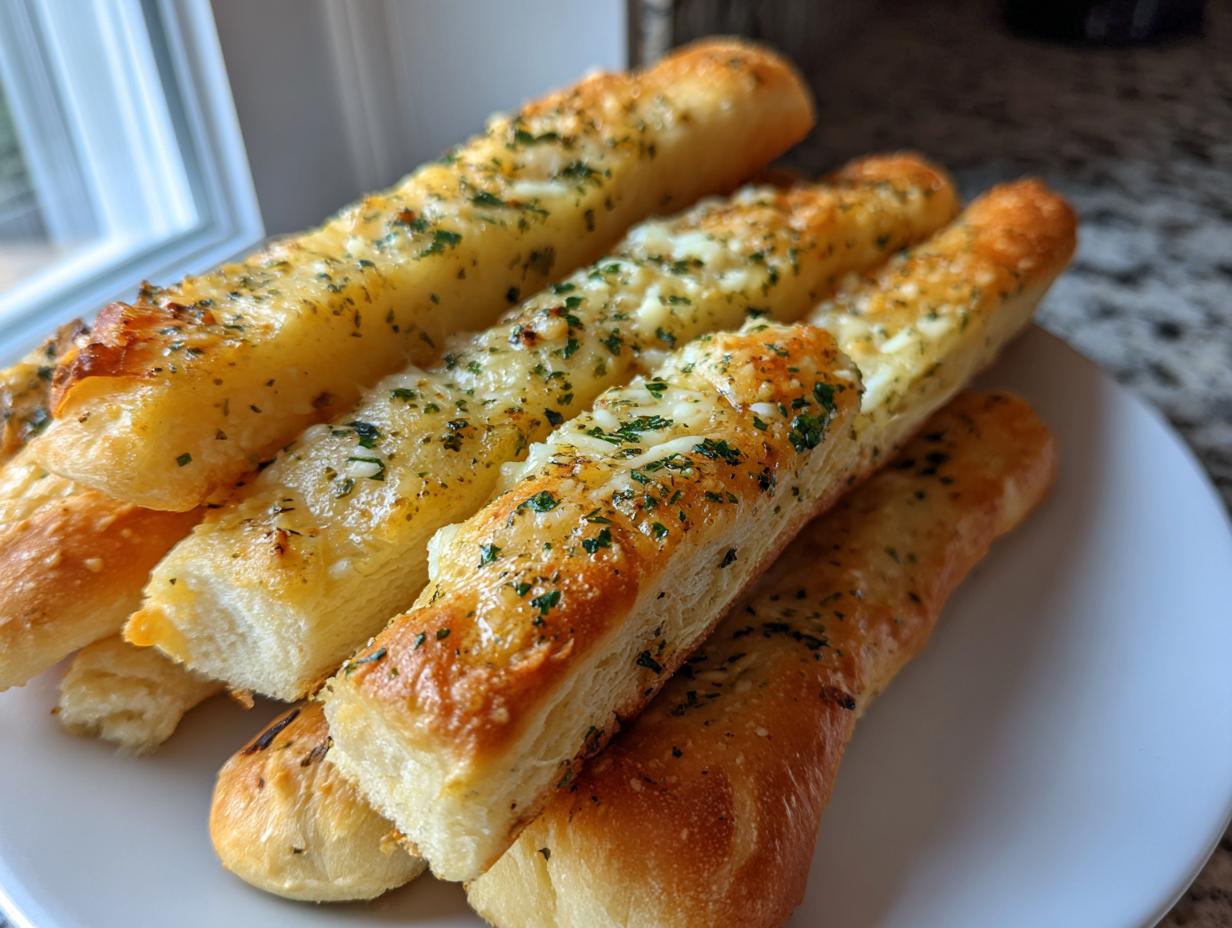
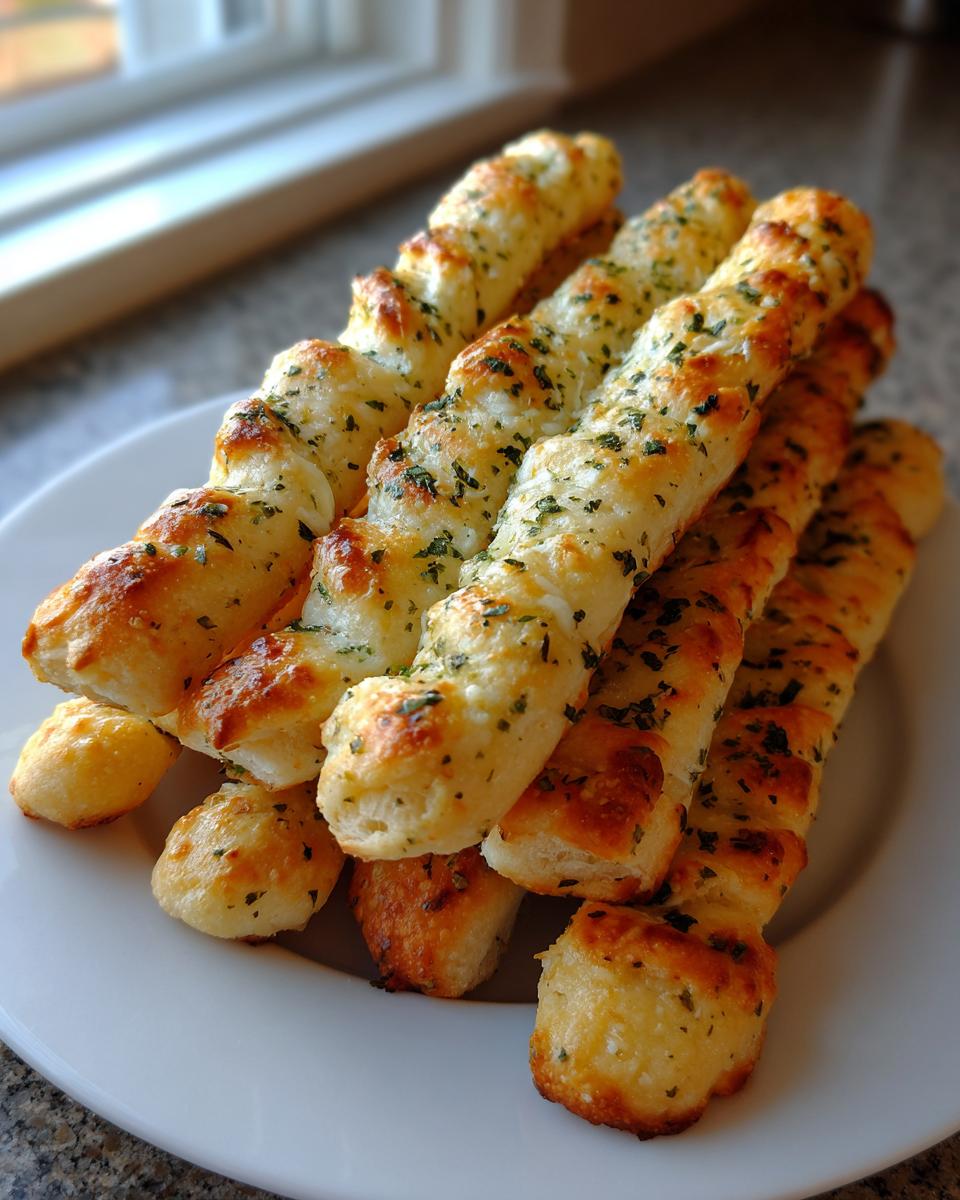
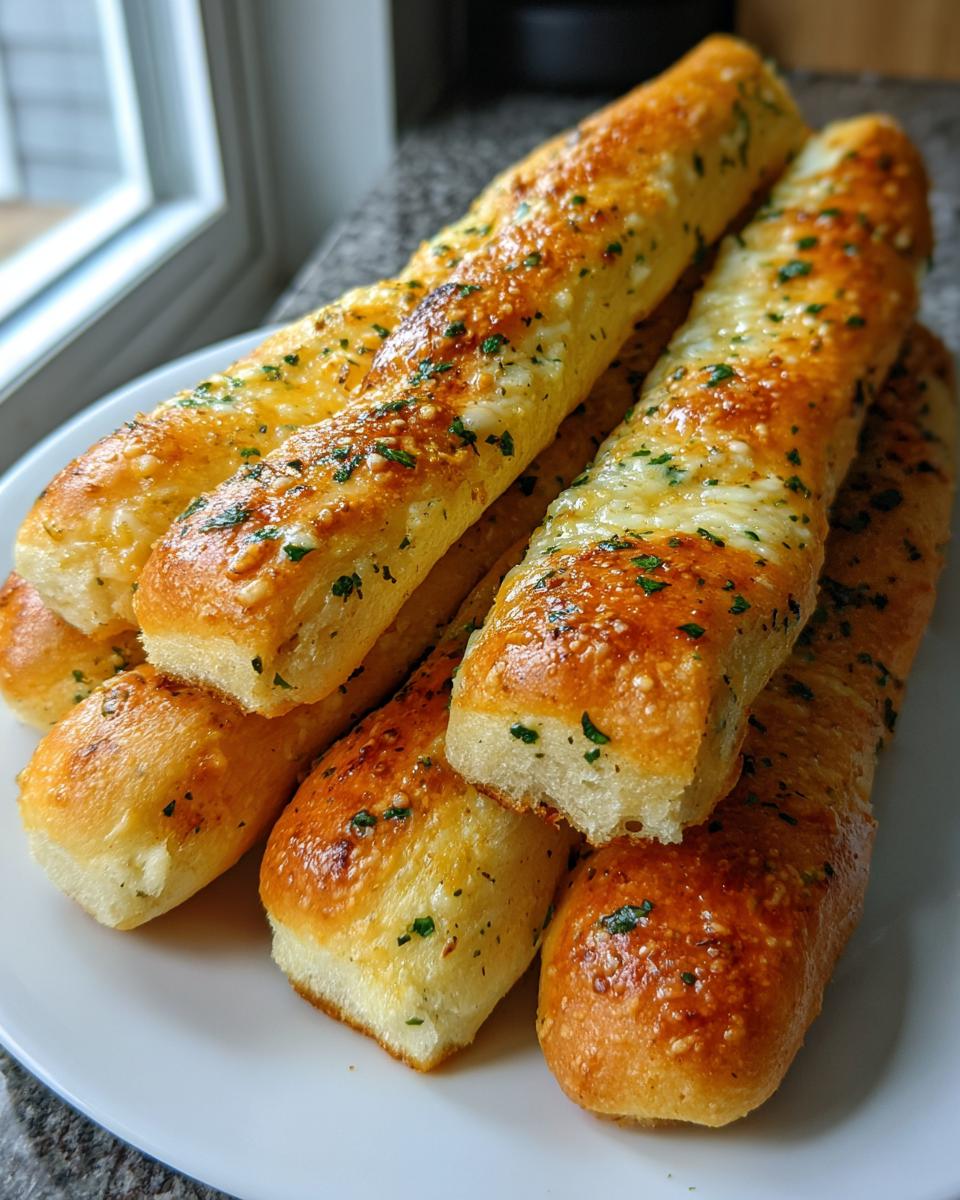
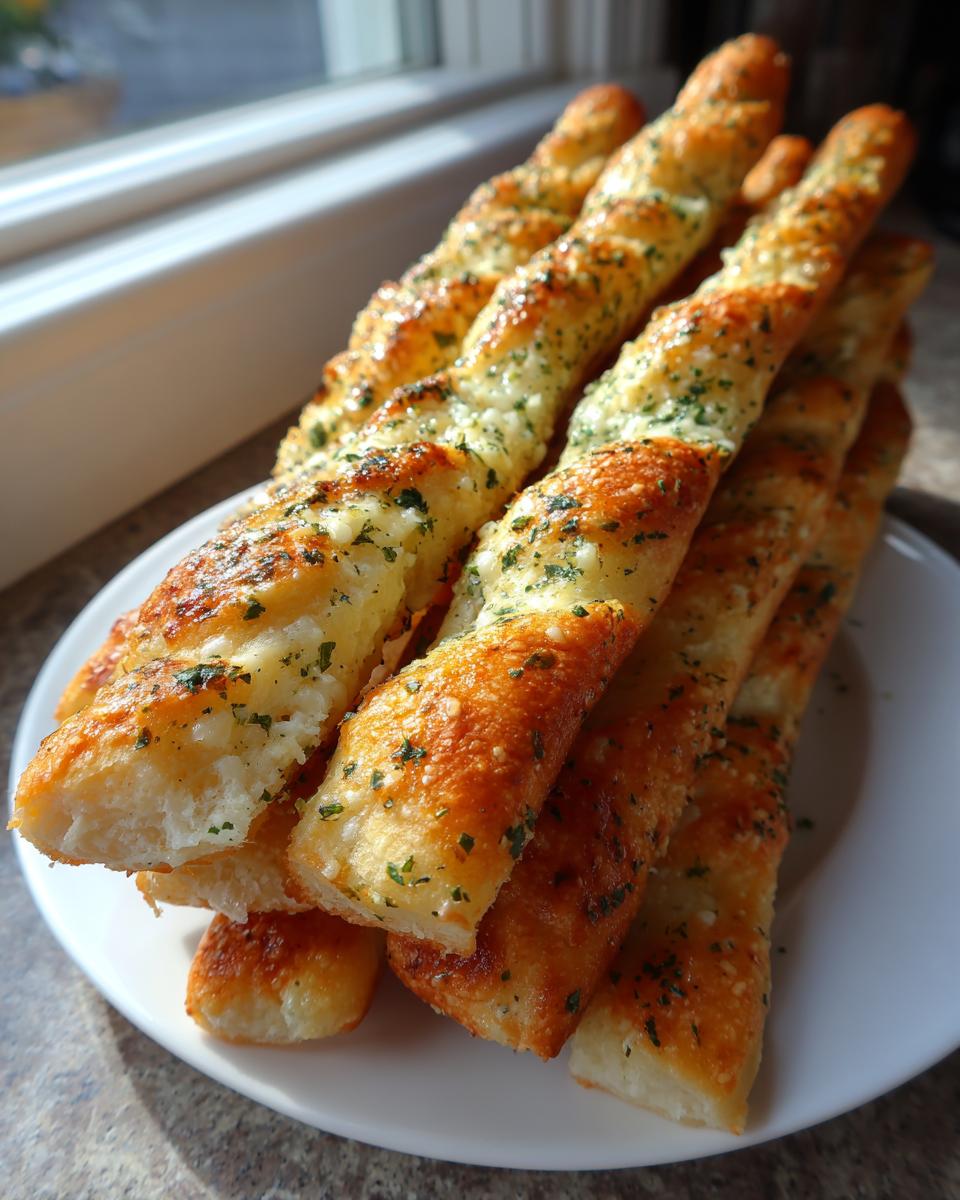
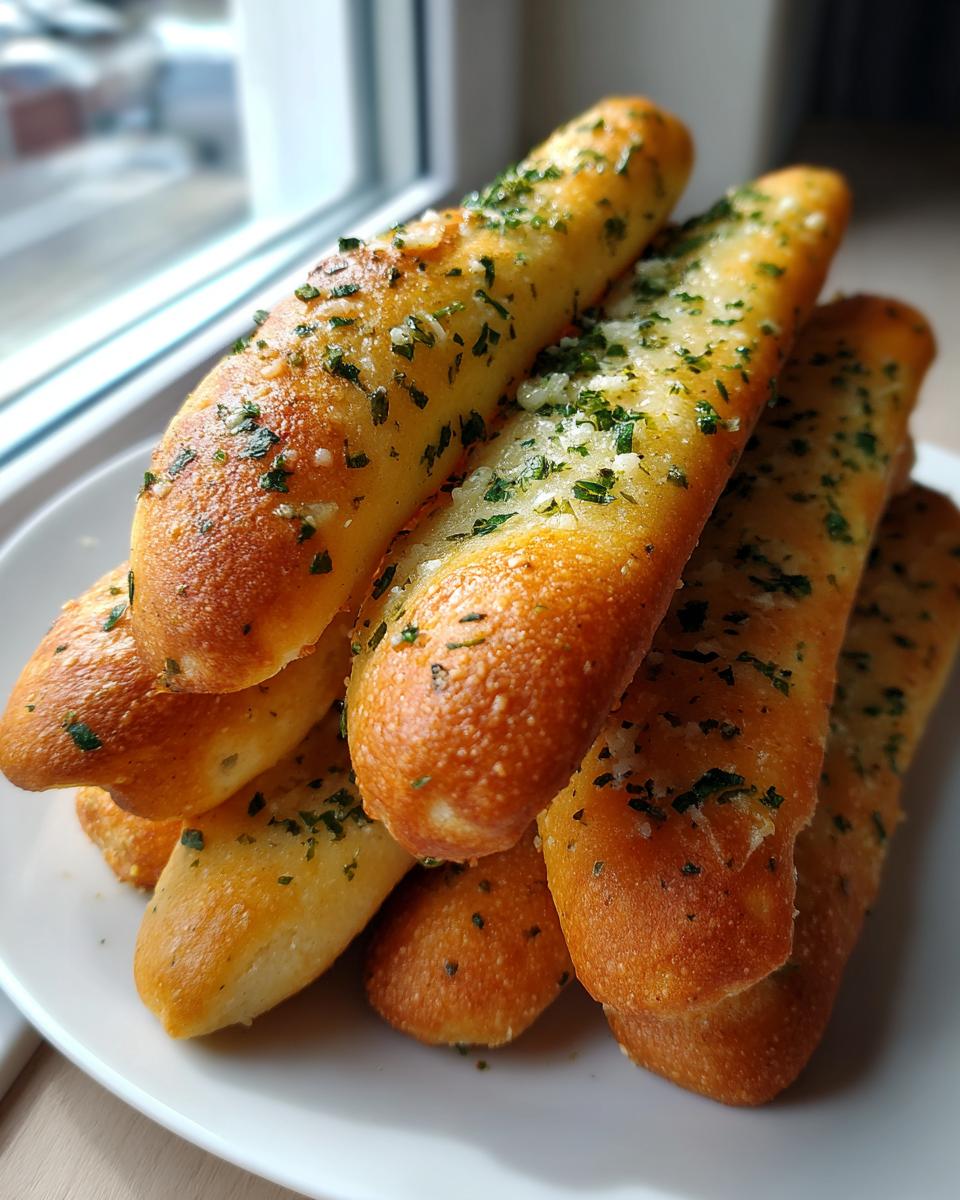
The breadsticks might be soft and chewy, but let’s be honest: the butter topping is what pulls you back week after week! This is where we turn a great dough into the iconic warm side dish everyone fights over. As soon as those hot breadsticks come out of the oven—and I mean the *second* they clear the oven door—you need to be ready to go with your melted butter mixture.
This immediate application is what gives us that signature melt that soaks right into the warm surface. You just melt down that stick of butter—I use unsalted so I can control the final salt level—and stir in your freshly minced garlic, the Italian seasoning, and that half teaspoon of salt. Whisk it just until combined. You want to brush it on evenly so every one of your Garlic Parmesan Breadsticks gets coated properly.
Once that garlic butter is brushed on generously, you move straight to the Parmesan cheese. Sprinkle that grated cheese all over while the butter is still shiny and wet. The residual heat melts the cheese just enough so it sticks beautifully! If you want to see a stunning example of how decadent this topping can be, check out this recipe for Buttery Garlic Parmesan Breadsticks—it proves that decadence is always worth it.
Variations: Making Cheesy Breadsticks
I know so many of you jump straight to the cheese element, and I fully support that! If you want to upgrade this version into amazing Cheesy Breadsticks, add mozzarella! You have two options, depending on how gooey you want them.
Option one is to add a light sprinkle of mozzarella *alongside* the Parmesan right when they come out of the oven. The residual heat will warm it up beautifully. Option two, if you truly want that ooey-gooey pull (and who doesn’t?), is to pop the buttered, pre-cheese breadsticks back into the turned-off, still-warm oven for just two more minutes until the mozzarella is melted and bubbly. Just watch them constantly so they don’t brown too fast!
Tips for Success with Homemade Breadsticks
Even when everything seems right, sometimes bread dough just acts funny. I’ve been there! But when you’re aiming for that perfect, soft texture that makes these Buttery Breadsticks so addictive, a few little tricks can save you from having tough or disappointing results. Since this dough is so simple, focusing on technique is really what sets this recipe apart from just making standard rolls.
First, about that rise time. If you are in a hurry, like I often am when dinner seems ages away, you can use the residual heat trick! Just turn your oven on for two minutes to warm it up slightly, then turn it OFF. Put your oiled, covered dough inside that warm, dark place. It’s not instant, but it often shaves 20 minutes off that 1 to 1.5-hour rise time. This is the compromise when you need a quick bread recipe, but don’t want to sacrifice texture.
My biggest piece of advice on handling the dough itself: be gentle when you roll them out! Don’t press too hard when shaping those 12-inch strips. If you are overly aggressive or try to stretch them too thin, you’ll knock out all the lovely air bubbles the yeast worked so hard to create. This results in dense breadsticks, not the soft, chewy delight we want.
Another thing: you can absolutely get ahead of the game! You can mix the entire batch of garlic butter topping well in advance. Keep it sealed up tight in the fridge. Now, when the breadsticks come straight out of the oven, you have to gently reheat that solidified butter just enough so it melts immediately when you brush it on. Cold, thick butter won’t spread evenly and won’t soak in the way hot, liquid butter does. This is key for that perfect, shiny butter coating!
And finally, if you are worried about them sticking, pull out that parchment paper trick again. Even if you’re making a big batch for a party, parchment lining the sheet ensures zero sticking and easy cleanup, letting you focus on enjoying those cheesy, garlicky bites!
Serving Suggestions for These Appetizer Bread Sticks
Once these Appetizer Bread Sticks come out of the oven—glistening with garlic butter and shimmering with Parmesan—you can’t just stand there staring, right? You need something to dunk them into! While they are amazing all by themselves, serving them with a hearty dish turns them into a true meal component or the best starter your guests have ever had.
Because this recipe aims for that classic, slightly salty, buttery Italian profile, they automatically become the perfect Dinner Side Dish Bread for any tomato-based meal. If you’re serving lasagna, baked ziti, or even just a simple bowl of spaghetti with marinara, these are required by law! Seriously, I always double the recipe if pasta is on the menu because they disappear fast.
But don’t feel limited to Italian food! Dip them into a massive bowl of creamy tomato soup on a chilly evening—it’s pure comfort food heaven. Or, bring them to your next potluck alongside a crisp Caesar salad. Their mild flavor means they complement almost anything savory. They are fantastic cut up and tossed right into the salad for a homemade crouton upgrade!
If you’re serving them just as an appetizer, make sure you have a couple of dipping options ready. A side of warmed marinara sauce is classic, but I also love setting out a small bowl of garlic hummus or even some warm, melted mozzarella dip if you want to double down on the cheese factor. Whatever you serve them with, make sure you have plenty, because I promise you’ll want more than one!
Storage & Reheating Instructions for Leftover Breadsticks
Okay, let’s talk logistics. If you somehow managed to have leftover breadsticks—which, honestly, takes planning in my house—you need to know the right way to keep them fresh. These are never as good the next day unless you treat them right! The goal is always to get that pillowy, soft texture back, and sadly, the microwave is often the enemy of great breadstick texture.
For short-term storage, you absolutely must use an airtight container. If you just toss them in a dish and cover it with foil, they’ll get soggy or stiff within hours. The container traps just enough air to maintain the softness without letting them dry out completely. If you plan on Make Ahead Breadsticks for a party later in the week, this container method is your best friend for keeping them fresh for about three days, tops.
When it’s time to bring them back to life, my method of choice is always the oven. It brings back that fresh-baked warmth! Lay your breadsticks out on a baking sheet. You don’t even need to preheat the oven fully beforehand—just set it to about 325°F. Pop them in for 5 to 7 minutes. This gentle heat warms them through and crisps up the outside just a tiny bit, mimicking that initial bake. You won’t even know they were leftovers!
Now, if you’re in a desperate, immediate rush, the microwave *can* work, but do it with caution. Only zap one or two at a time for about 10 to 15 seconds max. Any longer, and they turn into little bread-rocks. If you have a high-moisture-level microwave user at home (looking at you, kids!), you can try wrapping the stick in a damp paper towel before microwaving. That little bit of steam helps keep them from getting too hard too fast.
If you need to freeze them, let them cool completely first, then place them in a freezer-safe bag, squeezing out all the air. They keep fine for up to a month this way! When you decide it’s time for them again, thaw them completely on the counter, and then follow the oven reheating instructions above. Happy leftovers!
If you have questions about ingredients or steps, please feel free to reach out via the Contact Page!
Frequently Asked Questions About Making Breadsticks
When I share a recipe this popular, I always get questions about troubleshooting or how to switch things up. That’s what makes cooking fun, right? Finding the perfect balance for *your* family! Here are a few things folks ask me most often about achieving perfect, soft garlic breadsticks.
Can I skip the rising time for these breadsticks?
Oh, I wish you could skip it! But for these specific Soft Breadsticks, the rising time is absolutely necessary. That time in the warm spot allows the yeast to really build up those air pockets we talked about, which creates that beautiful, airy, and chewy structure. If you skip the rest period, you end up with dense, heavy dough—basically flat bread you can’t easily pull apart.
Now, I know you might be looking for a faster route. If you are in a huge rush, you can try the ‘quick rise’ trick I mentioned earlier (using residual oven heat), but you should still budget at least 45 minutes for that initial rise. There are recipes out there for 1-hour breadsticks, but they often rely on different yeast types or higher liquid ratios, and they rarely achieve the exact pillowy texture we are aiming for here.
What is the best dipping sauce for these garlic breadsticks?
This is my favorite question! Since we’ve focused so heavily on the famous garlic butter topping, you’ve got a great base flavor already, but dipping makes everything better. I have three top recommendations for your Garlic Breadsticks:
- Marinara Sauce: You simply cannot go wrong here. Warm up a classic, slightly chunky marinara sauce—it’s the perfect tangy contrast to the rich butteriness of the breadstick.
- Alfredo or Cheese Sauce: If you’re feeling extra decadent, a warm, slightly thinned-out Alfredo sauce or even a simple cheese sauce (like queso, if you’re feeling non-traditional) makes these feel like a gourmet appetizer.
- Pesto: For something brighter and fresher, a good quality basil pesto adds a lovely herbaceous kick. Just make sure it’s thinned with a touch of olive oil so it’s easy to dip into!
Trust me, having at least one of these options ready will make sure no breadstick ever goes undipped!
Estimated Nutritional Data for Your Homemade Breadsticks
Okay, I know we are focused on taste and those amazing soft textures here, but it’s also important to know what you’re bringing to the table when you serve these up! Since every batch might vary slightly based on how much butter you brush on or how thick you roll the dough, please remember that this chart is a general estimate based on the recipe measurements provided. We want accurate results, but baking is also just a little bit of art, right?
This information is based on the recipe yielding 16 breadsticks, served one per person. They pack a comforting punch of flavor and just enough satisfying carbohydrates to partner perfectly with your favorite pasta dish!
- Serving Size: 1 breadstick
- Calories: 185
- Fat: 8g (Keep in mind that’s coming largely from that delicious, rich butter!)
- Saturated Fat: 4g
- Carbohydrates: 24g
- Sugar: 1.5g
- Protein: 4g
- Sodium: 250mg
We always strive for transparency here at The YumMagnet Recipe Box, so you have all the info you need when sharing these fantastic breadsticks with your family. If you want to review our policies on how we handle data and recipes, you can always check out the Privacy Policy!
PrintThe Ultimate Soft & Chewy Olive Garden Copycat Breadsticks with Garlic Parmesan Butter
Make restaurant-style breadsticks at home. This easy recipe yields soft, chewy breadsticks topped with a rich garlic parmesan butter, perfect as a dinner side dish or appetizer.
- Prep Time: 20 min
- Cook Time: 12 min
- Total Time: 92 min
- Yield: 16 breadsticks 1x
- Category: Appetizer
- Method: Baking
- Cuisine: American
- Diet: Vegetarian
Ingredients
- 1 1/2 cups warm water (about 110°F)
- 2 1/4 teaspoons active dry yeast
- 2 tablespoons granulated sugar
- 4 cups all-purpose flour, plus more for dusting
- 1 teaspoon salt
- 1/4 cup vegetable oil, plus more for the bowl
- 1/2 cup (1 stick) unsalted butter, melted
- 4 cloves garlic, minced
- 1 teaspoon dried Italian seasoning
- 1/2 teaspoon salt
- 1/4 cup grated Parmesan cheese
Instructions
- Combine the warm water, yeast, and sugar in a large bowl. Let this mixture sit for 5 to 10 minutes until it becomes foamy. This shows the yeast is active.
- Stir the vegetable oil and salt into the yeast mixture. Gradually add the flour, mixing until a shaggy dough forms.
- Turn the dough out onto a lightly floured surface. Knead for 5 to 7 minutes until the dough is smooth and elastic.
- Lightly grease a clean bowl with vegetable oil. Place the dough in the bowl, turning to coat. Cover the bowl with plastic wrap or a clean towel and let it rise in a warm place for 1 to 1.5 hours, or until doubled in size.
- Preheat your oven to 400°F (200°C). Line a large baking sheet with parchment paper.
- Gently punch down the risen dough. Divide the dough into 16 equal pieces. Roll each piece into a long, thin strip, about 10 to 12 inches long, to form your breadsticks. Place them on the prepared baking sheet.
- Bake for 10 to 12 minutes, or until the breadsticks are lightly golden brown.
- While the breadsticks bake, prepare the topping: In a small bowl, melt the butter. Stir in the minced garlic, Italian seasoning, and 1/2 teaspoon of salt.
- As soon as the breadsticks come out of the oven, brush the garlic butter mixture evenly over the tops of the hot breadsticks.
- Immediately sprinkle the grated Parmesan cheese over the buttered breadsticks. Serve warm.
Notes
- For a quicker rise, place the dough in an oven that has been turned off but still retains some residual warmth.
- If you prefer a cheesier breadstick, sprinkle mozzarella cheese over the tops along with the Parmesan during the last minute of baking or immediately after brushing with garlic butter.
- You can make the garlic butter topping ahead of time and keep it covered in the refrigerator. Reheat gently before brushing on the breadsticks.
Nutrition
- Serving Size: 1 breadstick
- Calories: 185
- Sugar: 1.5
- Sodium: 250
- Fat: 8
- Saturated Fat: 4
- Unsaturated Fat: 4
- Trans Fat: 0.1
- Carbohydrates: 24
- Fiber: 1
- Protein: 4
- Cholesterol: 15