
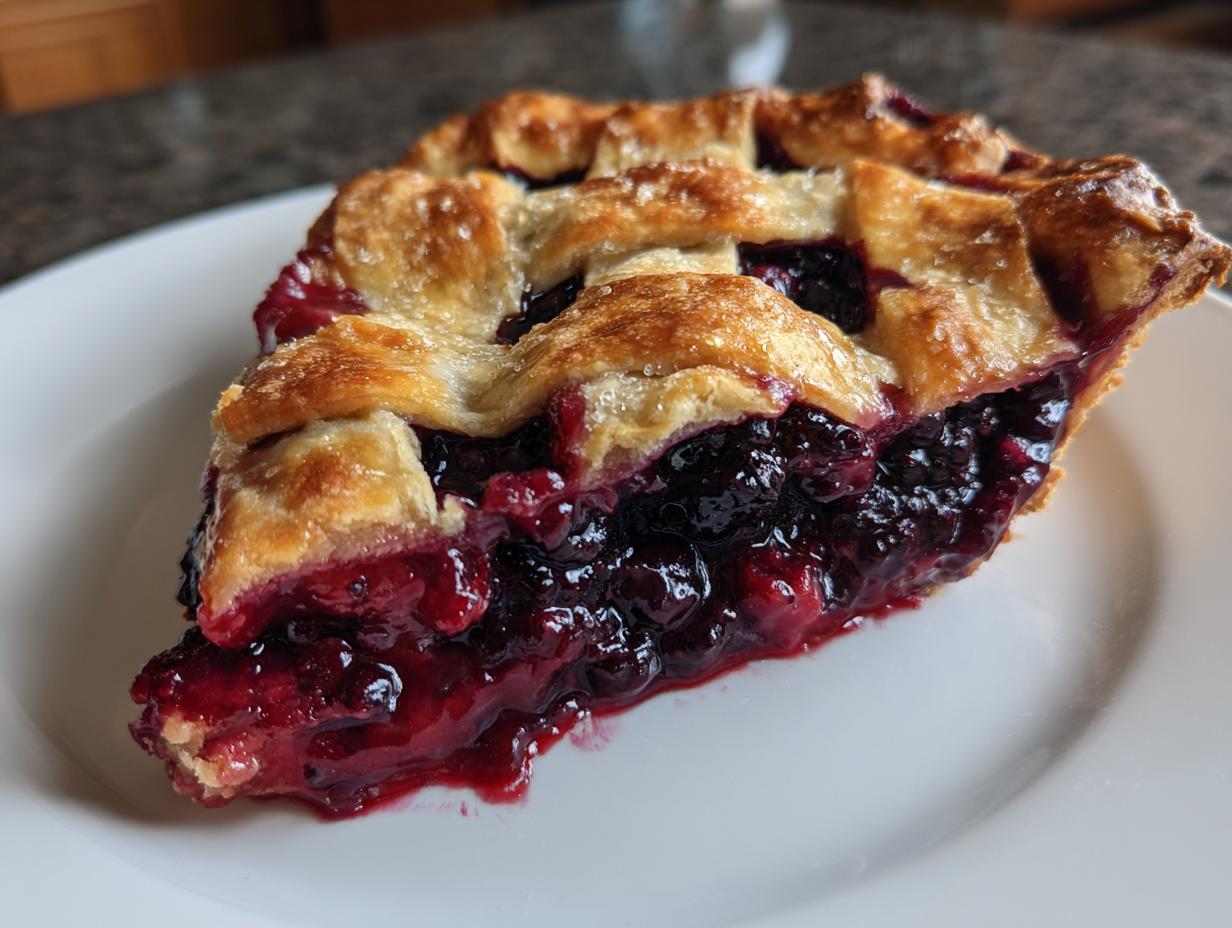
If you are looking for that one dessert that just screams old-fashioned comfort, forget cupcakes for a second. I live for a completely classic homemade blackberry pie. I spent years trying to recapture the magic of that perfect, juicy slice my mom used to make when I was a kid, but her process was always a little nebulous. Well, I finally cracked the code!
This isn’t just any recipe; this is the definitive guide for making the ‘Classic Homemade Blackberry Pie with Flaky Lattice Crust.’ We’re talking about a filling that is perfectly sweet-tart, packed with flavor, and absolutely, 100% guaranteed to have zero soggy bottom. My goal is always to bring those cherished, cozy family flavors into my busy week, and this showstopper dessert proves you can have incredible results without spending all day in the kitchen.
- Why This Classic Homemade Blackberry Pie Recipe Works
- Gathering Ingredients for Your Blackberry Pie
- Mastering the Flaky Pie Crust for Your Blackberry Pie
- Preparing the Blackberry Filling for the Best Blackberry Pie
- How to Assemble and Bake Your Homemade Blackberry Pie
- The Critical Cooling Phase for a Perfect Blackberry Pie
- Serving Suggestions for Your Old Fashioned Pie
- Storage and Reheating Instructions
- Frequently Asked Questions About Blackberry Pie
- Estimated Nutritional Data for Blackberry Pie
- Share Your Best Blackberry Pie Creations
Why This Classic Homemade Blackberry Pie Recipe Works
Honestly, trying to get a good pie crust right can feel like a culinary guessing game. But this particular blackberry pie recipe takes all the guesswork out. I wanted something that tasted exactly like what you’d get at a traditional county fair, and I nailed it.
Here is why I love sharing this one with you all:
- The Flaky Crust Guarantee: We use that all-butter technique that results in hundreds of little layers. You absolutely get that flaky double crust every single time, I promise!
- Sweet-Tart Perfection: The filling has this beautiful bright flavor—it’s not sickeningly sweet. The lemon zest really wakes up those deep berry notes.
- All Berries Welcome: Whether you pick them fresh or grab a frozen bag, this recipe handles them beautifully. No need to wait for peak season!
- It’s a Classic American Dessert: This pie feels authentic. Slathered with vanilla ice cream, it’s just pure comfort for any Sunday dinner or potluck.
Gathering Ingredients for Your Blackberry Pie
Okay, assembling the components for a truly great blackberry pie starts with quality. I want you to look at these ingredient lists and pay close attention to the temperature of the butter. Seriously, keeping everything cold is half the battle for that dreamy, flaky texture we are aiming for. We are keeping this recipe straightforward, using pantry staples mixed with those gorgeous fresh berries.
I trust you know how to read a list, but I’ve broken these down so you don’t accidentally grab the sugar meant for the filling when you are mixing up the dough!
For the Flaky Double Crust
This is where the magic starts, so don’t cheat the butter! Use the best unsalted butter you can find, and keep it very cold and cubed before you even start mixing.
- 2 1/2 cups all-purpose flour
- 1 teaspoon salt
- 1 cup (2 sticks) unsalted butter, very cold and cubed
- 1/2 cup ice water, plus more if needed
For the Sweet Tart Blackberry Filling
This portion ensures we get that perfect, juicy set without being overly sweet. Remember, if your berries are super ripe, you might want to dial the sugar back just a tiny bit!
- 6 cups fresh or frozen blackberries (do not thaw if frozen)
- 1 1/2 cups granulated sugar (adjust based on berry sweetness)
- 1/4 cup cornstarch
- 1 tablespoon lemon zest
- 1/4 teaspoon ground cinnamon
- Pinch of salt
Mastering the Flaky Pie Crust for Your Blackberry Pie
This is where we earn that flaky double crust, truly. If you’ve ever had a tough, one-note crust, you know we need to treat this stage with respect. Remember what I said about my Grandma in earlier posts? The secret is treating the butter like fragile treasure! We need those distinct pieces of cold butter to steam and separate during baking. If the dough gets warm, the fat melts right into the flour, and you end up with a tough, oily shell instead of something truly spectacular.
For a beautiful, showstopping dessert like this old fashioned pie, your top crust needs to look just as good as the bottom!
Mixing and Chilling the Buttery Pie Shell
Start by whisking together your flour and salt in a big, cold bowl. Now, take that very cold, cubed butter and use a pastry blender—or honestly, just your ice-cold fingertips—to work it into the flour. You are trying to get the butter down to coarse crumbs, but you absolutely need some visible, pea-sized chunks still hanging around. Those chunks are future layers! Add the ice water slowly, just until the dough barely whispers that it wants to stick together. Don’t squish it; we want shaggy dough, not smooth dough. Divide it into two disks, wrap them tight, and stick them in the fridge for at least one hour. Trust me, patience right now buys you incredible flakiness later.
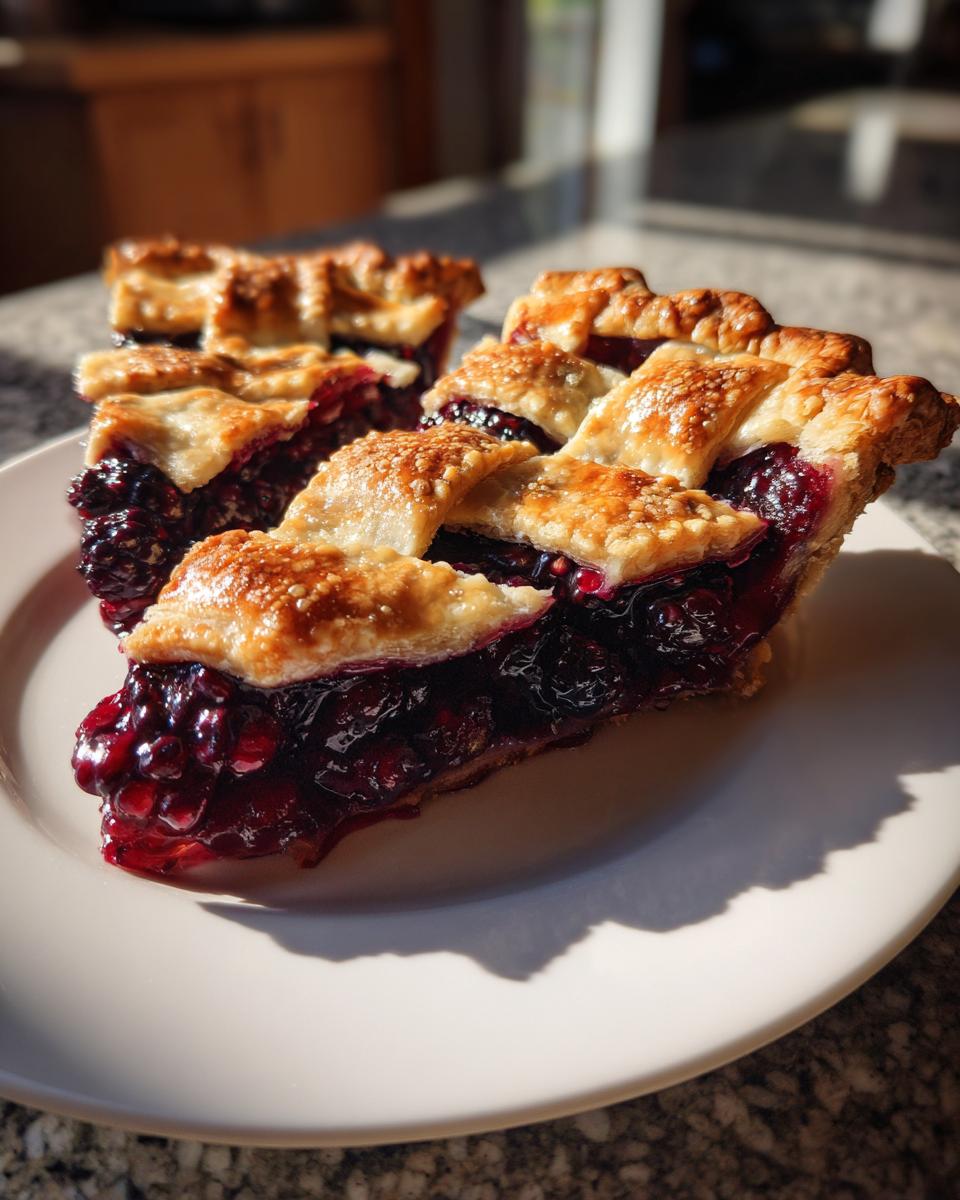
Creating the Lattice Pie Topping
Once that first dough disk is chilling happily, roll out the second one into a nice even circle. I like to use a ruler to make sure my strips are about 3/4 inch wide—consistency is key for a neat weave. Cutting even strips is what makes the final presentation so professional looking. We’re not just hiding the filling; we are decorating with pastry! We’ll weave this lattice over the filling in a few steps, but get those strips ready now while the dough is still cold and easy to handle.
Preparing the Blackberry Filling for the Best Blackberry Pie
Now for the wonderful part: mixing up that gorgeous blackberry filling! This is where you get that famous sweet-tart flavor that makes this homemade blackberry pie sing. You want to take your berries—whether they are fresh off the bush or straight from the freezer bag—and put them into a wide bowl. If you are using frozen ones, listen closely: do not thaw them first! If they thaw, the juices leak out, and you end up with runny mush.
Next, gently introduce the sugar, the cornstarch, the lemon zest, and that tiny pinch of cinnamon. The cornstarch is absolutely vital here; it’s our secret weapon for that thick, jammy consistency that means you won’t end up with soup in your crust. Use a gentle hand when tossing these together. We want those beautiful berries to stay mostly whole, not look like they survived a blender accident. Just enough stirring until you see that dry sugar mixture coat every single berry evenly. Set that bowl aside while you tackle assembling the crust!
How to Assemble and Bake Your Homemade Blackberry Pie
Alright, the dough is chilled, the filling is mixed—it’s time for the fun, slightly nerve-wracking part: putting this beautiful blackberry pie together! First things first, grab that bottom crust dough we rolled out earlier. Carefully ease it into your 9-inch pie plate. You want it to settle without stretching, leaving about an inch hanging over the edge. After you’ve gently nestled it in, pop the whole thing back into the fridge while you work on the top. Keeping that bottom pastry cold is essential if you are aiming for that “no soggy bottom” result.
Once chilled, pour in that shimmering blackberry filling. Now go ahead and weave those lattice strips over the top. It’s easier than you think—just alternate strips over and under—and it looks so impressive! After you weave the top, trim those overhangs, fold the bottom edges up over the lattice edges, and crimp them tight. Remember that essential last chill? Put the assembled pie back into the fridge for a full 15 minutes before it even thinks about seeing the oven. This helps everything firm up one last time.
Baking Technique for a No Soggy Bottom Pie
You must preheat your oven to 400 degrees Fahrenheit! We start with a blast of high heat. Place the pie on a baking sheet—this catches any glorious berry juices that inevitably bubble over, keeping your oven clean. Bake at 400 degrees for 20 minutes. Then, this is key, reduce the heat down to 375 degrees and go for another 35 to 45 minutes. If you notice the edges of your crust looking brown too fast—which happens with all that sugary filling—just grab a piece of foil and loosely tent those edges. We want a gorgeous golden brown top, not a charcoal ring around the edge!
The Critical Cooling Phase for a Perfect Blackberry Pie
I know, I know. The sweet scent of bubbling blackberries and golden pastry filling your kitchen is intoxicating. You want to grab a fork right now, but please, for the love of dessert, step away from the pie!
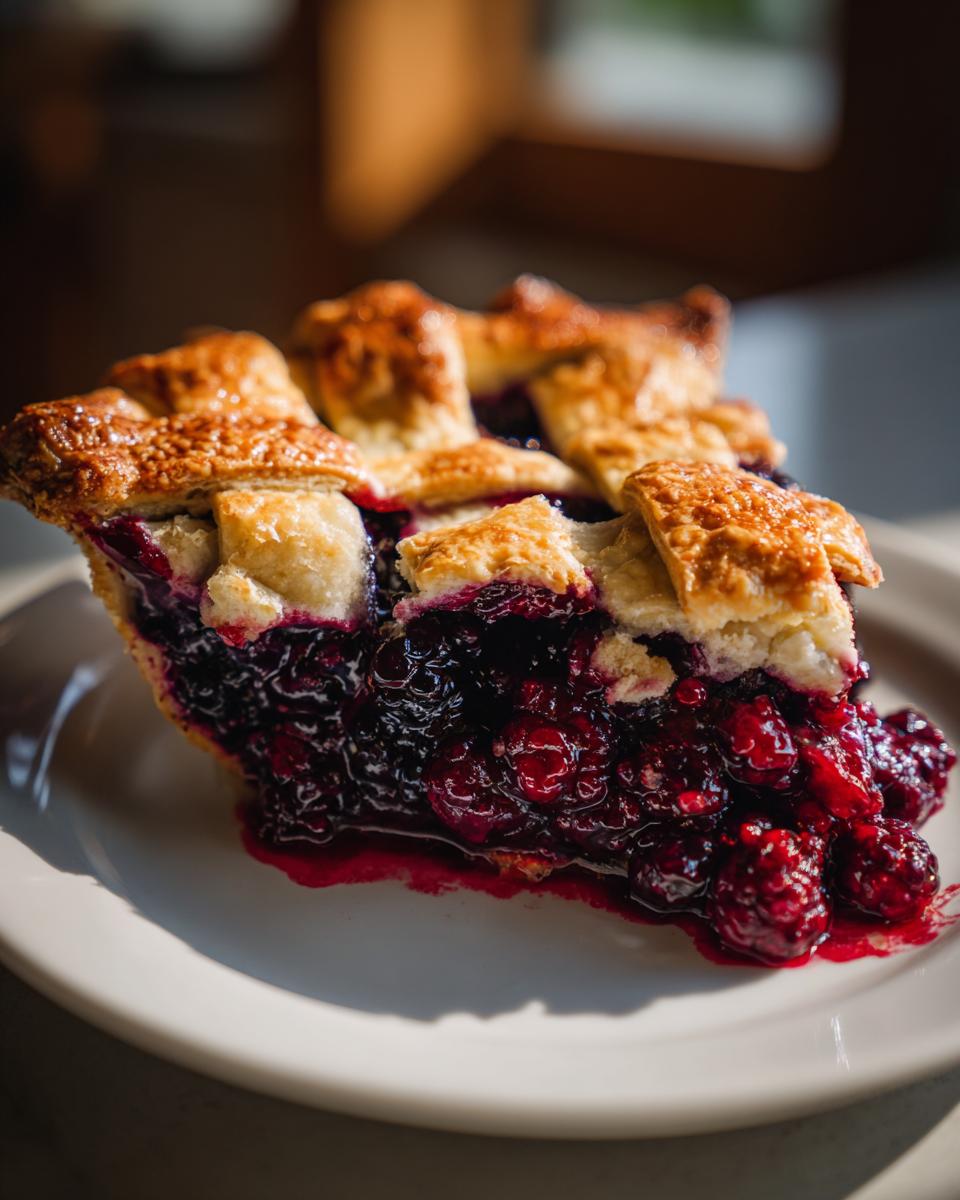
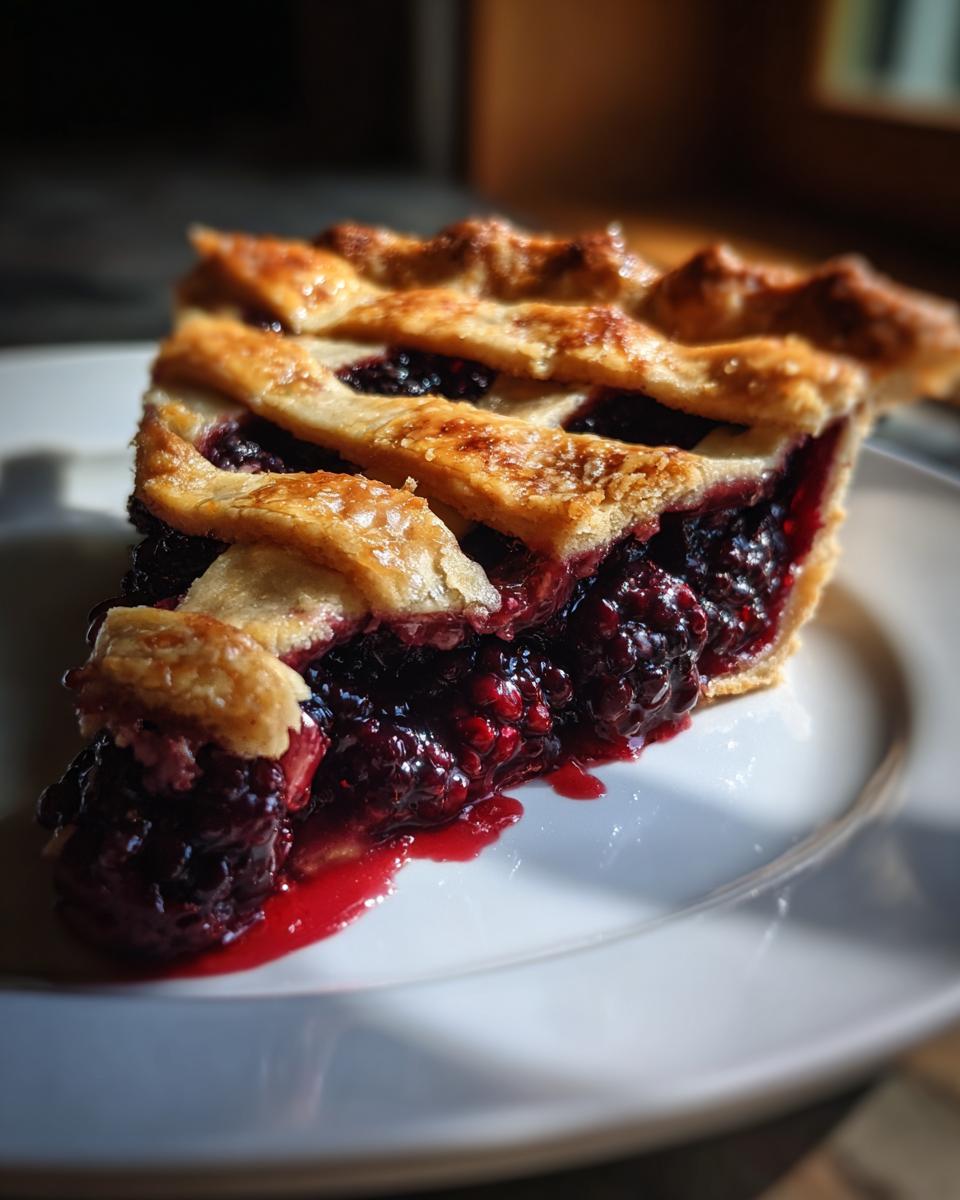
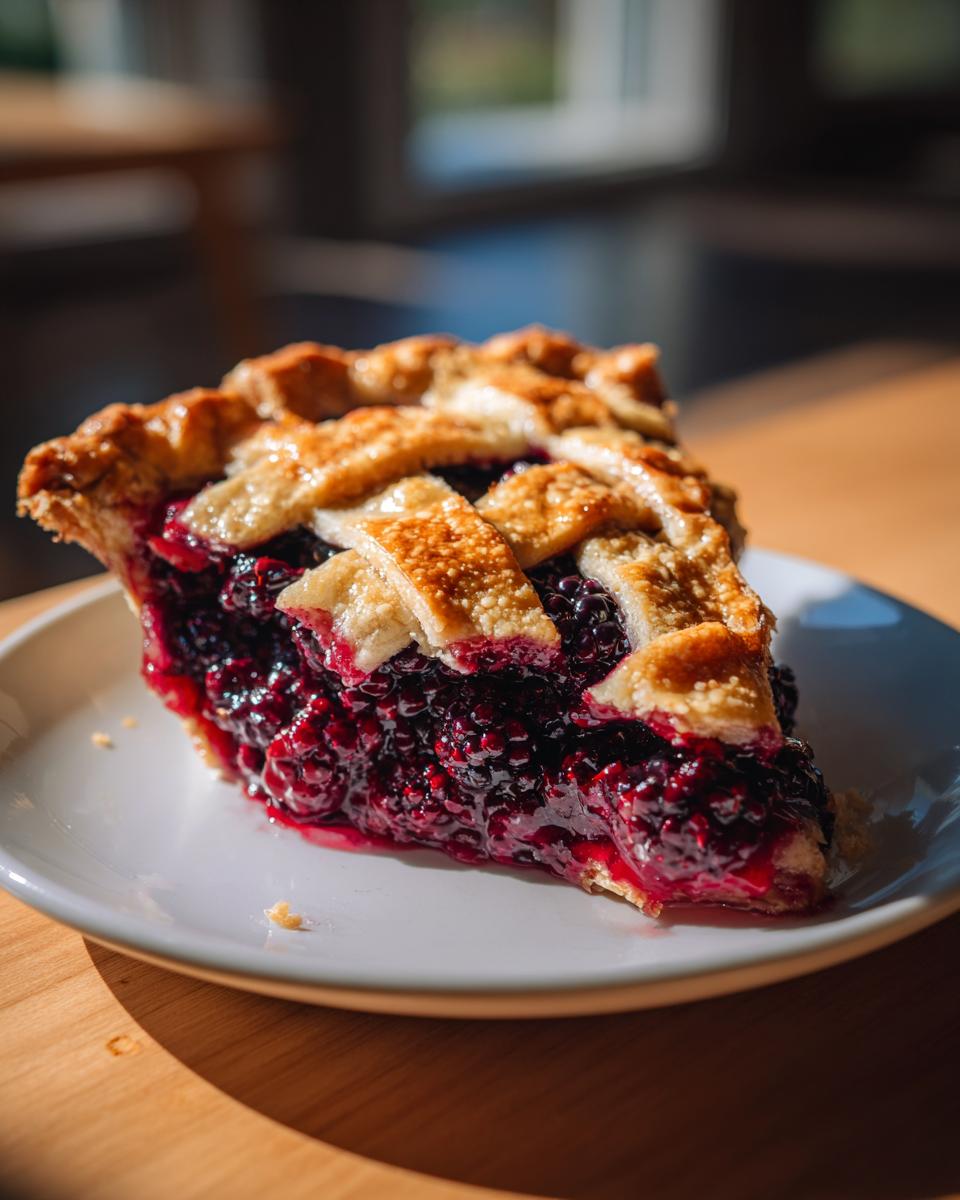
This cooling phase is where so many people mess up their beautiful work, and frankly, it’s my number one trick for ensuring you get that perfect slice every time. This gorgeous, thick sweet tart berry filling needs time to transition from hot liquid juice into that perfect, sliceable jam.
You absolutely must let this blackberry pie cool for a minimum of 3 to 4 hours on a wire rack. I usually put it on top of the stove and walk away for half the afternoon. If you slice into it too soon, all that beautiful, thick syrup will just run out onto your plate, leaving you with a dry crust and a sad puddle of fruit. We baked the crust perfectly; don’t sabotage the structure now! Patience here is an act of love for your future self—and everyone else waiting for dessert.
Serving Suggestions for Your Old Fashioned Pie
Now that you’ve waited patiently through the cooling phase—and trust me, it was worth it—it is time to present this masterpiece! This old fashioned pie is honestly a showstopper dessert all on its own, but serving it warm or at room temperature with a simple addition takes it over the top. I love setting a bowl of fresh, slightly sweetened whipped cream next to the pie, or grabbing the premium vanilla ice cream because those cool, creamy textures against the warm, tart berries are just unbeatable. Enjoy this genuine taste of summer!
Storage and Reheating Instructions
So, you managed to have leftovers—congratulations, you have excellent willpower! I get asked all the time how to keep this beautiful homemade blackberry pie tasting great the next day. You definitely want to treat that flaky crust gently, even when storing it, or you risk it getting a little soggy!
For storage, the best place is generally room temperature, lightly covered, for up to 24 hours. I wrap mine loosely in foil or pop it under a cake dome, because sealing it too tightly in plastic traps moisture, and as we know, moisture is the enemy of crisp pastry.
If you need to keep it longer than a day, stick it in the fridge. It should stay good in there for about three to four days. Just make sure it’s covered well so it doesn’t absorb any weird fridge smells!
When you’re ready for round two, skip the microwave entirely—it turns that gorgeous, buttery crust soft and chewy, which defeats the entire purpose of all our hard work! Instead, I reheat slices in a 350-degree oven for about 10 to 15 minutes. You want it just warmed through so the filling is soft again but the crust gets that little crisp back. Serve it with a fresh dollop of cream, and no one will ever know it’s not fresh from the oven!
Frequently Asked Questions About Blackberry Pie
You all ask such fantastic questions when it comes to baking this perfect blackberry pie recipe! I pulled together a few of the most common things that pop up after people start gathering their ingredients.
Can I substitute blueberries for some of the blackberries in this Blackberry Pie Recipe?
Oh, absolutely! That’s one of my favorite little twists. You can definitely make a mixed berry pie here. A 50/50 split works beautifully. Blueberries tend to be a little sweeter than the wild blackberries I often use, so you might want to taste your mixed dry ingredients and dial back the sugar by about a quarter cup, just to keep that wonderful sweet-tart balance we worked so hard for.
What is the best way to prevent the bottom crust from getting soggy?
This is the battle of every pie maker! We’ve covered a lot of ground on this, but here are the three essentials for a no soggy bottom pie: First, make sure your filling mixture is very, very thick thanks to that cornstarch—it needs to look almost pasty when you mix it. Second, that final 15-minute chill of the fully assembled pie before it goes in the oven is non-negotiable. And third, if you can manage it, placing your pie plate on a preheated baking sheet in the oven gives the bottom crust direct heat insulation, helping it set faster!
How long can I store leftover Homemade Blackberry Pie?
If you have leftovers—which is a feat itself!—you want to preserve that flaky crust. I find that for the best texture, leaving it covered at room temperature for about 24 hours is perfect. If you need to keep your amazing homemade blackberry pie longer than that, definitely move it into the fridge, covered loosely, where it’ll be happy for up to four days. When you serve it later, pop that slice in the oven for a quick warm-up!
If you have any other questions about baking, don’t hesitate to reach out to me over on the contact page!
Estimated Nutritional Data for Blackberry Pie
Now, listen, I’m a home cook, not a registered dietitian, so these numbers are my best estimate based on the standard ingredients and serving sizes provided for this blackberry pie. When you’re making a double-crust fruit pie with all that beautiful butter, you know you’re in for a treat, okay?
This data assumes you cut the final pie into 8 generous slices. If you are serving huge slabs with extra whipped cream, you’ll need to adjust those numbers upwards!
- Calories: Around 450 per slice
- Sugar: Roughly 45g (Remember, most of that is natural fruit sugar mixed with granulated sugar)
- Fat: About 25g (This is where the flaky, buttery crust comes from—don’t skimp!)
- Saturated Fat: Around 15g
- Carbohydrates: About 60g
- Protein: Near 5g
- Sodium: About 250mg
Again, these are just handy guidelines found in my recipe notes. If you look at our privacy policy, you’ll see we keep all our recipes focused on flavor first! The most important thing is that this is a homemade treasure that’s worth every single bite.
Share Your Best Blackberry Pie Creations
I am just dying to see what beautiful, golden, lattice-topped creations you all come up with! Making this blackberry pie has to be one of the most rewarding baking experiences, and I truly hope it brings that cozy, classic feeling to your table.
Once you’ve had it cool completely (I know, the patience is the hardest part!), please head down to the comments section below. Let me know how it went! Did you try fresh berries? Did you stick strictly to the recipe, or did you make a little substitution? I love hearing how you make these family recipes your own way.
And if you took a picture of that perfect, thick slice, please tag me on social media! Seeing your delicious results keeps me inspired in the kitchen every single day. Your success with this berry pie means the world to me. Happy baking, everyone!
PrintClassic Homemade Blackberry Pie with Flaky Lattice Crust

Bake an old-fashioned blackberry pie featuring a sweet-tart berry filling encased in a perfectly flaky, buttery double crust. This recipe works well with fresh or frozen blackberries.
- Prep Time: 45 min
- Cook Time: 65 min
- Total Time: 110 min
- Yield: 8 servings 1x
- Category: Dessert
- Method: Baking
- Cuisine: American
- Diet: Vegetarian
Ingredients
- 2 1/2 cups all-purpose flour
- 1 teaspoon salt
- 1 cup (2 sticks) unsalted butter, very cold and cubed
- 1/2 cup ice water, plus more if needed
- 6 cups fresh or frozen blackberries (do not thaw if frozen)
- 1 1/2 cups granulated sugar (adjust based on berry sweetness)
- 1/4 cup cornstarch
- 1 tablespoon lemon zest
- 1/4 teaspoon ground cinnamon
- Pinch of salt
- 1 large egg, beaten with 1 tablespoon milk (for egg wash)
- 1 tablespoon coarse sugar, for sprinkling
Instructions
- Prepare the Pie Dough: In a large bowl, whisk together the flour and 1 teaspoon salt. Cut in the cold butter using a pastry blender or your fingers until the mixture resembles coarse crumbs with some pea-sized pieces of butter remaining. Gradually add the ice water, one tablespoon at a time, mixing until the dough just comes together. Do not overmix.
- Divide the dough in half, form each half into a disk, wrap in plastic, and chill in the refrigerator for at least 1 hour.
- Prepare the Filling: In a separate bowl, gently combine the blackberries, granulated sugar, cornstarch, lemon zest, cinnamon, and a pinch of salt. Toss lightly until the berries are evenly coated. Set aside.
- Assemble the Bottom Crust: On a lightly floured surface, roll out one disk of dough into a 12-inch circle. Carefully transfer the dough to a 9-inch pie plate. Trim the edges, leaving a 1-inch overhang. Return the pie plate to the refrigerator.
- Create the Lattice Top: Roll out the second disk of dough into an 11-inch circle. Cut the dough into even strips (about 3/4 inch wide) for the lattice.
- Fill and Top the Pie: Pour the blackberry filling into the chilled bottom crust. Arrange the dough strips over the filling in a lattice pattern. Trim the overhang strips, fold the bottom crust overhang over the lattice edges, and crimp the edges to seal.
- Chill the assembled pie for 15 minutes before baking. Preheat your oven to 400 degrees Fahrenheit (200 degrees Celsius).
- Bake: Brush the lattice top evenly with the egg wash and sprinkle generously with coarse sugar. Place the pie on a baking sheet to catch any drips.
- Bake at 400 degrees Fahrenheit for 20 minutes. Reduce the oven temperature to 375 degrees Fahrenheit (190 degrees Celsius) and continue baking for another 35 to 45 minutes, or until the crust is golden brown and the filling is bubbling thickly. If the edges brown too quickly, cover them loosely with foil.
- Cool: Let the blackberry pie cool completely on a wire rack for at least 3 to 4 hours before slicing. This allows the filling to set properly and prevents a soggy bottom.
Notes
- For the flakiest crust, keep all dough ingredients cold. If the dough feels warm while you are rolling it, return it to the refrigerator for 10 minutes.
- Serve this classic American dessert warm or at room temperature with a scoop of vanilla ice cream or fresh whipped cream.
- If you use frozen berries, do not thaw them before mixing with the sugar and thickeners.
Nutrition
- Serving Size: 1 slice
- Calories: 450
- Sugar: 45g
- Sodium: 250mg
- Fat: 25g
- Saturated Fat: 15g
- Unsaturated Fat: 10g
- Trans Fat: 0g
- Carbohydrates: 60g
- Fiber: 5g
- Protein: 5g
- Cholesterol: 60mg