
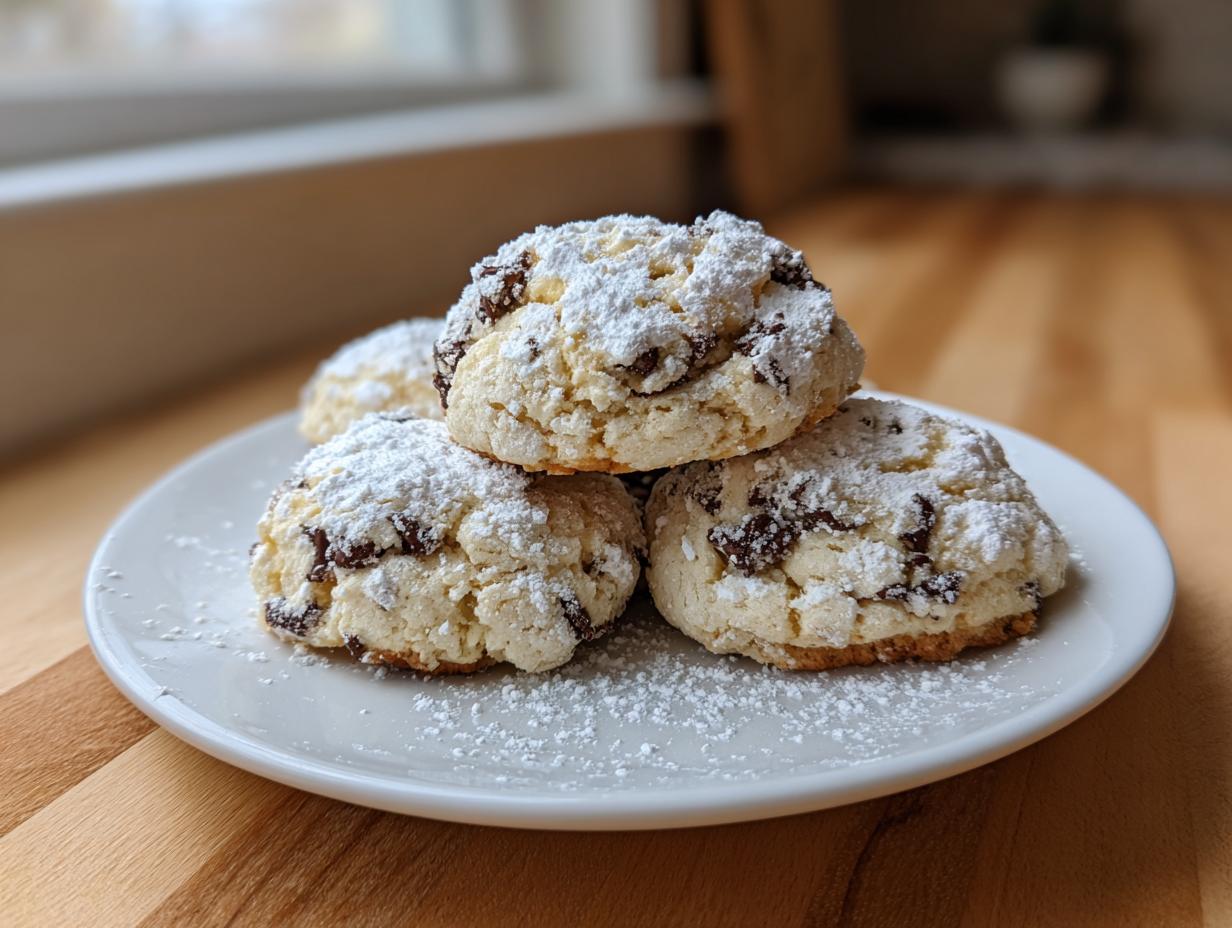
You know, I love a truly authentic Italian bakery treat, but let’s be honest—frying up cannoli shells or piping that creamy filling takes serious time. When I was refocusing my family recipes to fit our crazy modern schedule, I needed a shortcut that didn’t sacrifice soul. So, I played around until I landed on these incredible **cannoli cookies**! They capture every bit of that delicious flavor—the creamy ricotta, the bright citrus zest, and those little bursts of chocolate chips—but in a wonderfully soft, easy cookie format. If you’re looking for more delightful sweets like this, be sure to check out my collection of delicious dessert recipes. Trust me, these are the perfect answer when you want that Sicilian Inspired Baking magic without needing a fryer.
- Why You Will Love These Easy Cannoli Cookies
- Gathering Ingredients for Authentic Cannoli Cookies
- Step-by-Step Instructions for Perfect Cannoli Cookies
- Tips for the Best Cannoli Cookies Every Time
- Storage and Make-Ahead Options for Cannoli Cookies
- Serving Suggestions for Sicilian Inspired Baking
- Frequently Asked Questions About Cannoli Cookies Recipe
- Estimated Nutritional Information for Cannoli Cookies
- Share Your Homemade Cannoli Cookies Creations
Why You Will Love These Easy Cannoli Cookies
When I developed this recipe, my main goal was to give you that amazing Italian bakery flavor without the whole ordeal. And wow, did we succeed! These **cannoli cookies** are fantastic for so many reasons. Friends always ask me if I spent all day making them, and I just laugh because they come together so fast.
- Super Simple, One-Bowl Mixing: Seriously, this is almost as easy as dropping dough onto a sheet. We ditch the complicated shell-making entirely. This is one of the best Quick Italian Sweets you’ll ever make!
- Authentic Flavor Profile: We pack in the real deal—creamy ricotta cheese and bright orange zest—so you get that unmistakable taste. It’s the perfect Homemade Cannoli Flavor in cookie form.
- Incredible Texture: These aren’t crisp wafers; they’re soft, slightly cake-like, and melt in your mouth while still holding up beautifully for gifting. A true No Shell Cannoli Treat!
- Party Perfect: They look fancy because of that dusting of powdered sugar, but they are incredibly durable for transporting, making them instant Bake Sale Favorites.
- Ricotta Power: Using ricotta keeps them feeling rich and moist, which is exactly what you want in these **Ricotta Cheese Cookies**.
Gathering Ingredients for Authentic Cannoli Cookies
Okay, getting the right ingredients is where the magic starts for these **cannoli cookies**. Since we aren’t frying anything, the quality of what goes into the dough really shines through. I’ve tried shortcuts, and trust me, sticking to the core flavor components makes all the difference in achieving that true Italian bakery taste. Remember, this recipe comes together in one main bowl, which is a huge win on a busy day!
Here is exactly what you need to grab for about 24 delicious **Ricotta Cheese Cookies**:
- One cup of unsalted butter—it has to be softened, so set it out a bit before you plan to bake!
- One full cup of regular granulated sugar.
- One nice big egg.
- One teaspoon of pure vanilla extract—none of that imitation stuff if you can help it.
- A half-cup of whole milk ricotta cheese. This is key, and yes, it *must* be drained really well, which we talk about next!
- One teaspoon of fresh orange zest. This is non-negotiable for that classic tang!
- Two and three-quarters cups of all-purpose flour.
- One teaspoon of baking powder for just a little lift.
- One-half teaspoon of salt to balance out all that sweetness.
- One cup of mini chocolate chips. I push for ‘mini’ because they distribute better in this softer dough.
- And finally, a half-cup of powdered sugar for dusting when they cool off.
If the ingredients are good, the cookies are good. That’s just baking truth! For more simple sweet treats, check out my guide on sugar cookie icing, though these cookies shine best with just that simple dusting.
Ingredient Notes and Ricotta Preparation
Listen, if you only take one piece of advice from me today, let it be this: DO NOT skip draining your ricotta cheese! Watery ricotta is the number one way to get flat, soggy cookies that don’t set right. I measure my ricotta into a fine-mesh sieve lined with a coffee filter or cheesecloth and let it sit over a bowl for at least an hour—sometimes even overnight in the fridge. This extra effort ensures we get that creamy, dense texture needed for the **Best Cannoli Cookies Recipe**.
Now, if you can’t get a fresh orange or just don’t want to zest, you can swap that teaspoon of orange zest for about 1/2 teaspoon of high-quality orange extract. It’s not quite the same brightness, but it works in a pinch! Also, if you want to get fancy and make some **Pistachio Cannoli Cookies**, feel free to swap out half the mini chocolate chips for finely chopped, unsalted pistachios. They look totally gorgeous when they come out of the oven!
Step-by-Step Instructions for Perfect Cannoli Cookies
Alright, here is where we pull everything together! Remember my core philosophy? Cooking should be joy, not a chore. These instructions are straightforward because I designed this recipe to be quick, even for a weeknight bake. We are aiming for that signature soft texture that makes these cannoli cookies so addictive.
First things first: get your oven warmed up to 350°F (175°C). You need to line your baking sheets with parchment paper—this saves cleanup time, which is part of the modern update to these classics. We want to spend time eating, not scrubbing!
Mixing the Dough for Soft Italian Cookies
Start big! In your large bowl, cream that softened butter and the granulated sugar together. Beat this until it looks genuinely light and fluffy. This is your foundation for the soft texture we want; it whips air into the fats, which is super important for these **Soft Italian Cookies**. Once it’s happy looking, beat in your egg, vanilla, that well-drained ricotta, and the orange zest until everything is just barely combined. Don’t overdo it yet!
Now for the dry stuff. In a separate bowl, whisk your flour, baking powder, and salt together quickly. Then, the most crucial part for texture: add the dry mix to the wet mix gradually, mixing only on low speed until you see the flour just disappear. Stop the mixer immediately once it combines. I can’t stress this enough: overmixing the flour develops gluten, and we want tender **cannoli cookies**, not hockey pucks!
Finally, gently fold in those mini chocolate chips by hand with a spatula. You’re done with the main mixing!

Baking and Finishing Your Homemade Cannoli Flavor
Scoop out rounded tablespoons of the dough and drop them onto your prepared sheets, giving them about 2 inches of space to spread out a little. They bake fast! Keep an eye on them for 10 to 12 minutes. You’re looking for the edges to just be turning lightly golden brown. The tops will still look soft—that’s how you know the center is going to be perfectly gooey. Don’t try to make them look dark brown, or they’ll dry out!
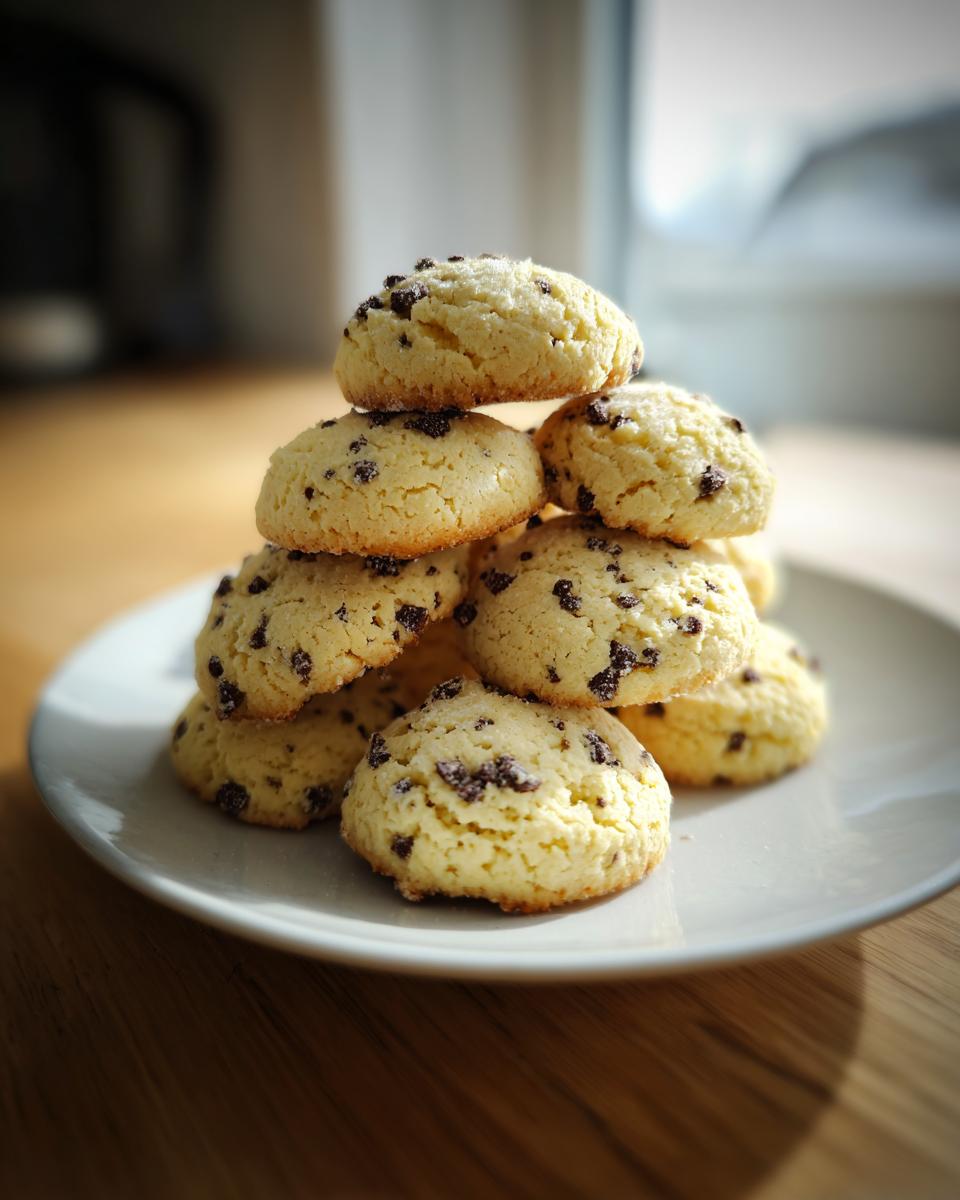
Let them rest on the hot pan for about 5 minutes. This lets them firm up enough so they don’t collapse when you move them. Then, transfer them gently onto a wire rack to cool completely. Once they are totally cool—and this is the fun part—dust them generously with powdered sugar. That final white cloud is what gives these cookies the beautiful look of a true Homemade Cannoli Flavor!
Tips for the Best Cannoli Cookies Every Time
You’ve got all the ingredients mixed, and that dough looks perfect, but I want to make sure you walk away with the absolute Best Cannoli Cookies possible. There are just a couple of little tricks that move these from “pretty good” to “where did you buy these?!” territory. It’s all about managing that moisture and knowing when to stop stirring!
Remember how worried I was about draining the ricotta? That’s tip number one for maintaining that perfect, soft texture. If your dough seems too wet after you add the chocolate chips—and this can happen if your ricotta was even slightly wetter than mine—don’t panic! You can save it!
Here are a few other little secrets I’ve picked up over testing this recipe to get the texture just right:
- Chill If You Need To: If you live somewhere really warm and your dough feels sticky while you’re scooping, pop the whole bowl in the fridge for 15 minutes. Cold butter helps the cookies hold their shape better and prevents spreading too much, which keeps the interior soft.
- Don’t Go Over-Zest: That orange zest is essential, but if you accidentally scrape some of the white pith in there—that bitter white part under the orange skin—it can throw off the flavor balance. Be gentle when zesting, aiming only for the brightly colored outer layer.
- Adjusting for Firmness: If you absolutely prefer a slightly crisper edge (like a really good cookie), you can increase the baking time by about 1-2 minutes, but definitely pull them out as soon as the edges look golden. These are designed to be soft, so test one batch first! They firm up a lot as they cool on the rack.
- The Power of Rest: While you can bake these right away, if you have time, covering the dough and letting it sit in the fridge for an hour—maybe even overnight—allows the flour to fully hydrate. This often results in a deeper flavor and slightly better texture, moving these firmly into the category of amazing creamy filling cookies, even without an actual filling!
Storage and Make-Ahead Options for Cannoli Cookies
I know the struggle! You bake a batch of these amazing **cannoli cookies**, and suddenly, you’re worried about eating them all before company comes next week, or maybe you just want dessert ready for the weekend rush. Good news: these Italian sweets are fantastic for making ahead! Practicality is my whole thing here at The YumMagnet, so let’s talk about how to keep these fresh.
First off, they are best eaten within two to three days stored simply. Once they are totally cool, keep them in an airtight container at room temperature. Make sure you wait until they are completely cool before you even think about sugaring them! If you dust them while they are warm, that powdered sugar melts into a weird, sticky glaze, and we definitely don’t want that messy look.
But my favorite trick—and this comes straight from my need to have snacks ready before the school week even starts—is freezing them. These dough balls freeze like a dream! For easy baking later, drop the dough into rounded spoonfuls and arrange them on a parchment-lined baking sheet. Pop that sheet into the freezer until the dough balls are rock hard. Then, transfer the frozen cookie dough balls into a zip-top freezer bag. They stay perfectly good for about three months. I love knowing I can pull out just two or three cookies whenever a craving hits, like having a special treat hidden away! If you need more ideas for making things ahead, you might enjoy my recipe for easy toffee pretzels, too.
When you bake from frozen, just remember that since the dough is starting super cold, you need to add a couple of extra minutes to that baking time—maybe 2 to 3 extra minutes, depending on your oven. They will still turn out just as soft and wonderful as if you baked them fresh. Easy, right?
Serving Suggestions for Sicilian Inspired Baking
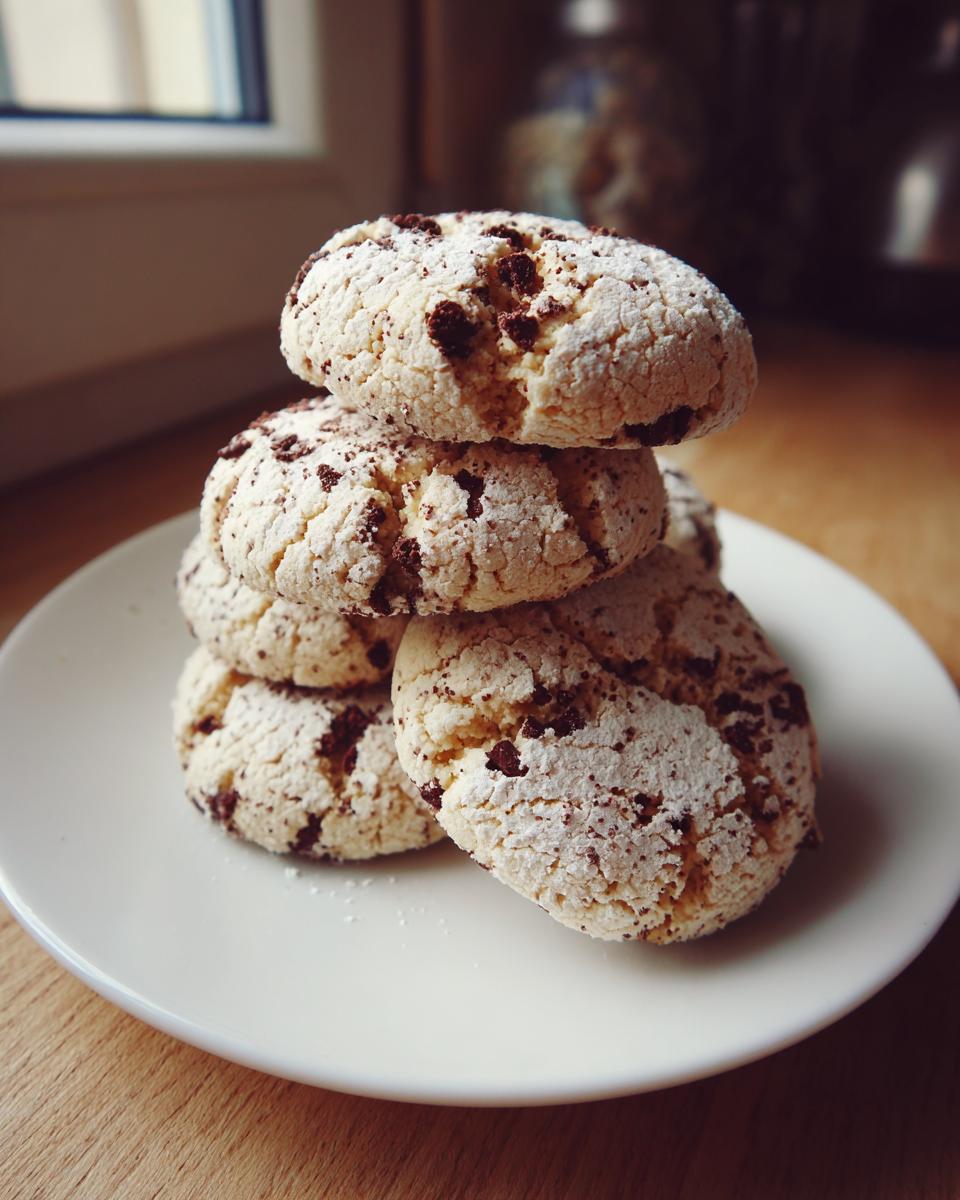
Now that you have these amazing, easy **cannoli cookies** cooling on the rack, the most important question is: how should we serve them? That’s the fun part! Because they are so sturdy and packed with authentic flavor, they truly fit into any occasion. They’re too good just to eat standing over the cooling rack, even though I often do that myself!
These cookies are wonderful for bringing a touch of Italy to your table, whether you are hosting a big event or just having a quiet weeknight treat. They are beautiful on a platter and always seem to disappear first at any gathering I take them to. They fit perfectly into my philosophy of making simple things feel special, which is why they are such great Dessert Recipes for Parties.
Here are a few of my favorite ways to present these **Sicilian Inspired Baking** beauties:
- The Coffee Pairing: Honestly, nothing beats a strong cup of espresso or a dark roast coffee next to one of these cookies. The slight bitterness of the coffee cuts through the sweetness of the ricotta filling flavor beautifully.
- Holiday Tray Star: If you are putting together a big Christmas cookie assortment, these are a must-have. They provide a lovely soft texture contrast to crunchier biscotti or shortbread. We often trade out some of the usual holiday sprinkles for crushed pistachios on top for an extra pop of color!
- Elevate with Citrus: When I serve them at a fancy brunch, I chop up ultra-fine ribbons of fresh orange peel, mix it with a tablespoon of sugar, and sprinkle that on top instead of just the powdered sugar. It makes the citrus zest really sing! I love doing that also with these lemon scones if I need another citrus element.
- Dessert Wine Delight: For an adult gathering, serve these alongside a cool glass of Vin Santo or a dessert-style Marsala. The nutty, honeyed notes in the wine complement the vanilla and ricotta flavor perfectly.
If you’re looking for more inspiration on how others are serving their wonderful Italian-inspired treats, you might find some ideas on this great article about similar cannoli cookies. But really, you can’t go wrong just piling them high on a pretty dish. They are ready to go!
Frequently Asked Questions About Cannoli Cookies Recipe
It’s totally normal to have questions when you’re trying a new twist on a classic dessert! I get asked the same things every time I bring these **cannoli cookies** to a gathering. It’s my mission to make sure you feel confident baking these, so let’s clear up a few common thoughts about texture, sticking to tradition, and ingredient swaps. When you feel good about the recipe, the result is always better!
Do these cannoli cookies taste exactly like the pastry?
That’s the million-dollar question! I want to set expectations correctly: no, they don’t taste *exactly* like biting into a crunchy, freshly filled shell. That crisp shell texture is hard to replicate in a drop cookie! What these **cannoli cookies** deliver is all the wonderful flavor essence of the filling—the creamy tang of the ricotta, the bright little lift from the orange zest, and the sweet counterpoint of the chocolate chips—all baked into a wonderfully soft, cake-like cookie. They are an homage to the pastry, not a direct copy, and honestly, many people find them even easier to eat!
Can I use low-fat ricotta cheese in this Ricotta Cheese Cookies recipe?
Oh, honey, please don’t! I know low-fat or part-skim cheese looks tempting, but when it comes to these **Ricotta Cheese Cookies**, you need the fat content. Low-fat ricotta holds way more water than the whole milk variety. Even if you drain it for an hour, that extra moisture will leak out during baking, and your cookies will spread, maybe even turn gummy underneath. I strongly recommend sticking with the full-fat, whole milk ricotta. Yes, you have to drain it really well, but that richness is what gives you that perfectly tender crumb and prevents the cookie from tasting watery. It’s worth the little bit of prep!
If you are looking for tips on making other treats that use cheese beautifully, you might find my post on easy Italian cookies helpful for expanding your baking repertoire!
Estimated Nutritional Information for Cannoli Cookies
As much as I wish baking was just magic and butterflies, we do have to talk about the numbers sometimes! Since I developed this recipe in my own kitchen focusing on flavor and ease, I ran the numbers based on the ingredients listed above. This should give you a really good ballpark idea of what you are getting into when you bite into one of these delightful **cannoli cookies**.
Keep in mind, because we are dealing with real ingredients—like the exact fat content of the butter or how much sugar is actually in the specific brand of ricotta you drain—these are just estimates! I always tell people not to stress too much over the exact count, but it’s good to have a general idea, especially when you’re making these for a group sharing platter.
Here is the estimated breakdown:
- Serving Size: 1 cookie
- Calories: 180
- Sugar: 15g
- Sodium: 85mg
- Fat: 10g
- Saturated Fat: 6g
- Unsaturated Fat: 4g
- Trans Fat: 0g (Hooray for quality butter!)
- Carbohydrates: 21g
- Fiber: 0.5g
- Protein: 3g
- Cholesterol: 35mg
Seriously, these are pretty straightforward for a dessert cookie packed with cheese and butter! If you’re swapping out chocolate chips for pistachios, for example, that count might shift a little, but overall, you have a wonderful, easy treat here. Happy baking, and don’t let the numbers stop you from enjoying the process!
Share Your Homemade Cannoli Cookies Creations
If you’ve made it this far, you’re officially part of The YumMagnet family! My whole goal here is to bring warmth and connection back to the kitchen, and that means connecting with YOU when you bake these **cannoli cookies**. Creating a recipe is only half the fun; the real joy comes when I see how they turn out in your kitchens!
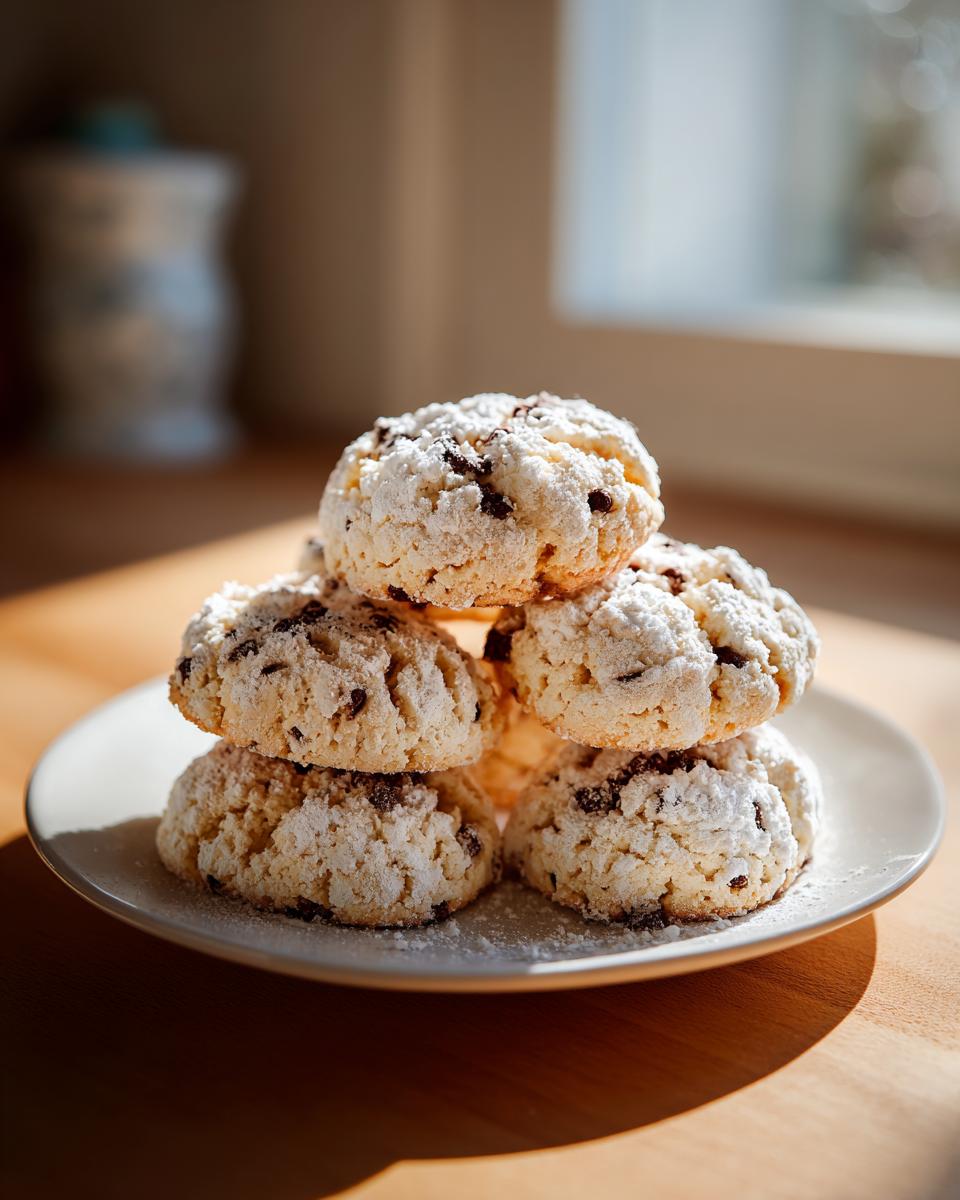
I absolutely, one hundred percent, want to see your results. Did you add pistachios like I suggested? Did you manage to get that perfect dome shape? Did your kids devour them before you could even get a picture? Tell me everything!
Please take a moment, once you’ve enjoyed your batch of incredibly easy Ricotta Cheese Cookies, to leave a star rating and a comment right down below. Your feedback is what helps me know which recipes to keep refining and sharing, and it helps other home cooks decide if this is the right Sicilian Inspired Baking project for them.
And if you snapped a photo—and I know you did, because these look gorgeous dusted in white sugar—share it on social media! Tag me! I truly love seeing your creations, and it helps spread the word that making amazing Italian desserts doesn’t have to mean hours of fuss. If you’re looking for inspiration for showcasing your beautiful bakes, sometimes checking out what others are doing helps, like this collection of cannoli cookies.
If you ever have specific questions about the recipe, need clarification on the draining technique, or just want to share a story about how these **cannoli cookies** became a new family favorite, don’t hesitate to reach out directly through my contact page. Happy baking, friends. I can’t wait to hear all about your delicious success!
PrintEasy One-Bowl Cannoli Cookies with Ricotta and Chocolate Chips

Make the flavors of classic Italian cannoli into a simple, soft cookie. This recipe uses ricotta cheese, chocolate chips, and orange zest for an authentic taste without the fuss of filling shells.
- Prep Time: 20 min
- Cook Time: 12 min
- Total Time: 32 min
- Yield: 24 cookies 1x
- Category: Dessert
- Method: Baking
- Cuisine: Italian
- Diet: Vegetarian
Ingredients
- 1 cup unsalted butter, softened
- 1 cup granulated sugar
- 1 large egg
- 1 teaspoon vanilla extract
- 1/2 cup whole milk ricotta cheese, drained well
- 1 teaspoon orange zest
- 2 3/4 cups all-purpose flour
- 1 teaspoon baking powder
- 1/2 teaspoon salt
- 1 cup mini chocolate chips
- 1/2 cup powdered sugar (for dusting)
Instructions
- Preheat your oven to 350°F (175°C). Line baking sheets with parchment paper.
- In a large bowl, cream together the softened butter and granulated sugar until light and fluffy.
- Beat in the egg, vanilla extract, drained ricotta cheese, and orange zest until just combined.
- In a separate bowl, whisk together the flour, baking powder, and salt.
- Gradually add the dry ingredients to the wet ingredients, mixing on low speed until just combined. Do not overmix.
- Gently fold in the mini chocolate chips.
- Drop rounded tablespoons of dough onto the prepared baking sheets, spacing them about 2 inches apart.
- Bake for 10 to 12 minutes, or until the edges are lightly golden. The centers will look soft.
- Let the cookies cool on the baking sheets for 5 minutes before transferring them to a wire rack to cool completely.
- Once cool, dust generously with powdered sugar before serving.
Notes
- Drain your ricotta cheese thoroughly using a fine-mesh sieve or cheesecloth for at least one hour to prevent a soggy cookie dough.
- For extra flavor, substitute some of the mini chocolate chips with chopped pistachios.
- You can freeze the unbaked dough balls for up to three months; bake directly from frozen, adding 2-3 minutes to the baking time.
Nutrition
- Serving Size: 1 cookie
- Calories: 180
- Sugar: 15g
- Sodium: 85mg
- Fat: 10g
- Saturated Fat: 6g
- Unsaturated Fat: 4g
- Trans Fat: 0g
- Carbohydrates: 21g
- Fiber: 0.5g
- Protein: 3g
- Cholesterol: 35mg