
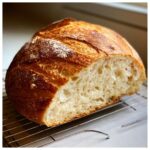
Oh my goodness, there is nothing quite like the smell of freshly baked bread filling your kitchen, is there? It wraps around you like a warm hug! When I first started simplifying recipes—which is my whole mission here at The YumMagnet Recipe Box, born from those crazy busy family days—I knew I had to crack the code on true bakery-quality loaves without spending half the day waiting around. Trust me, you deserve bread that shouts “Italy!” on the outside. This Easy Crusty Italian Bread Recipe delivers that perfect, golden, crispy exterior while keeping the inside unbelievably soft and chewy. It’s one of those simple, practical recipes I developed for my own hectic schedule, and it has become essential for everything from weeknight pasta nights to stacking up hearty sandwiches.
- Why This Easy Crusty Italian Bread Recipe is a Family Favorite
- Simple Bread Ingredients for Your Rustic Italian Loaf
- Step-by-Step Tutorial for Bakery Style Bread at Home
- Tips for Success: Baking Perfect Italian Bread Every Time
- Ingredient Notes and Substitutions for Homemade Italian Bread
- Serving Suggestions: What to Serve with Italian Bread
- Storage & Reheating Instructions for Your Warm Italian Loaf
- Frequently Asked Questions About This Italian Bread Recipe
- Estimated Nutritional Data for Homemade Italian Bread
- Share Your Golden Brown Italian Loaf Experience
Why This Easy Crusty Italian Bread Recipe is a Family Favorite
You might think making real, bakery style bread at home needs a night course or fancy equipment, but nope! I promise this recipe is an easy homemade bread superstar that truly delivers on texture.
- Quick: From start to finish, you are looking at just over two hours, most of which is hands-off rising time.
- Easy: We use simple pantry staples—nothing intimidating, I swear!
- Texture: That magic combination of crusty outside and soft inside is non-negotiable in my kitchen.
Achieving That Perfect Crusty Italian Bread Texture
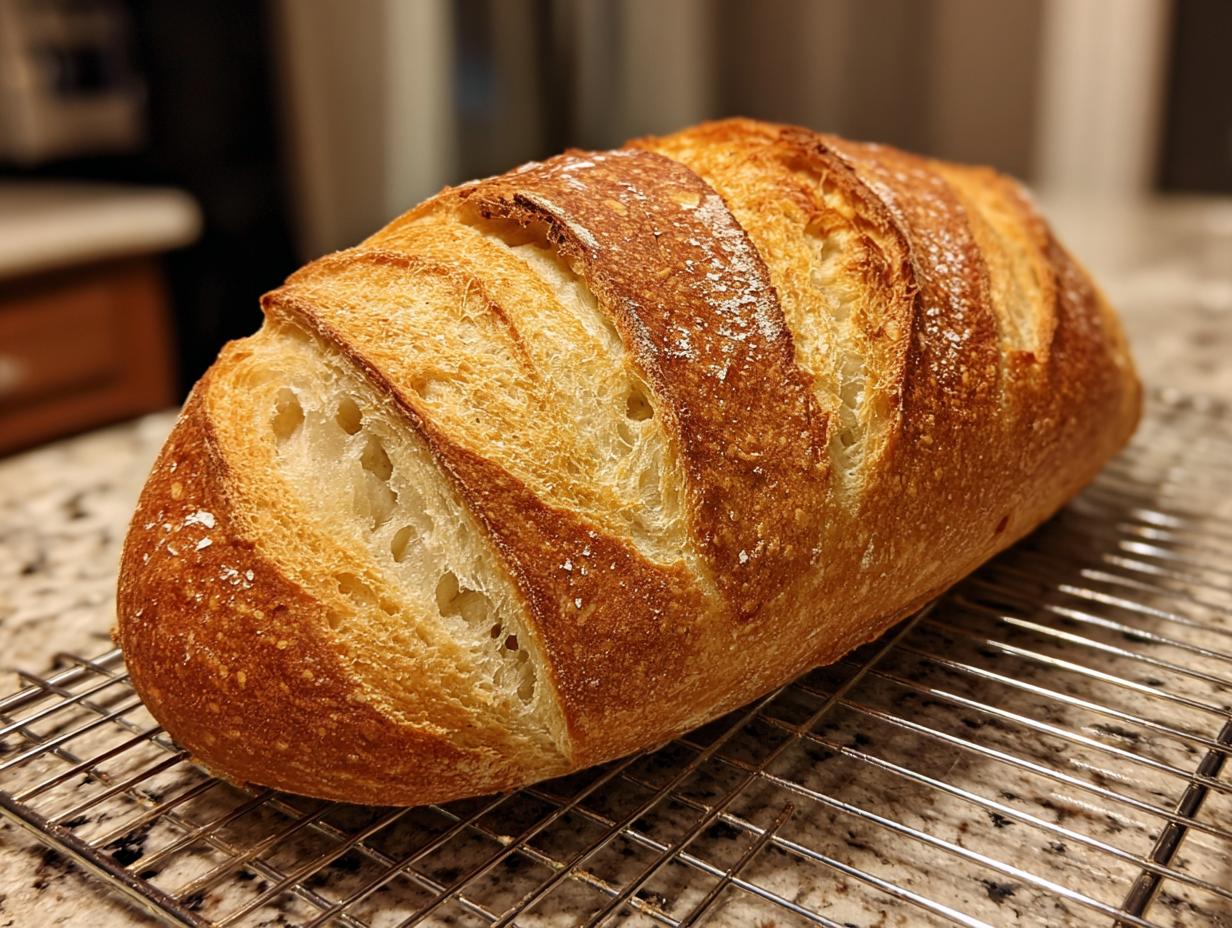
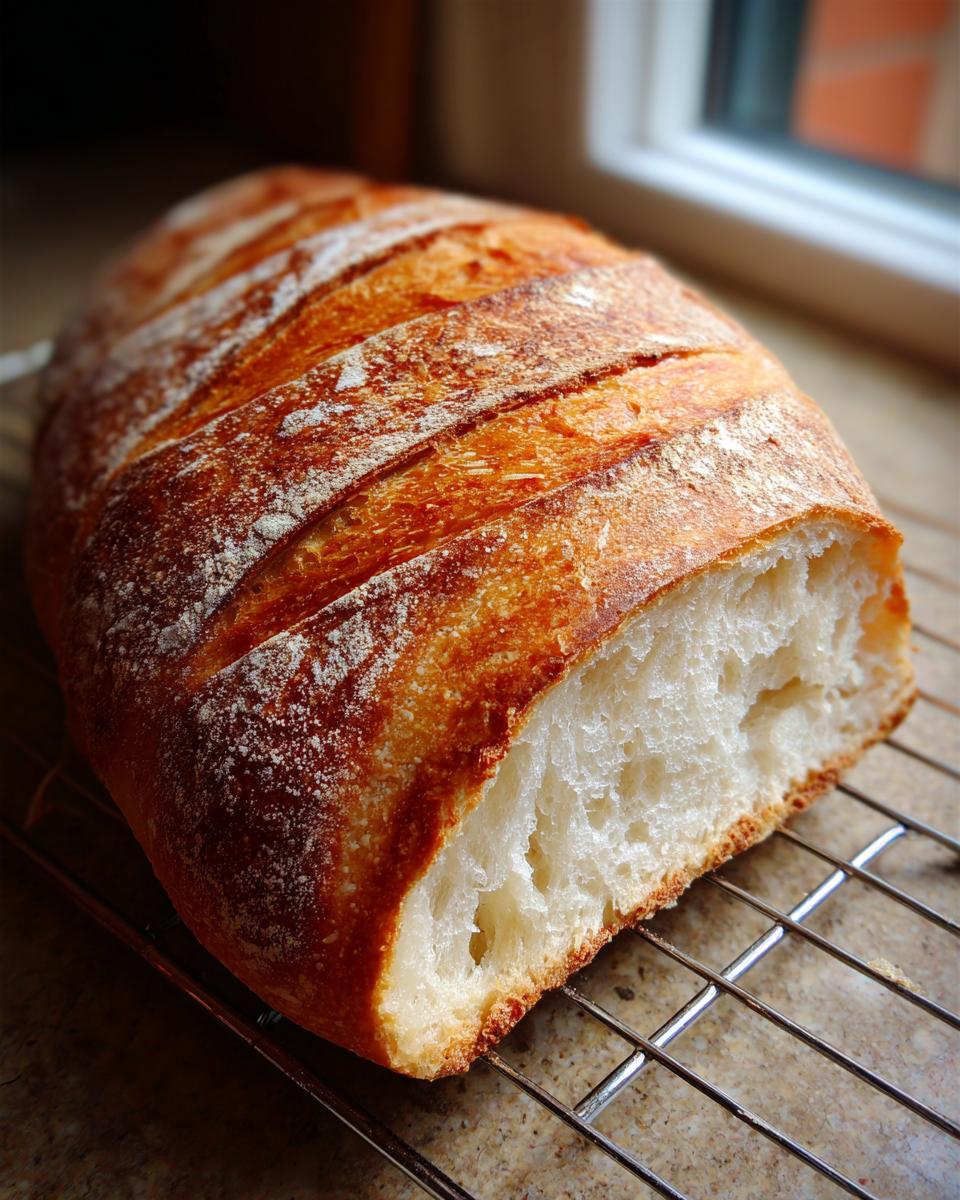
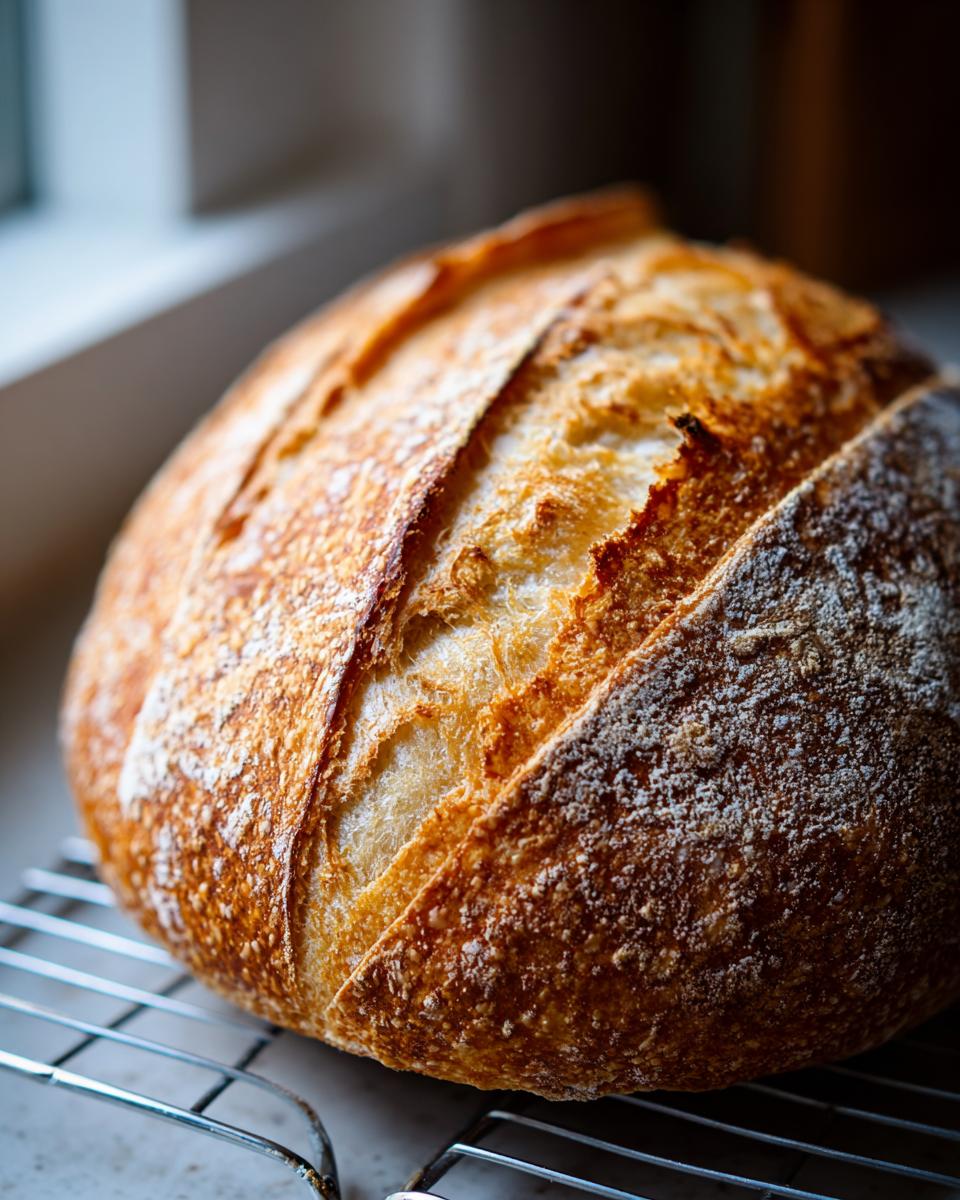
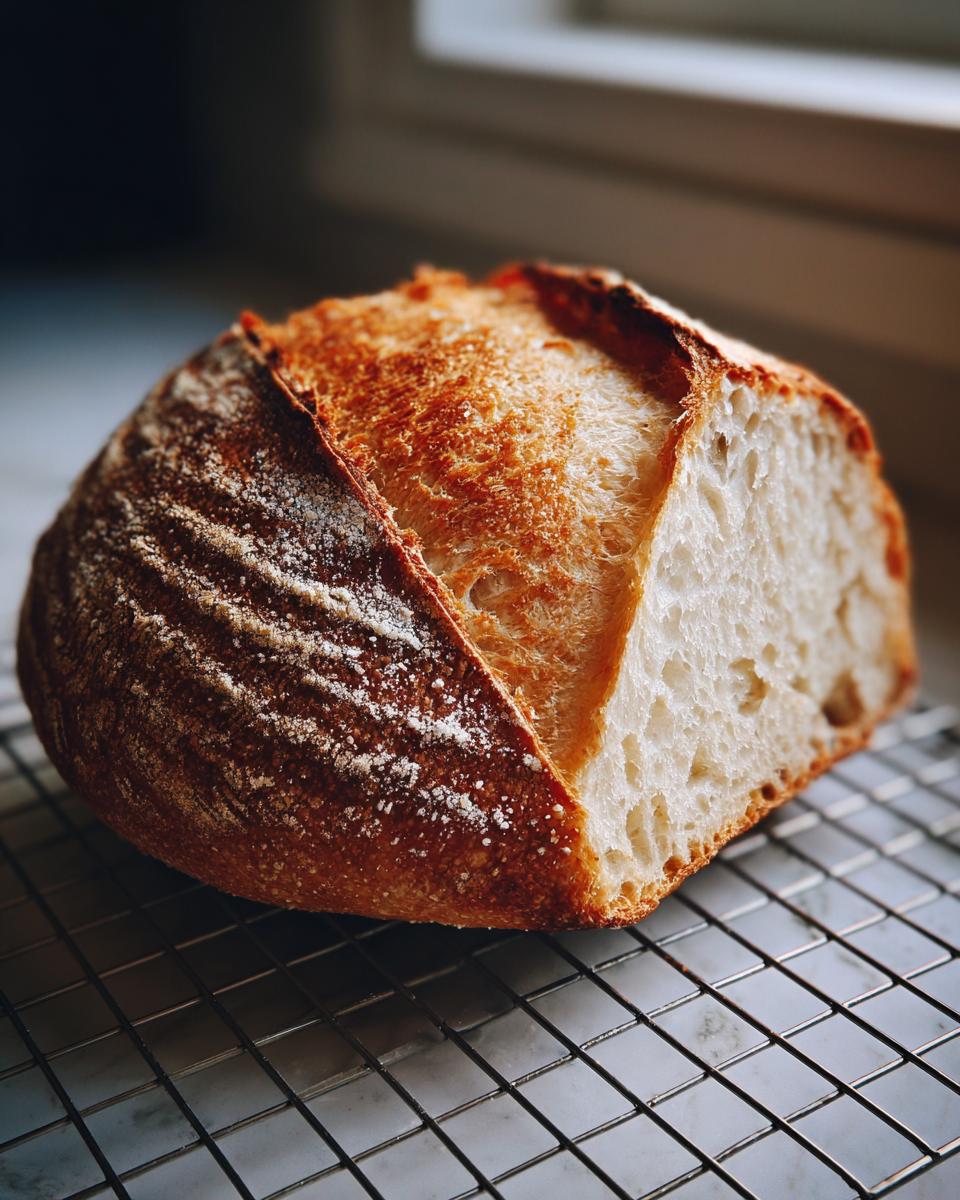
How do we lock in that satisfying crunch? It’s all about the steam in the oven! Sending a rush of moist heat into the oven keeps the surface of your crusty Italian bread supple long enough to really expand. When you pull that steam away, you are left with that gorgeous, crackly shell protecting the wonderfully soft and chewy interior. It works every single time!
Simple Bread Ingredients for Your Rustic Italian Loaf
One of the best things about this quick Italian bread is that you probably have every single thing needed right now! We aren’t messing around with complicated starters or specialty flours here. These simple bread ingredients are the foundation for an amazing, restaurant-quality loaf. You just need the basics, plus a splash of olive oil for richness.
- 3 1/2 cups all-purpose flour (don’t change this for your first try!)
- 1 1/2 teaspoons salt
- 1 teaspoon granulated sugar
- 2 1/4 teaspoons active dry yeast (that’s one standard packet!)
- 1 1/4 cups warm water (aim for 105-115°F—needs to feel warm, not hot!)
- 2 tablespoons olive oil, plus a little extra for coating the bowl
Step-by-Step Tutorial for Bakery Style Bread at Home
This is it—the core process where the magic happens! Baking this Italian bread is easier than you think, but the timing on the rising and the steam trick at the end are what transform it from just ‘bread’ to ‘professional bakery style bread at home.’ Remember what I always say: precision matters early on, but you can lean on your senses later. We’re aiming for that incredible, fragrant result! For more on my approach to practical cooking, check out my terms of use, but for now, let’s focus on baking.
Activating Yeast and Mixing the Italian Bread Dough
First things first, we have to wake up that yeast. Grab your warm water—it needs to be between 105°F and 115°F. If it’s too cold, the yeast sleeps; if it’s too hot, well, you kill it. Pour the warm water into your bowl, sprinkle in the sugar, and then the yeast. Give it a gentle nudge and leave it alone for about five minutes. When it gets foamy on top? Success! That means you’ve got happy little yeasties ready to work.
Next, toss in your flour and salt. Then, drizzle in that lovely olive oil. Start mixing it all up with a sturdy wooden spoon. Don’t worry if it looks messy right now; you’re looking for a shaggy dough to form. Seriously, don’t try to add more water if it looks rough. That’s normal for this stage!
Kneading and First Rise for Soft and Chewy Italian Loaf
Now for the fun arm workout! Turn that shaggy mix out onto a surface dusted lightly with flour. We need to knead this for about 5 to 7 minutes. You are looking for the dough to transform; it should feel smooth, slightly tacky (but not sticky enough to glue your fingers to it), and elastic. Feel that spring yet? That’s what builds the structure for your soft and chewy Italian loaf.
Once it’s beautifully kneaded, lightly coat a clean bowl with a drop or two of olive oil, drop your dough ball in, and spin it around to coat. Cover it up tightly with plastic wrap or a clean towel—you don’t want a skin forming! Place it somewhere warm—like on top of the fridge—and just let it be. This first rise usually takes 60 to 90 minutes, or until it’s doubled in size. Be patient here; this is where the flavor really develops.
Shaping and Second Rise for Your Quick Italian Bread
When the dough has puffed up nicely, gently punch it down. Don’t attack it; we’re just letting the big air bubbles gently escape! Turn it onto your counter and shape it. I usually go for a nice, fat oval shape that looks wonderfully rustic, but you can certainly make it into a round ball as well. Place your loaf onto your prepared baking sheet or into your greased loaf pan. You MUST use parchment paper if you want an easy release; look over this tip for that perfect crust!
Cover it loosely again—we don’t want to squash that beautiful shape we just created. Now, it needs a second, shorter nap. Give it another 30 to 45 minutes. You’ll know it’s ready when it looks puffy again, but it won’t quite double this time. This quick step prepares it perfectly for the oven!
Creating the Crispy Crust Bread Tutorial with Steam
This is the moment where we pretend we own a professional brick oven! Preheat your oven to 400°F (200°C). This is important: put a very shallow, oven-safe pan on the bottom rack while it preheats—this pan will hold our steam secret. Once the oven is hot, use a razor blade or a very sharp knife to make those quick, shallow slashes across the top of the dough. This allows the bread to expand evenly—your crispy crust bread tutorial starts now!
Right before you pop the bread in, carefully pour about half a cup of very hot water into that preheated pan on the bottom rack. Seriously, be careful of the escaping steam! Quick and carefully shut that door! That burst of steam keeps the surface moist while the initial heat sets the crust structure. Bake it for 30 to 35 minutes. You’re done when the crust is deep golden brown and, if you have a thermometer, the internal temp hits 200°F (93°C). I learned the hard way that if you skip the steam, the crust sets too fast and you end up with a dull, flat top. Don’t skip the steam!
Tips for Success: Baking Perfect Italian Bread Every Time
Okay, now that you have the steps, let me share a few secrets that helped me level up from ‘pretty good’ to ‘OMG, is this from a bakery?’ My biggest struggle early on was getting that beautiful, crackly shell—my bread always came out looking a little sad and soft on the outside. I used to just throw the water in the pan and hope for the best. Big mistake!
I finally realized that the steam needs a little reinforcement. If you want that truly stunning, golden, and extra-crispy exterior, you need to cheat a little more! A couple of minutes into the bake—say, around the 5 or 8-minute mark—quickly open the oven door, spray the sides of the oven cavity (avoiding the light bulb, obviously!) with a little spritz of water, and shut the door right away. Do this just two or three times. That extra moisture burst is just enough to keep the crust elastic for longer, allowing your loaf to get that amazing, dramatic oven spring. For more visual guidance on getting that crunch, check out this step-by-step tutorial on getting a thicker crust, which gave me the confidence to try the spraying trick. This homemade Italian bread technique really changed everything for me!
Another thing: don’t be afraid of color! If your bread looks pale halfway through baking, it means the crust isn’t developed yet. If it’s still pale after 25 minutes, pull that steam pan out and let it bake naked for the remaining time. I aim for a *deep* golden brown, almost mahogany color. That deep color is the difference between a decent loaf and the best Italian bread recipe you’ll ever need.
Ingredient Notes and Substitutions for Homemade Italian Bread
A quick note on the ingredients, because even simple recipes can trip us up if we aren’t careful about the details! The most common question I get about this recipe whirls around the water—it’s super important for activation. If your water is too cold when you mix it with the yeast, nothing exciting happens, and you end up with dense, lifeless bread. If it’s scorching hot, you’ve accidentally given your yeast a hot bath and rendered it useless.
Seriously, make sure that water temperature is right in that 105°F to 115°F sweet spot. It should feel pleasantly warm against your wrist, like a baby’s bathwater. That gentle warmth is like the perfect cup of coffee for your yeast, getting it buzzing and ready to give us that fantastic rise we need for a soft and chewy interior.
Now, about flour! I wrote this recipe using all-purpose flour because it’s accessible, fitting my mission to keep things easy. But if you happen to have bread flour on hand, you can absolutely substitute it cup-for-cup. Just know that bread flour has higher protein, so your loaf might feel a tiny bit chewier and the rise could be slightly more dramatic after kneading. It’s a great upgrade once you nail the technique, but for your first time baking this artisan bread recipe easy version, stick with the AP flour!
Serving Suggestions: What to Serve with Italian Bread
Okay, let’s talk about the best part: eating it! Once this loaf has cooled just enough—still warm, but not burning the roof of your mouth—you have to decide what it’s going to accompany. That crispy crust and pillowy soft interior make it versatile for almost any meal, but there are a few ways I absolutely insist you try it first.
If you’ve just made a big pot of marinara or bolognese, you need serious dipping material. Forget those sad, squishy grocery store loaves; this bread is built for soaking up sauce! This is prime time for Italian bread for dipping. Just grab a nice shallow bowl, pour in really good quality olive oil—maybe sprinkle in some dried oregano or a pinch of red pepper flakes—and tear off hunks of your fresh loaf.
Then, of course, there is the sandwich transformation. This loaf makes the absolute best Italian sandwich bread. Whether you’re piling it high with cold cuts and provolone for a massive lunch or just toasting thick slices for garlic bread, the structure holds up beautifully. You don’t get that sad, soggy bottom that happens when the bread is too fluffy inside. The chewiness locks everything in perfectly.
And honestly? Sometimes the best pairing is nothing at all! I often just slice it thick, slather it with salted butter while it’s still cooling, and call it dinner. If you’re looking for more ways to use up that amazing aroma, click over to see how they style their crusty Italian bread—it might give you some new ideas!

Storage & Reheating Instructions for Your Warm Italian Loaf
Look, the absolute best time to eat this bread is within about three hours of it coming out of the oven. I won’t lie to you—that initial, glorious, crispy crust starts softening up as it cools, and that’s just the nature of bread, especially bread made with love instead of preservatives!
The biggest mistake people make is wrapping it up tight in plastic wrap right away. If you do that while the bread is even slightly warm or even fully cooled, you are trapping steam inside, which immediately turns that beautiful, crackly crust into something soft and slightly rubbery. We don’t want that!
For keeping it for a day or two, you want to let it cool completely on a wire rack first. Once it’s totally cool, wrap it snugly—but not suffocatingly tight—in aluminum foil or a clean kitchen towel. Foil works better to lock in the internal softness for up to 48 hours. Keep it on the counter, not in the fridge; refrigeration dries bread out faster, which is the opposite of what we want for this warm Italian loaf!
How to Revive the Crispy Crust
So, your bread is soft, but you’re ready for an amazing dinner and want that *snap* back in the crust? Don’t just microwave it—that’s a fast track to rubbery disappointment. We are going for the steam trick again, but in reverse!
Preheat your oven to 350°F (175°C). Take the loaf, unwrap it completely, and brush the crust lightly with a few drops of water—just enough to dampen the very surface. Then, pop it directly onto the middle rack. If you have one of those shallow pans you used for baking, set that on the bottom rack again and pour in a tiny splash of water for ambient steam. Bake it for about 5 to 7 minutes. Pull it out, and oh my gosh, the crust will have reformed its crunch! It smells like you just pulled it fresh from the oven.
Using Leftover Italian Bread for Croutons or Bread Crumbs
If your loaf ends up a bit too soft, or if you simply have leftovers after a few days, please don’t let it go to waste! This bread makes amazing crunchy additions to meals. Dice up the slightly stiff loaf, toss it with some olive oil, garlic powder, salt, and maybe some dried basil, and bake it at 300°F until perfectly dried out and golden.
These homemade croutons are leagues better than anything store-bought for salads or soups. If you bake them until they are rock hard, you can toss them into a food processor for the best, most aromatic crumbs for topping your next casserole. It’s just another way to honor all that hard work you put into that first batch of easy homemade bread!
Frequently Asked Questions About This Italian Bread Recipe
I always get the same questions when someone tries this recipe for the first time, and honestly, that’s great! It means you’re thinking like a baker and want to troubleshoot before you even start. These are the things I wished someone had clearly explained to me when I was first starting out with quick Italian bread! Feel free to check out my privacy policy if you’re curious about how we protect your data!
Can I skip the kneading process entirely?
This is the big one! I know we all crave a no knead Italian bread recipe after a long day, but for this specific crusty Italian bread recipe, I strongly advise against skipping the kneading. Kneading develops the gluten structure that gives you that signature soft and chewy interior. If you skip it, you risk ending up with a very dense, crumbly, almost cake-like loaf instead of the light, airy texture you want. If you absolutely must reduce kneading time, go for 5 minutes, but don’t skip it completely!
My loaf turned out dense and heavy. What went wrong?
That’s the worst feeling, isn’t it? When bread is dense, it usually points back to one of two places: the yeast or the gluten development. If you didn’t knead enough, you didn’t build enough structure to trap those gases. If the rise seemed weak, double-check your water temperature—too hot kills yeast, too cold slows it down dramatically. Also, sometimes people add the salt directly onto the yeast before it foams; salt can inhibit yeast activity, so always mix it with the flour first!
Can I use bread flour instead of all-purpose flour?
Yes, you sure can! As I mentioned earlier, bread flour has more protein, which means more gluten potential. You will get a slightly chewier loaf that might rise a bit higher. It works beautifully for this rustic Italian loaf, but just be aware that you might need to add a teaspoon or two more of water during the mixing phase because bread flour tends to soak up a bit more liquid than AP flour. If you want the exact beginner results I achieved, stick to AP flour for your very first attempt, just like in this excellent guide.
How do I ensure the crust stays crispy once cooled?
The crust wants to soften as it sits on the counter—that’s moisture migration, scientifically speaking! To keep it crispy for longer, make sure you cool the bread completely on a wire rack so air circulates underneath. Don’t cover it until it’s room temperature. Once cooled, wrap it loosely in foil or a clean linen tea towel. Never store it in a plastic bag, or you’ll instantly soften that gorgeous crust you worked so hard for!
Estimated Nutritional Data for Homemade Italian Bread
When you’re baking something this delicious and fresh, you know the nutritional content is going to be way better than store-bought stuff! Just remember, since every oven and measuring spoon is a little different, these numbers are estimates based on the ingredients list above and our standard serving size of one slice. This data helps you understand the building blocks of this wonderful aromatic fresh baked bread!
- Serving Size: 1 slice
- Calories: 150
- Fat: 2g
- Saturated Fat: 0.3g
- Trans Fat: 0g
- Cholesterol: 0mg
- Sodium: 250mg
- Carbohydrates: 30g
- Fiber: 1g
- Sugar: 1g
- Protein: 5g
Share Your Golden Brown Italian Loaf Experience
Alright, bakers, that’s the end of the tutorial, but the journey isn’t over! I genuinely want to know how your golden brown Italian loaf turned out. If you followed these steps, you should have that perfect crusty exterior that makes dipping into olive oil so satisfying. Did it work? Did you hear that little crackle when you sliced into it?
Don’t be shy! Leave me a comment down below! Tell me how long the rise times took in your kitchen, or what fantastic meal you served this crusty Italian bread with tonight. Knowing how these recipes work in real American kitchens—not just mine—is how we build a truly helpful community here.
And seriously, I dream of seeing your creations! Snap a picture of that beautiful loaf resting on your cooling rack and tag me on social media. It always makes my day to see your fantastic results. If you need to reach out directly with a question that just couldn’t wait, you can always find my contact form over here. Happy baking, and thanks for trying out this recipe!
If you have a moment, drop a star rating at the top of the page—it truly helps other busy home cooks like us find reliable recipes. And if you loved the secret trick for reforming the crust, why not share this recipe with a friend who always buys their bread from the store? They could use a little slice of homemade bakery magic in their life, just like this recipe suggests for effortless homemade baking!
PrintEasy Crusty Italian Bread Recipe: Bakery Style at Home
Bake bakery-style Italian bread with a golden, crispy crust and a soft, chewy interior. This simple recipe uses basic ingredients and is perfect for beginners needing a quick, homemade loaf for dinner or sandwiches.
- Prep Time: 20 min
- Cook Time: 35 min
- Total Time: 2 hours 5 minutes
- Yield: 1 large loaf 1x
- Category: Bread
- Method: Baking
- Cuisine: Italian
- Diet: Vegetarian
Ingredients
- 3 1/2 cups all-purpose flour
- 1 1/2 teaspoons salt
- 1 teaspoon granulated sugar
- 2 1/4 teaspoons active dry yeast (1 packet)
- 1 1/4 cups warm water (about 105-115°F)
- 2 tablespoons olive oil, plus more for the bowl
Instructions
- In a large bowl, mix the warm water, sugar, and yeast. Let it stand for 5 minutes until foamy.
- Add the flour, salt, and olive oil to the yeast mixture. Mix with a wooden spoon until a shaggy dough forms.
- Turn the dough out onto a lightly floured surface. Knead for 5 to 7 minutes until the dough is smooth and elastic.
- Lightly oil a clean bowl. Place the dough in the bowl and turn it once to coat. Cover the bowl with plastic wrap or a clean kitchen towel.
- Let the dough rise in a warm place for 60 to 90 minutes, or until it has doubled in size. This is your first rise.
- Gently punch down the dough. Shape it into a round or oval loaf.
- Place the shaped loaf on a baking sheet lined with parchment paper or in a lightly oiled loaf pan. Cover loosely.
- Let the dough rise again for 30 to 45 minutes, or until it looks puffy. This is your second rise.
- Preheat your oven to 400°F (200°C). Place a shallow pan on the bottom rack to create steam later.
- Before baking, lightly brush the top of the loaf with water. Use a sharp knife to score the top of the bread with a few shallow slashes.
- Carefully pour about 1/2 cup of hot water into the shallow pan on the bottom rack to create steam, then quickly close the oven door.
- Bake for 30 to 35 minutes, or until the crust is deep golden brown and the internal temperature reaches 200°F (93°C).
- Remove the bread from the oven and transfer it to a wire rack to cool completely before slicing.
Notes
- For an extra crispy crust, spray the sides of the oven with water a couple of times during the first 10 minutes of baking.
- If you prefer a rustic look, shape the dough into a free-form loaf directly on a baking stone or preheated pizza stone instead of a pan.
- This bread is perfect for dipping in olive oil or serving alongside your favorite pasta dishes.
Nutrition
- Serving Size: 1 slice
- Calories: 150
- Sugar: 1
- Sodium: 250
- Fat: 2
- Saturated Fat: 0.3
- Unsaturated Fat: 1.7
- Trans Fat: 0
- Carbohydrates: 30
- Fiber: 1
- Protein: 5
- Cholesterol: 0