
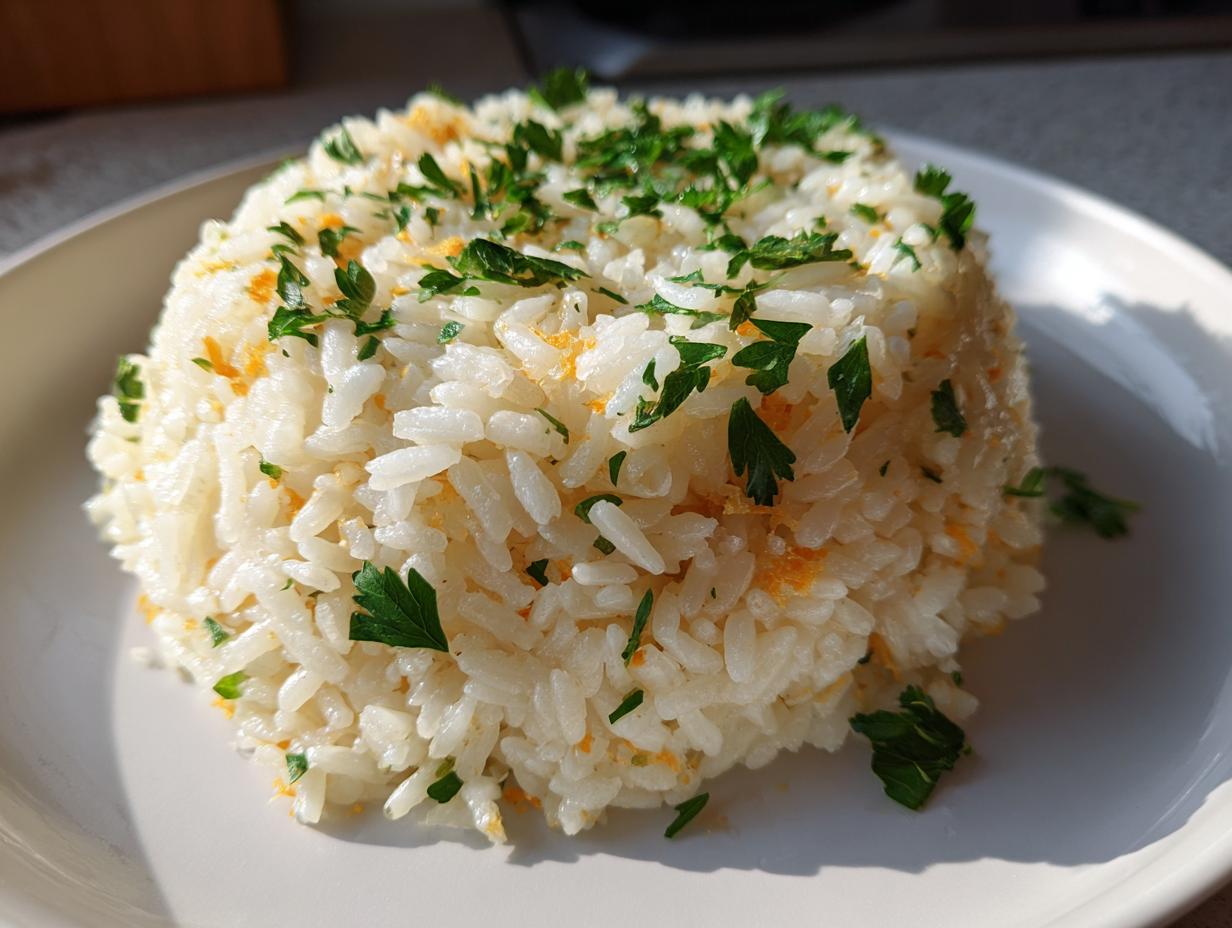
I’m going to let you in on a little secret that changed my dinner table forever: you absolutely do not need that box of dry little pasta and rice bits to make a truly phenomenal side dish. Forget lukewarm, slightly salty boxed stuff! I whip up this ultimate fluffy homemade rice pilaf recipe from scratch, and trust me, it’s ready in less than 35 minutes. When I first started The YumMagnet Recipe Box, I was desperate to bring that comforting, flavorful feeling of my mom’s Sunday cooking to busy weeknights, and this pilaf was one of the first adaptations that worked! It’s savory, unbelievably light, and truly the best weeknight rice side you’ll make. If you love this kind of fluffy grain magic, you have to check out my recipe for fluffy cilantro lime rice, too!
- Why This Homemade Rice Pilaf Recipe is Your New Weeknight Rice Side
- Ingredients for the Ultimate Fluffy Rice Pilaf
- How to Make Perfect Rice Pilaf from Scratch: Step-by-Step
- Tips for the Best Side Dish for Chicken: Achieving Restaurant Style Rice Pilaf
- Variations: Making Healthy Rice Pilaf Recipe or Rice Pilaf with Orzo
- Storing and Reheating Your Flavorful Rice Pilaf
- Frequently Asked Questions About Making Rice Pilaf
- Serving Suggestions for This Buttery Rice Pilaf
- Nutritional Estimate for Your Rice Pilaf Serving
Why This Homemade Rice Pilaf Recipe is Your New Weeknight Rice Side
Look, I get it—weeknights are chaos. But that doesn’t mean your sides have to taste like they came out of a microwave pouch. This quick rice pilaf recipe is my secret weapon because it delivers major flavor without turning into gloopy mush. It’s miles better than anything you can buy pre-packaged, that’s for sure!
It’s easy to elevate your entire dinner when you have fantastic savory side dish recipes tucked away. Here’s why this pilaf beats everything else:
- It’s genuinely fast! Total time is under 40 minutes, making it perfect for busy schedules.
- The texture is locked in. We actively toast the noodles and rice, so you get that incredible light, separate grain quality.
- It is so versatile—the best side dish for chicken, pork chops, or just enjoying on its own.
If you want another fast, flavorful side that comes together lightning-quick, you have to try my recipe for crispy roasted broccoli next time!
Ingredients for the Ultimate Fluffy Rice Pilaf
Okay, let’s get down to business. The secret to a restaurant style rice pilaf that actually tastes like you spent all day on it is starting with the right players. You only need a few simple things sitting in your pantry right now, but how we use them makes all the difference. We aren’t using any packets here, just good, honest ingredients that build flavor layer by layer.
For the base of this amazing savory side dish recipe, you’re going to need about a tablespoon of good unsalted butter paired with an equal amount of olive oil to balance it out nicely. Then, the game-changer: half a cup of orzo pasta. Yes, orzo! That little noodle is what gives this rice pilaf its wonderful texture, helping it brown up perfectly.
Next up is your aromatics: one small yellow onion, finely chopped—don’t be shy, that’s where the deep, savory flavor starts—and about two cloves of garlic, minced super fine. For your main grains, grab 1 and 1/2 cups of long-grain white rice. I love using Basmati or Jasmine here, but like I said, it has to be rinsed well! Then, you need 2 and 1/4 cups of low-sodium liquid. If you’re making this a vegetarian rice pilaf, just swap out the chicken broth for an equal amount of vegetable broth.
Finally, you need just half a teaspoon of salt and a little black pepper to season things up. We finish it off with a touch of fresh parsley chopped up for garnish, just to make it look like it came from a fancy place!
Ingredient Notes and Substitutions for Perfect Rice Pilaf
I want to give you a few insider tips here, because this is where you make or break this fluffy rice pilaf tutorial. First, that rinsing step for the rice? It is non-negotiable. You absolutely must rinse your long-grain rice until the water runs mostly clear. That removes the excess surface starch that turns your beautiful pilaf into a sticky, mushy mess. Trust me, running it through a fine-mesh strainer under cool water is worth the two minutes, because it guarantees distinct, separate grains!
Also, pay attention to your liquid. While water works, using good quality low-sodium chicken or vegetable broth instead of plain water is what gives our rice pilaf from scratch that rich flavor that rivals the boxed stuff—it’s why you don’t need a whole long list of spices!
And about that orzo pasta—this is what we toast first, alongside the butter and oil, until it gets beautifully golden brown. This toasting step is essential because it prevents the pasta from dissolving into goo and adds a nutty depth. It’s one of the key secrets to learning how to make perfect rice pilaf!
How to Make Perfect Rice Pilaf from Scratch: Step-by-Step
Alright, deep breaths! This is the scary part, but I promise if you follow these steps exactly, you will know how to make perfect rice pilaf. The key to avoiding that dreaded sticky clump is building flavor before we even add the broth. It takes just a few extra minutes, but it’s the true difference maker between my pilaf and a sad, bland side dish. When I first started deep-diving into this recipe, I realized that skipping the toasting steps meant relying on those salty packets, and we aren’t doing that here!
We’re combining a little old-school technique with modern timing to ensure every grain is fluffy and distinct. Ready to start? If you want to check out another great take on rice next time, I really like what my friends over at Home Cooks Classroom have to say about their pilaf approach!
Toasting Orzo and Aromatics for Deep Flavor in Your Rice Pilaf
First things first: grab your butter and oil and get that medium saucepan heating over medium heat. Once it’s shimmering, toss in your orzo pasta. This is the critical visual cue! Stir it constantly, like you’re stirring temperamental fudge, until that orzo turns a nice, even golden brown. Don’t walk away—it goes from golden to burnt fast! Once it smells nutty, throw in your finely chopped onion and cook it down for about four minutes until it gets soft and sweet.
Now, add your minced garlic. Garlic burns faster than anything, so you only want to keep stirring for about 60 seconds until you can really smell it. Then, add your rinsed rice, salt, and pepper. You need to cook this mixture—rice and orzo and all—for a solid two minutes, stirring the whole time. This coating process, called toasting, is what seals the outside of the grains so they don’t absorb too much water and get mushy. It’s pure flavor foundation building!
The Simmer and Rest Technique for Fluffy Rice Pilaf Tutorial
Once everything is beautifully toasted, pour in that broth. Bring the whole thing up to a rolling boil—loud and bubbly—and then immediately drop the heat to the absolute lowest setting your stove has. Slap that lid on tight! Now, here is the expertise part of this fluffy rice pilaf tutorial: You must not lift that lid for a full 15 minutes. No peeking! Every time you cheat, you let out the steam we need to cook those internal starches.
When the 15 minutes are up, turn off the heat completely. But we aren’t done yet, sweet friend! The absolute most important step for that restaurant quality texture is the rest. Leave the pot sitting, lid still completely sealed, for an additional 10 minutes. This resting period allows the residual steam to perfectly finish cooking the grains without getting waterlogged. When you finally lift that lid, the grains should be tender and separate. Grab a fork and gently fluff everything up before you serve it alongside that killer tomato sauce you made!

Tips for the Best Side Dish for Chicken: Achieving Restaurant Style Rice Pilaf
If you want to move beyond just ‘good’ and hit that dreamy restaurant style rice pilaf mark, we need to talk about layering richness. You already nailed the fluffy texture by toasting, but now we bring in the deep savory notes. My top trick, which I learned from my Aunt Carol, is swapping out half of your chicken broth for a dry white wine—think Pinot Grigio. Just pour it in right after you toast the rice and let it cook down completely until you can barely smell the alcohol.
That step creates an acidic base that brightens everything up! Also, don’t be afraid to add a pat of butter right at the very end, just before you fluff the grains. That’s what gives you that gorgeous sheen you see in nice spots. This elevated dish is truly the best side dish for chicken, but it works wonders with pork chops too. For more ideas on what to pair it with, check out my guide on the best side dishes for chicken.
For general tips on keeping things light and flavorful, you might also want to see how the folks at Tastes Better From Scratch handle their easy rice pilaf!
Variations: Making Healthy Rice Pilaf Recipe or Rice Pilaf with Orzo
One of the best things about mastering this simple grain recipe base is how easily adaptable it is! You’ve got the technique down for perfectly fluffy rice, so now we can start flexing those culinary muscles. This isn’t just a one-trick pony; it’s the foundation for so many incredible global flavors, and it’s super easy to make a healthy rice pilaf recipe version.
If you want to keep this lighter and make it suitable for vegetarians, it’s simple: just use vegetable broth instead of chicken broth—that’s your first big step. You can also bulk up the nutrition immensely by sautéing some finely chopped carrots, celery, or even peas along with your onions. Adding a cup of finely chopped mushrooms in place of some of the liquid really deepens that savory umami flavor, making it a substantial vegetarian rice pilaf if needed!
Now, let’s talk culture for a minute, because this base works for so many incredible sides. If you’re aiming for a Mediterranean feel, think Greek rice pilaf recipe. Right before you cover the pot to simmer, stir in a tablespoon of dried oregano and maybe some lemon zest. It brightens everything up instantly!
For a middle-eastern twist, look into making a proper Lebanese rice pilaf. That version often incorporates toasted vermicelli (which we already have with the orzo!) and sometimes includes toasted slivered almonds or pine nuts added at the very end for crunch. If you’re feeling ambitious later, check out my recipe for easy chicken satay; this pilaf would be the perfect bed for it!
If you want to see a fantastic dedicated guide on adapting flavors, my friends over at Silk Road Recipes have a brilliant breakdown of authentic Lebanese flavors!
Storing and Reheating Your Flavorful Rice Pilaf
Even though this buttery rice pilaf disappears fast—seriously, it vanishes when I make it—sometimes we have leftovers, right? You want to treat those leftovers with respect so they don’t turn into a sad, sticky scoop the next day. The way you store and reheat this rice is just as important as the toasting step for keeping everything light and fluffy!
First, storage: Once the pilaf has cooled down to room temperature, transfer it into a shallow, airtight container. Don’t pack it down hard! You want to keep it airy. It’ll stay fresh in the fridge for about three to four days. If you try to save it in the hot pot it cooked in, you’re asking for trouble; the residual heat will make the bottom layer steam itself into glue.
Reheating is where most people make a mistake with rice. If you just microwave a cold clump of pilaf, it’s going to get dry and stiff. To bring back that original tenderness, you have to reintroduce steam. For a single serving, toss it into a microwave-safe bowl and add one or two teaspoons of water or broth right on top of the rice. Cover it loosely with plastic wrap or a damp paper towel and heat it in 30-second bursts until it’s steaming hot all the way through. That little bit of added moisture turns the stiff grains soft again!
If you are reheating a larger batch, just put that covered container on the stovetop over very low heat with a splash of liquid, stirring gently every minute or so until it’s warm. Don’t overheat it, or you’ll lose that lovely separation we worked so hard for. Once you try these steps, you’ll have perfect rice every time, just like my favorite chicken tinga!
Frequently Asked Questions About Making Rice Pilaf
When I first started testing this recipe, I had a notepad full of questions that I needed answered before I could call it perfect. It’s natural to have some confusion when you’re trying to nail the texture, especially when you are aiming for that gorgeous, light texture we talked about. Here are the questions I get asked most often about creating the best rice pilaf from scratch!
Why is my rice pilaf sticky instead of fluffy?
Oh, this is the most common pitfall, and it always comes down to two things we talked about in the steps. First, did you rinse your rice thoroughly? If you skip rinsing, that excess starch creates a gluey coating, making it sticky. Second, did you lift the lid during the 15-minute simmer time? Lifting the lid releases the necessary steam, causing the rice to cook unevenly and often turn gummy in the center. Stick to the rules for simmering and resting, and you’ll get that perfect fluffy rice pilaf tutorial result every time!
Can I use Basmati rice or Jasmine rice instead of long-grain?
Yes, absolutely! This is a fantastic way to customize your homemade rice pilaf side dish. Basmati rice is actually often my first choice because its grains are naturally longer and separate beautifully after cooking. Jasmine works well too; it has a lovely fragrance. The rule of thumb is to use long-grain varieties; short-grain rice, like Arborio or sushi rice, releases too much starch and will never achieve that light, pillowy texture we are looking for in a savory side dish recipe like this.
Can I make this ahead of time for meal prep?
You sure can! I often make a big batch because this serves as a wonderful weeknight rice side throughout the week. You can prepare the entire easy rice pilaf recipe, let it cool completely, and store it in an airtight container for up to four days in the fridge. Now, like I mentioned in the storage section, when reheating, you must add a splash of liquid (water or broth) back in to reintroduce the necessary steam to keep it moist. You don’t want to reheat it completely dry, or it will taste dry and stiff!
Do I absolutely have to use orzo pasta?
You don’t *have* to, but for this specific recipe, I strongly suggest it! The orzo is key to achieving that distinct, slightly denser body and nutty flavor profile that makes this recipe so much better than a standard rice side. It toasts up gorgeous brown speckles throughout the dish, much like the tiny noodles in traditional Lebanese or Greek variations. If you absolutely cannot use orzo, you could try substituting it with brown or wild rice, but you must increase the cooking and resting times significantly to account for the difference in how those grains absorb liquid.
If you need a go-to main dish to pair with this stellar side, try my easy one-pan chicken burrito bowl for a complete, satisfying meal!
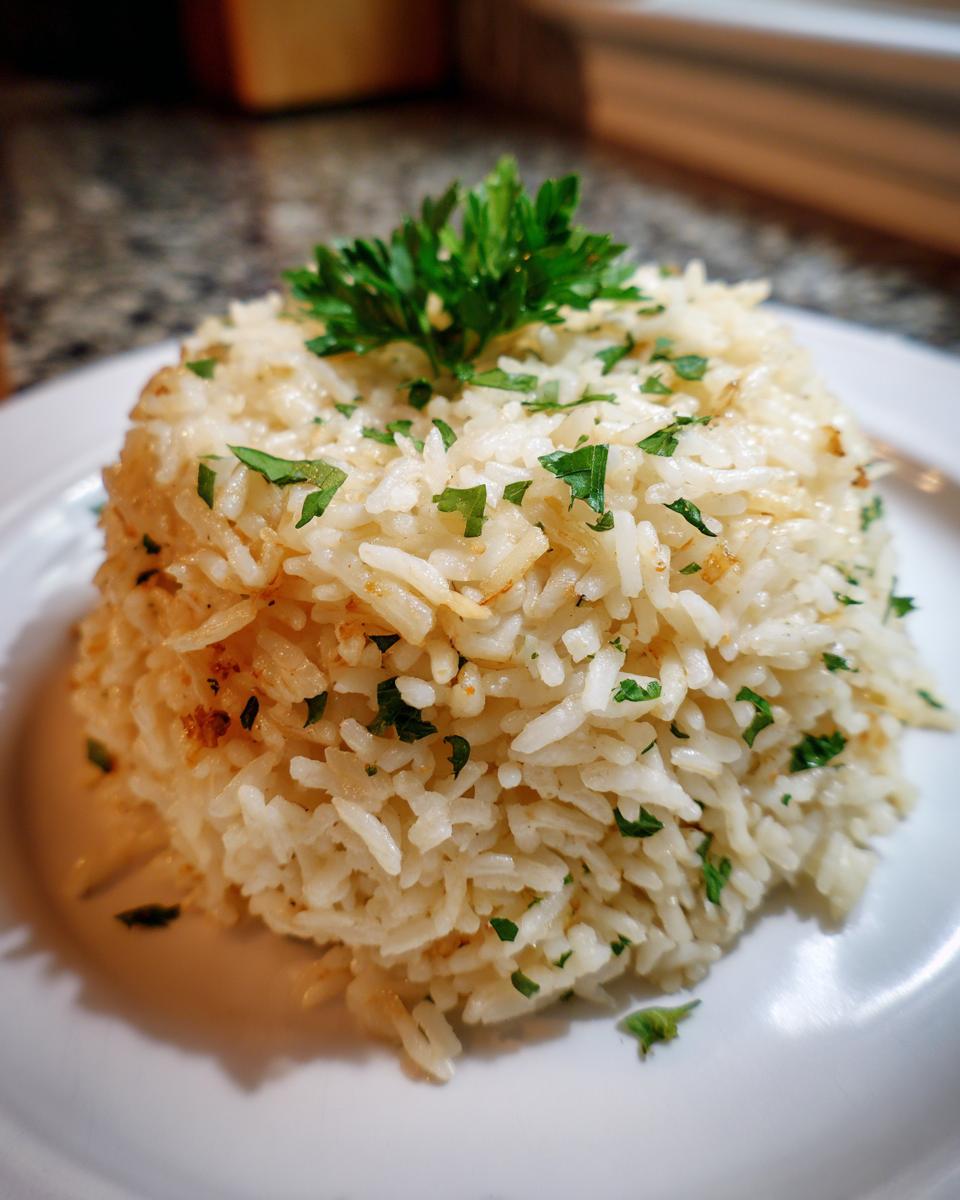
Serving Suggestions for This Buttery Rice Pilaf
This buttery rice pilaf is honestly so good it could stand alone as a light lunch, but it really shines as the perfect supporting actor for your main event. I love that this simple grain recipe acts as a fluffy, savory sponge, soaking up all the delicious juices from whatever you serve it with.
You already know this is my go-to because it’s the best side dish for chicken—think simple roasted chicken, grilled chicken breasts, or even a quick little pan-seared cutlet. But please, break out of that chicken rut! This pilaf is spectacular underneath grilled shrimp or flaky white fish, absorbing those light, lemony flavors beautifully.
If you’re making a heartier meal, this pilaf absolutely shines next to my recipe for juicy baked pork chops with a simple spice rub. The slight nuttiness from the toasted orzo really plays well with the sweetness of the pork. For a vegetarian dinner, just load it up with roasted seasonal vegetables like heavy asparagus or roasted sweet potatoes. It always makes the plate look fuller and way more satisfying!
Nutritional Estimate for Your Rice Pilaf Serving
You know I believe in tracking what goes into our bodies, but always remember that these numbers are just an estimate! Since we’re cooking this rice pilaf from scratch using real butter and broth, the exact nutritional breakdown can shift depending on the specific brand of chicken stock you grab or if you decide to add more oil during the sautéing process. Think of this as a guide, not a strict rulebook when you’re enjoying this comfort food rice recipe.
This estimation is based on dividing the total recipe yield into four standard servings. It shows you that even as a wonderfully rich and savory side dish, it packs great flavor without blowing your diet!
- Serving Size: 3/4 cup cooked
- Calories: 320
- Fat: 6g (of which Saturated Fat is only about 2g—hello, butter!)
- Carbohydrates: 58g
- Protein: 7g
It’s incredibly low in sugar, which I love for a savory side dish recipe! It provides a solid base of energy without weighing you down. If you’re tracking sodium, remember to stick to low-sodium broth, as that’s the biggest variable here. Enjoy knowing you’re eating something delicious that’s completely in line with a balanced meal!
PrintUltimate Fluffy Homemade Rice Pilaf: The Best Way to Beat Boxed Mixes

You can make a savory, fluffy rice pilaf from scratch that tastes better than any boxed mix. This quick recipe uses toasted orzo and broth for deep flavor, perfect as a weeknight rice side dish.
- Prep Time: 10 min
- Cook Time: 25 min
- Total Time: 35 min
- Yield: 4 servings 1x
- Category: Side Dish
- Method: Stovetop
- Cuisine: American
- Diet: Vegetarian
Ingredients
- 1 tablespoon unsalted butter
- 1 tablespoon olive oil
- 1/2 cup orzo pasta
- 1 small yellow onion, finely chopped
- 2 cloves garlic, minced
- 1 1/2 cups long-grain white rice (like Basmati or Jasmine), rinsed
- 2 1/4 cups low-sodium chicken broth (or vegetable broth for vegetarian)
- 1/2 teaspoon salt
- 1/4 teaspoon black pepper
- 1 tablespoon fresh parsley, chopped (for garnish)
Instructions
- Heat the butter and olive oil in a medium saucepan over medium heat.
- Add the orzo to the pan and cook, stirring frequently, until it turns golden brown, about 3 to 5 minutes. Watch closely to prevent burning.
- Add the chopped onion to the pan and cook until softened, about 4 minutes.
- Add the minced garlic and cook for 1 minute until fragrant.
- Stir in the rinsed rice, salt, and pepper. Cook for 2 minutes, stirring constantly to lightly toast the grains. This step is key for fluffy rice.
- Pour in the chicken broth. Bring the mixture to a boil.
- Once boiling, immediately reduce the heat to the lowest setting, cover the saucepan tightly with a lid, and simmer for 15 minutes without lifting the lid. Do not stir during simmering.
- Remove the saucepan from the heat and let it stand, covered, for an additional 10 minutes. This resting period allows the steam to finish cooking the rice perfectly.
- Fluff the rice gently with a fork before serving. Garnish with fresh parsley.
Notes
- Rinsing the rice removes excess starch, which helps prevent mushy results.
- For a richer flavor, substitute half the broth with white wine and let it cook down before adding the rest of the liquid.
- This recipe works well as a vegetarian rice pilaf if you use vegetable broth.
Nutrition
- Serving Size: 3/4 cup cooked
- Calories: 320
- Sugar: 1
- Sodium: 350
- Fat: 6
- Saturated Fat: 2
- Unsaturated Fat: 4
- Trans Fat: 0
- Carbohydrates: 58
- Fiber: 1
- Protein: 7
- Cholesterol: 5