
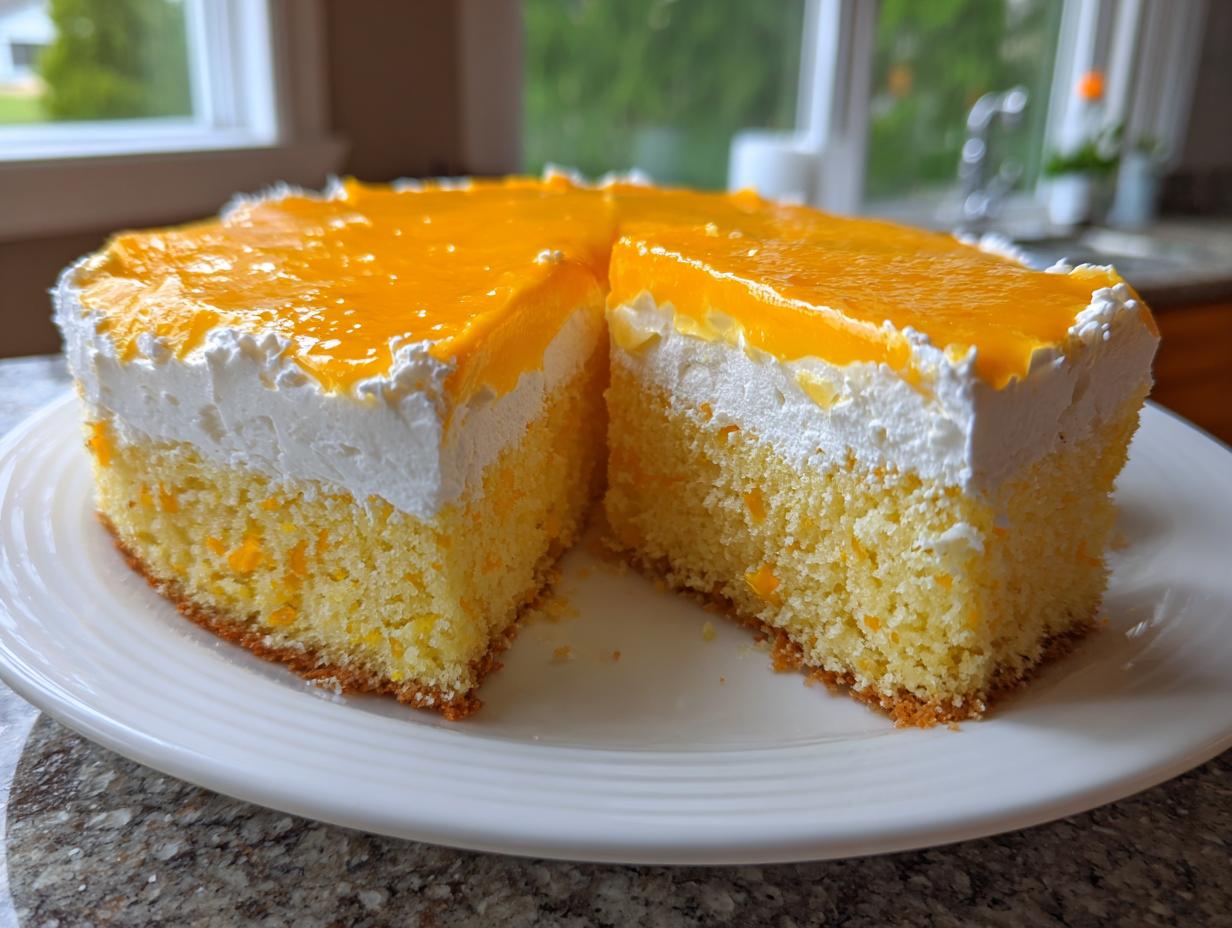
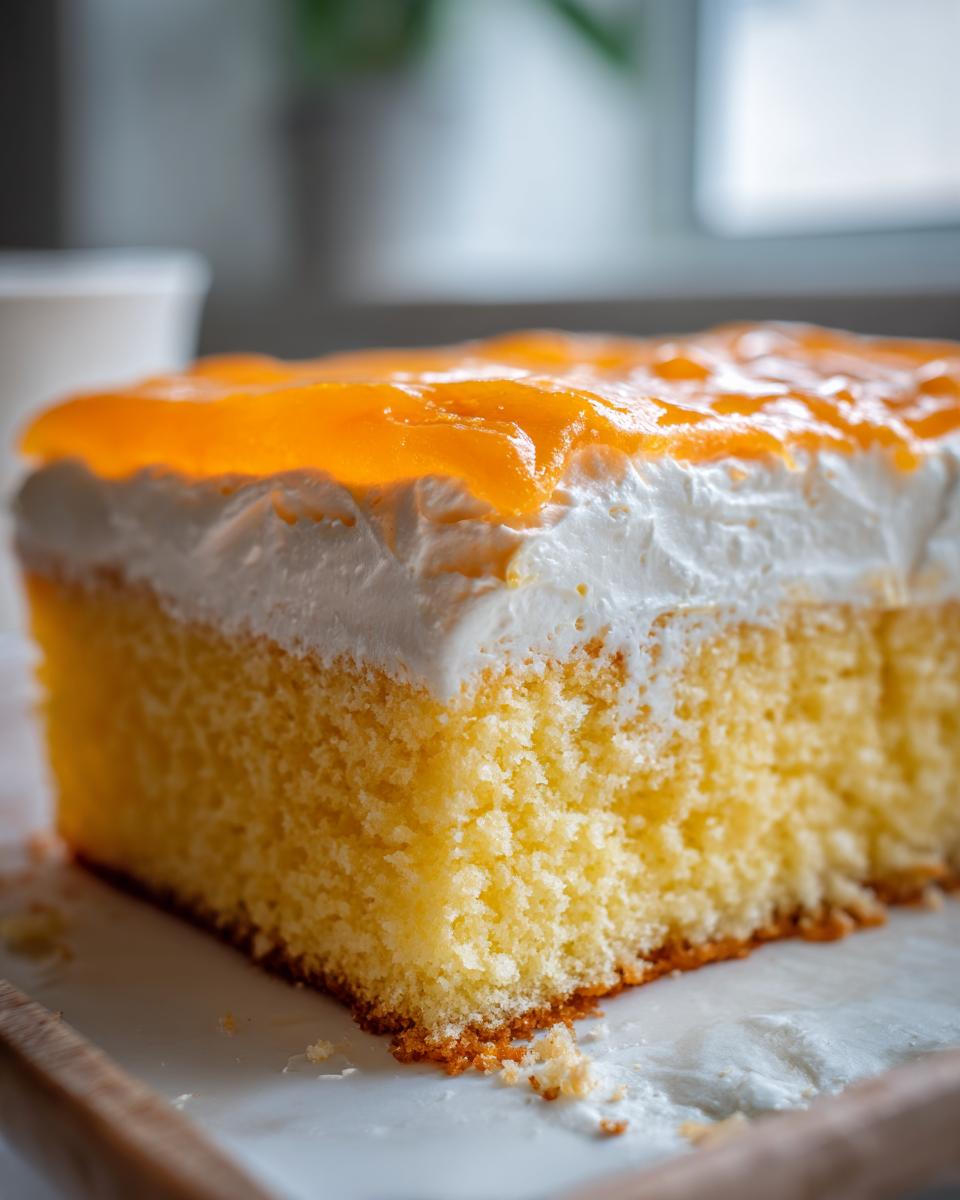
Remember those glorious summer afternoons, armed with a popsicle that was the perfect marriage of bright orange and creamy vanilla? Well, I’ve managed to bottle that exact feeling into an actual cake! This Easy Orange Creamsicle Cake isn’t just good; it’s ridiculously simple, super moist, and requires ingredients you probably already have staring at you from the pantry shelf—yes, even that box of cake mix. Here at The YumMagnet, my whole mission, thanks to lessons learned in my mom’s busy kitchen, is making those nostalgic, show-stopping desserts work for *your* busy life. Forget complicated techniques; this poke cake style delivers maximum flavor with minimum fuss. Trust me, this is the best Creamsicle Cake you’ll make all summer!
- Why This Orange Creamsicle Cake Recipe is Your New Summer Favorite
- Gathering Ingredients for Your Fluffy Vanilla Orange Cake
- Step-by-Step Instructions: Making the Orange Creamsicle Poke Cake
- Expert Tips for the Best Creamsicle Cake Texture
- Variations on the Classic Creamsicle Cake
- Serving Suggestions for Your Refreshing Layer Cake
- Storing Your Leftover Creamsicle Cake
- Frequently Asked Questions About Orange Creamsicle Cake
- Nutritional Estimates for This Easy Summer Dessert
- Share Your Best Creamsicle Recipe Experience
Why This Orange Creamsicle Cake Recipe is Your New Summer Favorite
Look, I get it. You want that impressive dessert for your 4th of July BBQ, but you absolutely do not want to spend six hours whipping anything. That’s why this Creamsicle Cake is my go-to summer superstar. It genuinely tastes like sunshine!
- Effortless Ease: We’re using a cake mix base and the brilliant poke cake method. Less stressing, more chilling!
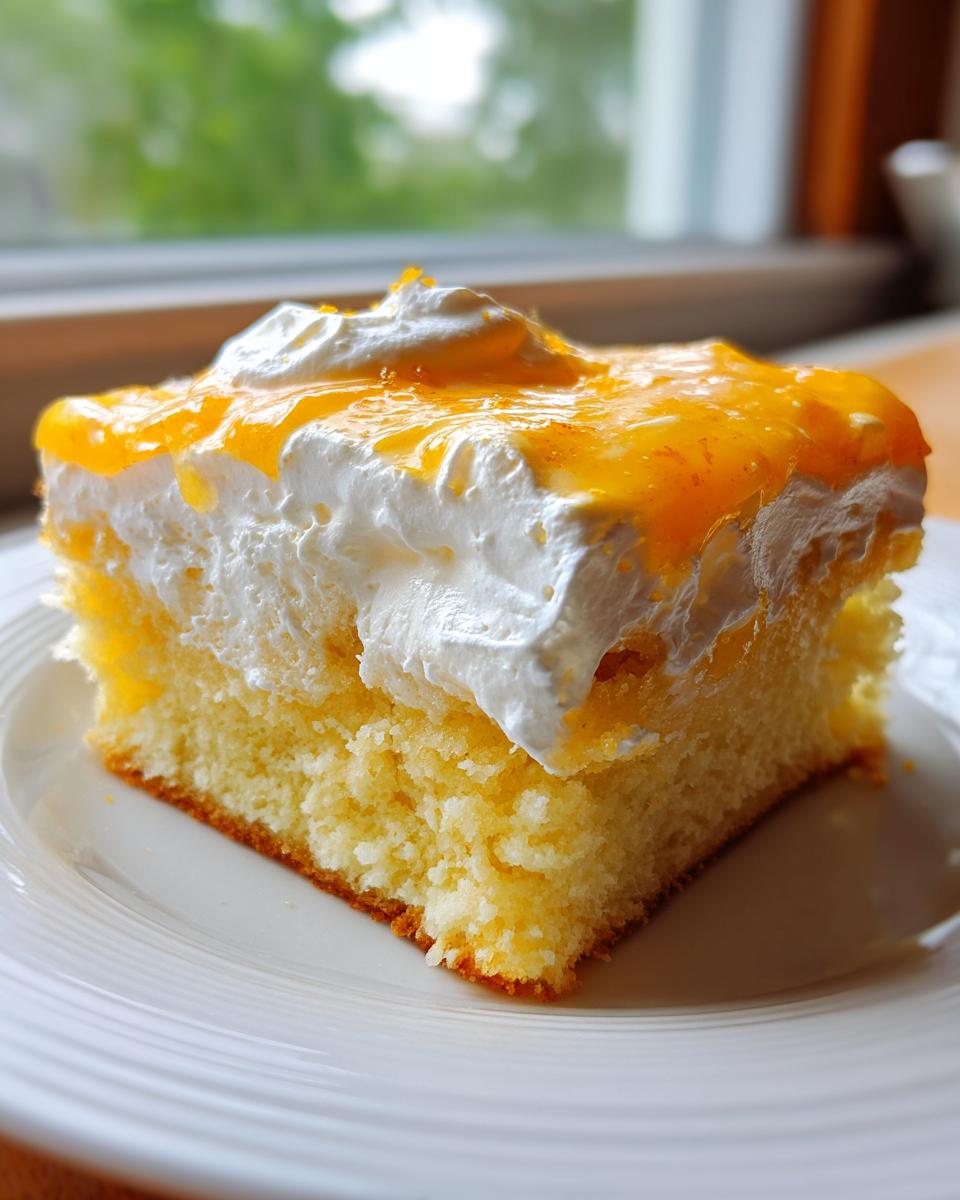
- Perfect Texture: The gelatin soak guarantees a moist cake that practically melts, topped with a fluffy vanilla dream.
- Nostalgia Factor: It tastes exactly like that frozen treat you loved as a kid, making it a huge hit at any gathering.
- Ultimate Summer Dessert: It comes together fast and is best served cold, which is exactly what you want when it’s ninety degrees outside.
If you’re looking for an easy summer dessert that always gets rave reviews, this is it. You won’t regret skipping the complex recipes for this one!
Gathering Ingredients for Your Fluffy Vanilla Orange Cake
Okay, so this is the best part about this recipe: we’re leaning hard into simplicity. I grabbed everything at my usual grocery run, and honestly, it feels like cheating how good this **Fluffy Vanilla Orange Cake** turns out. Remember, since this is a poke cake, we need a few things ready to go before we even start whipping up the topping.
My one crucial, non-negotiable tip before you start is this: make sure that tub of whipped topping is actually thawed! Cold clumps make for lumpy frosting, and we want smooth, dreamy clouds here. If you want to kick up the citrus, I always keep a fresh orange on hand for zest, but the recipe works perfectly without it too.
If you want to check out some other easy baking shortcuts that still taste homemade, I love this zesty lemon brownie recipe for a different kind of summer treat!
For the Orange Creamsicle Cake Base and Soak
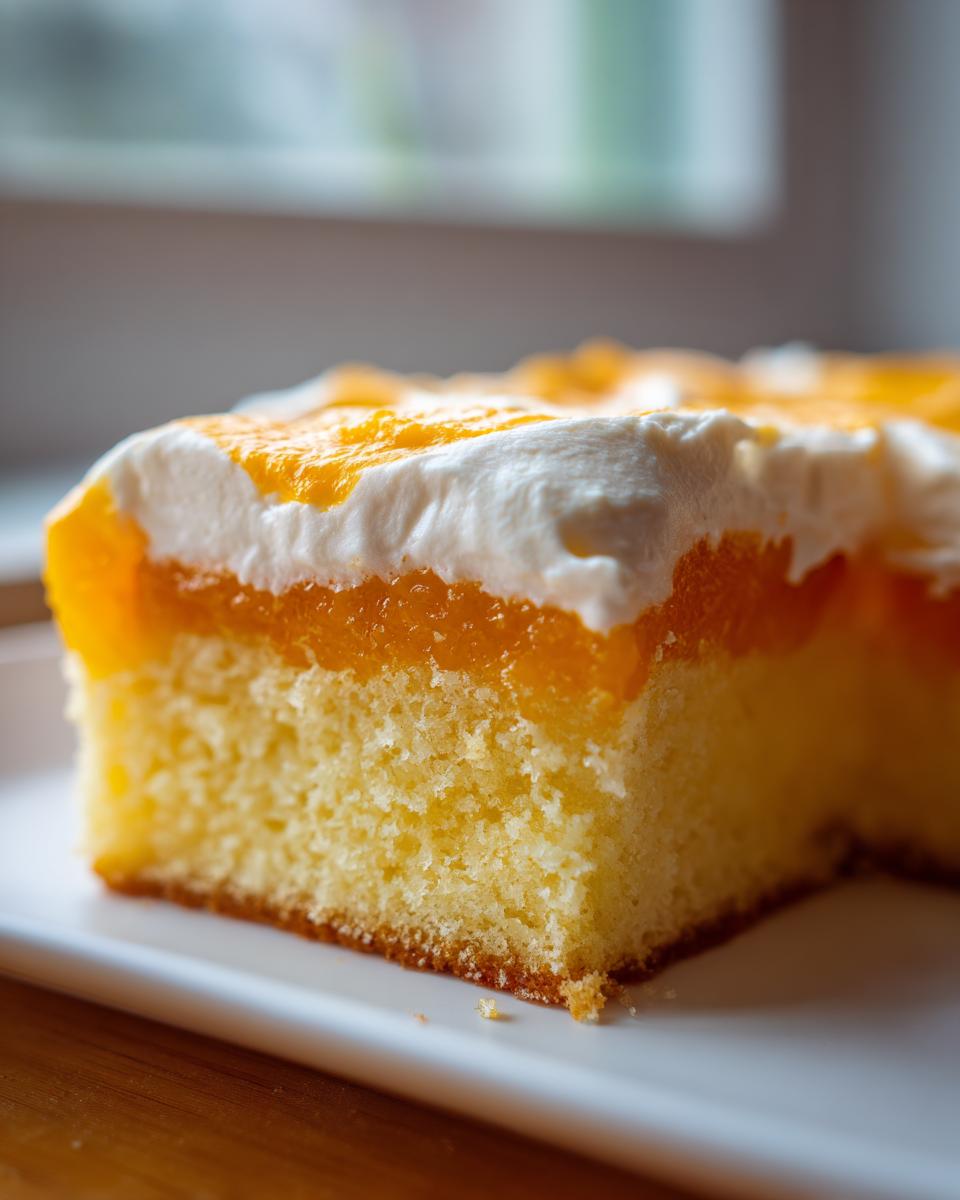
This is what infuses that bright, signature color and tang right into the cake crumb. Don’t skip the step where you dissolve the gelatin completely; that’s key to absorbing all that juice evenly!
- One box (15.25 ounces) of your favorite yellow cake mix.
- The ingredients called for on the cake mix box (usually eggs, oil, and water—follow their standard instructions for a 9×13 pan).
- One package (3 ounces) of orange gelatin (yep, the Jell-O powder!).
- One cup of boiling water.
- Half a cup of cold water.
- Half a cup of orange juice—I usually use store-bought pulp-free for this to keep it nice and clean.
For the Light Cream Frosting Cake Topping
This is where that creamy, nostalgic element comes in! This frosting sets up beautifully and is so much lighter than a heavy buttercream. Make sure your pudding mix is the *instant* kind!
- One tub (8 ounces) of frozen whipped topping, fully thawed. Seriously, thaw it completely so it folds in nicely.
- One package (3.4 ounces) of instant vanilla pudding mix.
- Half a cup of cold milk. This helps the pudding set up quickly.
- One teaspoon of orange zest—this is totally optional, but oh my gosh, it really wakes up the vanilla flavor!
Step-by-Step Instructions: Making the Orange Creamsicle Poke Cake
Alright, let’s get this sunshine dessert assembled! If you’re familiar with other amazing poke cake recipes, you know the timing here is everything. We want the cake warm enough to absorb the gelatin but cool enough not to melt it completely. Getting this timing right makes all the difference for a super moist result!
Baking and Poking the Creamsicle Cake
First things first, preheat your oven to 350°F (175°C). Mix up that yellow cake according to the box for your 9×13 inch pan. Bake it until your toothpick comes out clean—you know the drill! Once it’s out, don’t rush it too much, but don’t let it cool completely either. Let it rest right in the pan for about 15 minutes. Now for the fun part: grab the blunt handle of a wooden spoon or a sturdy fork and poke holes all over the top. Seriously, go crazy! Poke them about an inch apart so the juice gets in everywhere.
Infusing Flavor with the Gelatin Soak
While the cake is cooling slightly, make that bright orange soak. In a small bowl, whisk the orange gelatin powder with the full cup of boiling water until it’s absolutely smooth, no granules hiding at the bottom! Then, whisk in the cold water and the fresh orange juice. Slowly, evenly, pour this liquid magic right over all those holes you just made. Next, cover the whole pan gently and put it into the fridge. It needs at least two hours—or until that gelatin is completely set—before we do anything else.
Preparing the Citrus Cream Cake Topping
Once the cake is chilled and set, we tackle the topping. In a separate bowl, I whisk the instant vanilla pudding mix with the cold milk. You only need about two minutes until it starts thickening up nicely. Then, grab that thawed whipped topping and *gently* fold it in. I mean gentle! We want to keep all that airy fluffiness, so just use a spatula and fold until it’s barely combined. If you add the orange zest here, do it now before the final fold.
Final Assembly and Chilling of the Creamsicle Cake
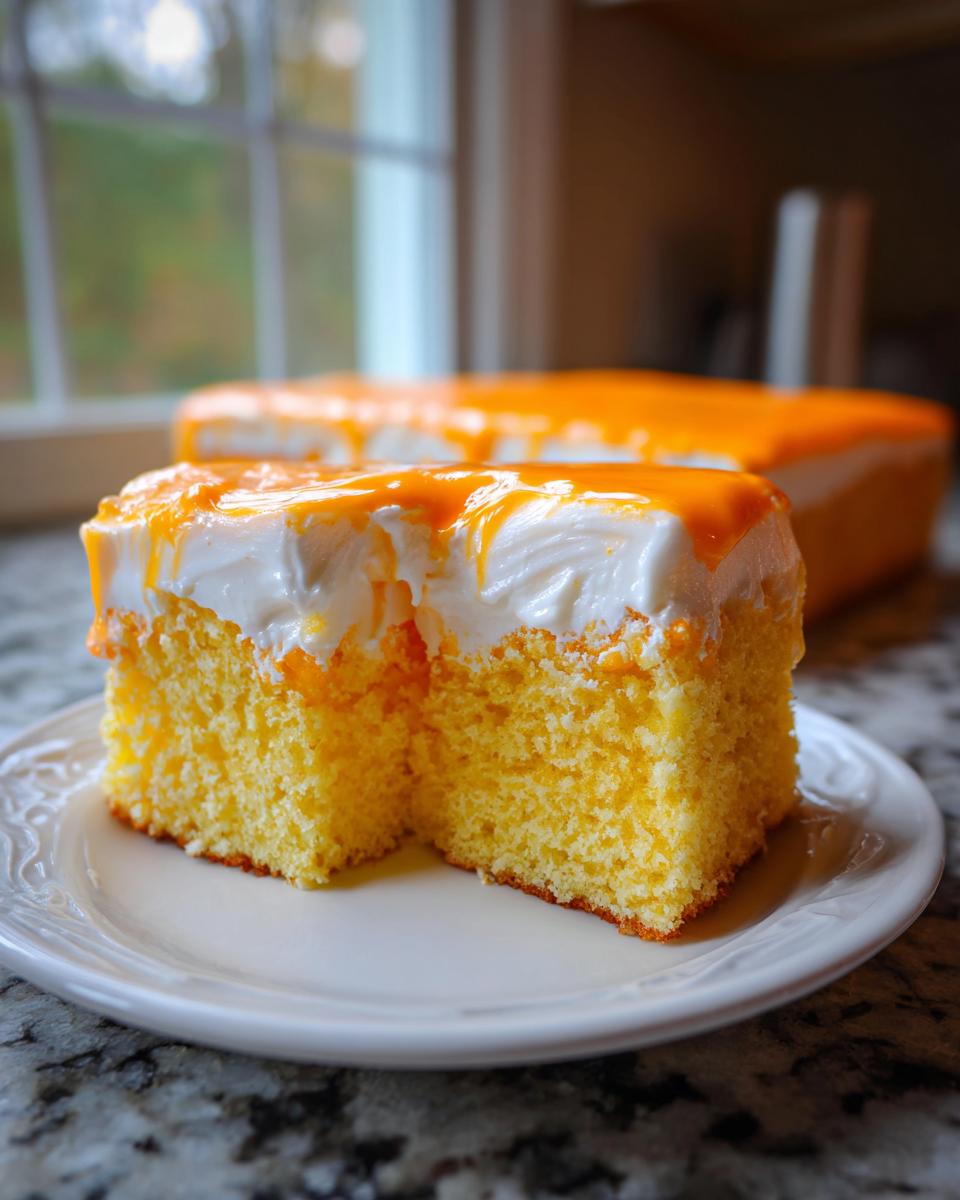
Now, take that light, dreamy topping and spread it carefully over the chilled, gelatin-infused cake. Make sure you get a nice, even layer right to the edges. Once it’s frosted, cover it again and back into the fridge it goes for at least another 30 minutes. This final chill firms up that creamy topping just enough so you can cut nice, clean slices without everything squishing out the sides. Patience pays off here, trust me!
Expert Tips for the Best Creamsicle Cake Texture
We’ve put in the work to bake and soak this gorgeous cake, so now it’s time to talk about maximizing that melt-in-your-mouth texture. Because this is already such an **easy summer dessert**, I love sharing the little tweaks that take it from great to absolutely unforgettable. These aren’t mandatory, but they’re the little secrets I use to make sure every serving of this **refreshing layer cake** tastes bright and perfect.
Maximizing Orange Flavor in Your Citrus Cream Cake
If you want this cake to taste like it’s screaming oranges, you have to boost that citrus! The main trick I use that I learned from my aunt Sally is swapping out some of the liquid binder for soda. Seriously! When you’re making that gelatin soak, try swapping the cold water for a nice, cold can of orange soda. It’s an instant flavor boost because the soda adds carbonation and concentrated orange flavor right into those little cake pores.
Also, don’t be shy with that optional orange zest we mentioned earlier. If you actually grate the zest right before folding it into your pudding mixture, those essential oils release a ton of aromatic pop. It makes the vanilla pudding taste less like plain vanilla and more like the creamy side of that beloved creamsicle flavor combo.
Adjusting the Cream Frosting Cake Consistency
The recipe calls for half a cup of milk when you mix the instant vanilla pudding, which gives you that lovely, light, somewhat yielding frosting that drapes nicely. But let’s be real—sometimes you make a cake for a party, and it’s going to sit out for a bit, or maybe it’s just super hot that day.
If you know the cake is going to be exposed to warmth, or you just prefer a frosting that stays put a little better—think of it like edging toward a slightly firmer buttercream—you can absolutely increase that milk to a full cup when mixing the pudding. This makes a thicker, stabilized base for the whipped topping. It won’t be as cloud-like, but it will hold its shape beautifully, especially if you decide to frost the cake a few hours before serving. Just remember to use the fluffiest vanilla cake recipe you can find as a base to balance out that slightly firmer frosting!
Variations on the Classic Creamsicle Cake
I love that you’re already thinking about how to tweak this **Orange Creamsicle Cake Recipe**! While the poke cake method is my absolute favorite because it guarantees moisture, I know sometimes you need a different shape or maybe you just don’t want to turn on the oven at all. Don’t worry, we can totally adapt this sunshine flavor profile for other formats!
If you’re looking for something different, this flavor works beautifully as an **Orange Bundt Cake**. You would bake the cake batter (without adding the gelatin soak) in a greased and floured Bundt pan. Once it’s completely cool, you can poke it lightly, or skip the poking entirely and just drizzle it with a simple orange glaze made from powdered sugar and a splash of orange juice. Or, if you happen to be obsessed with coconut cupcakes, pairing a coconut frosting with this orange base is divine!
Making a No Bake Orange Dessert Version
Now, this is how we really beat the summer heat! Turning this into a no-bake treat is surprisingly easy, though the texture changes from fluffy cake to dense, creamy pudding, which is just as good, honestly. You’ll want to start by pressing a shortbread or graham cracker crust firmly into the bottom of your 9×13 pan.
For the filling, you basically combine the topping elements into one big batch. You’ll prepare the instant vanilla pudding mix with just slightly less milk than called for—maybe use about 1/3 cup of cold milk instead of 1/2 cup—to make it super firm. Then, fold in your thawed whipped topping and the orange gelatin (which you should probably prepare ahead using cold water and orange juice only, no boiling). Press this mixture evenly over your crust. Chill it for a good four hours until it sets completely. It becomes a fantastic **No Bake Orange Dessert** that feels wonderfully rich and cool.
For a truly decadent version that rivals recipes found on sites like Taste Cove, sometimes I layer the orange gelatin, let it set slightly, and then pour a thin layer of chilled vanilla pudding mixture over top before chilling again. It gives you those distinct orange and vanilla layers without having to bake a thing!
Serving Suggestions for Your Refreshing Layer Cake
You’ve done the work, and this **Refreshing Layer Cake** is ready. Since this cake is all about bright, pure citrus and cream, we don’t want to weigh it down! It’s fantastic all by itself, chilled straight from the fridge. But if you want to dress it up for a summer party, keep the garnishes light.
I usually grab a small bowl of superfine orange zest and sprinkle just a tiny pinch over each slice right before serving—it smells amazing! Alternatively, if you have any fresh orange slices left over, just cut them into delicate little wedges for the side of the plate. If you’re serving it alongside a cool drink, you absolutely have to try it with a tall glass of my refreshing watermelon smoothie. They complement each other perfectly without fighting for flavor dominance!
Storing Your Leftover Creamsicle Cake
Okay, the party is over, and miraculously, you have some of this glorious Orange Creamsicle Cake left. Good for you! Because we utilized whipped topping and gelatin in this recipe—which are both dairy-based or very delicate—this isn’t a cake we ship off to the counter for a couple of days. Nope. This cake needs to stay cosy in the refrigerator.
Cover the pan tightly with plastic wrap or transfer the slices to an airtight container. Make sure whatever you use covers the fluffy topping well so it doesn’t pick up any fridge odors. Stored correctly, this cake stays fantastic for about three to four days. Honestly, it usually doesn’t last that long in my house, but those are the safety guidelines!
Now, about reheating? Don’t even think about it! This cake is meant to be served cold, straight from that chill. Warming it up would turn the gelatin soak watery and ruin the lovely structure of the pudding frosting. If you find it got a little too firm after a day or two, just let a slice sit out on the counter for about 10 to 15 minutes before eating. That brief warming softens the cake back up without melting the topping.
Keeping it cold keeps that refreshing, citrus ice-cream vibe alive! Trust me when I say this cake thrives on being chilled.
Frequently Asked Questions About Orange Creamsicle Cake
I get so many wonderful questions about this cake, and I love hearing how you all are adapting it for your own family gatherings! Since this recipe is built on those throwback flavors, there are always a few things folks want to make sure they get just right. Here are the most common things I get asked about making the perfect **Orange Creamsicle Cake**.
Can I make this Creamsicle Cake ahead of time?
This is a great question for party planning! Because the cake relies on that gelatin soaking in and the whipped topping staying fluffy, you’ve got a little flexibility. You can absolutely bake the cake and pour the gelatin soak over it a day ahead of time—even up to 24 hours out. Cover it tightly and keep it chilled. That lets the flavor really deepen!
However, for the absolute best texture, I highly recommend waiting until about 2 to 3 hours before you plan to serve it before you spread on that creamy pudding frosting. If you frost it too early, the moisture from that fantastic topping can start to seep into the cake layers more than we want. A little advance prep is fine, but finish the topping just before the final chill!
What is the best way to get clean slices of this Citrus Cream Cake?
I wish I had a magic wand for this! Because the topping is light and the cake layer is super moist from that soak, it can sometimes want to squish when you cut it. The absolute secret weapon here is a knife you’ve heated up. Fill a tall pitcher or glass with very hot water. Dip your long, sharp chef’s knife into the hot water for a few seconds, wipe the blade completely dry, and then make your cut. Repeat that process—hot water, wipe dry—for every single slice you take.
Make sure you’ve done that final 30-minute chill after frosting, too. That little bit of cold time really firms up the top layer enough so you get those beautiful, clean wedges of **Citrus Cream Cake** that look professional!
Can I use fresh orange juice instead of store-bought for this Nostalgic Frozen Treat Cake?
Oh, absolutely! Using fresh juice is a guaranteed way to make this **Nostalgic Frozen Treat Cake** taste even brighter. I love using fresh juice for that vibrant flavor. The only thing you need to watch out for is the pulp and the acidity. If your fresh juice is really pulpy, you might have little bits floating in the gelatin soak, which some people don’t mind, but it changes the uniform appearance.
If you juice a bunch of oranges, you might notice the juice is slightly thinner or more acidic than the canned stuff. For this Poke Cake specifically, if you use extra-fresh juice, consider skipping about two tablespoons of the cold water or the milk (depending on which step you are in) just to keep the moisture level where we want it. If you follow the recipe exactly and use fresh juice, you’ll still have a phenomenal cake!
For another great recipe that uses simple, fresh ingredients, check out how I make my famous comforting chicken and dumplings. It’s all about quality ingredients, even when it’s simple!
If you want to see how others are making this dessert, you can check out some great inspiration over at Jovanies Kitchen, just remember to always keep that final chill time in mind for the poke cake method!
Nutritional Estimates for This Easy Summer Dessert
Okay, let’s talk brass tacks. I know a lot of you are tracking things, and even though this is a fun, easy summer dessert, knowing what’s in your slice is important for balancing out the week! I ran the numbers for this Orange Creamsicle Cake based on standard ingredient packages, but I need to give you the usual disclaimer, because my kitchen isn’t a lab!
These numbers are just estimates for one serving size. The final count might change depending on which brand of cake mix you grab or exactly how much whipped topping actually makes it *into* the bowl versus *into* my mouth (oops!).
If you want more simple recipes that help you keep track without stressing out, my collection of easy breakfast recipes keeps mornings manageable!
- Serving Size: 1 slice
- Calories: 310
- Sugar: 35g (It’s high, but that’s the joy, right?!)
- Sodium: 280mg
- Fat: 12g
- Saturated Fat: 6g
- Carbohydrates: 48g
- Protein: 4g
See? Not too bad for a cake that tastes like dessert magic! As always, treat these as a general guide. The real nutrition here is the joy you get eating a slice on a warm evening!
Share Your Best Creamsicle Recipe Experience
Okay, my fellow home cooks, this is where I need your help! Seeing you all bring this **Orange Creamsicle Cake** to life in your kitchens is the absolute best part of running The YumMagnet. I put my heart into simplifying these nostalgic meals so they work for real life, and your feedback lets me know I’m on the right track!
Once you’ve let this lovely cake chill and you’ve dug into that moist, citrusy slice, please hop down to the comments section below. I really want to hear how it went for you!
Rate This Recipe
Did it make your neighbors ask for the recipe? Was it ready in time for that last-minute BBQ? Give it a rating from one to five stars. A 5-star rating means you think this is the best version of this dessert out there, and a lower rating tells me exactly where I can make the recipe clearer.
Your Creamsicle Cake Story
Tell me everything! Did you use orange soda in the soak? Did you manage to keep any leftovers, or did your family inhale the whole thing? If you tried swapping out the yellow cake mix for a white one, let us know how that turned out. Every single comment helps another busy home cook feel confident enough to try something new.
Your success stories are what keep this recipe box full of practical, tried-and-true ideas. If you enjoyed making this recipe, you might want to check out my contact page if you have specific feedback you don’t want to share publicly! And if you’re looking for more inspiration on phenomenal summer desserts, take a peek at what the folks at Baker’s Slider are doing!
PrintEasy Orange Creamsicle Poke Cake

You can make this refreshing Orange Creamsicle Cake using simple ingredients like cake mix and gelatin. It delivers the bright citrus flavor and creamy texture of the classic frozen treat, making it a perfect, easy summer dessert for any gathering.
- Prep Time: 20 min
- Cook Time: 35 min
- Total Time: 2 hours 55 min
- Yield: 12 servings 1x
- Category: Dessert
- Method: Baking and Chilling
- Cuisine: American
- Diet: Vegetarian
Ingredients
- 1 box (15.25 ounces) yellow cake mix
- Ingredients called for on cake mix box (usually eggs, oil, water)
- 1 package (3 ounces) orange gelatin
- 1 cup boiling water
- 1/2 cup cold water
- 1/2 cup orange juice
- 1 tub (8 ounces) frozen whipped topping, thawed
- 1 package (3.4 ounces) instant vanilla pudding mix
- 1/2 cup cold milk
- 1 teaspoon orange zest (optional, for extra flavor)
Instructions
- Prepare the cake: Preheat your oven to 350°F (175°C). Prepare the yellow cake mix according to the package directions for a 9×13 inch pan. Bake until a toothpick inserted comes out clean. Let the cake cool in the pan for 15 minutes.
- Poke the cake: While the cake is still warm, use the handle of a wooden spoon or a large fork to poke holes all over the surface of the cake, about 1 inch apart.
- Prepare the gelatin soak: In a medium bowl, whisk together the orange gelatin powder and the boiling water until the gelatin is completely dissolved. Stir in the cold water and orange juice.
- Soak the cake: Slowly pour the gelatin mixture evenly over the poked holes in the warm cake. Allow the cake to cool completely to room temperature, then cover and refrigerate for at least 2 hours, or until the gelatin is set.
- Make the creamy topping: In a separate bowl, whisk together the instant vanilla pudding mix, cold milk, and orange zest (if using) until the mixture thickens, about 2 minutes. Gently fold in the thawed whipped topping until just combined.
- Frost the cake: Spread the creamy vanilla-orange topping evenly over the chilled, set cake.
- Chill before serving: Return the cake to the refrigerator for at least 30 minutes before slicing and serving.
Notes
- For a richer orange flavor, substitute the water in the gelatin mixture with orange soda.
- You can use a white cake mix instead of yellow for a lighter base color.
- If you prefer a thicker frosting, use 1 cup of cold milk instead of 1/2 cup when mixing the pudding.
Nutrition
- Serving Size: 1 slice
- Calories: 310
- Sugar: 35g
- Sodium: 280mg
- Fat: 12g
- Saturated Fat: 6g
- Unsaturated Fat: 6g
- Trans Fat: 0g
- Carbohydrates: 48g
- Fiber: 1g
- Protein: 4g
- Cholesterol: 30mg