
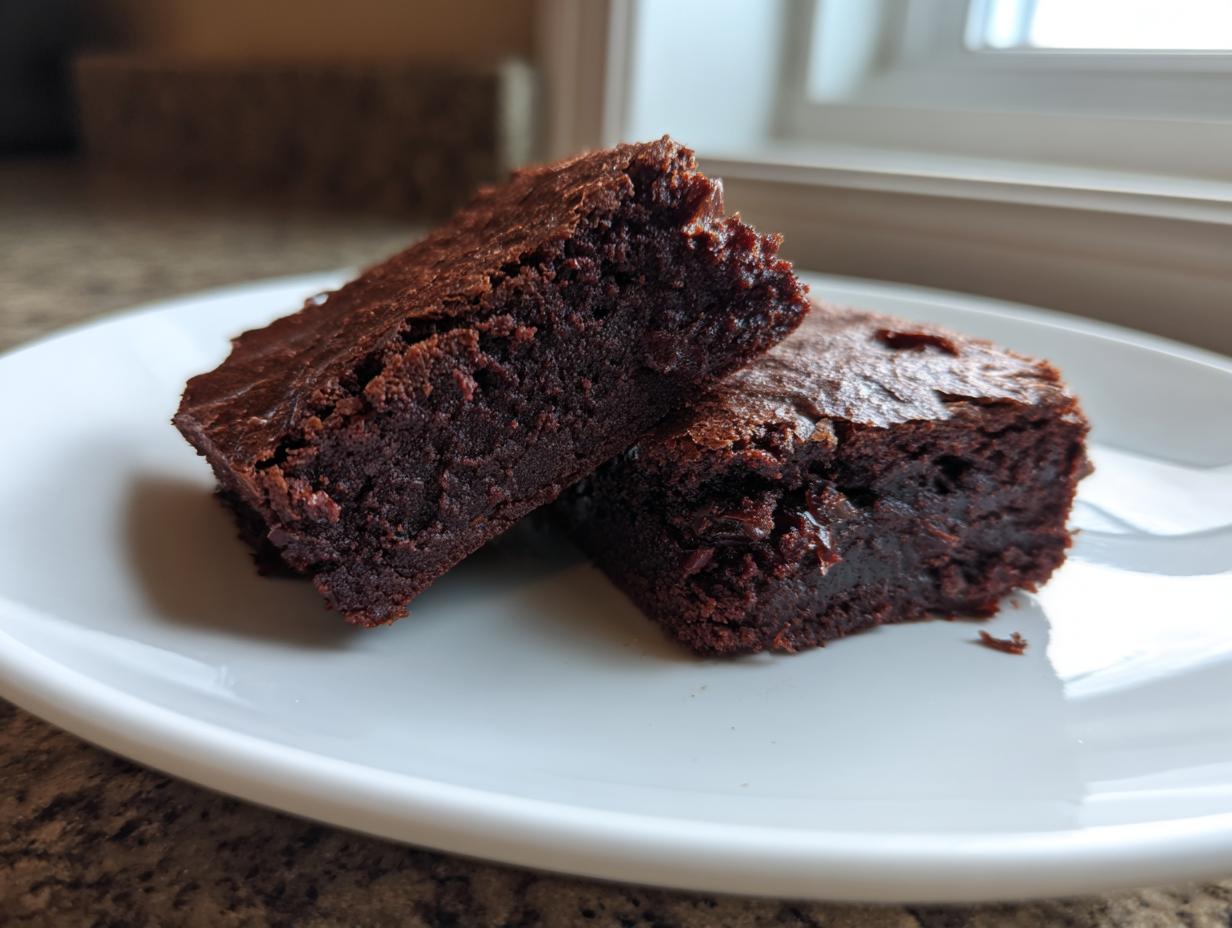
Oh, honey, do I have a recipe for you if you’re staring down a serious chocolate craving but trying to keep things on the wholesome side! My mission at The YumMagnet is always finding ways to bring that classic comfort food magic to our busy modern kitchens, and I think I’ve absolutely nailed it here. These are the Ultimate Fudgy Date Brownies, and I use Medjool dates—nothing but that sweet, caramel fruit—to make them completely naturally sweetened. Seriously, you won’t miss the refined sugar one bit. These date brownies are the perfect guilt-free indulgence that tastes completely decadent.
I tweaked flavor profiles from family cards forever until I got that fudgy texture just right, making sure they bake up beautifully in under 30 minutes. Trust me, they are going to be your new go-to delicious dessert favorite.
- Why You Will Love These Ultimate Fudgy Date Brownies
- Gathering Ingredients for Your Date Brownies
- Essential Equipment for Perfect Date Brownies
- Step-by-Step Instructions to Make Fudgy Date Brownies
- Tips for Success with Naturally Sweetened Brownies
- Ingredient Notes and Substitutions for Your Date Brownies
- Storage and Reheating Instructions for Date Brownies
- Serving Suggestions for Guilt Free Brownies
- Frequently Asked Questions About Date Brownies
- Nutrition Estimates for These Date Brownies
- Share Your Date Brownies Creations
- Nutrition Estimates for These Date Brownies
- Share Your Date Brownies Creations
Why You Will Love These Ultimate Fudgy Date Brownies
Now, you might be wondering why you should drop everything and make this specific batch of date brownies right now instead of grabbing that old box mix. Honey, trust me, once you try these, you’ll never look back. They hit every single note we want in a perfect chocolate treat but keep things clean and simple.
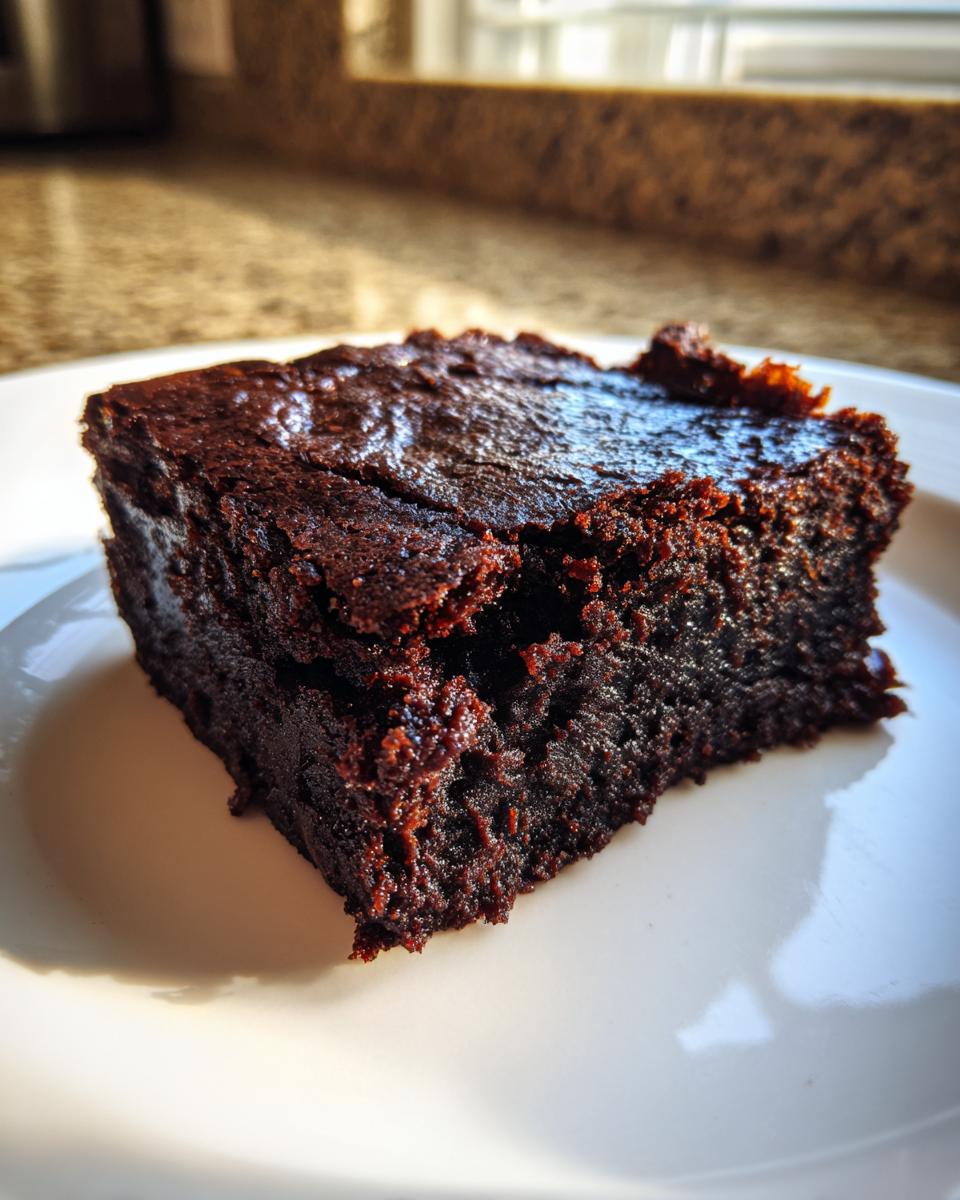
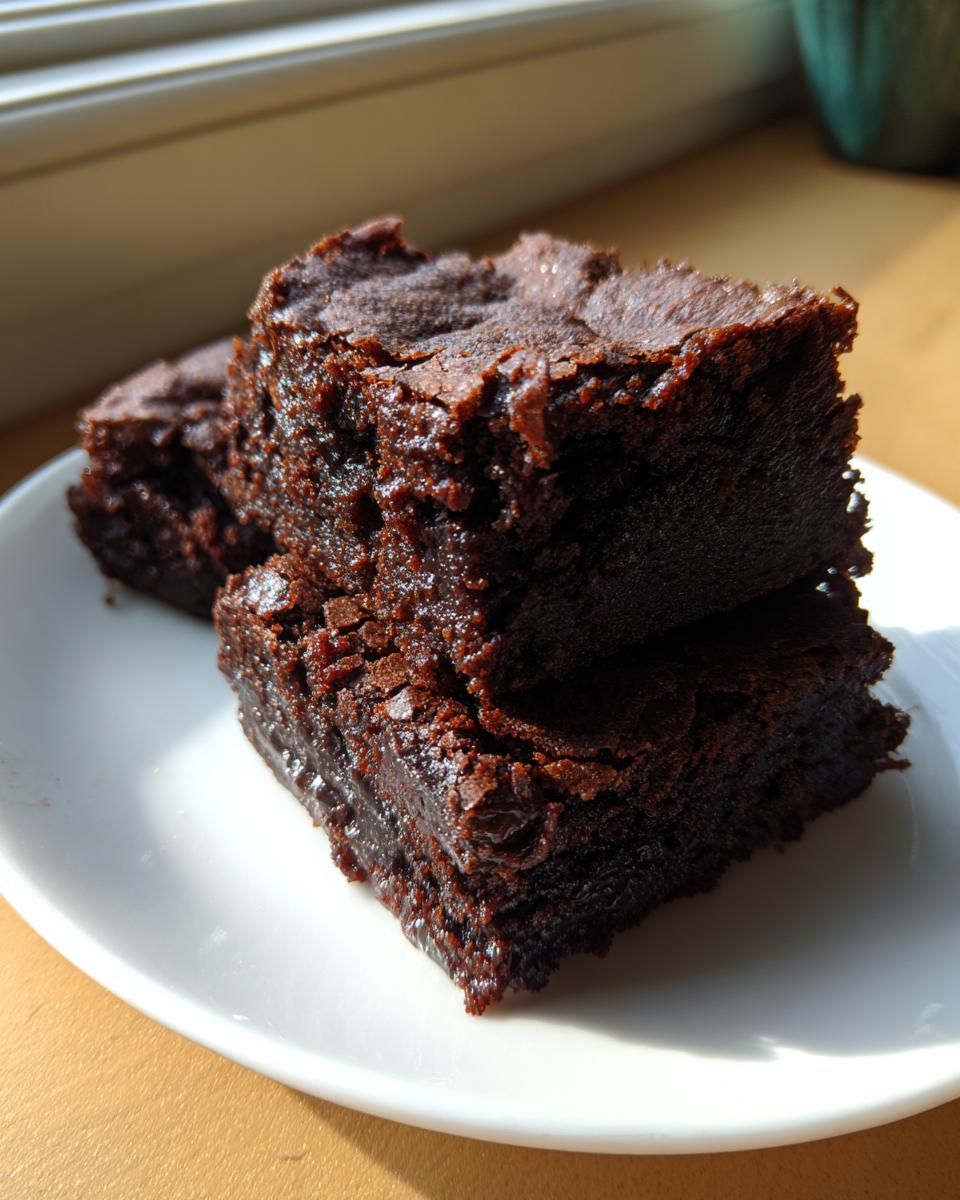
- They are intensely fudgy! We are talking seriously moist in the middle, not cakey in the slightest. That’s the magic of properly blended dates working their charm.
- Totally naturally sweetened—we ditch refined white sugar completely by relying on those sweet Medjool dates. It’s the best dessert swap!
- They seriously satisfy that deep, dark chocolate craving without any guilt tagging along afterward. Hello, wholesome chocolate treats!
- Super fast prep time! I can usually have the batter mixed up before the oven even hits temp. Hello, quick dessert ideas!
- Perfectly versatile! You can easily make them gluten-free or even vegan with just simple swaps mentioned later on.
- That rich, almost caramel-like depth the dates bring to the classic chocolate flavor is just unbeatable.
These aren’t just brownies; they are an experience in refined sugar free baking that tastes like you cheated!
Gathering Ingredients for Your Date Brownies
Alright, let’s get our mise en place ready! Making truly amazing date brownies means knowing exactly what goes into them, especially since we are skipping the granulated sugar. This list is what turns simple fruit and cocoa into something magical. Seriously, don’t even think about swapping out the Medjool dates for anything else; they are the backbone of this recipe! We use the notes from my easy moist date nut bread recipe to make sure these are just as rich.
You’ll need about one packed cup of pitted Medjool dates, which usually shakes out to about 12 big ones. We soften those up with a half cup of hot water before we even start mixing. For the dry stuff, grab a half cup of unsweetened cocoa powder, and then here’s a key spot for flexibility: a half cup of standard all-purpose flour, or you can easily swap that for almond flour if you need to keep it gluten-free! Remember, that quarter cup of maple syrup is totally optional; I add it sometimes just because I love that extra little caramel ribbon it gives the final product, but the dates give you plenty of natural sweetness on their own. Don’t forget the eggs and vanilla extract to tie it all together.
Essential Equipment for Perfect Date Brownies
Before we even think about soaking those dates, we need to make sure the kitchen is set up correctly. Getting the right tools out beforehand prevents panic mixing, which is the enemy of fudgy texture! For these date brownies, we aren’t talking about fancy industrial mixers; we are keeping it simple, just like I do at home.
The absolute must-have here is a good food processor or a high-speed blender. Why? Because turning those sticky dates into a perfectly smooth paste takes power. You cannot get that super silky base using just a whisk or a hand mixer—trust me, I learned that the hard way!
Beyond the blending powerhouse, you’ll need:
- One 8×8 inch baking pan. This is the sweet spot for these measurements, giving us that perfect dense, chewy square size.
- Parchment paper, hands down. I always line the pan so the paper hangs over two sides; these are your handles for lifting the whole delicious block out later.
- A couple of decent mixing bowls—one for your wet ingredients and one for dry, so we can follow the mixing rules later!
Having these things ready means the actual assembly goes super fast. Clean setup equals happy baking, my friends!
Step-by-Step Instructions to Make Fudgy Date Brownies
Okay, we’ve got our tools, we’ve got our ingredients—now we make the magic happen! These date brownies bake up so fast once you start mixing, so make sure your 8×8 pan is ready to go before you even touch the dates. I mean it: Preheat to 350°F and line that pan with parchment paper, letting those two sides hang over the edge like little handles. That little bit of overhang is key to avoiding a heartbreaking, stuck-to-the-bottom situation later on.
The whole process flows smoothly if you tackle the date paste first, then mix the wet stuff, and finally introduce the dry ingredients carefully. We need patience here, especially right at the end, to keep that wonderful chewy quality these date brownies are famous for. And just one more non-negotiable rule before we start: You absolutely must let these cool completely before slicing. If you cut them warm, you’ll end up with a chocolatey mess instead of that perfect fudgy square we are aiming for. If you want to see how another great baker handles these, check out this fudgy date brownies recipe for comparison!
Preparing the Date Paste Base for Rich Date Brownies
This step is non-negotiable because the date paste *is* our sugar replacement. It needs to be utterly smooth! Toss those pitted Medjool dates right into your food processor or blender, and pour that half cup of hot water over them. Honestly, watch this part—it’s kind of wild how fast it transforms. You’re going to process this until it looks like thick, glossy, perfectly smooth caramel sauce. If you have any chunks left in there, especially when trying to make a pure no added sugar brownie, you’ll get little date bombs instead of even sweetness scattered throughout your date brownies.

Mixing Wet and Dry Components for Chewy Brownie Recipe
Once that paste is ready, scrape it into a big bowl. Now, whisk in your melted coconut oil, the maple syrup if you’re using it for that extra touch, your eggs, and vanilla. Get that nice and combined. In a separate, smaller bowl, just quickly whisk your dry items: cocoa powder, baking powder, and salt. Now, here’s where we protect the texture we’ve worked for! Add the dry mixture to the wet mixture, and I mean *gently* mix it—just until you stop seeing white flour streaks. Do not get aggressive with that spoon! Overmixing develops gluten way too much, and that’s how you turn a glorious, chewy, chewy brownie recipe into something tough. Fold in your flour (or almond flour) last until it just disappears. If you’re using chocolate chips, fold them in right at the very end, and then pour that batter right into your waiting pan!
Tips for Success with Naturally Sweetened Brownies
Listen, baking with fruit instead of straight sugar is different, and like any great recipe, knowing a few tricks ensures you get that mind-blowing result every single time. Since these are going on their own merit as fantastic Naturally Sweetened Brownies, we need to treat the ingredients right. Getting these little nuances down is what separates a good batch from an absolutely unforgettable one!
First off, let’s talk dates. I mentioned Medjools above, but it’s worth repeating: You cannot substitute the soft, caramel power of a Medjool date here. If your dates feel stiff—like, they could crack a tooth stiff—you absolutely must soak them in hot water for a good 10 to 15 minutes before blending. Stiff dates give you a grainy paste, and we aren’t here for graininess; we are here for silk!
When you check for doneness, you have to rely less on the toothpick and more on what you see. Because we want that truly fudgy, almost gooey center, we pull these out when the toothpick comes out with moist, sticky crumbs clinging to it, not wet batter, but definitely not clean! If you wait until the toothpick comes out clean, you’ve baked them too long, and you’ll lose that signature texture—a common pitfall when trying any healthy chocolate dessert recipe.
And finally, the cooling process. This is the hardest part, I know! But you have to let these set. If you try to slice these beauties when they are warm coming straight out of the oven, they will collapse into a glorious puddle. Let them cool on the rack, then if you have the patience of a saint, chill them in the fridge for about an hour before slicing. That cooling time allows the structure to firm up around the moisture and locks in that amazing chewy texture. It truly makes all the difference!
Ingredient Notes and Substitutions for Your Date Brownies
Part of my mission here at The YumMagnet is making sure that everyone, no matter what allergies or dietary preferences you have going on, can enjoy a truly incredible dessert. These date brownies are flexible, which is wonderful! We already designed the core recipe to be inherently healthier, but we can push that flexibility further with just a couple of simple swaps. Don’t worry about losing that fudgy texture; these modifications are tried-and-true, just like swapping out the caramel in my family’s favorite dessert recipes.
The key substitutions target the eggs and the flour. We aren’t messing with the Medjool date paste, though—that’s the soul of the brownie! But if you’re avoiding eggs or wheat, here’s exactly what you need to do to keep everything tasting perfect.
Making Date Brownies Gluten-Free
If you need to keep things wheat-free, this swap is incredibly easy, and honestly, I sometimes use it even when I don’t strictly need to because almond flour adds such a lovely subtle richness! For the half cup of all-purpose flour listed in the main recipe, simply substitute it with a high-quality almond flour instead. That’s it! The structure of these date brownies relies more on the eggs and the dense date paste than on heavy gluten development anyway, so the almond flour blends in seamlessly.
Just keep in mind that almond flour absorbs moisture slightly differently than wheat flour, so make sure you stick to the baking time listed. We want that soft, slightly underbaked center, remember? Almond flour helps achieve a beautiful, tender crumb.
Vegan Swaps for Egg-Free Date Brownies
If you’re baking for vegan friends or skipping eggs for any reason, don’t panic about the two large eggs the recipe calls for. We are using a classic, reliable vegan binder: the flax egg. You’ll need two flax eggs total to replace those standard eggs.
Here’s how you make one flax egg: just take 2 tablespoons of ground flaxseed and whisk it into 6 tablespoons of plain water. Give it a quick stir and then just let it sit on the counter for about five minutes. It will thicken up into a gelatinous mixture that mimics the binding power of an egg perfectly. Whisk two of those mixtures into your wet ingredients along with the date paste, and you are good to go! These vegan date brownies come out just as moist and fudgy as the original version.
Boosting Chocolate Flavor and Date Softness
For my seriously dedicated dark chocolate fans, I highly recommend reaching for dark cocoa powder if you happen to have it in your pantry. It deepens the flavor profile so much, making the final product taste richer and less sweet, even though the sweetness is only coming from fruit! Also, a quick note on dates: If you grab a bag and they feel brittle rather than squishy, don’t use them right away. Give them a 10-minute soak in hot but not boiling water before pitting and blending them for that paste. This simple step ensures your base stays wonderfully smooth.

Storage and Reheating Instructions for Date Brownies
Since these brownies get all their incredible moisture from those lovely Medjool dates, how you store them really matters if you want them to stay perfectly fudgy and tender throughout the week. I know it’s hard, but you have to resist eating them all in one sitting!
The best way to keep these brownies hitting that perfect texture is to let them cool completely—I mean, completely cool—before you even wrap them up. Trying to seal them warm traps condensation, and while we love moisture, we don’t want soggy tops!
Once they are fully cooled, wrap the entire batch tightly in plastic wrap or place them in a sturdy, airtight container. If you are cutting them first, go ahead and place a small square of parchment paper between the layers so they don’t stick together. Stored this way on the counter at room temperature, they are fantastic for three to four days. Seriously, they stay surprisingly moist because of the fruit content!
Freezing Your Homemade Date Brownies
If you’ve had a marathon baking session and made a double batch (which I totally recommend, you know I do!), freezing is your absolute best friend. Again, make sure they have cooled down completely, and slice them into individual squares first. Freezing them pre-cut means you can grab exactly what you need without having to thaw a huge block.
Wrap each individual square tightly in plastic wrap first. We want to protect them from freezer burn! After wrapping them individually, you can place those wrapped squares into a heavy-duty freezer bag or an airtight freezer-safe container. They hold up beautifully for about two to three months this way.
Quick Thawing and Serving
Thawing couldn’t be easier! Just pull out the number of squares you want and let them sit on the counter for maybe 30 minutes or so. If you’re in a real hurry, you can zap them in the microwave for about 10 to 15 seconds, but honestly, they taste best when they come back to room temperature naturally.
I think they are even better chilled! Sometimes if I have leftover brownies, I just keep them in the fridge. The cooling firms them up just a touch, making them resemble an almost truffle-like texture—pure bliss when you want that intense chocolate hit!
Serving Suggestions for Guilt Free Brownies
I always say that even a clean eating dessert deserves a little polish before serving, right? These Guilt Free Brownies are fantastic all on their own—seriously, they require zero fuss—but sometimes you just want to dress them up a little bit when company comes over, or maybe you just want to feel extra fancy while eating one after dinner!
My favorite way to serve these is warmed up just slightly. If you pop a square in the microwave for about 12 seconds, it gets that center gooey again, and you can watch the melted chocolate chips start to ooze. That’s when you need to lean into that indulgence!
Simple Toppings to Elevate Your Snack
You don’t need complicated frosting when you’re making something this naturally rich. A simple dusting of high-quality cocoa powder makes them look professionally finished and adds a lovely bit of bitterness to cut through the date sweetness. If you’re feeling a bit snazzier, a very light drizzle of melted dark chocolate across the top looks amazing.
For a wonderful textural contrast, try crumbling some toasted pecans or walnuts right on top before they cool completely. The crunch against that dense, chewy center is just heaven. And hey, if you’re feeling like this is too sweet for your palate, a tiny dollop of plain Greek yogurt alongside it adds a beautiful, cooling tang. It’s the perfect pairing for a rich chocolate moment!
Pairing Brownies with Beverages
Let’s talk about what to drink alongside your phenomenal date brownies. If you managed to make them gluten-free or vegan, they still deserve a great partner! Naturally, a strong cup of coffee is my number one choice. The bitterness of the fresh brew complements the cocoa so perfectly. If you’re taking these to an evening event, a glass of full-bodied red wine, like a Cabernet, works surprisingly well with the fruit notes from the dates—check out some great ideas on pairings over here!
For the afternoon treat crowd, a cold glass of almond milk or oat milk serves up that classic brownie experience without complicating the whole healthy vibe of the dessert. Honestly, these are so good, they rarely survive long enough for me to get creative with pairings, but it’s fun to pretend we’re being fancy when we serve them!
Frequently Asked Questions About Date Brownies
I know when I first start tinkering with a new recipe, especially one that swaps out traditional sugar for fruit, I have a million little questions swirling around. It’s totally normal! You want to make sure you get that perfect texture for your date brownies so you don’t waste those beautiful Medjool dates. I pulled together some of the things I always wondered about when I was first figuring out this type of clean eating dessert.
Are these date brownies truly fudgy and chewy?
Oh, yes, they are! And this is the number one thing people worry about when moving to refined sugar free baking. Because we use that thick, naturally sticky paste made from the Medjool dates instead of granulated sugar, these brownies bake up incredibly dense and chewy. The texture is much richer than a standard cakey brownie. The key, which I harped on above, is not to overbake them! Pull them when they still look just a *tiny* bit soft in the middle; that texture sets up when they cool, giving you that perfect, melt-in-your-mouth chewiness!
Can I use dried dates other than Medjools?
This is tricky, and I always advise sticking to Medjools if you can! Medjool dates are often called the “King of Dates” for a reason—they are much softer, fattier, and have that amazing caramel quality. If you use smaller, drier dates (like Deglet Noor), you will have to increase the amount of hot water you blend them with significantly, and you might lose some of that natural fat content, making the final product a little less rich. I haven’t tested it thoroughly in this recipe, but for the best Medjool date dessert experience, the bigger, softer dates are the way to go.
What happens if I skip an optional ingredient like maple syrup or chocolate chips?
Don’t stress at all if you skip them! The recipe is structured so the dates do the heavy lifting for sweetness. If you skip the optional maple syrup, you are still getting plenty of sweetness from the dates, and the flavor will lean slightly more toward the pure cocoa profile, which some people prefer! If you skip the chocolate chips, you still have a deeply satisfying chocolate bar. The *only* thing I wouldn’t mess with is the oil, the eggs (or flax eggs), and the date paste itself—those are non-negotiable for the structure of these date brownies.
How long does it take until these are ready to serve?
The actual mixing and baking time is super quick, clocking in around 40 minutes total, which I love for a weeknight treat! But, if you want that absolute best fudgy texture, you need to factor in cooling time. I strongly recommend letting them cool on the counter for at least an hour, or even chilling them in the fridge for an hour after that. To get them truly perfect for slicing without crumbling, plan on needing maybe 2 hours total from oven to plate. Quick to bake, but worth the wait for the slice!
If you want even more ideas on making amazing easy date sweetened treats, check out my other favorites on the site!
Nutrition Estimates for These Date Brownies
When we talk about making delicious swaps like using dates instead of white sugar, people naturally want to know what that means for the label. Remember, these are just estimates, because the exact numbers will shift based on if you use almond flour instead of AP flour, or if you add that optional drizzle of maple syrup! But this gives you a great baseline for enjoying these as a genuinely wholesome option.
This information is based on nine equal servings, using standard ingredients and skipping the optional maple syrup and chocolate chips. It’s good to know what you’re putting in your body!
- Calories: Right around 220 per square. Not bad at all for something that tastes this rich!
- Sugar: Roughly 18 grams. This is crucial—that sugar is entirely natural, coming from the fruit.
- Fat: About 12 grams total. A lot of this comes from the coconut oil and the natural oils in the dates, which gives us that beautiful mouthfeel.
- Protein & Fiber: You get a nice boost here, usually around 4 grams each, thanks to the dates and the flour.
It’s a satisfying snack that hits the spot without spiking your blood sugar the way traditional baked goods do. It allows us to satisfy those deep chocolate cravings while keeping things clean!
Share Your Date Brownies Creations
Oh, I just love seeing what you all create in your kitchens! When you make these date brownies, please, please let me know how they turned out for you. Did the date paste get perfectly smooth in your machine? Did you manage to wait for them to cool before cutting? I can only picture how fudgy yours turned out!
When you do, take a quick picture and tag me on social media! We have a whole community of home cooks sharing their wins, and I love watching you adapt these classic ideas for your modern demands. If you have feedback or want to suggest a twist for a future batch, head over to my contact page and send me a note!
Five stars is always nice, but an honest review detailing how this recipe solved your chocolate craving is even better. Happy baking, everyone!
Nutrition Estimates for These Date Brownies
When we talk about making delicious swaps like using dates instead of white sugar, people naturally want to know what that means for the label. Remember, these are just estimates, because the exact numbers will shift based on if you use almond flour instead of AP flour, or if you add that optional drizzle of maple syrup! But this gives you a great baseline for enjoying these as a genuinely wholesome option.
This information is based on nine equal servings, using standard ingredients and skipping the optional maple syrup and chocolate chips. It’s good to know what you’re putting in your body!
- Calories: Right around 220 per square. Not bad at all for something that tastes this rich!
- Sugar: Roughly 18 grams. This is crucial—that sugar is entirely natural, coming from the fruit.
- Fat: About 12 grams total. A lot of this comes from the coconut oil and the natural oils in the dates, which gives us that beautiful mouthfeel.
- Protein & Fiber: You get a nice boost here, usually around 4 grams each, thanks to the dates and the flour.
It’s a satisfying snack that hits the spot without spiking your blood sugar the way traditional baked goods do. It allows us to satisfy those deep chocolate cravings while keeping things clean!
Share Your Date Brownies Creations
Oh, I just love seeing what you all create in your kitchens! When you make these date brownies, please, please let me know how they turned out for you. Did the date paste get perfectly smooth in your machine? Did you manage to wait for them to cool before cutting? I can only picture how fudgy yours turned out!
Your feedback truly means the world to me. In my kitchen, cooking is all about connection, and knowing this recipe brought that same warm, satisfying feeling to your family makes all the recipe testing worth it. It’s about creating that magnetic pull around the table that my mom and grandma always aimed for.
If you have a moment, drop a quick rating at the top of the page! Even better, snap a picture of your beautiful, naturally sweetened squares and tag me on social media! We have a whole community of home cooks sharing their wins, and I love watching you adapt these classic ideas for your modern demands. If you have feedback or want to suggest a twist for a future batch, head over to my contact page and send me a note!
Five stars is always nice, but an honest review detailing how this recipe solved your chocolate craving is even better. Happy baking, everyone!
PrintUltimate Fudgy Date Brownies (Naturally Sweetened, Gluten-Free Option)
Make these rich, fudgy date brownies that satisfy chocolate cravings using only natural sweetness from Medjool dates. This recipe is easy to prepare and offers a wholesome alternative to traditional desserts.
- Prep Time: 15 min
- Cook Time: 25 min
- Total Time: 40 min
- Yield: 9 servings 1x
- Category: Dessert
- Method: Baking
- Cuisine: American
- Diet: Vegetarian
Ingredients
- 1 cup pitted Medjool dates (about 12 large dates)
- 1/2 cup hot water
- 1/2 cup unsweetened cocoa powder
- 1/4 cup melted coconut oil
- 1/4 cup maple syrup (optional, for extra sweetness)
- 2 large eggs (or flax eggs for vegan option)
- 1 teaspoon vanilla extract
- 1/2 teaspoon baking powder
- 1/4 teaspoon salt
- 1/2 cup all-purpose flour (or almond flour for gluten-free)
- 1/4 cup chocolate chips (optional)
Instructions
- Preheat your oven to 350°F (175°C). Grease and line an 8×8 inch baking pan with parchment paper, leaving an overhang for easy removal.
- Place the pitted Medjool dates and hot water in a food processor or high-speed blender. Process until a smooth, thick paste forms. This is your natural sweetener base.
- In a large bowl, whisk together the date paste, melted coconut oil, maple syrup (if using), eggs, and vanilla extract until well combined.
- In a separate bowl, whisk together the cocoa powder, baking powder, and salt.
- Gradually add the dry ingredients to the wet ingredients, mixing until just combined. Do not overmix.
- Fold in the flour (or almond flour) until no streaks remain. If using, gently stir in the chocolate chips.
- Spread the batter evenly into the prepared baking pan.
- Bake for 20 to 25 minutes. The edges should look set, but the center should still be slightly soft for a fudgy texture.
- Let the brownies cool completely in the pan on a wire rack before lifting them out using the parchment overhang.
- Cut into squares and serve. These are best enjoyed once fully cooled.
Notes
- For a gluten-free version, substitute the all-purpose flour with almond flour.
- To make this recipe vegan, substitute the two eggs with two flax eggs (mix 2 tablespoons ground flaxseed with 6 tablespoons water and let sit for 5 minutes to thicken).
- If your dates are not soft, soak them in hot water for 10 minutes before pitting and blending.
- For a richer chocolate flavor, use dark cocoa powder.
Nutrition
- Serving Size: 1 brownie square
- Calories: 220
- Sugar: 18
- Sodium: 85
- Fat: 12
- Saturated Fat: 7
- Unsaturated Fat: 5
- Trans Fat: 0
- Carbohydrates: 28
- Fiber: 4
- Protein: 4
- Cholesterol: 35