
When company shows up unexpectedly, or you just need a quick, intensely flavorful bite to tide you over between dinner and when dinner actually happens—we all need those recipes, right? Life gets busy around here, and I’m always looking for ways to take those gorgeous, slow-cooked family flavors and shrink them down to fit a Tuesday night schedule. That’s exactly how these spectacular Mediterranean Spinach and Feta Cheese Crisps were born. This recipe is my answer to needing an impressive-looking appetizer that actually takes less than thirty minutes total. Trust me, these little bites pack that huge Mediterranean punch without demanding your whole afternoon!
- Why You Will Love These Mediterranean Spinach and Feta Cheese Crisps
- Essential Ingredients for Crispy Spinach Feta Squares
- Step-by-Step Guide to Making Mediterranean Spinach and Feta Cheese Crisps
- Tips for Success with Mediterranean Snacks
- Serving Suggestions for Feta Cheese Appetizers
- Storage and Reheating Instructions
- Frequently Asked Questions About Spinach and Cheese Bites
- Nutritional Estimates for These Baked Savory Crisps
- Share Your Experience Making These Finger Food with Feta
Why You Will Love These Mediterranean Spinach and Feta Cheese Crisps
When I started adapting my grandmother’s heavier pastry recipes for modern family life, speed and flavor payoff were my biggest concerns. These crisps are proof that you don’t have to sacrifice either one! They are honestly foolproof, even if you’ve never touched phyllo dough before. They check every box a busy cook needs.
- They are lightning fast! We’re talking 15 minutes prep and 15 minutes baking time. Hello, ready-in-under-30-minutes Quick party snacks!
- That Greek flavor is intense—the feta really stands up. If you love a strong cheese flavor, you’ll be hoarding these right off the cooling rack.
- Phyllo dough is magical; once you brush it with oil, it practically bakes itself into the crunchiest texture imaginable.
- These are vegetarian, light, and perfect for when you need something savory to go with a dip, but don’t want anything too heavy.
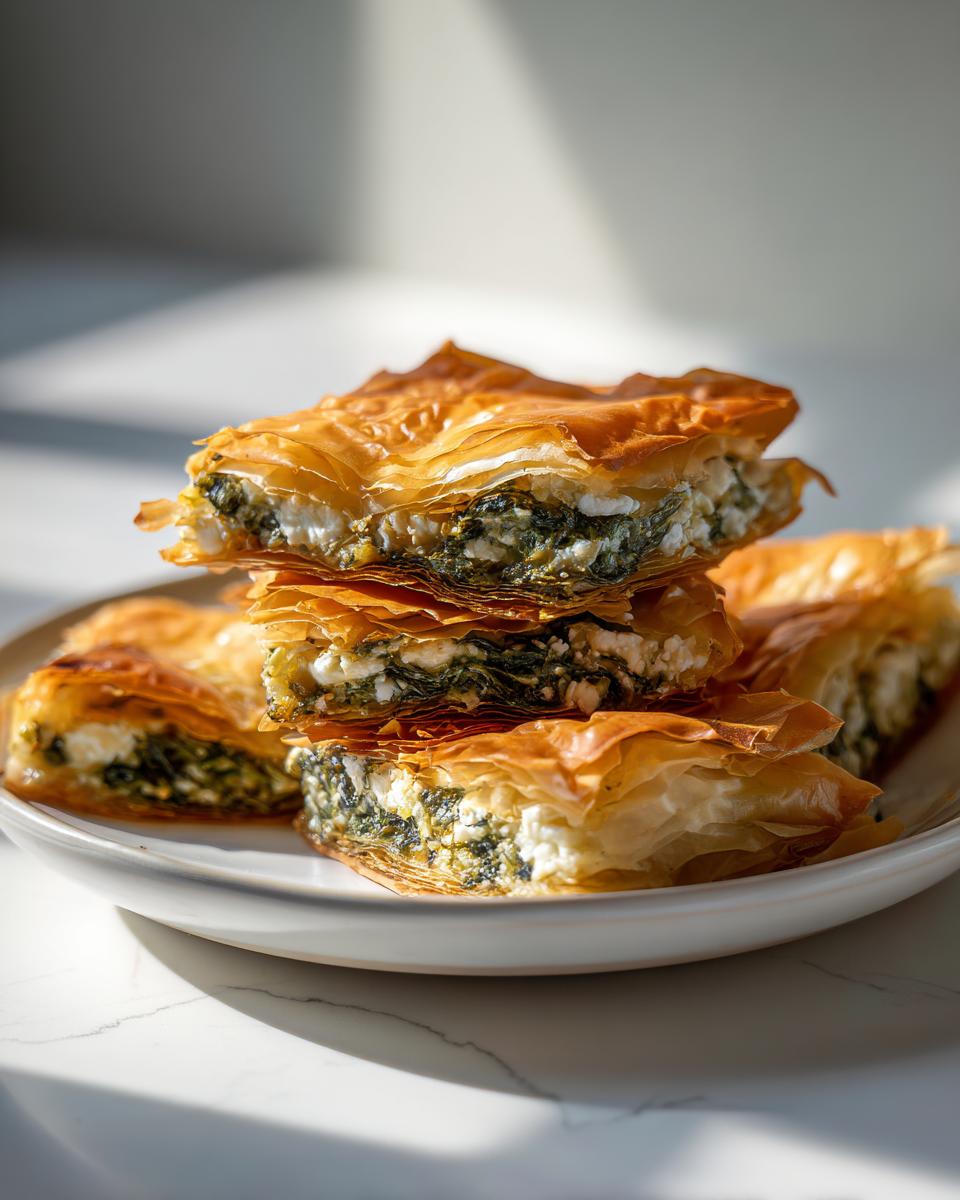
Essential Ingredients for Crispy Spinach Feta Squares
Okay, let’s talk about what goes into these little flavor bombs. Since we are dealing with only a few core ingredients, quality really matters here. You don’t want weak flavor! My list below looks short, but every item pulls its weight to get us those perfect, crunchy, savory squares.
- Ten sheets of phyllo dough—and please make sure this is fully thawed, or you’ll be crying over shattered dough!
- One tablespoon of good olive oil, plus extra for brushing everything down until it shines.
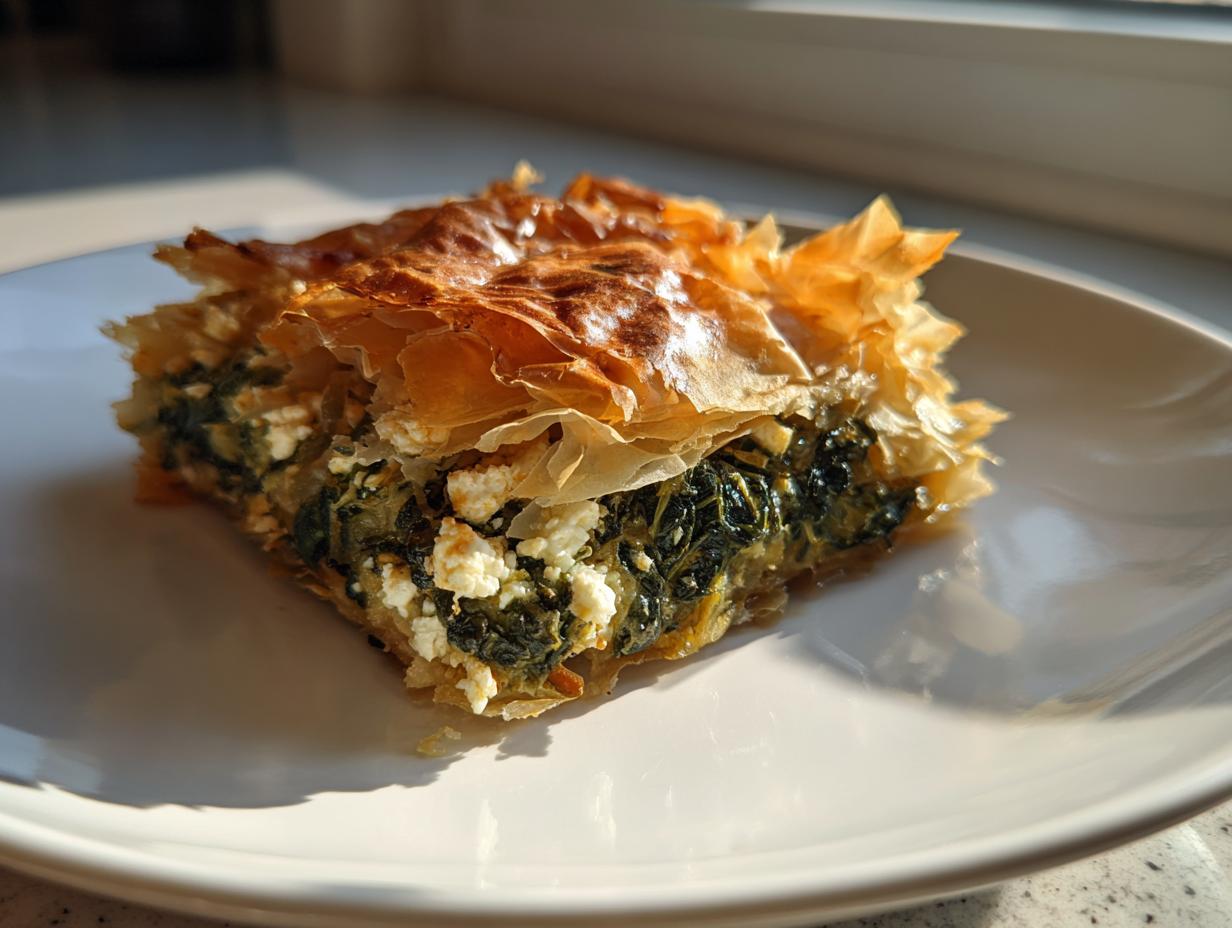
- One cup of fresh spinach, which needs to be very finely chopped. No big chunks sneaking in here!
- Four ounces of creamy feta cheese, crumbled finely. This is where you can’t skimp. Look for good quality feta packed in brine if you can. It makes a huge difference for that sharp, salty punch we want in our Appetizers with strong cheese flavor.
- One large egg, beaten lightly—this is our binder so the filling stays put.
- One teaspoon of dried oregano. This is what shouts “Mediterranean!”
- A whisper of black pepper and just a tiny pinch of salt. Remember, the feta is already salty, so taste before you add more!
Ingredient Notes and Flavor Boosters
When I was first testing these, I realized they sometimes needed just a little *zing* to cut through that rich feta. So, here’s my pro tip that I learned after making hundreds of these for neighborhood parties: Don’t hesitate to add half a teaspoon of fresh lemon zest to that filling mixture.
Zest is pure sunshine! It brightens up the spinach and really ties the oregano and feta together perfectly. It’s such a simple addition, but it takes these from a great snack to a truly standout Mediterranean treat. Also, if you happen to have fresh dill, toss in just a quarter teaspoon of that too—wow! It’s delicious, and showing you how to bump up the flavor profile just confirms that these recipes, even the quick ones, are made with care.
Step-by-Step Guide to Making Mediterranean Spinach and Feta Cheese Crisps
This is the part where patience pays off, but honestly, it’s also kind of fun! Getting these rolled right ensures max crunch later. The first thing you absolutely must do—before you even touch the filling—is get your oven preheated to 375 degrees Fahrenheit (190 Celsius) and have your baking sheet ready with parchment paper. Timing is everything here; we want those phyllo layers crisping up immediately!
Preparing the Spinach and Feta Filling
Grab a medium bowl; this part is simple mixing. Toss in your finely chopped spinach, the crumbled feta, your tablespoon of olive oil, the beaten egg, oregano, and pepper. Now, mix this gently but thoroughly. You aren’t whipping cream here, you just want that egg spread around enough so that it holds the cheese and spinach together when we start rolling. If it looks dry, you’ve done it right—the egg acts like glue, not a sauce.
Assembling and Rolling the Savory Thin Pastry Recipes
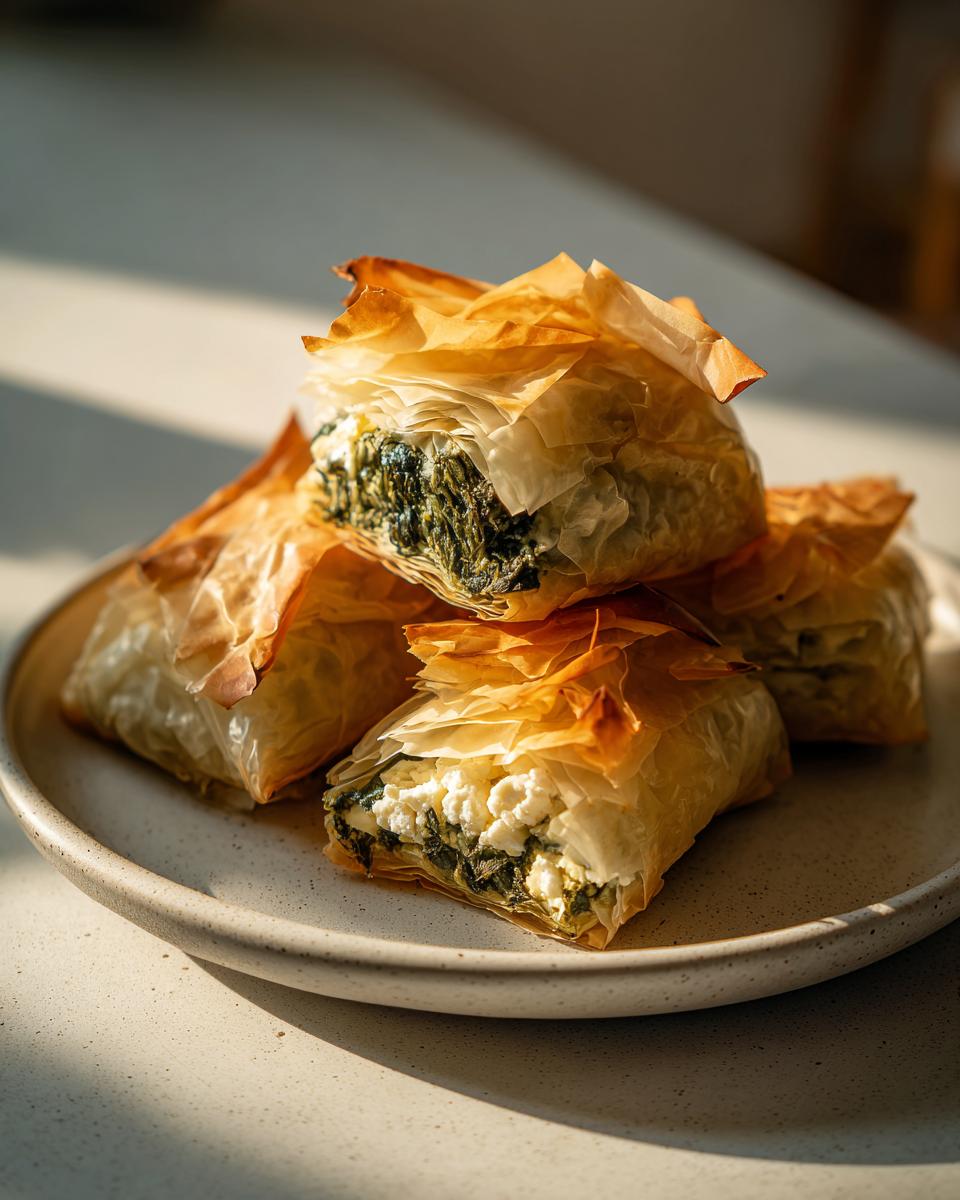
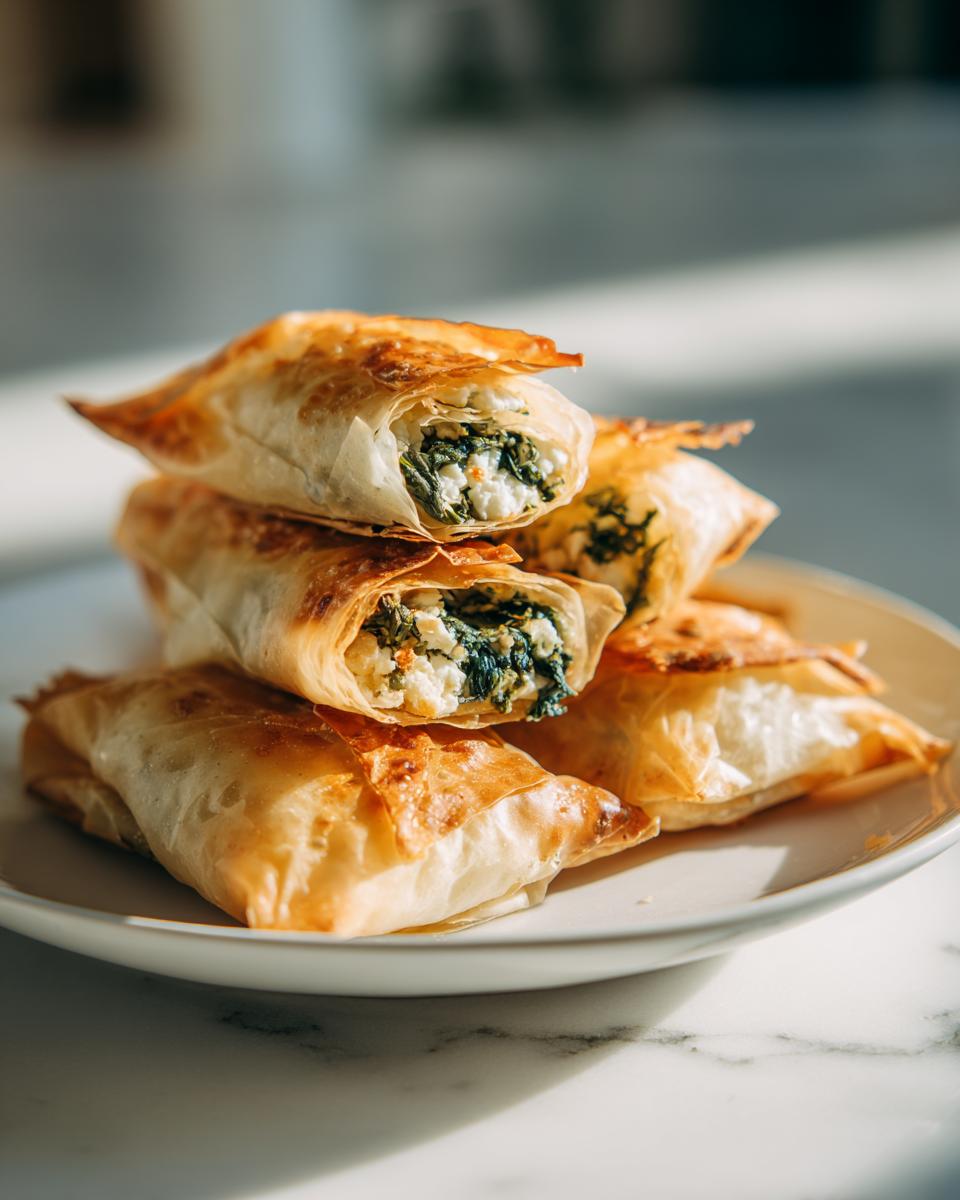
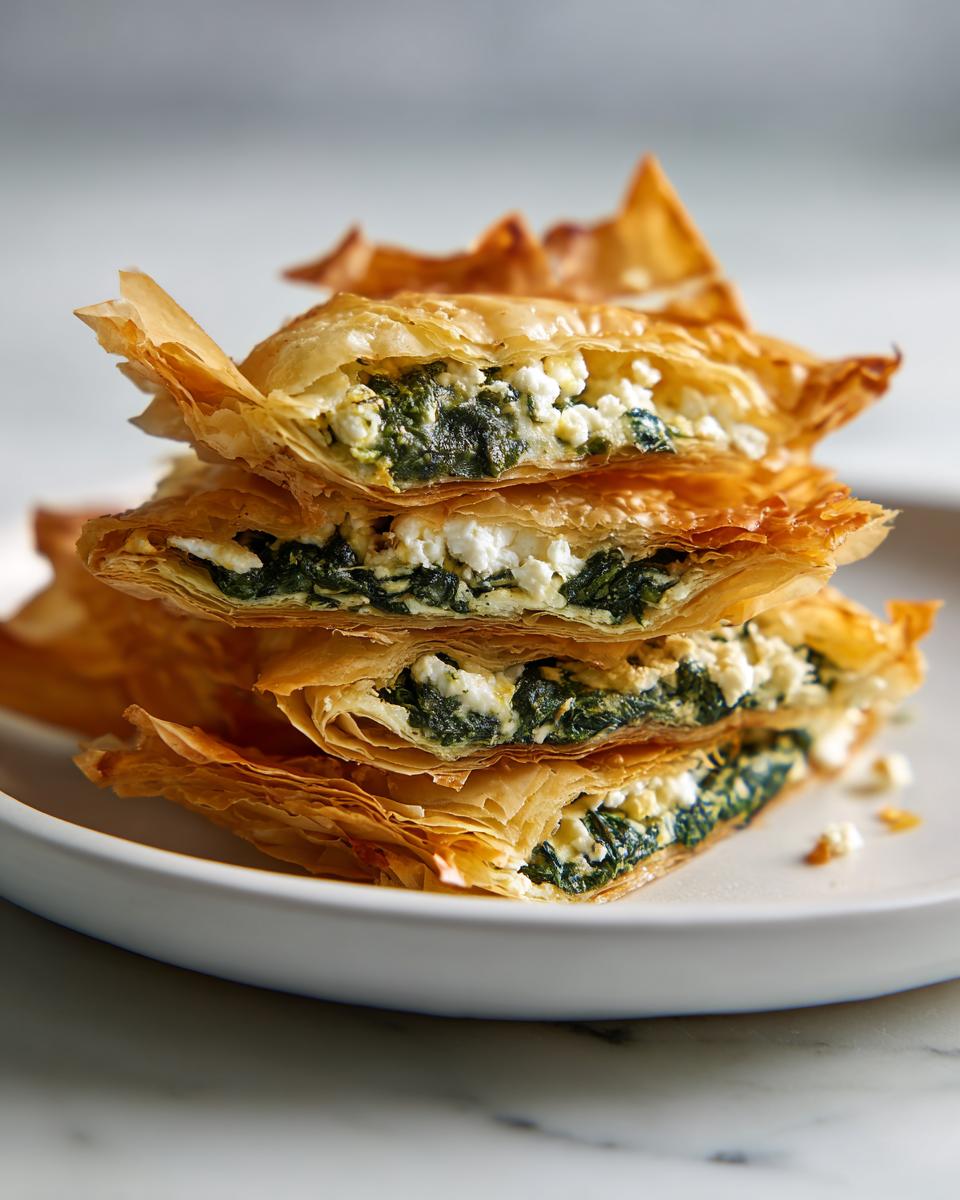
Time for the famous phyllo dance! Lay one sheet flat, brush it lightly with oil. Lay the second sheet right on top of it, and oil that again. This double layer is crucial for structure. Spoon about a tablespoon of your filling mixture along one long edge, leaving a small space on either side. Don’t overpack it, or you’ll have cheese explosions! Fold the short ends in just a tiny bit, and then, roll it up tightly from that long edge. Think of rolling a very skinny cigar. Brush the outside of that new log one last time with oil. Then, using a sharp knife, slice that log into 1-inch thick pieces. Voila! You have individual little parcels ready for the pan. Keep repeating so you have all your Savory thin pastry recipes ready to go.
Baking Your Greek Inspired Crackers to Perfection
Lay those little crisps cut-side up on your prepared sheet. They shouldn’t touch, because we want air circulating for maximum crispness! Send them into that preheated oven for about 12 to 15 minutes. When I first tried these, I pulled them out at 10 minutes because they looked golden, but they were still soft in the center. Nope! You need that full 12 minutes minimum until they are deep golden brown and truly feel crisp when you tap them. That’s when you know you’ve nailed the Greek inspired crackers. They shouldn’t be pale at all. They should look proud and absolutely crunchy!
Tips for Success with Mediterranean Snacks
Getting these right is all about respecting the delicate nature of the phyllo dough. It dries out faster than anything I’ve ever worked with! If you’re multitasking like me, try to slice and assemble your crisps quickly. If you have a break between batch rolling, cover the unused phyllo dough with a slightly damp kitchen towel—just dampen it, don’t soak it, we are not making soup!
The biggest textural disaster happens when you overstuff them. Seriously, resist the urge to pack that spinach and feta mixture in there. If you try to cram too much filling into that little log, the layers near the seam won’t seal properly, and guess what happens in the oven? Hot cheese molten lava spreading out across your pan and turning your beautiful **Mediterranean snacks** into sad, flat discs. Stick to about one tablespoon of filling per layer.
When it comes time for slicing, this is where uniformity helps everything bake evenly. Use your sharpest knife and try to keep those 1-inch slices consistent. If one crisp is half an inch thick and the next is an inch and a half, the thin one will burn before the thick one even starts to crisp up properly. A little precision here makes a huge difference in the final tray presentation.
And remember that bit about brushing with oil? Don’t skip that top brush! That oil is what helps that phyllo achieve that crackly, golden exterior. It’s what turns a simple pastry sheet into something incredibly satisfying. If you want to know more about the inspiration behind swapping my family’s complicated pastry rules for easier, modern techniques, you can read a little about my journey over at The YumMagnet Recipe Box story.
Serving Suggestions for Feta Cheese Appetizers
Now that you have a whole tray of golden, salty, unbelievably crunchy crisps, the next question is what do we serve them with? These are wonderful completely on their own, especially when they are scorching hot from the oven, but if you’re putting together a full spread, you want companions that balance out that amazing feta flavor.
Since the crisps are already quite rich and savory, you want dips that offer some cooling contrast or maybe a little herbal freshness. Think cool cucumber, bright tomato, or maybe a tang of lemon. These are the perfect accompaniment when you need a few low effort Mediterranean dips accompaniment on the table.
Here are a few pairings that always fly off the platter:
- Tzatziki: That cool, garlicky yogurt dip is the absolute champion pairing for anything feta-based. The cucumber melts perfectly with the crisp.
- Hummus (Sun-dried Tomato or Roasted Red Pepper): While plain hummus is great, opting for a slightly more robust flavor profile helps stand up to the strong cheese flavor of our crisps.
- A Simple Greek Salad Skewer: Don’t worry about making a whole dip! Just cube some tomatoes, thread them onto a small skewer with an olive and a tiny square of cucumber, and serve them right next to the crisps. It’s visually stunning and light!
And when it comes to drinks? Keep it light to really let these Feta cheese appetizers shine. A crisp, dry white wine like a Sauvignon Blanc or even a chilled Rosé is perfect. If you’re staying away from alcohol, sparkling water with extra lemon slices does the trick. You want something bubbly and clean to refresh your palate after that salty, buttery bite!
Storage and Reheating Instructions
Here’s the hard truth, friends: like most things made with delicate phyllo, these Mediterranean Spinach and Feta Cheese Crisps are absolutely, one hundred percent best when served the day you make them. That beautiful, flaky crispness starts to fade the moment they sit overnight. So, my first piece of advice? Make exactly what you know you will eat in one sitting—I’m serious, hide them from your family if you have to!
But, life happens, and sometimes you have leftovers. If you do end up with some extras, you need to treat them right so you can salvage that crunch later. Store them in an airtight container at room temperature. Do *not* put these in the refrigerator! Refrigeration makes everything soggy, and we absolutely cannot have that happen to our hard-earned crunch. They will still be totally safe to eat for maybe two or three days stored this way, but they will be softer.
The magic happens during reheating, though! You need dry heat, not steam. Do not, under any circumstances, microwave these. That just turns them into sad, warm dough wrappers. Instead, when you’re ready for a snack later, spread the cooled crisps out in a single layer on a baking sheet.
Pop them back into a 350 degrees Fahrenheit oven for just 4 to 6 minutes. Watch them closely; they heat up really fast. This blast of dry heat evaporates whatever residual moisture they picked up overnight and restores that satisfying shatter when you bite into them. It’s not *quite* as good as fresh out of the fryer, but it’s incredibly close, and it gets you back to peak crispness without any extra effort!
Frequently Asked Questions About Spinach and Cheese Bites
I get so many messages asking the same few things once people start making these, especially about getting that perfect crunch! I totally get it—we want these **Spinach and cheese bites** to be perfect every time. Here are the top three things folks always ask me about when they are getting ready to bake a batch of these **Finger food with feta**.
Can I make these Mediterranean Spinach and Feta Cheese Crisps gluten-free?
This is a tough one, and I have to be honest with you: making these truly gluten-free is tricky because the structural integrity relies so much on the traditional wheat-based phyllo dough layers. Phyllo is paper-thin, which is what gives us that amazing shattering texture when baked.
While there are some gluten-free phyllo brands out there, they are often thicker and can tear much more easily during brushing and rolling. If you want to try, absolutely use them, but you might need to use a smaller amount of filling and maybe even skip the double-layer technique since the wraps might be thicker overall. Please keep me posted if you find a brand that works beautifully!
What is the best way to prevent the filling from leaking out while baking?
Oh, the dreaded cheese leak! I have totally been there, and it’s usually because the log wasn’t sealed tight enough near the ends or we stuffed it too full. If you want to ensure you get beautiful, contained little **Crispy spinach feta squares**, focus on three things:
- Don’t Overfill: Seriously, stick to that tablespoon maximum of filling per layer. If you can see the filling trying to balloon out the sides as you roll, you’ve added too much.
- Seal the Ends: Before you start rolling the log, take a moment to gently fold those short, open ends inward, just like you would when rolling a burrito or a tight gift. This keeps the filling centrally located.
- Egg Wash the Seam: After you finish rolling the log tightly, use your pastry brush to dab a little extra beaten egg (or even just a tiny bit of water) right along the final seam where the dough overlaps. This acts like edible glue, sealing the package shut under the heat of the oven.
If you follow those steps, you should have zero cheese explosions and perfect little crisps ready for dipping!
Nutritional Estimates for These Baked Savory Crisps
So, you’ve made a beautiful batch of these crispy delights, and now you’re wondering about the *aftermath*, shall we say? I get tons of questions about the nutrition because, let’s be real, they are so easy to demolish! As I always tell everyone, these estimates are based strictly on the ingredients listed in my recipe, and they are just a guideline—not a guarantee from a registered dietitian, obviously!
Remember, since we are using phyllo dough and feta cheese, these have a delightful richness, but they bake up lighter than traditional, deep-fried pastries. This helps keep things reasonable for a delicious appetizer. When I look at the numbers for just two crisps, I feel pretty good about serving these during football season or as a fun starter!
Here is the breakdown for approximately two crisps from your yield:
- Serving Size: 2 crisps
- Calories: Around 95
- Fat: About 6 grams (Note that 3g of that is saturated fat from that wonderful feta!)
- Carbohydrates: Roughly 6 grams
- Protein: A solid 4 grams—not bad for a snack!
- Sugar: Super low, only about 0.5 grams.
- Sodium: Around 180 mg (Again, that feta is doing the heavy lifting here on the salt!)
This is why I love these so much! They satisfy that craving for something savory and buttery without weighing you down completely before the main event. If you wanted to lower the sodium or fat slightly, you could always look for lower-sodium feta, but you’d sacrifice some of that punchy flavor we worked so hard to achieve with our Baked savory crisps!
Share Your Experience Making These Finger Food with Feta
Honestly, that’s the best part of this whole journey for me—seeing these recipes come to life in *your* kitchens! I poured all my energy into making these **Finger food with feta** work for my chaotic modern schedule, and now I absolutely live for hearing how they work for yours.
Did you try adding that lemon zest like I suggested? Or maybe you got even more creative with your herbs? I want to know everything! Please, take a moment to leave a rating right down below. Did these crisps turn out perfectly golden and crisp for you, or did you have a little phyllo hiccup?
If you snapped a picture of your finished platter—whether they were served alongside your favorite yogurt dip or just eaten standing over the counter (we all do that!)—please share it with me on social media and tag us! It truly makes my day to see the YumMagnet family connecting over amazing, simple food.
And if you have any burning questions that I didn’t cover in the FAQs, or maybe a brilliant substitution you discovered, drop it in the comments section. I check every single one, and I love building this community of practical, flavor-loving home cooks together. You can always reach out directly if you have a special message for me over at the contact page too!
PrintMediterranean Spinach and Feta Cheese Crisps

You can make these quick, crispy, baked savory crisps featuring spinach and feta cheese. They are perfect for serving as a Mediterranean snack or appetizer.
- Prep Time: 15 min
- Cook Time: 15 min
- Total Time: 30 min
- Yield: About 20 crisps 1x
- Category: Appetizer
- Method: Baking
- Cuisine: Mediterranean
- Diet: Vegetarian
Ingredients
- 10 sheets phyllo dough, thawed
- 1 tablespoon olive oil, plus extra for brushing
- 1 cup fresh spinach, finely chopped
- 4 ounces feta cheese, crumbled
- 1 large egg, lightly beaten
- 1 teaspoon dried oregano
- 1/4 teaspoon black pepper
- Pinch of salt (feta is salty)
Instructions
- Preheat your oven to 375 degrees Fahrenheit (190 degrees Celsius). Lightly grease a baking sheet or line it with parchment paper.
- In a medium bowl, combine the chopped spinach, crumbled feta cheese, 1 tablespoon of olive oil, beaten egg, oregano, and pepper. Mix until all ingredients are evenly distributed.
- Lay one sheet of phyllo dough flat on your work surface. Brush the entire surface lightly with olive oil.
- Place a second sheet of phyllo dough directly on top of the first. Brush this second sheet lightly with olive oil.
- Spoon about one tablespoon of the spinach and feta mixture along one long edge of the stacked phyllo sheets, leaving a small border.
- Fold the short ends of the phyllo over the filling slightly. Then, tightly roll the dough from the long edge over the filling to create a thin log.
- Brush the outside of the log lightly with olive oil.
- Slice the log into 1-inch thick pieces to create individual crisps or triangles. Place the crisps cut-side up on the prepared baking sheet.
- Repeat steps 4 through 10 with the remaining phyllo sheets and filling.
- Bake for 12 to 15 minutes, or until the crisps are golden brown and crisp.
- Remove from the oven and let cool slightly before serving.
Notes
- If you prefer a stronger Mediterranean flavor, add 1/2 teaspoon of lemon zest to the filling mixture.
- For a lower effort preparation, you can layer 5 sheets of phyllo, brush with oil, spread the entire filling over the top, roll into a large log, slice, and bake.
- These are best served the day they are made for maximum crispness.
Nutrition
- Serving Size: 2 crisps
- Calories: 95
- Sugar: 0.5
- Sodium: 180
- Fat: 6
- Saturated Fat: 3
- Unsaturated Fat: 3
- Trans Fat: 0
- Carbohydrates: 6
- Fiber: 0.5
- Protein: 4
- Cholesterol: 30