
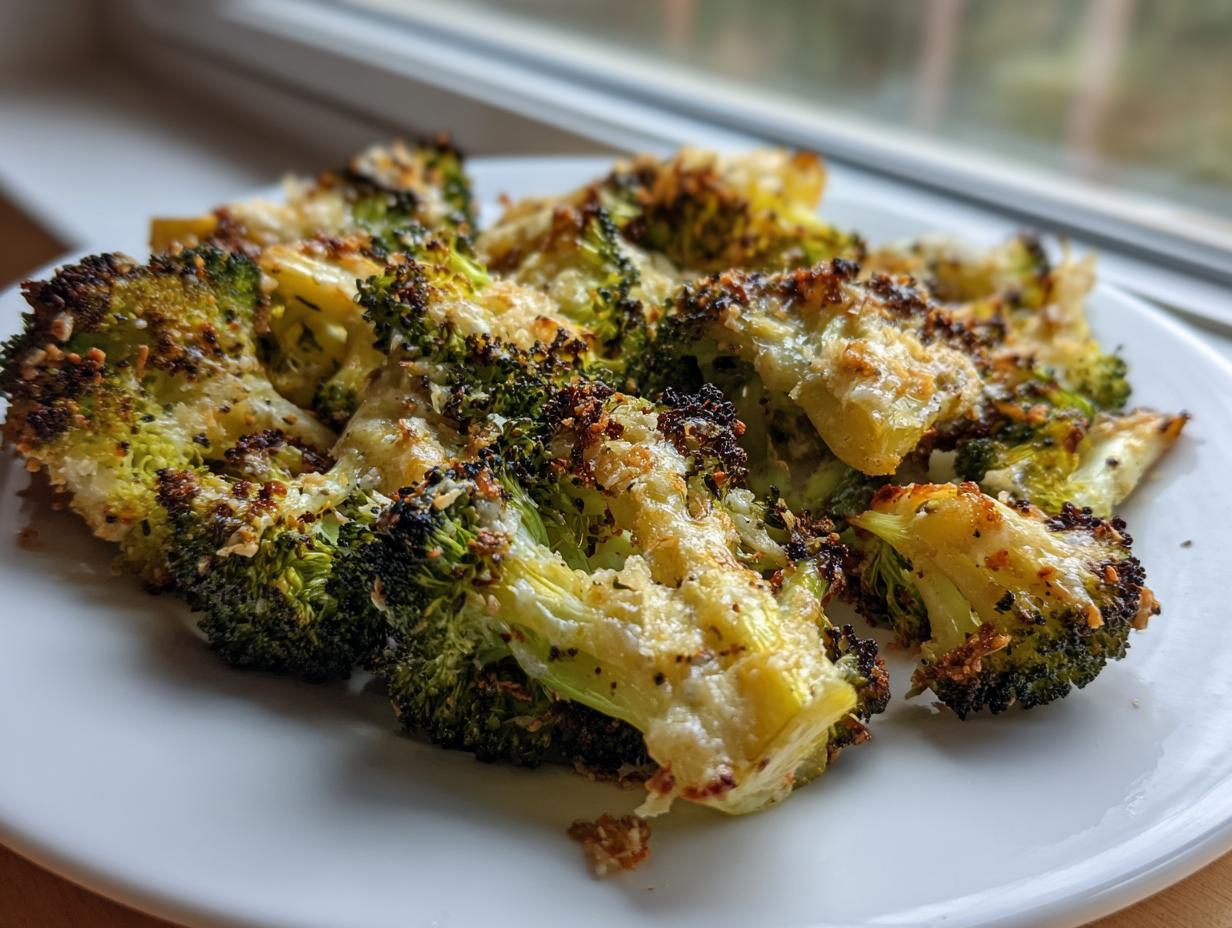
It’s time we had a serious talk about broccoli. If you’re still steaming it until it’s a mushy, sad, green puddle, you’re missing out on one of the best, easiest side dishes you can make! I’m Jessica Thompson, and around here at The YumMagnet Recipe Box, my whole mission is taking those treasured family flavors and making them work for your real, busy life. That’s why I developed the Crispy Oven-Roasted Smashed Broccoli with Garlic Parmesan. Seriously, just a little bit of smashing unlocks unbelievable crisp texture. This isn’t just another recipe; it’s my go-to weeknight vegetable side that brings the crunch and flavor we all crave, proving healthy food doesn’t have to be boring. You can read more about my philosophy of making practical meals work for busy families over on the About Us page!
- Why This Crispy Smashed Broccoli Recipe Works So Well
- Gathering Ingredients for Your Smashed Broccoli Recipe
- Step-by-Step Guide: How to Make Smashed Broccoli
- Tips for Perfect Oven Roasted Smashed Broccoli
- Ingredient Substitutions for Smashed Broccoli
- Serving Suggestions for Your Crispy Broccoli Side Dish
- Storage and Reheating the Smashed Broccoli
- Frequently Asked Questions About Smashed Broccoli
- Share Your Weeknight Vegetable Side Creation
Why This Crispy Smashed Broccoli Recipe Works So Well
You might be wondering, why do I have to smash my broccoli? Great question! Most people bake or roast broccoli straight up, and you end up with either hard stems or scorched tops. This recipe changes the game for any **crispy broccoli side dish**. We are aiming for maximum crunch, and that requires a little bit of technique. Trust me, once you see how satisfyingly flat these little guys get, you’ll be hooked!

The Secret to Ultra-Crispy Smashed Broccoli
The magic starts before the oven, with a quick two-minute dip into boiling, salted water. That’s called blanching, and it just softens the interior perfectly. The truly vital step, though, is plunging those hot florets straight into an ice bath right after. Why the shock treatment? It stops the cooking process immediately so they don’t get mushy later. After you pat them bone-dry—and I mean *really* dry—smashing them creates all these wonderful, craggy edges. Those exposed surfaces are what get absolutely shatteringly crisp in the oven. This method guarantees you have the **best broccoli recipe** on your table.
Flavor Profile: Garlic Butter and Parmesan Smashed Broccoli
Once we have that great texture, we load it up with flavor. We’re talking rich, salty, aromatic goodness here. It’s a decadent coating made from melted butter, fresh garlic, and olive oil that seeps right into those cracks created by smashing. When you finish it off with a blanket of cheese, you get this incredible **parmesan smashed broccoli** hybrid. It’s savory, slightly cheesy, and pairs well with everything!
Gathering Ingredients for Your Smashed Broccoli Recipe
Okay, let’s get our supplies ready! Because this is such a fast recipe, preparation is everything. You don’t want to be scrambling for the garlic while your butter is burning, right? Everything for this side dish is super accessible—nothing fancy needed. You’ll be grabbing your heads of broccoli, good olive oil, real unsalted butter, fresh garlic, and, of course, that gorgeous Parmesan cheese.
Ingredient Clarity and Preparation Notes
When you’re chopping up your two large heads of broccoli, make sure you cut them into medium florets. We need them big enough to handle the smashing, but small enough to actually char nicely. And here is one of my oldest home-cook secrets: after blanching and chilling, you absolutely must pat them completely dry with towels. Every drop of water is the enemy of crispness, so put some elbow grease into that drying step!
Step-by-Step Guide: How to Make Smashed Broccoli
Now for the fun part! Seriously, making this **smashed broccoli** is almost as satisfying as eating it. It moves fast once you get going, so have everything ready. We skip a lot of the long roasting times other recipes use because we are cheating a bit by blanching first. Don’t worry, I’ll walk you through exactly what to do so you get that perfect crispness every time. This entire process takes less than 35 minutes, making it one of my favorite easy vegetable side dishes for busy weeknights.
Prep Work: Blanching and Drying for Perfect Smashed Broccoli
First things first: preheat that oven to 425 degrees Fahrenheit. Set up a big baking sheet with parchment paper—this keeps cleanup a breeze. Next, boil a large pot of salted water. Drop your broccoli florets in and let them blanch for exactly two minutes. Two minutes! If you let them go longer, you’re heading toward mush, not crispness. Immediately, scoop them out and plunge them right into a bowl filled with ice water. This stops the cooking instantly! Once they cool, drain them really well, and then you must pat them until they are as dry as possible; I use a whole stack of paper towels here. This drying step is crucial for getting that beautiful surface texture.
Smashing and Coating the Broccoli
Lay your dried florets on the ready baking sheet. Now, feel free to channel your inner stress reliever! Grab the bottom of a sturdy drinking glass or a heavy spatula and gently press down on each floret. You want to flatten them so they expose a nice, wide surface area for roasting, but please, don’t crush them into little green paste patties! Next, we make the flavor coating. Whisk together your olive oil, melted butter, minced garlic, garlic powder, salt, and pepper. Drizzle this magical **garlic butter broccoli** mixture all over your flattened florets and gently toss them right on the pan to make sure every little edge is coated.
The Roasting Process for Crispy Smashed Broccoli
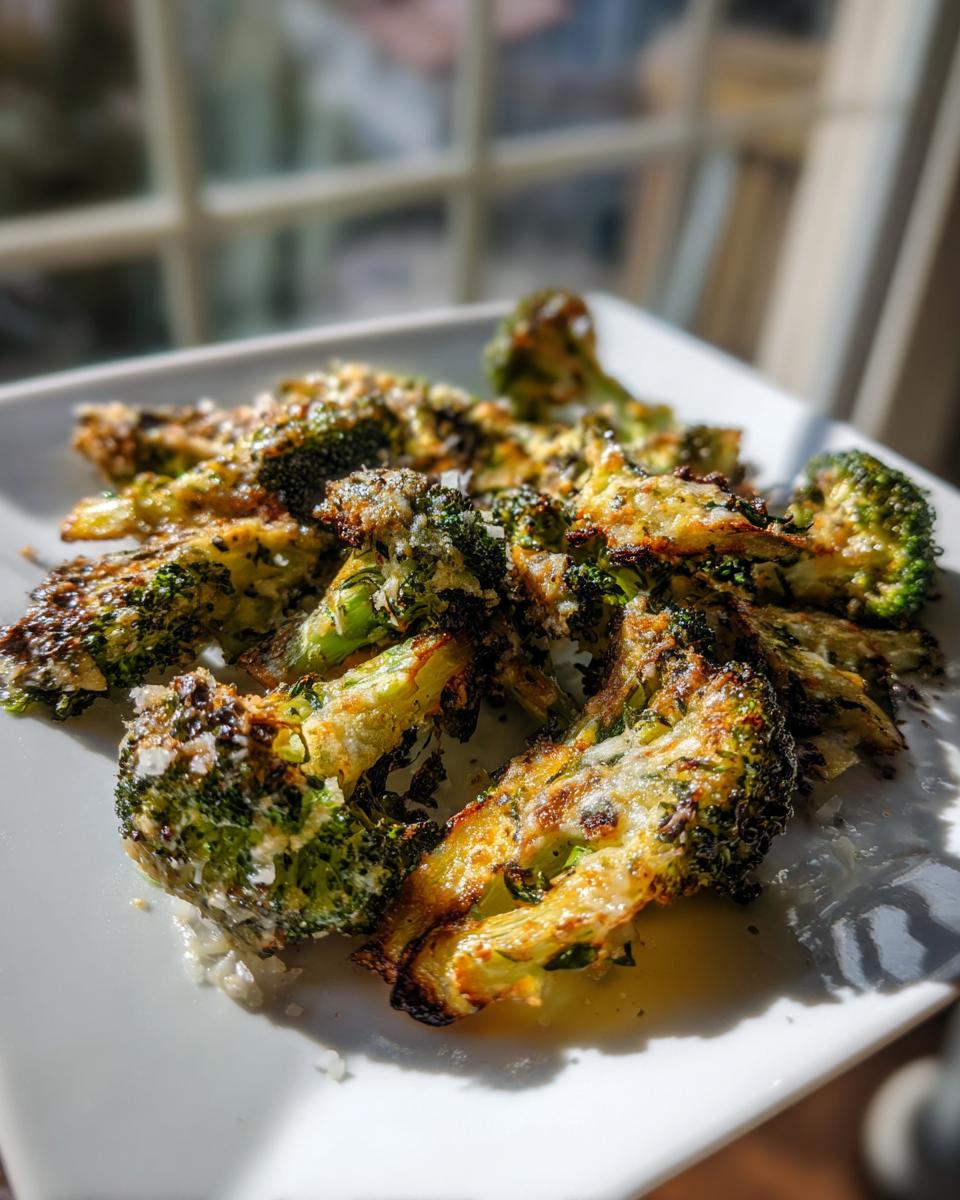
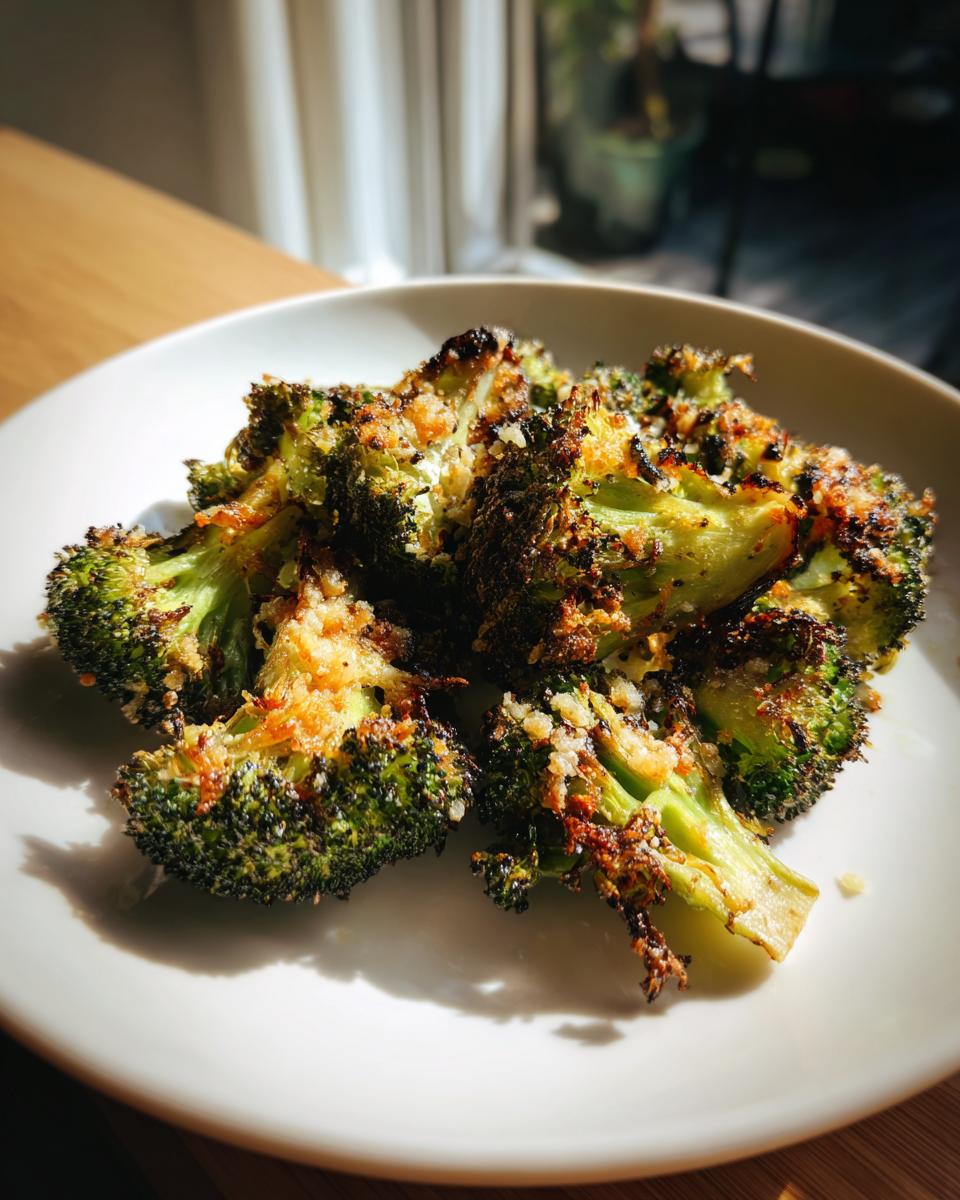
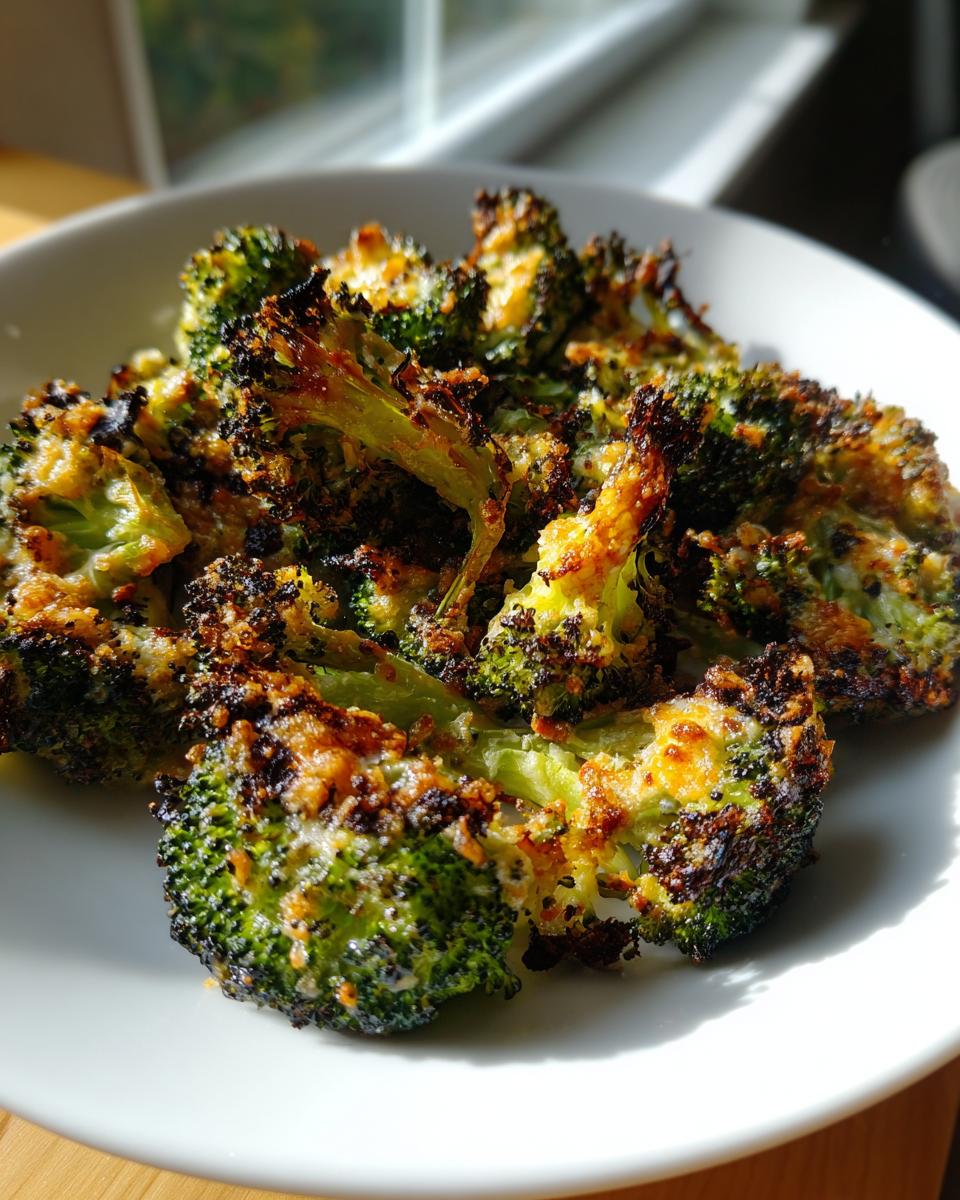
Pop that pan into your preheated 425°F oven for just 15 minutes without any cheese on top. You’ll notice the edges starting to brown nicely. When that time is up, pull the tray out. Now, quickly sprinkle that grated Parmesan cheese evenly over the top of everything. The sugar in the cheese will help it brown beautifully without burning the greens underneath. Put the pan back in for another 5 to 8 minutes. You’re waiting until the cheese is golden and those edges of the **crispy smashed broccoli** are dark brown and absolutely begging to be eaten!
Tips for Perfect Oven Roasted Smashed Broccoli
We’ve covered the how-to, but let’s talk about troubleshooting, because even the best techniques can go sideways if we’re not careful. Achieving that perfect brittle texture on the outside of your **smashed broccoli** is really just a battle against moisture, plain and simple. If you follow the blanching and ice bath steps, you are already leagues ahead of 90% of people trying this for the first time!
Avoiding Soggy Smashed Broccoli
I cannot stress this enough: dry those florets! If they are even slightly damp when they hit that hot baking sheet, they will steam instead of roast, and you end up with mushy bottoms. But there is another trick for maximum crispness: don’t crowd the pan! If your florets are piled on top of each other underneath the broiler, they trap moisture. You might need two sheets if your broccoli heads were huge. I always use my oven roasted broccoli recipe trick here: ensure there’s space between every single smashed piece so the hot air can circulate and crisp up those lovely edges. That separation is how we win the war against sogginess!
Ingredient Substitutions for Smashed Broccoli
Sometimes we’re missing an ingredient, or maybe a family member decided they are giving up dairy this week—life happens! The great thing about this recipe is that it’s incredibly flexible. We can easily tweak the coating for whatever your pantry demands, while still keeping the satisfying crunch of the **smashed broccoli** intact. I’ve experimented with this a ton while trying to find the quickest low carb vegetable recipe that still tastes amazing.
Making This a Low Carb Vegetable Recipe
If you’re strictly watching carbs, the Parmesan is usually fine in small amounts, but skipping it altogether is the easiest route. For that cheesy flavor, nutritional yeast is your absolute best friend! It gives a nutty, savory kick without the dairy. Also, if you’re out of butter, just use a richer olive oil instead. The main thing to remember when tailoring this recipe is that the texture comes from the smashing and the high heat, not the specific fat you use in the coating. Butter adds richness, but oil ensures that crispy outside layer remains intact for your **low carb vegetable recipe**!
Serving Suggestions for Your Crispy Broccoli Side Dish
Part of my mission here is making sure you have a complete, delicious meal planned with minimal stress. This cheesy, garlicky preparation is a fantastic, versatile addition to anyone’s rotation of easy vegetable side dishes. Because the flavor is so robust—that salty Parmesan really sings—it holds up beautifully next to almost any protein you throw at it.
Pairing with Main Courses
For a classic American dinner, this roasted green veggie pairs perfectly with simple grilled chicken breasts or flaky baked salmon. If you’re making pasta, skip the standard roasted veggies and put this on the plate instead. Honestly, it’s one of my favorite healthy dinner ideas side dishes when we have spaghetti or ravioli because the crunch really cuts through the sauce richness. It’s a winner every time!
Storage and Reheating the Smashed Broccoli
I know you’ll want leftovers, because this **smashed broccoli** is seriously addictive, but holding onto that crispness can be tough. If you have any left, the best thing you can do is let it cool completely on the baking sheet before bagging it up later. Never put warm, crispy vegetables into a sealed container—that’s just creating steam, and we worked so hard avoiding sogginess!
When you’re ready to reheat it, please, for the love of crunch, skip the microwave! A quick zap heats it up but totally ruins that beautiful texture we worked for. For the best results with your leftovers, pop the **smashed broccoli** onto a clean sheet pan in a 375°F oven for about 5 minutes. If you have an air fryer, even better—just 3 minutes at the same temperature will bring those edges right back to life!
Frequently Asked Questions About Smashed Broccoli
I know you might have a few lingering questions before you dive into making this incredible vegetable side dish. It’s a bit different from how most people cook broccoli, so I wanted to tackle the most common concerns right here. Getting the prep just right ensures you get that perfect crunch every single time you prepare **smashed broccoli**.
Can I use frozen broccoli for smashed broccoli?
Oh gosh, please don’t try this with frozen broccoli! I’m shaking my head just thinking about it. Frozen broccoli retains so much water, and when you blanch and smash it, you’re just going to end up with a bowl of greenish soup by the time it hits the oven. We need those florets completely dry for crisping, so always stick to fresh heads for the **smashed broccoli recipe**.
What temperature is best for oven roasted broccoli recipe?
For any **oven roasted broccoli recipe**, especially when you’re trying to achieve deep, delicious crispness, you need high heat. We set the oven to 425°F (220°C). This high temperature is what rapidly evaporates any residual moisture and helps caramelize those edges quickly before the inside turns soft. It’s the key to making this an amazing **crispy broccoli side dish**.
How do I make this a cheesy broccoli recipe without Parmesan?
That’s totally doable! If you need a swap or whether you’re looking for a dairy-free option, switch that Parmesan for nutritional yeast. It imparts a beautiful, nutty, savory flavor that works surprisingly well with the garlic butter. If you still want dairy but don’t have Parmesan, sharp Pecorino Romano is a bit saltier but works wonderfully in this cheesy broccoli recipe style. We also have some other fun quick healthy side dishes ideas on the blog if you want more inspiration!
Share Your Weeknight Vegetable Side Creation
Now that you’ve conquered the best way to prepare broccoli—yes, this crispy preparation is the best!—I really want to hear all about it. Look, the whole reason The YumMagnet Recipe Box exists is to share practical victories from real kitchens, and that means I need your feedback!
Did you smash them hard enough? Did your kids finally agree that this was a winner for your rotation of **smashed broccoli**? When you made this, did you use it with salmon or chicken? I want to know everything! Please leave a rating right down below and drop all your comments in the box. Tell me what worked, what you changed, and how this ultra-crispy side dish helped simplify your weeknight dinner.
If you snapped a great picture of your golden, cheesy creation, feel free to send it over through the contact page. Seeing your success stories is what keeps me experimenting and sharing simple, delicious food that brings everyone to the table. Happy smashing!
PrintCrispy Oven-Roasted Smashed Broccoli with Garlic Parmesan

Make this easy, flavorful smashed broccoli side dish. Roasting after smashing creates crispy edges and a tender center, coated in garlic butter and Parmesan cheese. It is a quick, healthy dinner idea.
- Prep Time: 10 min
- Cook Time: 23 min
- Total Time: 33 min
- Yield: 4 servings 1x
- Category: Side Dish
- Method: Oven Roasting
- Cuisine: American
- Diet: Low Fat
Ingredients
- 2 large heads of broccoli, cut into medium florets
- 3 tablespoons olive oil
- 2 tablespoons unsalted butter, melted
- 3 cloves garlic, minced
- 1/2 teaspoon garlic powder
- 1/4 teaspoon salt
- 1/4 teaspoon black pepper
- 1/2 cup grated Parmesan cheese
Instructions
- Preheat your oven to 425 degrees Fahrenheit (220 degrees Celsius). Line a large baking sheet with parchment paper.
- Bring a large pot of salted water to a boil. Add the broccoli florets and blanch for 2 minutes. Immediately drain the broccoli and plunge it into an ice bath to stop the cooking. Drain well and pat the florets very dry with paper towels.
- Place the dried broccoli florets on the prepared baking sheet. Use the bottom of a glass or a sturdy spatula to gently smash each floret until it is flattened, exposing more surface area. Do not crush them completely into mush.
- In a small bowl, whisk together the olive oil, melted butter, minced garlic, garlic powder, salt, and pepper.
- Drizzle the garlic butter mixture evenly over the smashed broccoli on the baking sheet. Toss gently to coat.
- Roast for 15 minutes.
- Remove the baking sheet from the oven. Sprinkle the grated Parmesan cheese evenly over the broccoli.
- Return the pan to the oven and roast for another 5 to 8 minutes, or until the edges are crispy and the cheese is golden brown.
- Serve this crispy broccoli side dish immediately.
Notes
- Drying the broccoli thoroughly after blanching is key to achieving maximum crispness.
- For a low carb vegetable recipe, skip the butter and use only olive oil.
- If you prefer a stronger garlic flavor, increase the minced garlic to 4 cloves.
Nutrition
- Serving Size: 1 serving
- Calories: 185
- Sugar: 3
- Sodium: 280
- Fat: 13
- Saturated Fat: 5
- Unsaturated Fat: 8
- Trans Fat: 0
- Carbohydrates: 11
- Fiber: 4
- Protein: 8
- Cholesterol: 15