
There’s just something magical about a potato that’s been roasted slowly until it’s almost exploding out of its skin, right? It smells like comfort, like a Saturday night dinner we all deserve. When I started The YumMagnet, my whole mission was taking those treasured, time-intensive recipes from my family’s kitchen and making them fit into your incredibly busy schedule. And nothing is more essential than perfecting the humble potato. Trust me when I say that once you try this method, you’ll never go back. We unlock the secret to achieving the best baked sweet potatoes: an interior that melts like butter and skin that actually gets nice and crisp. It’s simple science for major comfort food! If you want to read more about why we prioritize practical, real-life cooking here, you can check out our story.
- Why You Will Make These Baked Sweet Potatoes Every Time
- Gathering Ingredients for Easy Baked Sweet Potatoes
- How to Bake Sweet Potatoes Perfectly: The Foolproof Oven Method
- Expert Tips for Fluffy Baked Sweet Potatoes Recipe Success
- Serving Suggestions: Flavorful Sweet Potato Topping Ideas
- Storage and Reheating for Sweet Potato Meal Prep
- Frequently Asked Questions About Simple Dinner Sides
- Nutritional Estimate for This Healthy Baked Vegetables Recipe
- Share Your Perfect Homemade Baked Sweet Potatoes
Why You Will Make These Baked Sweet Potatoes Every Time
I’ve tested so many ways to cook these orange gems, and I keep coming back to this foolproof technique. Why mess with perfection when it comes to a truly fluffy baked sweet potatoes recipe?
- The Skin Secret: We ditch the foil! Placing the potatoes directly on the rack ensures you get those deeply caramelized, slightly crackly, crispy skin sweet potatoes every single time. No more soggy bottoms, I promise!
- Zero Fuss Prep: Seriously, it takes about three minutes, tops. Oil them, salt them, poke them. Done. This is honestly one of the easiest simple dinner sides you can rely on.
- Natural Sweetness Amplified: That high baking temperature works magic, concentrating the natural sugars in the potato. They come out tasting naturally sweet without needing a ton of added brown sugar or butter inside.
- Perfect Texture Guaranteed: Because we prick them properly to let the steam escape, the insides cook evenly and turn incredibly airy and fluffy—never gummy or dense.
- Amazing for Meal Prep: Bake a batch on Sunday, and you have the base for healthy meals all week long. They reheat like a dream!
Gathering Ingredients for Easy Baked Sweet Potatoes
This is where simplicity shines! Honestly, the base recipe for our baked sweet potatoes is almost scandalous in how few things you need. This is what I mean by a minimal ingredient sweet potato recipe that delivers maximum flavor. No fancy spices needed on the outside—just good potatoes and a little bit of fat to coax out that crispy skin.
Essential Components for Baking
Make sure you’re starting with quality potatoes, because when you only use a few ingredients, each one counts! Grab these items before you even think about turning on the oven.
- Medium Sweet Potatoes: You’ll want about four of them, aiming for medium size—roughly 8 to 10 ounces each. Smaller ones cook fast, and huge ones take forever, so stick to medium for the best timing.
- Olive Oil: Just a tablespoon is all it takes. This isn’t about deep frying; it’s just enough to help the skin brown nicely and grab onto the salt.
- Coarse Salt: I specify coarse salt because regular table salt dissolves too quickly and can make the skin taste overly salty in spots. You want that lovely crunch when you bite into the skin!
- Black Pepper: Freshly ground is always best if you have it. A little bit of bite balances the intense sweetness, which is so good before you add any sugary toppings later.
Pro Tip: After you scrub them clean, dry them off completely. I mean *completely* dry. Any lingering moisture is the enemy of a crispy exterior!
How to Bake Sweet Potatoes Perfectly: The Foolproof Oven Method
Okay, let’s get into the actual baking process. This is where we separate the perfectly tender, naturally sweet baked sweet potatoes from the ones that end up a little steamed and sad. My goal is always that beautiful contrast: skin that’s almost roasted and an inside that is light as air. Following these steps ensures you nail that perfect oven baked sweet potatoes time ratio every time.
Preheating and Prep for Crispy Skin Sweet Potatoes
First things first, we need high heat, which is key to making that skin crisp up instead of turn rubbery. Crank that oven up to 400 degrees Fahrenheit (about 200 Celsius). Don’t skimp on this preheating time; we need it roaring hot!
Next, take your clean, dry potatoes. I cannot stress being dry enough—moisture equals steam, and steam means no crispiness. Once they are bone dry, grab your oil and rub it all over every inch of the skin. Make sure the oil is evenly coated, and then dust on that salt and pepper. Think of the oil as the glue holding your seasoning right where you want it next to the skin.
Now for the part that trips people up: the rack! You *must* put the potatoes directly onto the middle oven rack. If you put them on a sheet pan or, heaven forbid, cover them in foil, you trap all that wonderful steam underneath. That steam steams the skin instead of roasting it. We want direct heat exposure for that beautiful caramelization.
Baking Time and Testing Doneness for Oven Baked Sweet Potatoes Time
Once they are nestled directly on that rack, they need to bake. For medium-sized potatoes, you’re looking at anywhere from 45 to 60 minutes. Seriously, you have to start checking around the 45-minute mark because no two potatoes are exactly the same size, right?
How do you know they’re done? Don’t rely just on a timer! First, press them gently with your oven mitts—they should feel somewhat soft but still firm. If they feel mushy or collapse, you’ve gone too far! The second indicator, which I always use, is looking at the skin. It should be slightly crinkled and shiny, showing that it’s really cooked down.
The final test, the one my parents always made us do, is the fork test. Slide a sharp knife or a fork right into the center. If it goes in with almost no resistance and feels light and fluffy inside, you’re golden! If it feels like you have to push hard, crank that oven up another 10 degrees and give them another 5 to 10 minutes. This is why knowing your oven baked sweet potatoes time is more about feel than exact minutes.
You can grab the full terms of use for The YumMagnet right here if you’re curious about how we handle recipe testing and publishing: our official terms.
Finishing and Fluffing the Interior
When they pass the test, carefully bring them out. Let them hang out on the counter for about five minutes—they’re incredibly hot right out of the oven! This slight cool-down makes them easy to handle.
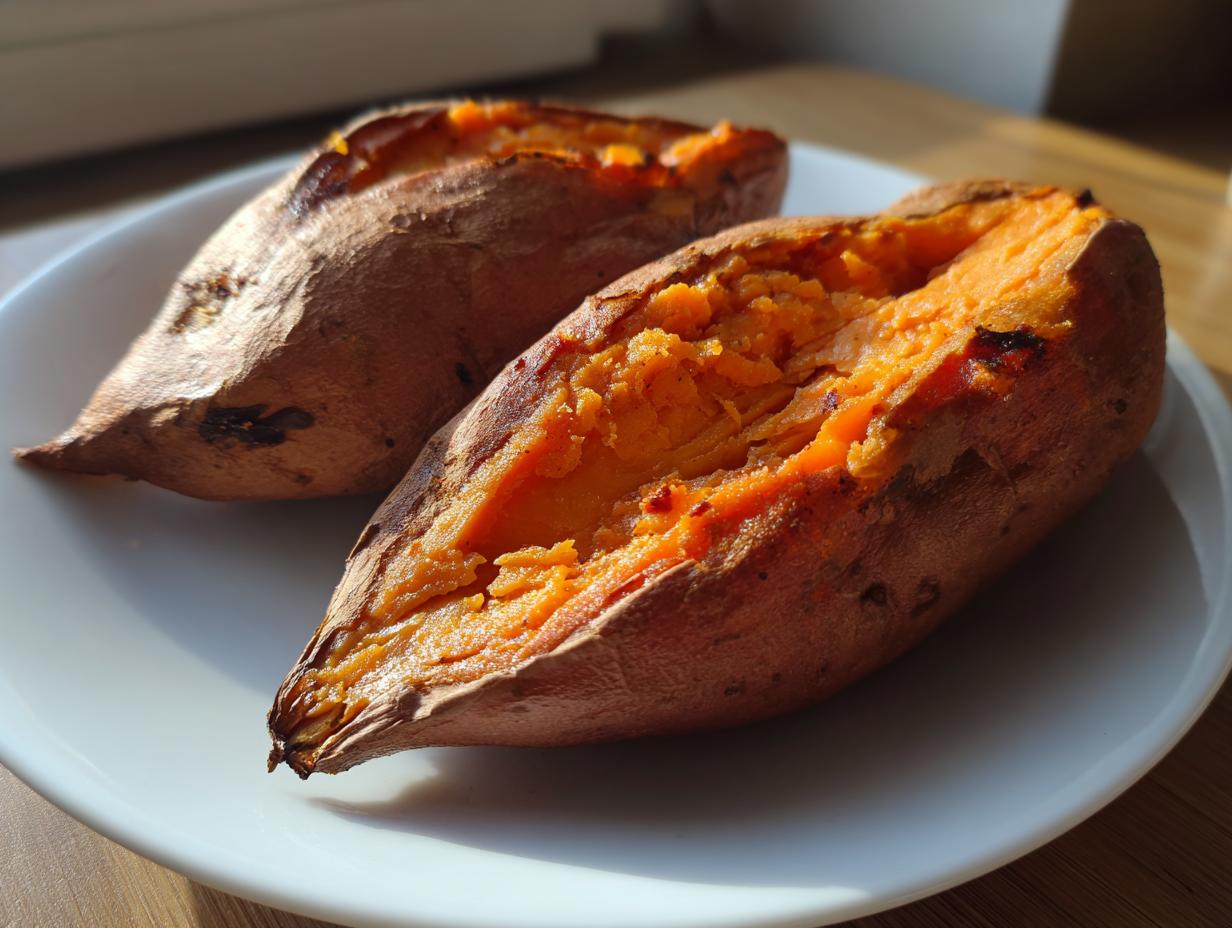
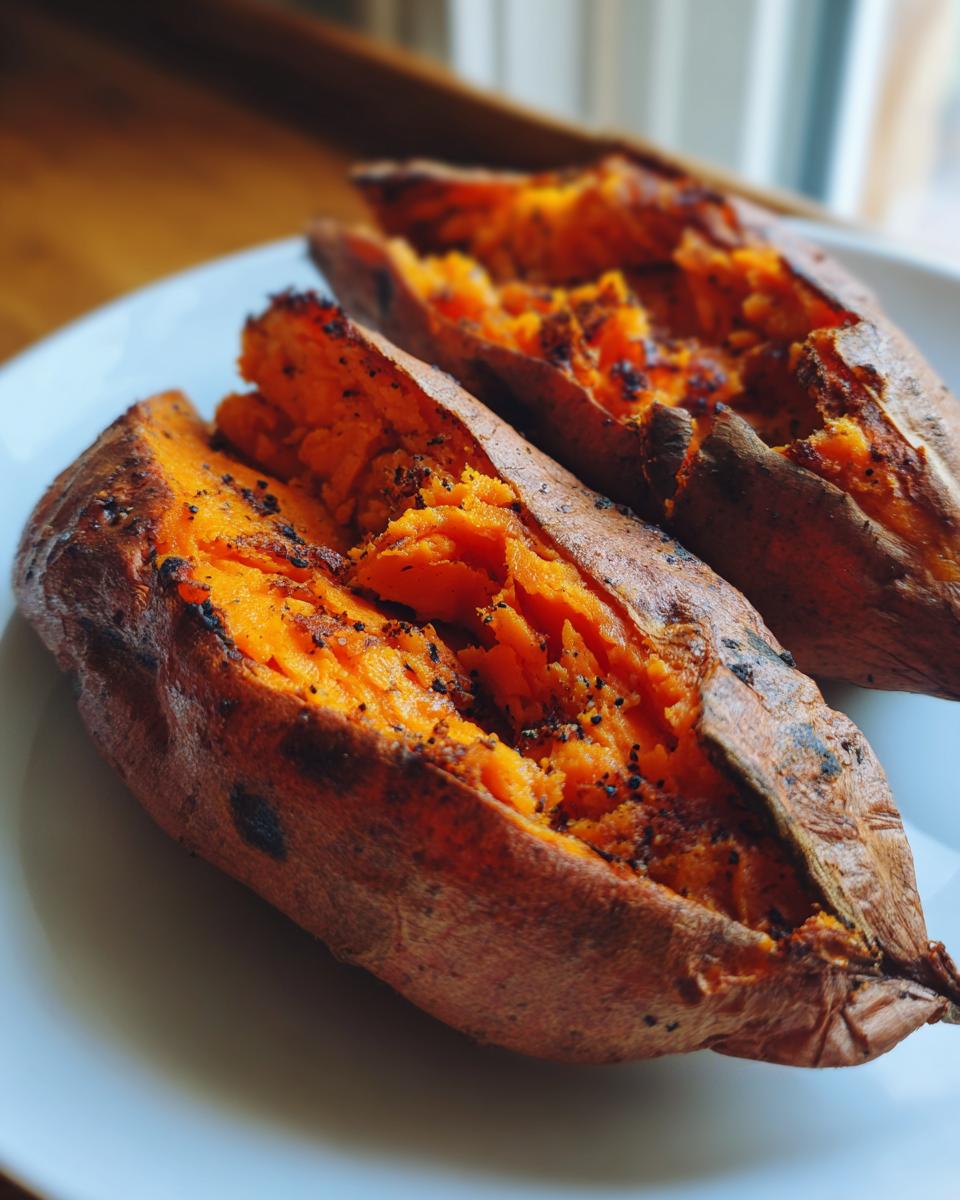
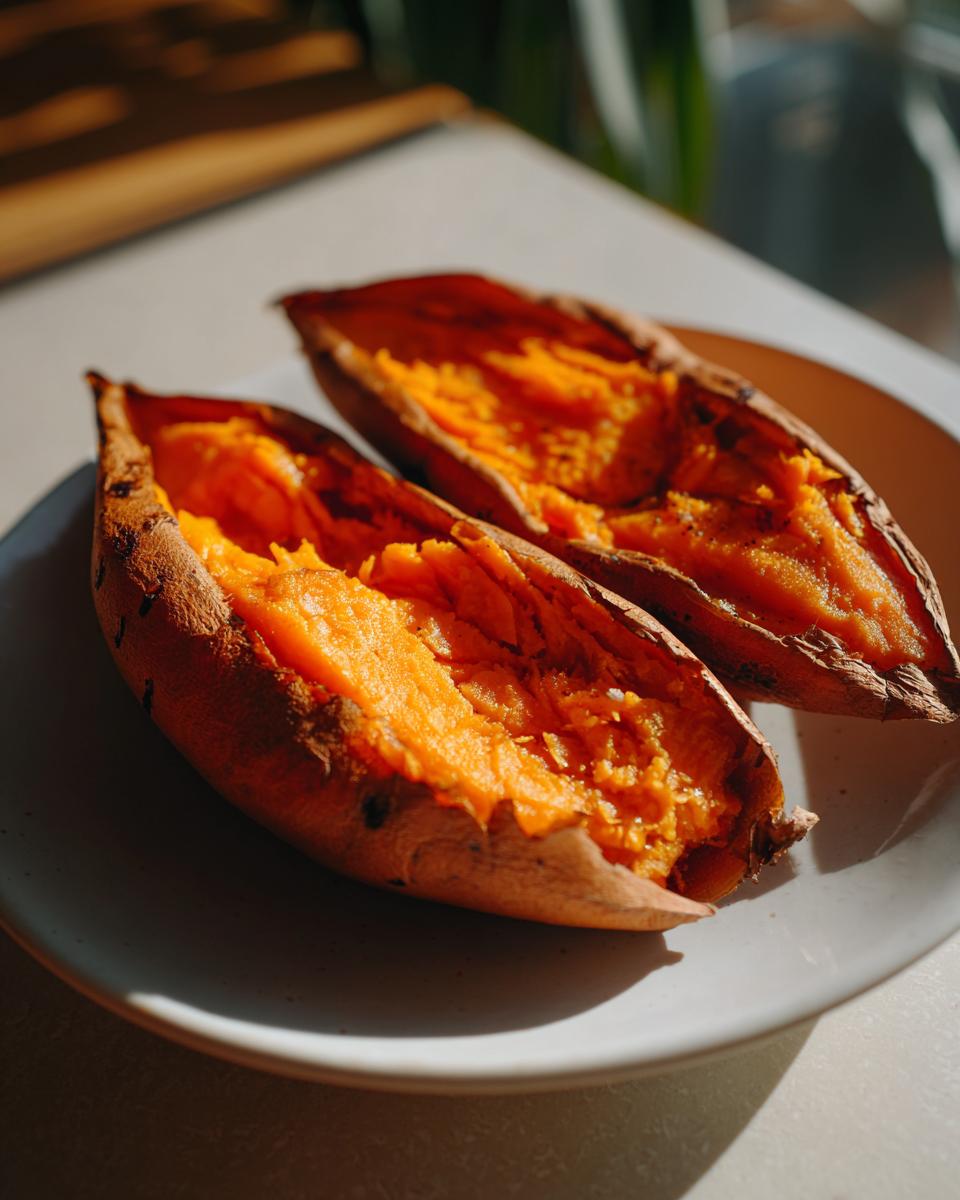
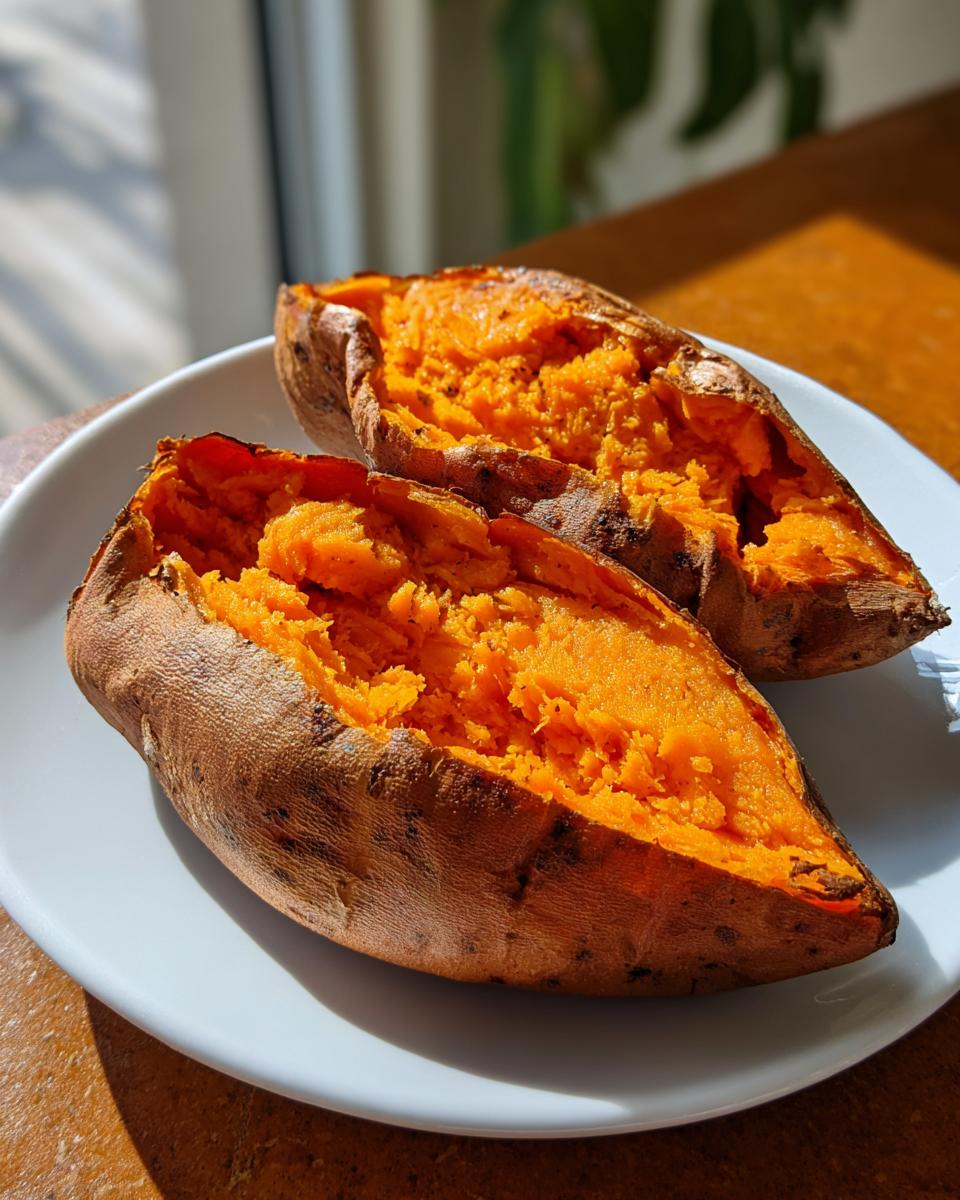
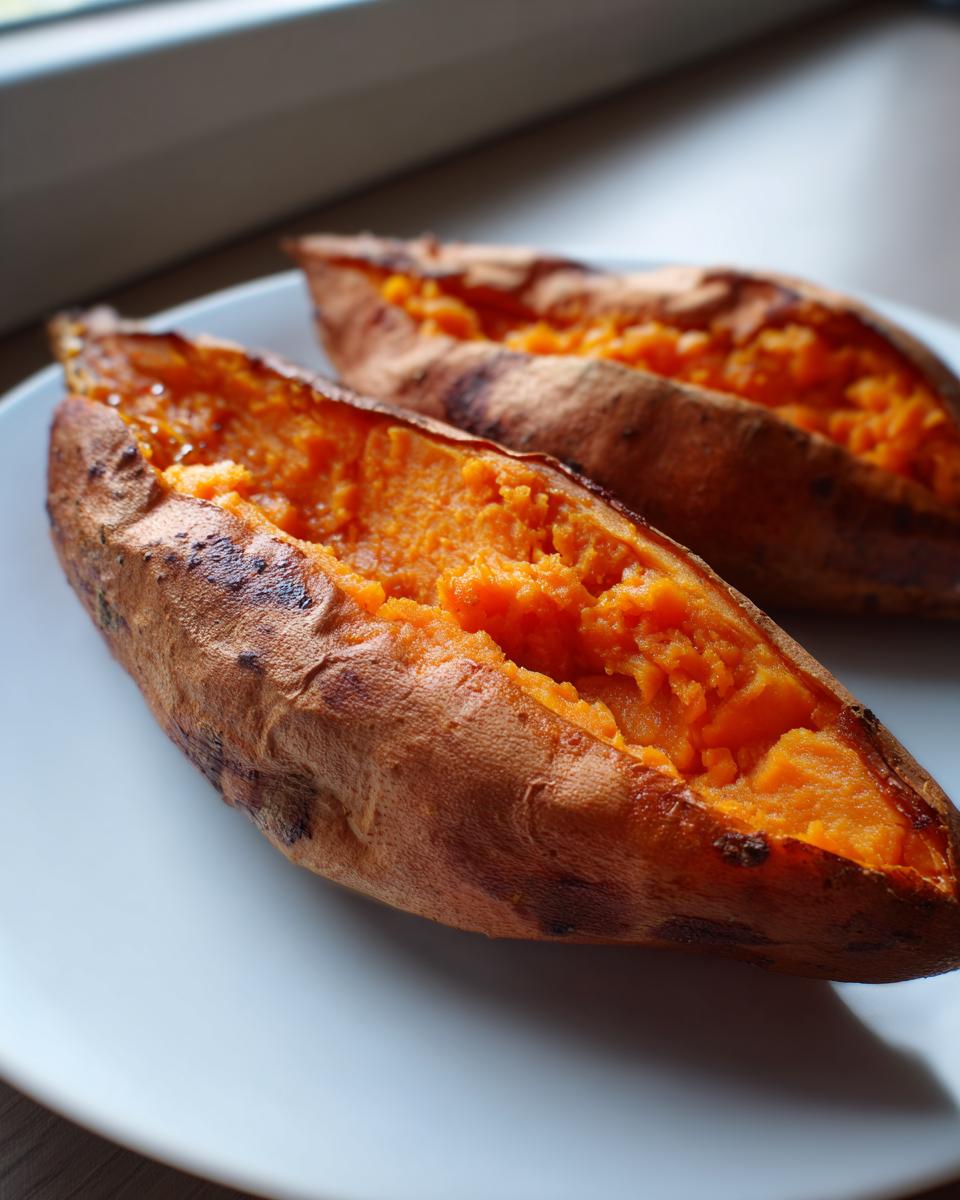
Take a sharp paring knife and slice each one longways, right down the center. Don’t cut all the way through! Then, the fun part: grab each end and gently squeeze inward. Watch that beautiful, steamy, fluffy interior just pop up and wait for butter! It’s seriously the best part of making baked sweet potatoes.
Expert Tips for Fluffy Baked Sweet Potatoes Recipe Success
I’ve learned a few things over the years about timing and technique—mostly through trial and error, and sometimes by burning a few edges! These tips are the little nuggets of advice I wish someone had handed me when I first tried making fluffy baked sweet potatoes without ending up with a dense mess.
Since we already talked about ditching the foil to get that perfect skin, here’s another structural tip that makes a big difference:
- Go Naked on the Rack: I mentioned it briefly, but let’s really drive this home. If you use a baking sheet, the bottom steams because the moisture has nowhere to go. Don’t cover them with foil for moisture, either! Placing the seasoned potatoes directly onto the middle rack gives you total convection cooking. It’s the secret to making them truly crisp on the outside while staying soft inside.
- The Flavor Swap Trick: If you’re leaning more towards the sweet side—maybe you hate salt on your potatoes, or you’re saving them for a breakfast side—try this simple trade! Skip the salt and pepper entirely. Instead, mix a little melted butter with cinnamon until it’s runny, and rub that mixture all over the skin before baking. Wow, they smell incredible baking, and it really enhances that natural sweetness.
- Bake Ahead for Busy Weeks: This is a lifesaver, especially if you’re planning a big holiday meal or just need grab-and-go lunches. Bake the potatoes following the recipe above until they are totally done. Let them cool completely, then store them wrapped loosely in the fridge. They hold up beautifully for about four days. When you need one, just zap it in the microwave for a minute to warm through, or pop it into a 300-degree oven for ten minutes if you want to bring back some of that crispy skin texture.
- Considering Twice Baked: If you find yourself with extras, or you just want a real showstopper side dish, use the baked potato as your base for twice baked sweet potatoes. Bake them until tender, scoop the fluffy flesh out, mix it with whatever delicious things you want—maybe some pecans and brown sugar?—and spoon that mixture right back into the skins. Pop those filled skins back in the oven for about 10 minutes until the edges are set and slightly browned. Instant upgrade!
Serving Suggestions: Flavorful Sweet Potato Topping Ideas
You’ve got your perfectly fluffy baked sweet potatoes ready to go—now what? This is where you get to turn a simple, healthy baked vegetable into the star of the plate! I always think of my baked sweet potatoes as the perfect blank canvas. They pair beautifully with almost anything, which is why they are my go-to when I need a simple dinner side dish that feels special.
If you’re leaning savory, try piling yours high with things like crumbled feta, chopped fresh cilantro, a dollop of Greek yogurt, and maybe some spicy black beans! These make a fantastic base for a quick vegetarian dinner. For the honey-and-spice lovers out there, you can’t go wrong with a pat of salted butter melting over the top, a sprinkle of cinnamon, and maybe some toasted pecans. That combination is pure fall comfort food heaven, and it’s so easy to pull together!
If you’re looking for more savory inspiration, some folks love taking this base straight to a full dish. You can check out some amazing ideas over at Simply Meat Smoking for ideas on loading up your spuds, they have some great ones!
Transforming into Twice Baked Sweet Potatoes
Want to take this effort from a side dish to a centerpiece? That’s where the twice-baked route comes in! It sounds fancy, but it’s just an extra step. Once your potato is cooked and fluffed, scoop out about halfway of that beautiful interior flesh into a bowl. Leave a sturdy shell behind, of course.
Mix the scooped flesh with whatever makes you happy—maybe some crème fraîche, goat cheese, a little maple syrup, and toasted almonds. Then, spoon that mixture right back into those waiting skins. Pop them back into the oven for just about 10 minutes until they look set and golden on top. Instant upgrade, and they look fancy, even though they really weren’t much extra work!
Storage and Reheating for Sweet Potato Meal Prep
One of the best parts about mastering baked sweet potatoes is that they become your secret weapon for quick lunches or last-minute healthy baked vegetables throughout the week. I hate waste, and luckily, these potatoes store incredibly well if you follow one simple rule: cool them down fast!
After you’ve split them open and fluffed the inside, let them cool completely on the counter, or speed it up slightly in the fridge. Once they are totally cool, wrap each potato tightly in plastic wrap or slide them into an airtight container. They stay fantastic in the refrigerator for about four days.
Now, for reheating—this is where most people mess up their hard work! If you reheat them too fast, they steam, and you lose that beautiful fluffy texture we worked so hard to achieve.
If you’re just warming up a single potato and you want to keep that skin semi-crisp, skip the microwave completely. Just pop it straight into a 300-degree oven. Give it about 10 to 15 minutes. This gentle warming heats it through evenly, and you get that little bit of oven magic back on the skin.
If you’re in a genuine hurry and you aren’t worried about the skin (maybe you plan on mashing it up anyway), the microwave works just fine for 60 to 90 seconds. This method is perfect if you’re doing sweet potato meal prep bowls that you’ll load up with chili or black beans later on. It’s all about balancing speed with texture, depending on how you plan to eat them!
Frequently Asked Questions About Simple Dinner Sides
I know sometimes you just need a quick answer before you dive into the full guide, so I gathered the questions I get most often from readers asking about timing, texture, and how to make these the best simple dinner sides possible!
Why didn’t my sweet potato skin get crispy even though I put it directly on the rack?
Oh, this is usually down to one thing, and it’s the one I harp on about the most: moisture! If the potato wasn’t wiped completely dry before you oiled it, or if you happened to use a slightly smaller oven that runs cooler, the skin might steam instead of crisp. Another potential issue is that your oven temperature might be running low. If you suspect your oven is reading low—which is super common!—you might want to check it with an inexpensive oven thermometer. For crispy skin sweet potatoes, we really need that consistent 400°F.
How much does the oven baked sweet potatoes time change if I use really large potatoes?
That’s a great question about oven baked sweet potatoes time variation! If you have those giant guys that look like small footballs, definitely add at least 15 to 20 minutes to the upper limit of our suggested 60 minutes. The key measurement isn’t time; it’s tenderness. Once your big potato passes the fork test—meaning the fork slides into the center without *any* resistance or feeling dense or gummy—it’s done. If you’re worried about the outside burning before the inside is ready, you can loosely tent the top with foil for the last 15 minutes, but try to avoid it if you can. You can find some great extra deep dive timing advice over at Kitchen Seer if you need more specifics.
Can I use butter instead of olive oil on the skin for a healthier choice?
You absolutely can! Butter gives a lovely, rich flavor that makes them taste decadent, even though they’re still a healthy baked vegetables base. If you use butter, make absolutely sure it’s melted when you rub it on! If you try to rub solid butter on, you end up dragging off bits of skin, and it doesn’t spread evenly. Just use the same amount (about a tablespoon) and then sprinkle your salt and pepper over the melted butter.
I want to make mashed sweet potatoes later. Should I just steam them instead of baking?
Oh, you are thinking ahead for future sweet potato meal prep! While steaming is faster and creates very moist flesh, I still champion baking for mashing. Steamed potatoes have a higher water content and can result in a thinner, soupier mash unless you cook them for a long time uncovered to dry them out. For the best flavor and the thickest, fluffiest texture when you finally mash them, stick to this oven baking method. The natural sugars caramelize slightly, giving your future mash so much more depth!
If you have any more questions about technique or need to reach out to see if we’ve tested a specific substitution, don’t hesitate to check out our contact page!
Nutritional Estimate for This Healthy Baked Vegetables Recipe
I know that for so many of us, especially when we’re focusing on healthy baked vegetables for meal prep or quick dinners, knowing the numbers matters! These sweet potatoes are naturally fantastic, packed with Vitamin A and fiber, but I want to be super clear right up front.
The nutrition information below is based on using just the base ingredients—the potato, olive oil, salt, and pepper—and dividing that equally into four servings. It doesn’t account for any butter, cinnamon, or sugary toppings you might use later on. Also, since I’m a home cook sharing what I’ve learned, these figures are estimates based on the average size of the potatoes.
For precise dietary tracking or medical advice, you should always cross-reference this with professional software, but this gives you a great baseline for these delicious baked sweet potatoes!
- Serving Size: 1 medium potato
- Calories: 180
- Sugar: 13g (Mostly natural fruit sugars!)
- Sodium: 230mg
- Fat: 0.5g
- Saturated Fat: 0.1g
- Carbohydrates: 41g
- Fiber: 6g
- Protein: 4g
If you ever want to review how we manage data and reader information across The YumMagnet, you can check out our official privacy policy here. We take your trust seriously!
Share Your Perfect Homemade Baked Sweet Potatoes
Alright, that’s it! You’ve got the technique, you know how to manage that tricky skin, and you’ve got five ways to load them up if you’re feeling adventurous. Now, the recipe is officially yours!
I truly eat these baked sweet potatoes at least once a week, and I just live for hearing how you guys customize them in your own kitchens. Did you go savory with feta and lime, or did the cinnamon butter win out? Don’t keep the magic to yourself!
Take a minute when you finish that perfect, fluffy potato to drop a rating below. Five stars lets me know I nailed the foolproof method, and honestly, reading your comments about how this simple side dish made your dinner feel special is what keeps me experimenting in my own kitchen!
And if you managed to get a stunning picture of your potatoes sitting on the rack—perfectly golden and steaming—please share it on social media and tag me! I love seeing how The YumMagnet recipes look on your tables. Happy baking, friends!
PrintFoolproof Oven Baked Sweet Potatoes: Crispy Skin and Fluffy Inside

Learn the simple method for achieving perfectly baked sweet potatoes every time. This recipe delivers a naturally sweet, fluffy interior and a slightly caramelized, crisp skin, making it the best simple dinner side dish.
- Prep Time: 5 min
- Cook Time: 55 min
- Total Time: 60 min
- Yield: 4 servings 1x
- Category: Side Dish
- Method: Baking
- Cuisine: American
- Diet: Vegetarian
Ingredients
- 4 medium sweet potatoes (about 8–10 ounces each)
- 1 tablespoon olive oil
- 1 teaspoon coarse salt
- 1/2 teaspoon black pepper
Instructions
- Preheat your oven to 400 degrees Fahrenheit (200 degrees Celsius). This high heat helps achieve the crispy skin.
- Scrub the sweet potatoes thoroughly under running water to remove any dirt. Pat them completely dry with a paper towel. Moisture prevents crisping.
- Prick each sweet potato deeply 5 to 6 times all over using a fork. This allows steam to escape during baking.
- Rub the entire surface of each potato with olive oil. Distribute the coarse salt and pepper evenly over the oiled skins.
- Place the prepared sweet potatoes directly onto the middle oven rack. Do not use a baking sheet or foil, as this traps steam and prevents the skin from crisping.
- Bake for 45 to 60 minutes. The exact time depends on the size of your potatoes. Start checking at 45 minutes.
- The sweet potatoes are done when the skin is slightly wrinkled and firm to the touch, and a knife or fork slides easily into the center.
- Remove from the oven. Let them cool for 5 minutes before slicing them lengthwise down the middle. Gently squeeze the ends to fluff the interior flesh.
- Serve immediately with your favorite toppings.
Notes
- For extra crispy skin, you can bake the potatoes directly on the oven rack for the entire cooking time.
- If you prefer a sweeter flavor, you can skip the salt and pepper and instead rub the potatoes with a small amount of melted butter mixed with cinnamon before baking.
- This method works well for meal prep. Bake the potatoes, let them cool, and store them whole in the refrigerator for up to 4 days. Reheat in the oven or microwave.
- If you are making twice baked sweet potatoes, bake them until tender, scoop out the flesh, mix with your filling ingredients, and return to the skins to bake for an additional 10 minutes.
Nutrition
- Serving Size: 1 medium potato
- Calories: 180
- Sugar: 13
- Sodium: 230
- Fat: 0.5
- Saturated Fat: 0.1
- Unsaturated Fat: 0.4
- Trans Fat: 0
- Carbohydrates: 41
- Fiber: 6
- Protein: 4
- Cholesterol: 0