

The holidays can bring so much joy, but let’s be honest—the pressure to make the side dishes perfect? It’s real! Every year, I hear people stressing about their turkey, but for me, the real star of the show is the stuffing. If the stuffing is dry, the whole meal feels a little flat, right? That’s why I’m sharing what I call The Ultimate Classic Homemade Thanksgiving Stuffing Recipe. This isn’t some trendy new idea; this is the recipe that filled my grandmother’s kitchen in Ohio. Standing on that little stool, learning to balance the savory herbs and moisture was my first real lesson in family cooking. Trust me, once you nail this traditional bread stuffing, you’ll never look back. It’s pure, comforting holiday magic, and it’s way easier than you think!
- Why This Classic Homemade Stuffing is Your Holiday MVP
- Gathering Ingredients for Your Traditional Bread Stuffing
- Foolproof Stuffing Instructions: From Prep to Golden Brown
- Making Ahead Holiday Sides: Preparing Your Stuffing Early
- Understanding Dressing vs Stuffing for Your Holiday Meal
- Serving Suggestions for This Perfect Savory Herb Stuffing
- Storage and Reheating Instructions for Leftover Stuffing
- Frequently Asked Questions About Classic Holiday Dressing
- Estimated Nutritional Data for This Homemade Stuffing
Why This Classic Homemade Stuffing is Your Holiday MVP
Look, you could use the box, but why would you when you can make this incredible stuffing? This recipe delivers that iconic holiday balance that everyone swoons over. I promise, serving this dish makes you instantly look like a culinary star, even if you only spent a little time on it. It’s tradition made easy! When you master this, you’ll be knocking out great sides like my crispy fried chicken recipe.
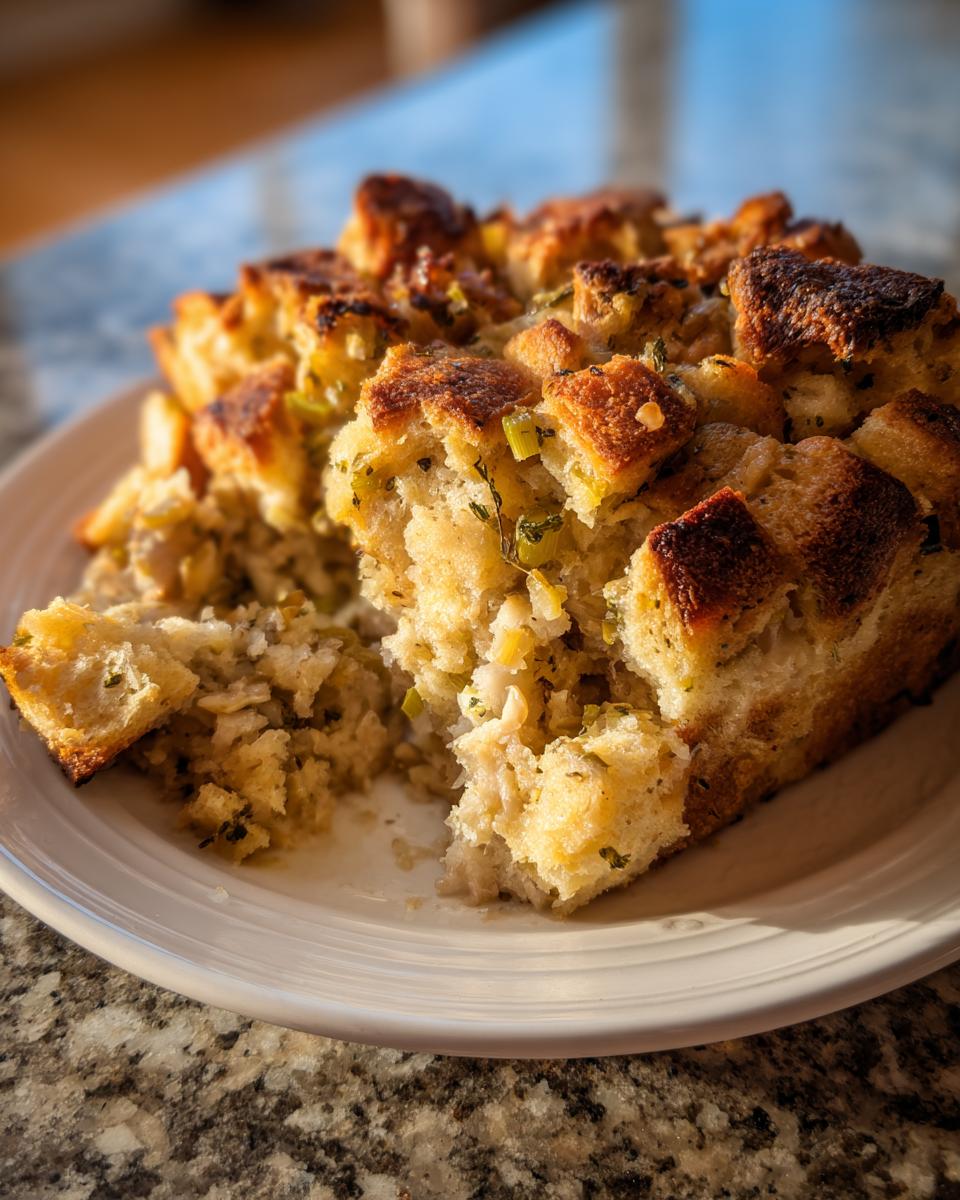
- The absolute best texture: a crusty, golden top layer holding in a tender, steamy center.
- Flavor bomb packed with savory herbs—it smells like Thanksgiving from the moment it hits the oven.
- It’s hearty enough to stand next to the turkey; this isn’t some flimsy side dish.
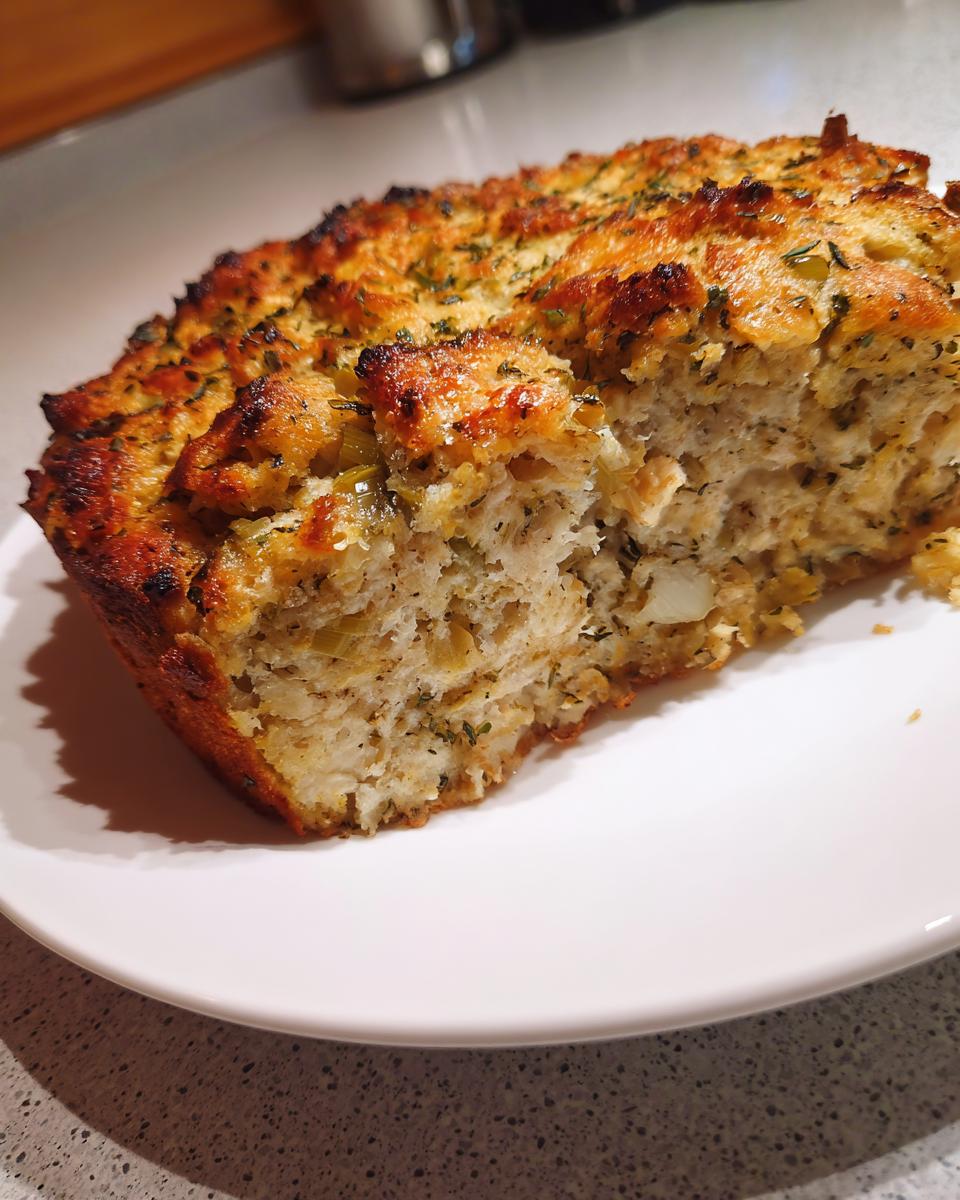
Achieving the Perfect Moist and Crispy Stuffing Texture
The secret to that fantastic texture—what I call perfect moist and crispy stuffing—is all about managing moisture before it even gets near the oven. We dry the bread out just a tiny bit first by toasting it. This makes sure the bread cubes act like tiny sponges—they soak up all that buttery broth without collapsing into mush. It’s a delicate ratio, but once you get it, you’re set for life!
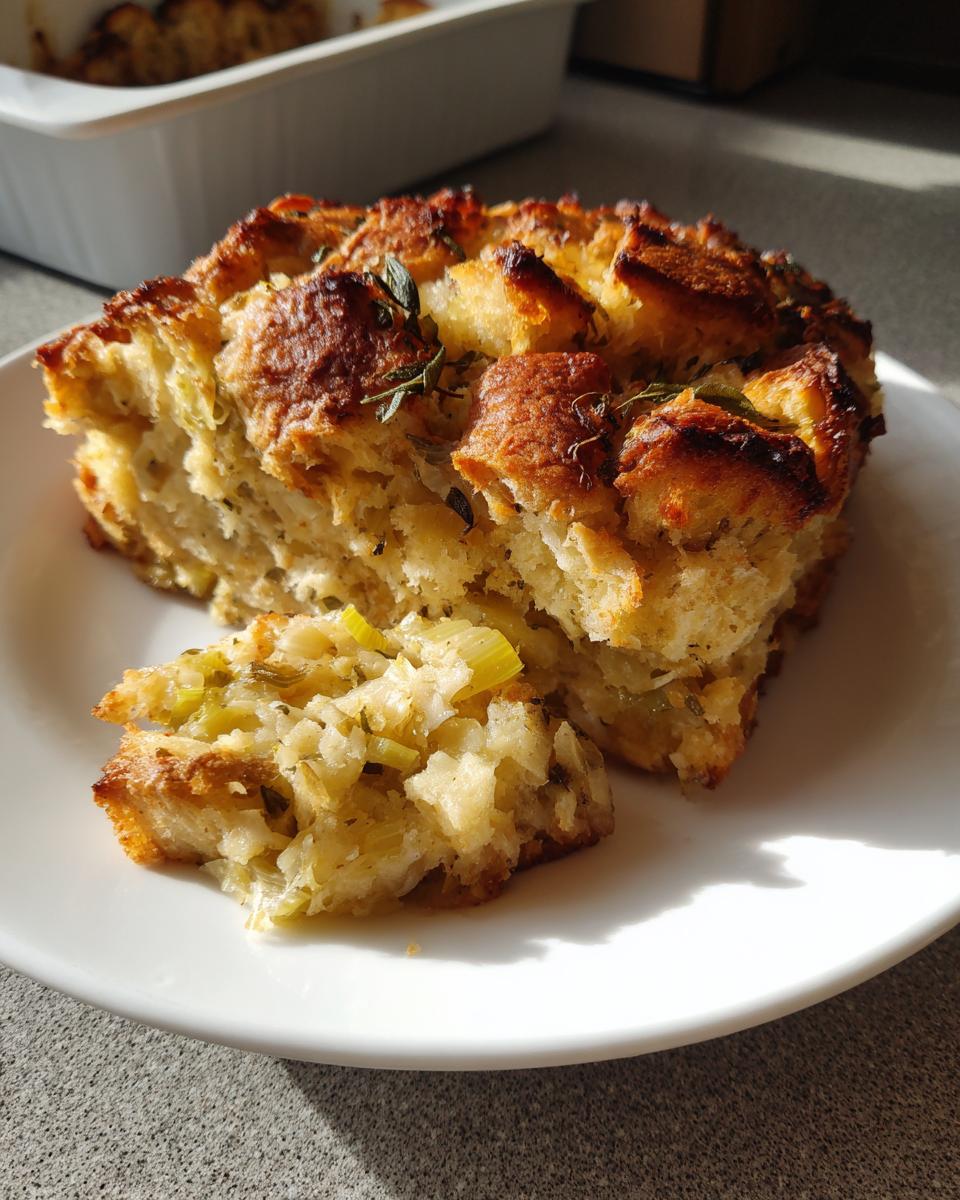
Grandma’s Stuffing Recipe Flavors: Herbs and Aromatics
You can’t fake classic holiday flavor, and that comes straight from the aromatics. These are the core elements of Grandma’s stuffing recipe flavors. Fresh sage is non-negotiable here; it’s earthy and warm. We don’t skimp on the thyme or the sautéed onion and celery base, either. Those veggies cook down in butter first, softening up and releasing their sweetness before they ever touch the bread. It brings such a depth you just can’t get any other way.
Gathering Ingredients for Your Traditional Bread Stuffing
Okay, so for the best stuffing, you absolutely need good components. I’ve listed everything right here, but let me tell you why certain things matter. My philosophy is that simple ingredients prepared well always win. You’ll need about 12 cups of dried bread cubes—use a mix if you can! Sourdough or a slightly stale white bread works wonders because it soaks up the liquid better than fresh stuff. We are building flavor from the ground up with butter, celery, and onion before we even get to the herbs. Don’t rush this base part; it’s what makes the final product sing.
Ingredient Notes and Substitutions for This Stuffing
I know everyone has their own special touches, so let’s talk about tweaks. If you really want that festive pop, throw in some dried cranberries—that’s where my cranberry stuffing ideas come from! If you’re serving a crowd and want something heartier, you can easily brown up half a pound of breakfast sausage and mix it right in with the veggies; those sausage stuffing recipes are amazing too. But for this classic version, stick to the herbs as written, since that’s the key to that traditional taste.
Foolproof Stuffing Instructions: From Prep to Golden Brown
Getting this classic holiday stuffing right is all about following the steps in order. It’s not hard, but you can’t skip the prep work if you want that famous texture. My goal here is to make this the most foolproof stuffing recipe you ever use. First up: get that oven hot! You need to preheat to 350°F (175°C) and make sure your 9×13 dish is buttery. Then comes the most important part for texture—toasting the bread.
The Essential Bread Toasting Step for Perfect Stuffing
Listen closely, because this step is absolutely non-negotiable if you want that great lift and those crispy edges. You need to spread your bread cubes out on a baking sheet and toast them for about 10 to 12 minutes. This dries them out just enough so they can soak up the liquid without turning into paste later on! Seriously, this transforms your stuffing from heavy sludge into something truly spectacular. While that’s happening, you cook your celery and onions in melted butter until they go soft—that’s where the savory foundation is built.
Mixing and Moistening the Stuffing Base
Once your aromatics are fragrant with sage and thyme, toss them gently with your toasted bread cubes. Now, stop! Don’t just dump the liquid in! We need to mix the broth and the eggs in a separate bowl first. Pour that mixture slowly over the bread. The key word here is gently. I mean it! You want to just barely toss everything until the bread is evenly moistened. If you start beating it around, you’ll break down the bread too much, and that’s how you end up with a dense casserole instead of light, fluffy stuffing. Then, transfer it to your dish. Remember, you can bake it now, or cover it up for later. If you’re baking it right away, it goes in for about 35 to 45 minutes until that top layer looks gorgeous and golden brown. If you try to get fancy and overmix, it’s a disaster, but if you keep it light, it’s perfect. You know, much like getting the perfect crust on my potato cakes, it’s all in the gentle handling. If you want to see how other folks ace their stuffing game, you can check out my friends over at Eat With Olivia for a fantastic companion recipe!
Making Ahead Holiday Sides: Preparing Your Stuffing Early
Because the holidays are nuts, right? Seriously, the last thing I want to do on Thanksgiving morning is be frantic over a side dish. That’s why this stuffing recipe is one of my absolute favorites for my holiday meal prep sides list! This recipe is brilliant because it is totally make-ahead friendly.
Here is my trick for keeping pre-holiday stress low: Assemble the entire stuffing mixture exactly as written—bread, veggies, herbs, the whole shebang—but stop before the final bake. Transfer it to your buttered 9×13 dish, cover it tightly with plastic wrap, and pop it in the fridge. It stays perfect for up to 24 hours. That frees up so much counter space!
Now, when you pull that chilled dish out on the big day, don’t panic about the timing. Since the bread is cold, it’s going to take a little longer for the internal temperature to come up. You just need to add about 10 to 15 extra minutes to the baking time I gave you. Keep an eye on the top, though! If it starts to look too dark before the center is hot, just loosely tent a piece of foil over it. This way, you still get that gorgeous, crispy, golden-brown top we love without burning the beautiful herbs.
Understanding Dressing vs Stuffing for Your Holiday Meal
Okay, I know this is a perennial debate every single November, and honestly, it drives my family a little nuts! We call this glorious dish stuffing, but if we’re being super technical, this recipe is actually a dressing. Why the confusion? Well, because I’m aiming for that ultimate holiday flavor, and honestly, the word “stuffing” just feels right when you’re talking about Thanksgiving comfort food.
Here’s the simple difference, and don’t let anyone tell you otherwise! True stuffing is cooked inside the turkey cavity, absorbing all those wonderful, rich drippings. Dressing, on the other hand, is baked separately in a casserole dish, like what we’re doing here. Baking it outside the bird is actually safer and it really helps you achieve that amazing textural goal—you get the crispy edges all over while keeping the inside perfectly moist.
So, while this recipe is technically oven-baked dressing, I call it stuffing because that’s what most people search for, and frankly, it tastes just as delicious cooked separately! We’re sticking with the name for tradition and search relevance, but know you’re baking a superior, evenly cooked dish!
Serving Suggestions for This Perfect Savory Herb Stuffing
This incredible stuffing is so flavorful, it can carry nearly any plate! Obviously, it’s mandatory next to that big bird, but think beyond that. It pairs perfectly with our creamy corn chowder for a hearty vegetarian meal, or it’s fantastic alongside roasted pork loin. Because this is such a rich, comfort food side dish, you don’t need much else! It’s the savory anchor for any holiday spread. A little scoop of mashed potatoes, this herbaceous stuffing, and you are basically done with dinner prep.
Storage and Reheating Instructions for Leftover Stuffing
Don’t you just love having leftover holiday food? That cold stuffing eaten straight from the fridge the next day? Perfection! But if you want to serve it warm without ruining that beautiful texture we worked so hard on, you need a slight strategy.
For storage, put any leftovers into an airtight container and keep them in the refrigerator. This savory dish stays good for about three to four days, tops. You want to make sure it cools down somewhat before you seal it up, just to prevent weird condensation build-up inside the container.
When it comes time to reheat your amazing stuffing, skip the microwave if you can! The microwave makes things steamy, which means you lose that crispy top instantly. For the best results, move the amount you want to eat back into a baking dish. Sprinkle just a tiny bit of chicken broth or even water over the top—maybe a teaspoon or two per serving—then cover it loosely with foil.
Pop it into a hot oven—about 350°F (175°C)—for about 15 to 20 minutes, or until it’s piping hot all the way through. If you are desperate and need it fast, you can use the microwave, but only reheat single servings that way, and maybe stick the warm portion under the broiler for 30 seconds at the very end just to wake up that crispy crust!
Frequently Asked Questions About Classic Holiday Dressing
I get so many questions about this stuffing every year, which just tells me you all care about making the best holiday side dish possible! Here are a few things I hear all the time when people are planning their big meal.
Can I use store-bought dried bread cubes instead of stale bread?
Absolutely! I know finding time to stale your own bread isn’t always realistic. For this Thanksgiving stuffing recipe, using good quality packaged dried bread cubes is totally fine. Just follow that toasting step in the instructions (10-12 minutes at 350°F) to give them a bit of life so they soak up the liquid right. If they are already very dry, you might need a splash less broth, so start small!
What if I want to make a richer version using sausage stuffing recipes?
That’s such a great idea! If you want to upgrade this to a savory sausage variation, it’s simple. Brown about half a pound of your favorite breakfast sausage—maybe mild or sage-flavored—before you sauté the celery and onion. Drain off most of the grease, and then use that seasoned fat to cook your veggies. It adds fantastic depth! If you love sausage in savory dishes, you’d probably adore my sausage gnocchi soup, too!
Is this recipe easy to adapt for gluten-free needs?
It is! You can easily find great gluten-free bread in loaves or as pre-cut cubes now. The key is making sure the gluten-free bread cubes are dried out well during the toasting step, as some GF breads can absorb liquid faster than traditional ones. You might also want to slightly reduce the broth by about 1/4 cup to start, just to ensure you don’t end up with soggy classic holiday dressing.
Why do some people call this dressing and others call it stuffing?
Oh, the eternal question! Technically, it’s dressing when it’s baked outside the bird in a dish like this, and stuffing when it’s cooked inside. Since this recipe gives you the perfect moist and crispy stuffing texture by baking it outside, it’s functionally a dressing. But since “stuffing” is what everyone searches for, we stuck with that! For more great holiday inspiration, check out how my friends at Foodsvita handle their version!
Estimated Nutritional Data for This Homemade Stuffing
Now, I want to be totally upfront here. Since this is made from scratch with real butter and all those savory veggies, it’s definitely richer than the stuff in the box! But when you’re feeding your family the best, you make those little compromises happily. The nutritional breakdown for this amazing stuffing really depends on how much broth you absorb and the exact bread you use.
Please remember, these numbers are just my best guess based on the ingredients I listed and how much liquid the bread typically soaks up. Think of this as a general guide for your holiday meal planning, not a hard science fact. This is for a serving size of about one cup:
- Calories: 320
- Fat: 18 grams (Mostly good fats from butter, don’t skip it!)
- Saturated Fat: 10 grams
- Trans Fat: 0.5 grams
- Cholesterol: 75 mg
- Carbohydrates: 35 grams
- Protein: 7 grams
- Sugar: 3 grams
- Sodium: 450 mg (This is why I always say use low-sodium broth!)
- Fiber: 2 grams
See? Not bad for the most comforting, flavorful savory herb stuffing you’ll ever make! It’s a treat, and that’s what the holidays are all about!
PrintThe Ultimate Classic Homemade Thanksgiving Stuffing Recipe

Make the best homemade stuffing for your holiday feast. This recipe delivers a moist interior and a crispy, golden top using traditional savory herbs.
- Prep Time: 20 min
- Cook Time: 45 min
- Total Time: 65 min
- Yield: 10 servings 1x
- Category: Side Dish
- Method: Baking
- Cuisine: American
- Diet: Vegetarian
Ingredients
- 1 pound dried bread cubes (about 12 cups), preferably a mix of white and sourdough
- 1 cup unsalted butter
- 2 cups chopped celery
- 1 large yellow onion, chopped
- 1 tablespoon fresh sage, finely chopped
- 1 teaspoon dried thyme
- 1 teaspoon dried parsley
- 1 teaspoon salt
- 1/2 teaspoon black pepper
- 2 large eggs, lightly beaten
- 2 cups low-sodium chicken broth
- 1/2 cup dried cranberries (optional, for cranberry stuffing ideas)
Instructions
- Preheat your oven to 350°F (175°C). Lightly butter a 9×13 inch baking dish.
- Spread the dried bread cubes in a single layer on a large baking sheet. Bake for 10-12 minutes until lightly toasted. This step helps achieve the crispy edges.
- While the bread toasts, melt the butter in a large skillet over medium heat. Add the chopped celery and onion. Sauté until softened, about 8-10 minutes.
- Stir in the fresh sage, thyme, parsley, salt, and pepper into the skillet. Cook for 1 minute until fragrant.
- In a very large bowl, combine the toasted bread cubes and the sautéed vegetable mixture. Toss gently to combine.
- In a separate bowl, whisk together the chicken broth and the lightly beaten eggs.
- Pour the egg and broth mixture over the bread mixture. Add the dried cranberries if you are making cranberry stuffing. Toss everything gently until the bread is evenly moistened. Do not overmix.
- Transfer the stuffing mixture to the prepared baking dish. If making ahead, cover and refrigerate at this point.
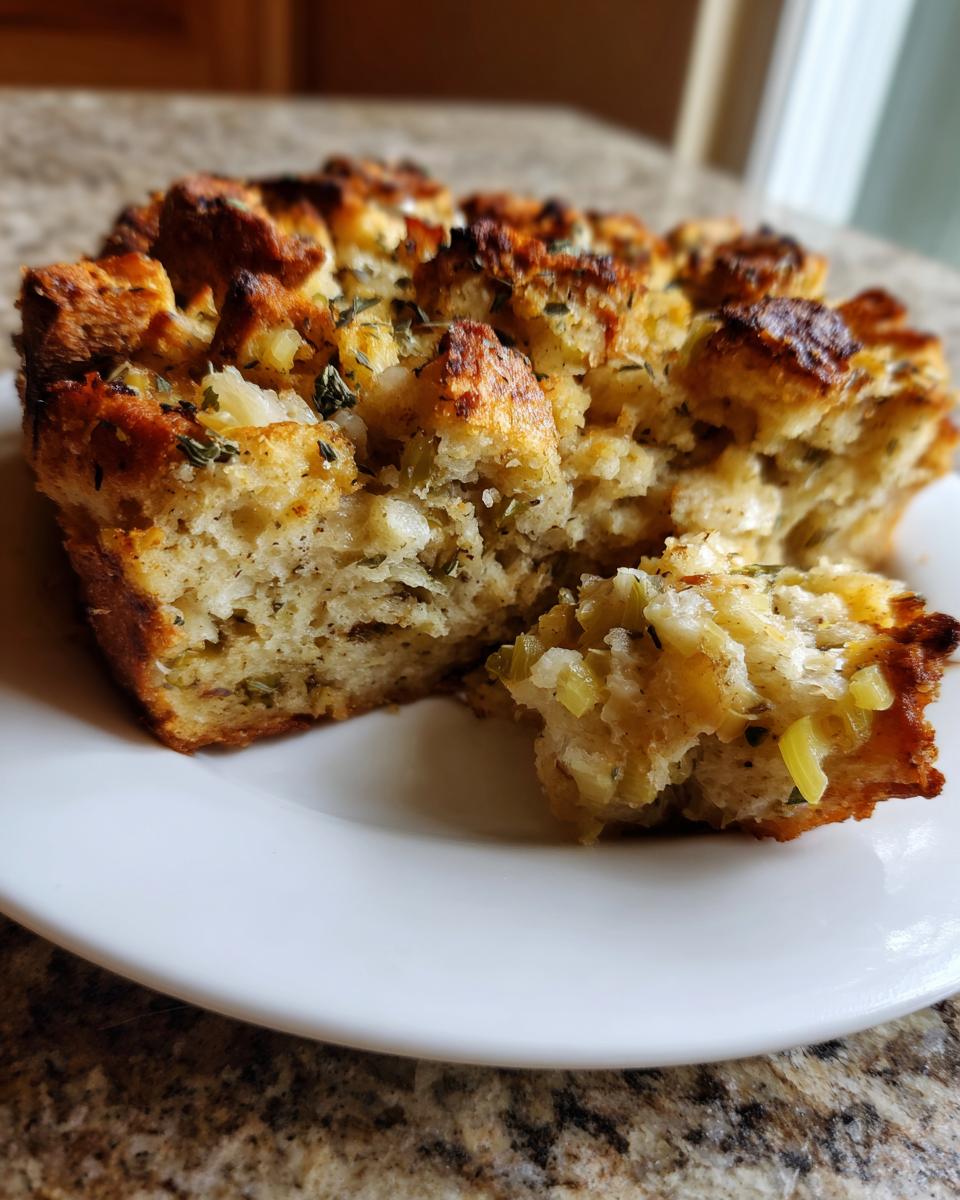
- Bake uncovered for 35-45 minutes, or until the top is golden brown and the center is heated through. If the top browns too quickly, loosely cover it with foil.
- Let the stuffing rest for 10 minutes before serving. This ensures a perfect, moist and crispy stuffing texture.
Notes
- For a richer flavor, substitute half the chicken broth with turkey broth.
- If you prefer sausage stuffing recipes, brown 1/2 pound of breakfast sausage and add it with the celery and onion mixture.
- This recipe is make ahead friendly; assemble completely, cover, and refrigerate up to 24 hours before baking. Add 10-15 minutes to the baking time if baking straight from the refrigerator.
- Use stale bread for the best texture absorption.
Nutrition
- Serving Size: 1 cup
- Calories: 320
- Sugar: 3
- Sodium: 450
- Fat: 18
- Saturated Fat: 10
- Unsaturated Fat: 8
- Trans Fat: 0.5
- Carbohydrates: 35
- Fiber: 2
- Protein: 7
- Cholesterol: 75