
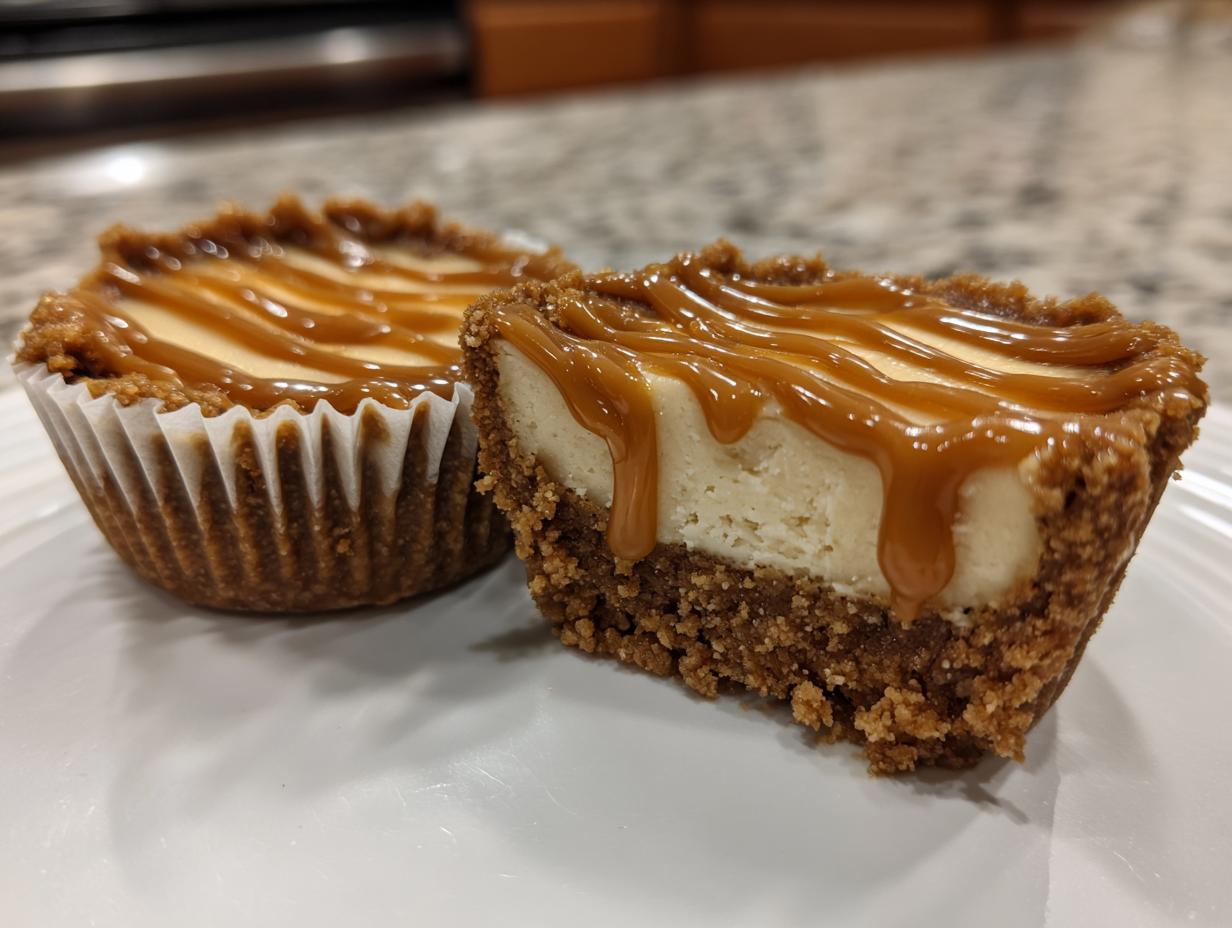
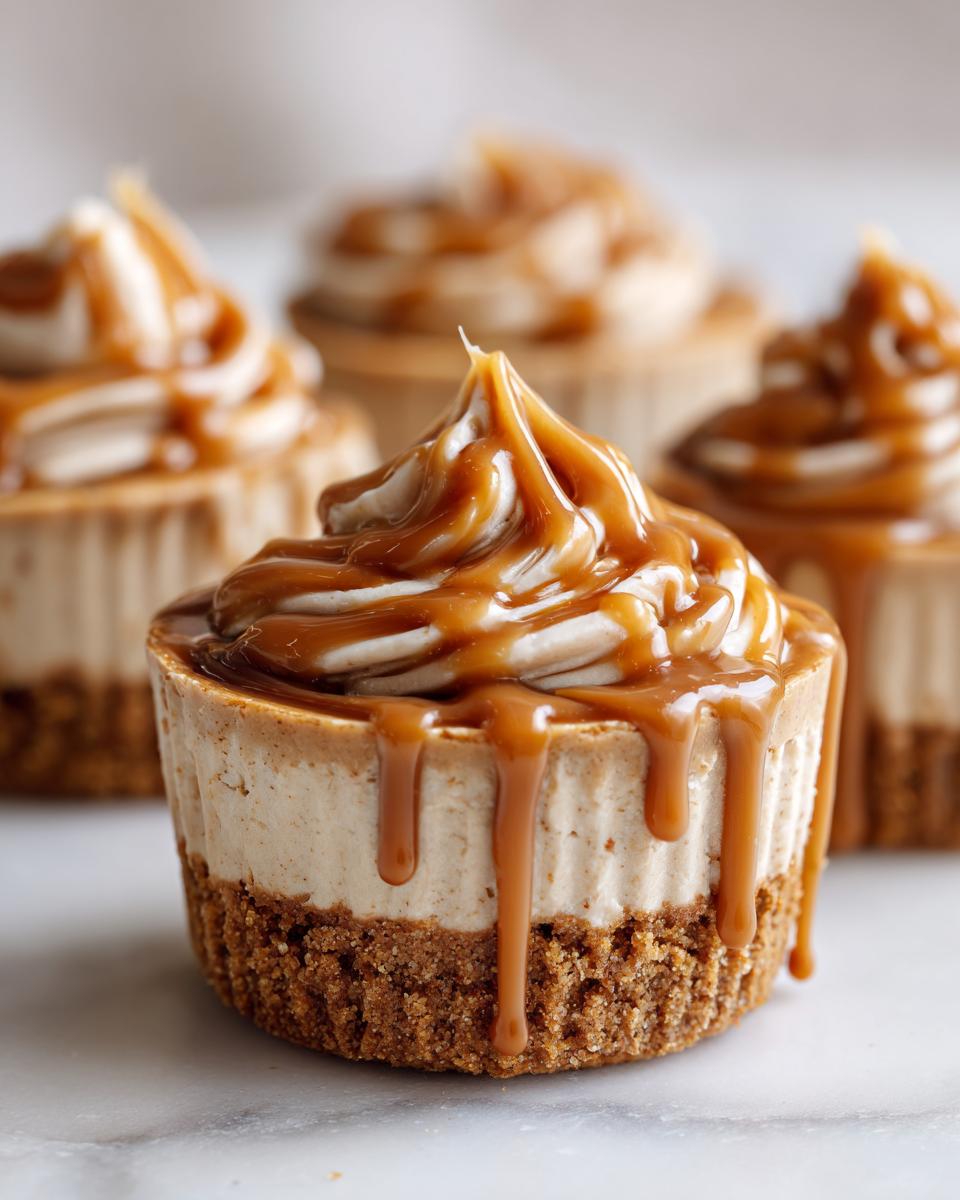
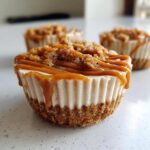
When company shows up unexpectedly, or when you just realize you need something rich and creamy right now, you don’t have time for fussy baking projects. That’s why I’m thrilled to share these cookie butter cheesecake cups with you today. Seriously, these are my new go-to! They deliver all the decadent flavor of a full cheesecake—that incredible tangy filling mixed with that spiced, comforting cookie butter—but they skip the oven entirely. We’re talking about individual serving cheesecake bites that look stunning sitting out on a dessert platter, yet they come together faster than you can brew a pot of coffee. If you’re drowning in a busy schedule but still crave that ‘wow’ factor, stick with me; we’ve got this covered.
- Why You Will Make These Cookie Butter Cheesecake Cups Often
- Essential Ingredients for Rich Cookie Butter Filling
- Step-by-Step Instructions for No Bake Cheesecake Cups
- Tips for Success Making Individual Serving Cheesecake
- Storage and Make Ahead Party Dessert Tips
- Serving Suggestions for These Creamy Cheesecake Bites
- Frequently Asked Questions About Cookie Butter Cheesecake Cups
- Estimated Nutrition for Your Indulgent Sweet Treats
- Share Your Experience Making These Cookie Butter Cheesecake Cups
Why You Will Make These Cookie Butter Cheesecake Cups Often
I’m not kidding when I say these little beauties flew off the plate at the last neighborhood potluck. When you need something that screams ‘I spent all day perfecting this’ but actually only took about 20 minutes of active work, these cookie butter dessert cups are your secret weapon. They check every box a busy home cook needs checked off!
- They require absolutely zero oven time, which is a lifesaver in the summer months, trust me!
- They chill beautifully while you’re busy doing literally anything else.
- Portion control is built right in—no slicing required!
Quick Preparation Time for Cookie Butter Dessert Cups
Active time is what really matters when you’re trying to get dinner on the table. You’re only looking at about 20 minutes of mixing and pressing before these head to the fridge. We’re smashing cookies, mixing the filling, and scooping. That’s it! Because they are a no bake cheesecake cups recipe, you don’t have to worry about preheating the oven or checking temperatures constantly. Just give those ingredients a good mix and move on with your evening.
Perfect Individual Serving Cheesecake Portions
I love individual desserts because they look so chic, but honestly, I love them most because they eliminate the messy cutting phase. Nobody fights over the ugly corner piece! These are perfect individual serving cheesecake portions, ready to grab right out of the tin after they set up. They are the ultimate make ahead party dessert because you can whip them up the day before, and they are instantly ready when the guests arrive.
Essential Ingredients for Rich Cookie Butter Filling
You know I always preach about quality ingredients, even in simple recipes, and this is where the flavor payoff happens! For these cookie butter cheesecake cups, we need two distinct groups of items: the base layer that gets pressed down and the impossibly creamy filling that goes on top. Don’t substitute the main flavor driver here—that cookie butter is non-negotiable for the best taste!
Ingredients for the Cookie Butter Crust Recipe
The crust is the foundation, and we want it sturdy enough to hold up that rich filling, but still crumbly enough to give you that nice textural contrast. You’ll need just two things here. Make sure your cookies are ground up nice and fine—I use my food processor for a quick pulse, but you can use a Ziploc bag and a rolling pin if you want to make extra noise!
- The Cookies: You need one and a half cups of crushed cookie butter cookies. I’m talking about Biscoff or any nice Speculoos cookie. You’ll need about 25 cookies total—don’t try to fake this part with plain graham crackers unless you absolutely have to; the spice profile is essential here!
- The Butter: Six tablespoons of unsalted butter, and make sure it’s melted. This is what glues those crumbs together perfectly.
Components for the Creamy Dessert Recipe Filling
This is where the magic happens. Remember, because this is a no-bake recipe, the texture relies heavily on the temperature of your dairy items. Your cream cheese absolutely must be softened up on the counter beforehand—cold cream cheese hates blending and leaves lumps, and we don’t want any lumps in these creamy dessert recipe bites!
- 16 ounces of cream cheese, softened (this is crucial!)
- One cup of powdered sugar—don’t try to use granulated sugar here; it won’t dissolve properly.
- One teaspoon of vanilla extract for warmth.
- Half a cup of your favorite cookie butter spread (like Biscoff).
- Half a cup of heavy whipping cream. This has to be whipped separately to stiff peaks, which is what gives our filling that light, airy texture despite the richness of the cream cheese!
Step-by-Step Instructions for No Bake Cheesecake Cups
Alright, let’s get down to business. If you managed to gather up those beautiful ingredients we just talked about, assembling these no bake cheesecake cups is almost laughably easy. This is where we move quickly, but gently, especially when folding in that whipped cream. Trust me, patience during the chilling phase is the hardest part of this entire recipe!
Assembling the Cookie Butter Crust Recipe Base
First thing first, we build the foundation! Grab a bowl and dump in your 1 1/2 cups of crushed cookies and your 6 tablespoons of melted butter. Give it a good stir until every single crumb looks moistened. You want it to look like damp sand—not swimming in butter, but sticky enough to hold its shape.
Now, divide this mixture among your 12 muffin liners in your muffin tin. Here’s my little trick for getting those sides looking professional: once the crumbs are in, grab the flat bottom of a small drinking glass or a metal measuring cup and press down firmly. Pressing them down tightly helps prevent the crust from crumbling when you try to pull the cookie butter crust recipe out later.
Creating the Rich Cookie Butter Filling
Time for the creamy part! Get your stand mixer or your hand mixer ready. You need to beat that 16 ounces of softened cream cheese until it is completely smooth and absolutely lump-free. If you skip this step, your filling will be gritty, and that’s just sad.
Once that’s whipped smooth, slowly add in your powdered sugar and vanilla. Mix until it’s all incorporated and silky. Then, beat in that half cup of cookie butter. Keep mixing until the entire bowl is one uniform color, usually a beautiful pale tan. Now, for the crucial texture step: In a separate bowl, whip your heavy cream until stiff peaks form. Don’t stop too soon! You want them to hold their shape when you lift the whisk.
Finally, take those stiff peaks and gently fold them into your rich cookie butter cream cheese mixture. I mean gently. Use a spatula and cut down the middle, scraping up the sides. We do this to keep those air bubbles we just whipped into the cream! Overmixing here deflates everything, and nobody wants flat cheesecake bites.
Chilling and Finishing Your Cookie Butter Cheesecake Cups
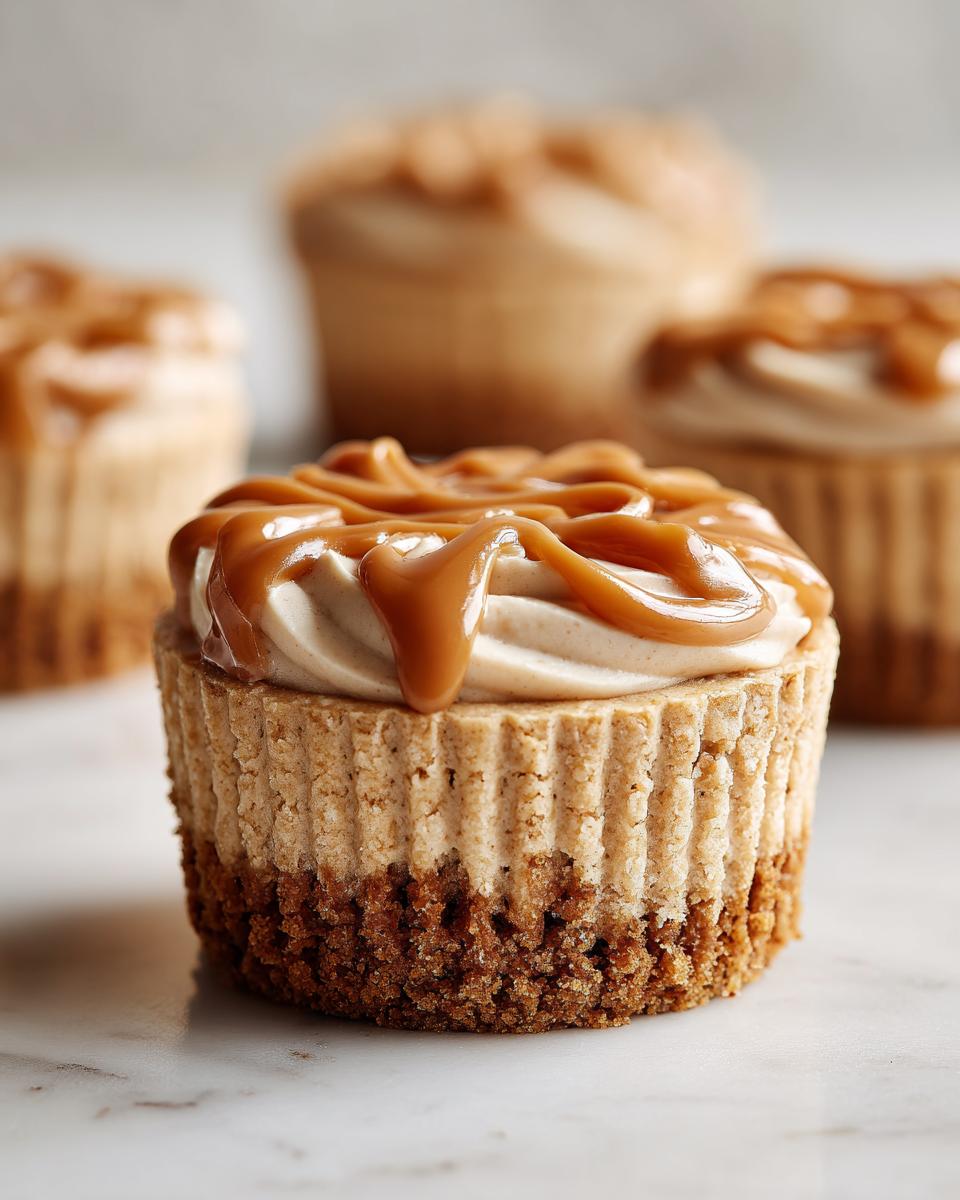
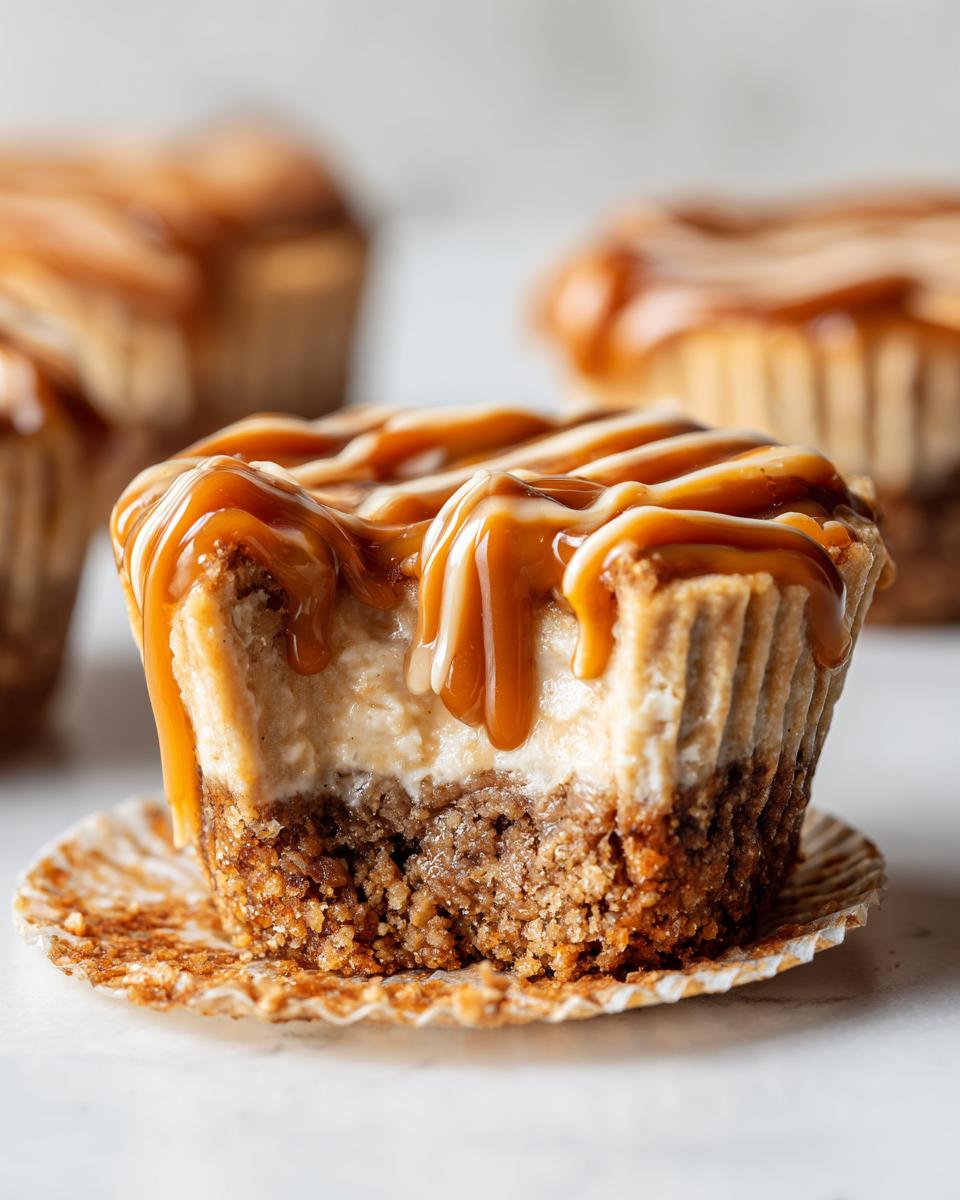
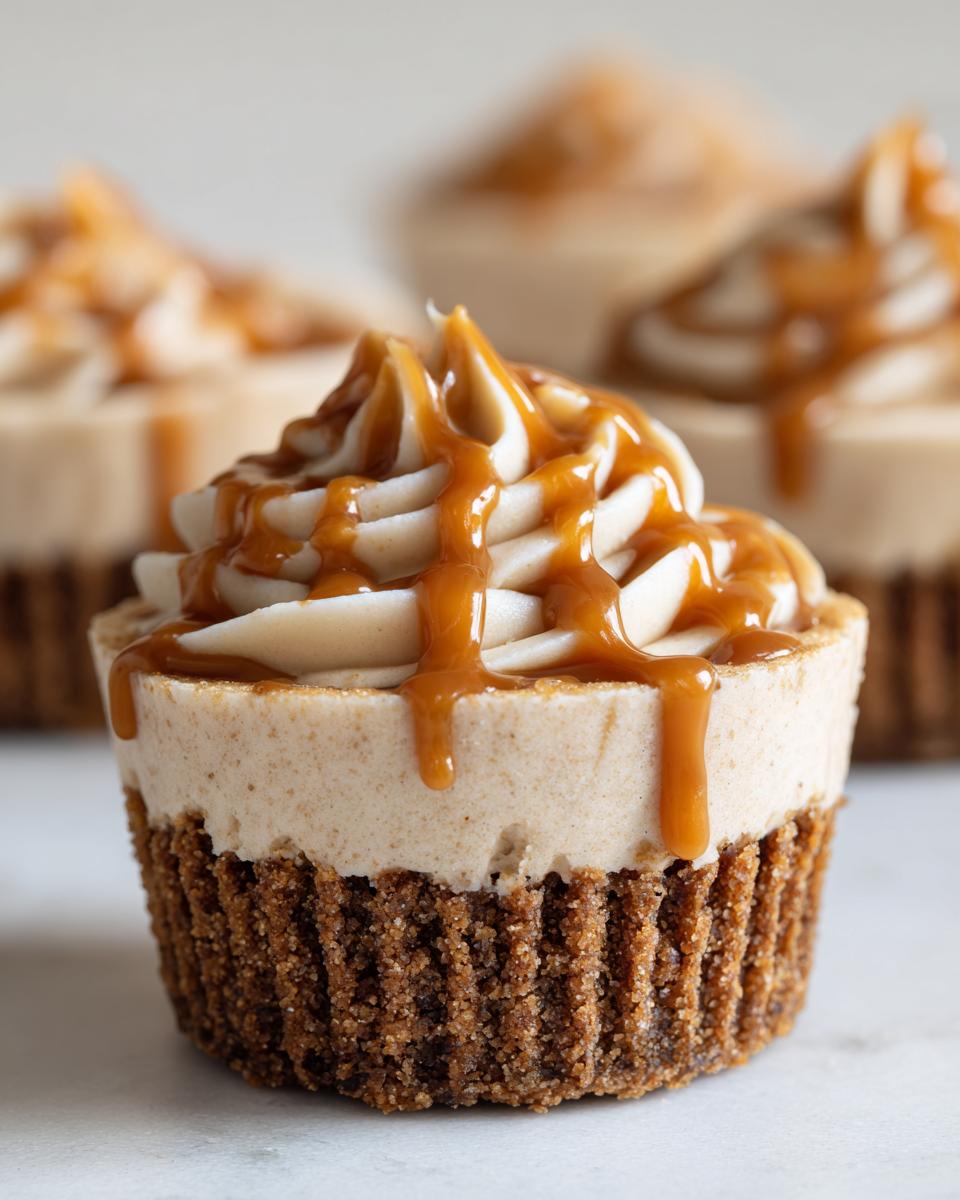
Once the filling is folded beautifully, spoon or pipe it evenly over the crusts in the liners. This is where the patience comes in, folks. You need to refrigerate these **cookie butter cheesecake cups** for a minimum of four hours. If you can leave them overnight, even better! They need that time to firm up so they hold their shape when you pull them out. This is key for any successful creamy cheesecake bites recipe.
When you’re ready to serve, take that extra dollop of cookie butter you saved for topping. If it’s too thick straight from the jar, microwave it for just about 10 seconds. It should be warm enough to drizzle easily off a spoon but not hot! Drizzle it generously over the set tops. They look amazing served right cold like that.
Tips for Success Making Individual Serving Cheesecake
We’ve got the recipe down, but the difference between a good dessert and a *great* one often comes down to little tricks I picked up from years of trial and error in my kitchen. When making these individual serving cheesecake portions, paying attention to ingredients and timing is everything. These cups are generally foolproof since there’s no oven involved, but a few pro tips ensure you get that luxurious, creamy texture we are aiming for.
Ingredient Notes and Substitutions
Let’s talk about that cream cheese one last time. Please, please, please make sure it’s room temperature! I know sometimes you’re rushing, but if you try to mix cold cream cheese, you are guaranteed to end up with little white lumps in your rich cookie butter filling. It’s just physics; cold cheese clumps up under pressure.
Now, if you are completely out of those beloved Biscoff cookies, you can substitute with graham crackers for the crust. However, you are sacrificing that signature spiced depth. If you go that route, maybe add just a tiny pinch of cinnamon or ginger powder to the crumbs to try and mimic that flavor profile a bit. Also, when it comes to the filling, stick with full-fat cream cheese, full-fat heavy cream—no light substitutes here! If you cut the fat content, you compromise the structure needed for a firm, satisfying **cookie butter cheesecake cups** experience.
Speeding Up the Set Time for Your Quick Cheesecake Treat
The hardest part about making these easy individual desserts is waiting for them to chill. If you’ve got guests coming over sooner than the suggested four hours, I have a little hack for you. This trick works wonders for any simple no oven dessert.
After you pour the filling into those crusts, pop the whole muffin tin directly into the freezer for about one hour. You aren’t trying to freeze them solid, just enough so the structure firms up quickly. Once they’re solid to the touch—usually around 60 minutes—transfer them immediately to the refrigerator to finish setting until they are completely chilled through. It cuts down the total chill time significantly while still giving you that firm, perfect square when you pull the liner away.
Storage and Make Ahead Party Dessert Tips
This is one of my favorite things about these cookie butter cheesecake cups: they are champions of the make-ahead game! Honestly, they taste even better the next day once those rich, spicy cookie butter flavors have really married with the cream cheese blend. You can totally get a head start on your dessert planning, which is a huge relief when you’re hosting.
Because these are no-bake, our main concern is keeping them fresh and stopping them from absorbing any fridge smells. You definitely want to cover them well. Once they are firmly set after that initial chill time, I recommend transferring the entire muffin tin (liners and all) into one large airtight container. If you don’t have a container big enough, place them on a tray and cover the whole thing tightly with plastic wrap, making sure the wrap doesn’t crush the drizzle on top.
For optimal texture, I tell everyone to store these in the refrigerator for up to four days. If you need to make them farther out, you can actually freeze them! That’s right, these make ahead party dessert cups freeze beautifully. Place your paper-lined cups in a freezer-safe container—make sure you don’t drizzle the final cookie butter topping on yet—and they will keep perfectly for up to two months. When you’re ready to serve, just thaw them overnight in the fridge, and then add that gorgeous warm drizzle right before they hit the table. It’s truly dessert magic for busy people!
Serving Suggestions for These Creamy Cheesecake Bites
Even though these creamy cheesecake bites are showstoppers all by themselves, presentation and pairing can elevate them from a tasty treat to a true centerpiece dessert. Since the flavor of cookie butter is so warm—think brown sugar and spice—we want accompaniments that either enhance that warmth or offer a nice, bright contrast. Don’t overthink it; we’re keeping things simple, just like the recipe!
First off, think texture when you’re plating these a little fancier than just grabbing them from the tin. If you didn’t already drizzle that extra warm cookie butter on top, you absolutely should. That smooth, slightly runny topping against the firm cheesecake layer is pure heaven. For a nice crunch factor, you can sprinkle a few extra crushed cookie crumbs or even a tiny dusting of finely chopped toasted pecans right around the base of the cup before serving.
When it comes to drinks, these rich indulgent sweet treats pair beautifully with something hot. A strong, black coffee cuts right through the richness of the cream cheese filling perfectly. If you’re serving these after dinner, a sweet dessert wine or even a small glass of spiced rum makes a fantastic companion. For the kids, a cold glass of milk is always the traditional winner when you have something this decadent—it just feels right!
And don’t forget color! Since the cups are generally brown and tan, adding a small, thinly sliced strawberry or a tiny mint sprig on top of the drizzle just gives the eye a little break. It makes these dessert in a cup treats look professional without adding any extra work to your active prep time!
Frequently Asked Questions About Cookie Butter Cheesecake Cups
I know you might have a few lingering thoughts, especially if you are fitting this recipe into a tight schedule. That’s totally normal! Building confidence in a new recipe, even an easy one, sometimes requires a quick Q&A session. I’ve gathered the questions I get most often from friends who try these cookie butter cheesecake cups for the first time. Let’s clear up any confusion so you can get them chilled perfectly!
Can I use a different brand than Biscoff for these Cookie Butter Dessert Cups?
That’s a great question! We talk about Biscoff a lot because it’s the original, and I always find its consistency just perfect for both the filling and the drizzle. However, if you have a different brand of speculoos or cookie butter spread that you love, absolutely go for it! Store brands or other European imports usually work just fine in this recipe. Just know that the final flavor might shift very slightly based on the spices used in that specific brand. For the best texture stability in the filling, I find the name brands tend to be a little thicker and less oily, but honestly, any decent cookie butter will make these cookie butter dessert cups taste incredible.
How long do these Easy Individual Desserts need to chill?
This is where you have to practice self-control, friend! For these easy individual desserts to be firm enough to easily pull out of the paper liner without squishing the sides, you need a minimum of four hours chilling time in the refrigerator. If you serve them too early, your beautiful filling will just slump right out. But if you give them the full time—or even better, let them chill overnight—they set up beautifully firm. When they’ve chilled thoroughly, they transform into perfect, ready-to-eat **cookie butter cheesecake cups**!
Is this truly a Simple No Oven Dessert?
Yes, yes, and a huge YES! You read that right—we aren’t generating any extra heat! These are specifically designed as a **simple no oven dessert**. This makes them ideal for me when my oven is already tied up making dinner, or when it’s ninety degrees outside and turning on the range feels like a crime. The firmness needed for these mini cheesecakes comes entirely from chilling the cream cheese and the newly whipped cream, not from heat setting the structure. It’s pure, simple refrigerator magic!
Estimated Nutrition for Your Indulgent Sweet Treats
I always want to be upfront about what we are putting into our bodies, even when we are indulging in something as fantastic as dessert! Because every brand of cream cheese or cookie butter can vary slightly in fat and sugar content, please keep in mind this table reflects an estimate based on the standard ingredients listed in the recipe. These calculations are for one single cookie butter cheesecake cups serving, based on a yield of 12 cups.
If you are tracking macros or managing specific dietary needs, you might want to plug in the specific nutrition labels from the products sitting on your counter right now. But for a general idea of just how wonderfully rich these indulgent sweet treats are, here is the breakdown:
- Serving Size: 1 cup
- Calories: 350
- Sugar: 25g
- Fat: 24g
- Saturated Fat: 14g
- Carbohydrates: 30g
- Protein: 5g
- Cholesterol: 70mg
It’s certainly a rich treat, meant for savoring! That high fat content is what gives us that incredible, melt-in-your-mouth texture in the filling, so we know where that amazing flavor comes from. Enjoy every single bite of these creamy dessert recipe delights!
Share Your Experience Making These Cookie Butter Cheesecake Cups
Now that you have the full rundown—from the crust-packing technique to the gentle folding—I really, truly want to hear from you! This little corner of the internet, The YumMagnet Recipe Box, only thrives when we talk about what works and what we change up in our own kitchens. I put so much love and practical testing into these cookie butter cheesecake cups, and I can’t wait to see them on your tables!
Did you try the freezer trick to speed up the chill time? Are you someone who stuck with the graham cracker crust, or did you go all-in on the Biscoff? Every little adjustment or success story is helpful for the next person reading this recipe. Don’t be shy!
Please take a moment to leave a star rating right here at the bottom of the page—it really helps me know which recipes are becoming your family’s new favorites. If you made any fun variations—maybe added a hint of espresso powder to the filling, perhaps?—drop the details in the comments below. I love reading about how you transform these simple recipes into something uniquely yours. Tagging me on social media with photos of your finished cookie butter dessert cups is the ultimate compliment! Happy baking (or, well, chilling)!
PrintEasy No-Bake Cookie Butter Cheesecake Cups
Make these simple, no-bake cookie butter cheesecake cups for a rich, creamy dessert perfect for parties or quick treats. They feature a cookie crust and a smooth, indulgent filling.
- Prep Time: 20 min
- Cook Time: 0 min
- Total Time: 4 hr 20 min
- Yield: 12 cups 1x
- Category: Dessert
- Method: No-Bake
- Cuisine: American
- Diet: Vegetarian
Ingredients
- 1 1/2 cups crushed Biscoff or speculoos cookies (about 25 cookies)
- 6 tablespoons unsalted butter, melted
- 16 ounces cream cheese, softened
- 1 cup powdered sugar
- 1 teaspoon vanilla extract
- 1/2 cup cookie butter (like Biscoff spread), plus extra for topping
- 1/2 cup heavy whipping cream
- 12 paper or foil liners for a standard muffin tin
Instructions
- Prepare the crust: Combine the crushed cookies and melted butter in a bowl. Mix until the crumbs are evenly moistened.
- Press the crust mixture evenly into the bottom of 12 lined muffin cups. Use the bottom of a small glass to pack it down firmly.
- Make the filling: In a large bowl, beat the softened cream cheese with an electric mixer until smooth.
- Gradually add the powdered sugar and vanilla extract, mixing until fully combined and creamy.
- Beat in the 1/2 cup of cookie butter until the filling is uniform in color and texture.
- In a separate bowl, whip the heavy cream until stiff peaks form.
- Gently fold the whipped cream into the cookie butter cream cheese mixture until just combined. Do not overmix.
- Spoon or pipe the cheesecake filling evenly over the crusts in the muffin cups.
- Chill the cups in the refrigerator for at least 4 hours, or until firm.
- Before serving, warm a small amount of extra cookie butter slightly (about 10 seconds in the microwave) to make it drizzle-able. Drizzle the melted cookie butter over the top of each cheesecake cup.
Notes
- You can substitute graham crackers for the cookie butter cookies in the crust if needed, but the full cookie butter flavor is best.
- For a quicker set time, place the cups in the freezer for about 1 hour before moving them to the refrigerator.
- These individual serving cheesecake cups are excellent for make-ahead party desserts.
Nutrition
- Serving Size: 1 cup
- Calories: 350
- Sugar: 25
- Sodium: 210
- Fat: 24
- Saturated Fat: 14
- Unsaturated Fat: 10
- Trans Fat: 0
- Carbohydrates: 30
- Fiber: 1
- Protein: 5
- Cholesterol: 70