
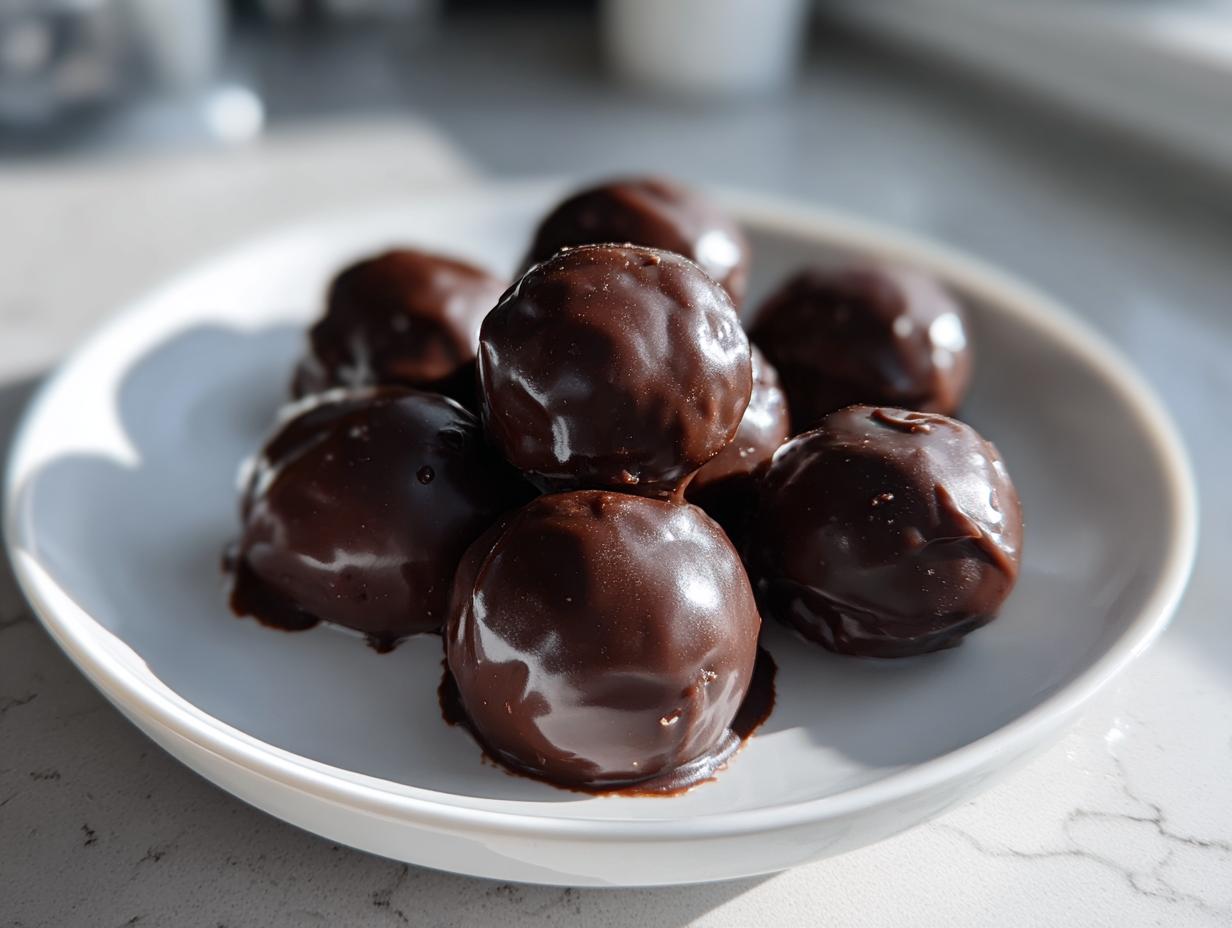
When life gets hectic—and let’s be honest, when isn’t it hectic?—we home cooks need a secret weapon. We need that gorgeous, impressive centerpiece for a party or cookie swap that takes zero actual oven time. Friends, I’ve found the magic eraser for busy evening schedules, and trust me, it involves Oreos. I’m talking about the ultimate 3-ingredient, no-bake oreo balls. These aren’t just quick; they are rich, decadent, and taste like a true labor of love, even though they come together faster than boiling water. This is exactly what The YumMagnet Recipe Box is all about: practical solutions that deliver unforgettable flavor without stealing your entire afternoon. You deserve a simple confection recipe that wows everyone!
- Why You Will Make These Easy Oreo Balls Again and Again
- The Essential Ingredients for Perfect Oreo Balls
- Step-by-Step Instructions for Classic Oreo Balls
- Tips for Making the Best Oreo Balls Every Time
- Serving Suggestions for Your Oreo Balls
- Storage and Make Ahead Dessert Tips for Oreo Balls
- Variations on Classic Oreo Balls
- Frequently Asked Questions About Oreo Balls
- Nutritional Estimates for Oreo Balls
Why You Will Make These Easy Oreo Balls Again and Again
I keep coming back to a few simple truths with this recipe. If you’re looking for the fastest way to look like a baking genius, these are it. Trust me, once you see how fast these come together, they become your default for every last-minute need.
- These are truly one of the best delicious dessert recipes out there because they rely on just three main ingredients.
- They are completely no-bake! Perfect for when you need quick and easy snacks or feel like the oven is already working overtime.
- They form the best party desserts because they are tiny, decadent, and require zero plates or forks.
- These are fantastic for your next Christmas cookie swap ideas—just wrap them up pretty!
The Essential Ingredients for Perfect Oreo Balls
The beauty of these oreo balls is that they demand very few players. When you strip a recipe down to just three core components, you have to make sure those components are top-notch and used correctly. Forget fancy extracts or dozens of steps; we rely on the power trio here. You’ll need one full package, that’s the 14.3 ounces size, of your standard Oreo cookies—the whole thing, filling included! Then, you need 8 ounces of cream cheese, and I mean 8 full ounces that have been sitting out until they are perfectly soft. Finally, you’ll need about 16 ounces of good melting chocolate for the coating.
Ingredient Notes and Simple Substitutions
Now, don’t go getting creative with your ingredients right away, okay? You need to master the classic first. While you absolutely *can* use Golden Oreos or Mint Oreos if you’re feeling adventurous, the classic black and white cookie gives you that perfect, rich base for this no bake dessert.
The cream cheese is non-negotiable regarding texture. If it’s cold, you’ll end up with crumbly patches in your dough, and that’s just frustrating. Make sure it’s soft enough to easily push a finger into. If you can’t find good quality dipping chocolate, I always recommend adding just one tiny teaspoon of vegetable shortening or unrefined coconut oil to your melted chocolate. This helps thin it out slightly so you get thinner, crack-free chocolate coated balls rather than thick, chalky shells. Candy melts work too, but real chocolate tastes so much better!
Step-by-Step Instructions for Classic Oreo Balls
Okay, this is where the magic happens, and I promise you, it’s faster than grabbing takeout! Seriously, if you follow these steps, you’ll have the most incredible easy dessert recipes ready for the fridge in under 20 minutes of active work. These oreo balls are completely foolproof, especially since there’s no actual baking involved!
Preparing the Oreo Cookie Base
First things first, we have to obliterate those cookies! My food processor sings when it gets to work on a whole package of Oreos—it just pulses them down into the finest, most uniform crumbs imaginable. That’s the absolute best way for a smooth final texture. If you don’t have one, don’t panic! Put them in a super heavy-duty zip-top bag, get your trusty rolling pin, and just smash away until you have fine crumbs. You want zero big chunks left.
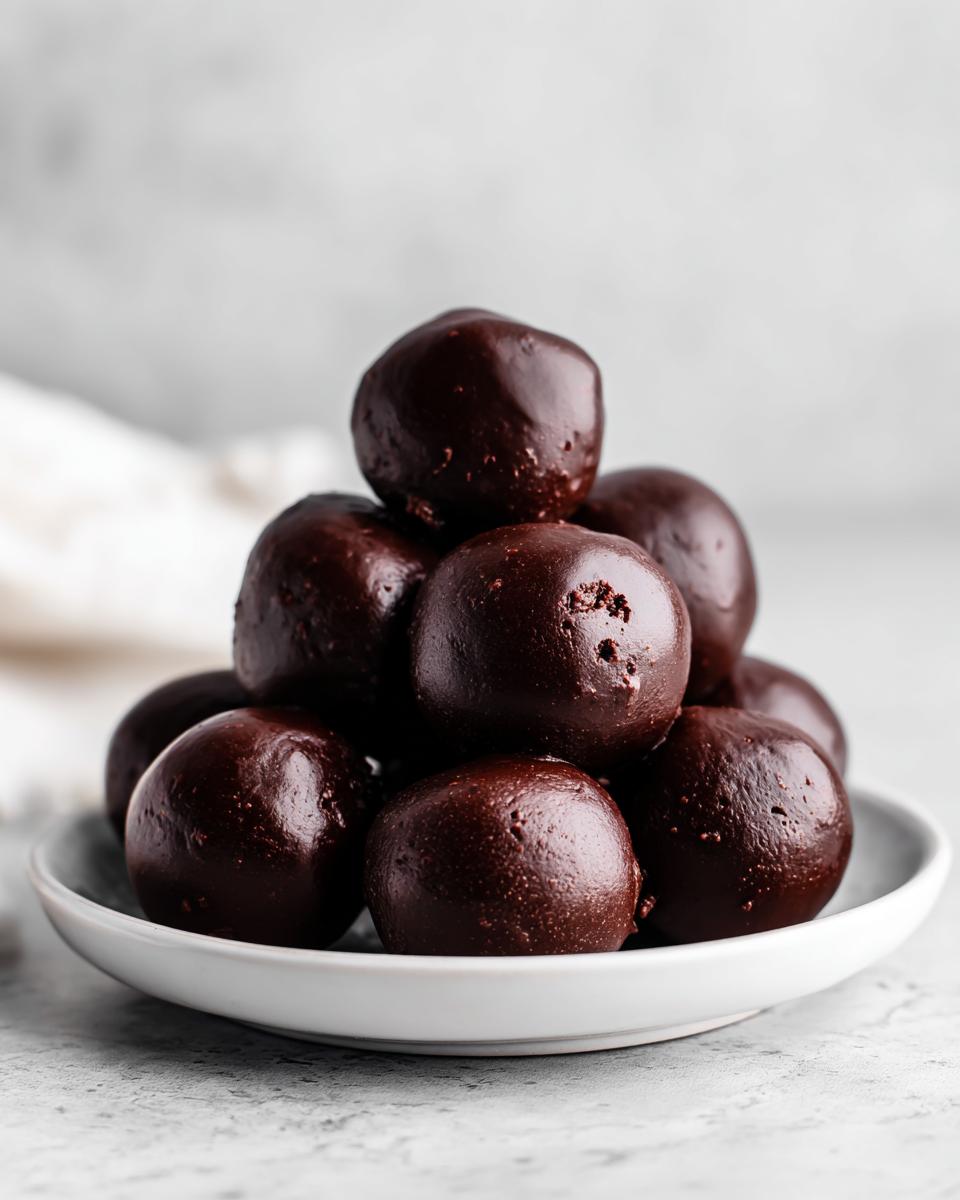
Once that’s done, you dump those crumbs into a bowl and add the soft cream cheese we talked about. Now, mix! You can use a hand mixer on low, but I often just use my hands—it’s the best way to know when that dough is perfectly uniform. Mix until you literally cannot see any white streaks of cream cheese left. It should look like a thick, dark, rich mud.
Chilling and Shaping Your Oreo Balls
Listen to me: Do not skip the chilling step. If you try to roll this dough warm, you will have chocolatey glue all over your hands, and we don’t want that messy disaster! Pop that dough onto a parchment-lined baking sheet immediately and chill it in the refrigerator for at least 30 minutes. Once they are firm, you can grab a small scoop (or just use your hands) and roll them into balls about one inch across. They don’t need to be perfectly round—that rustic look is part of their charm for a great simple confection recipe.
Mastering the Chocolate Coating
While those little dough nuggets are firming up, melt your chocolate. I usually go the microwave route because I’m impatient! Pop the chocolate in a microwave-safe bowl and heat it in short, 30-second bursts, stirring thoroughly between each one. Don’t overheat it, or it’ll seize up on you! Remember that little trick I mentioned? Stir in about a teaspoon of shortening or coconut oil once it’s mostly melted. This is the secret that makes dipping so much easier and keeps your final chocolate coated balls smooth and shiny.
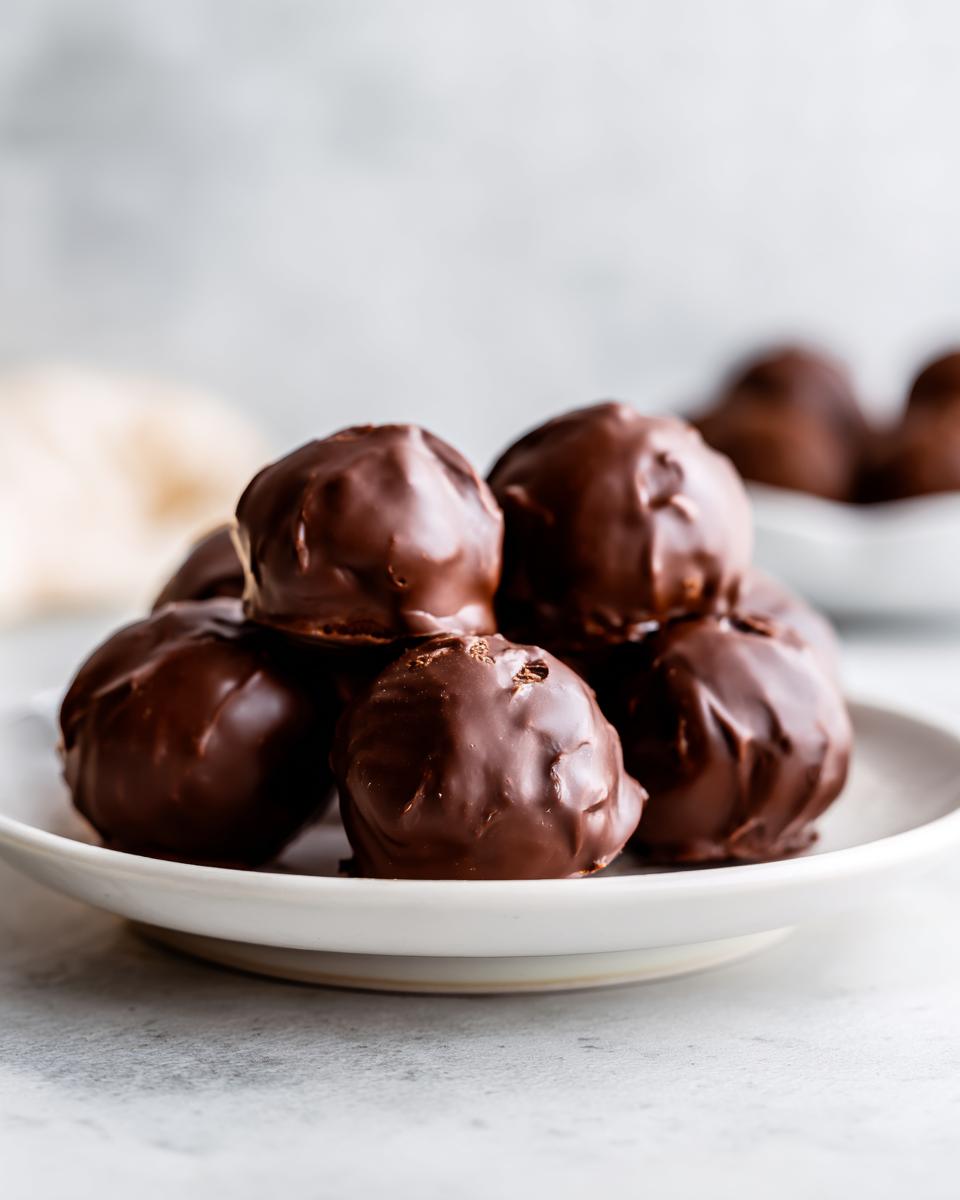
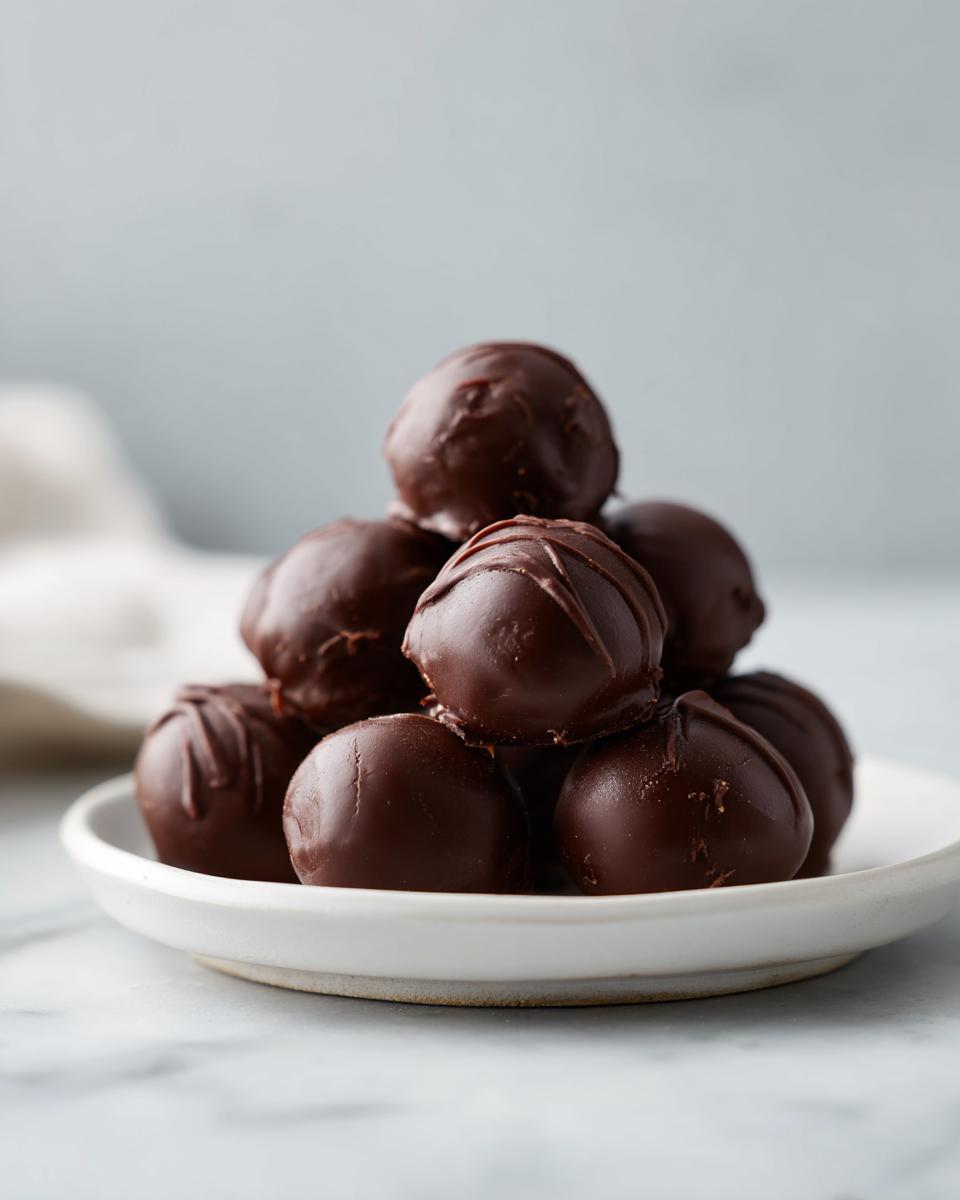
Take the firm balls out, dip them quickly, let the excess drip off using a fork tapping the side of the bowl, and put them right back on that parchment paper. If you want to decorate them—go for it! Sprinkles stick best right when they come out of the bath. Then, back into the fridge for at least an hour until that chocolate shell is completely set.
Tips for Making the Best Oreo Balls Every Time
We’ve all been there: you dip the truffle, and 30 seconds later, the chocolate coating cracks right off! It’s usually because of temperature shock. The key to perfect oreo balls that keep their beautiful chocolate shell is making sure your dough balls are *very* cold before dipping them. Seriously, 30 minutes in the fridge isn’t enough when it’s hot; aim for 45 if you can spare the time!
Another thing that drives me nuts is that thin, uneven coat. If your melted chocolate feels too thick to work with, don’t try to forcefully drag the ball through it! That just creates ridges. Instead, add that extra half-teaspoon of oil or shortening we talked about earlier. This little addition transforms your coating into the perfect liquid silk, ensuring you get that beautiful, smooth finish every single time. These little touches are what make these 3 ingredient treats look professional!
When you pull them out of the chocolate, let them sit on the parchment paper until they cool. If you try to move them too soon, you might end up smearing that gorgeous dip. Patience here really pays off!
Serving Suggestions for Your Oreo Balls
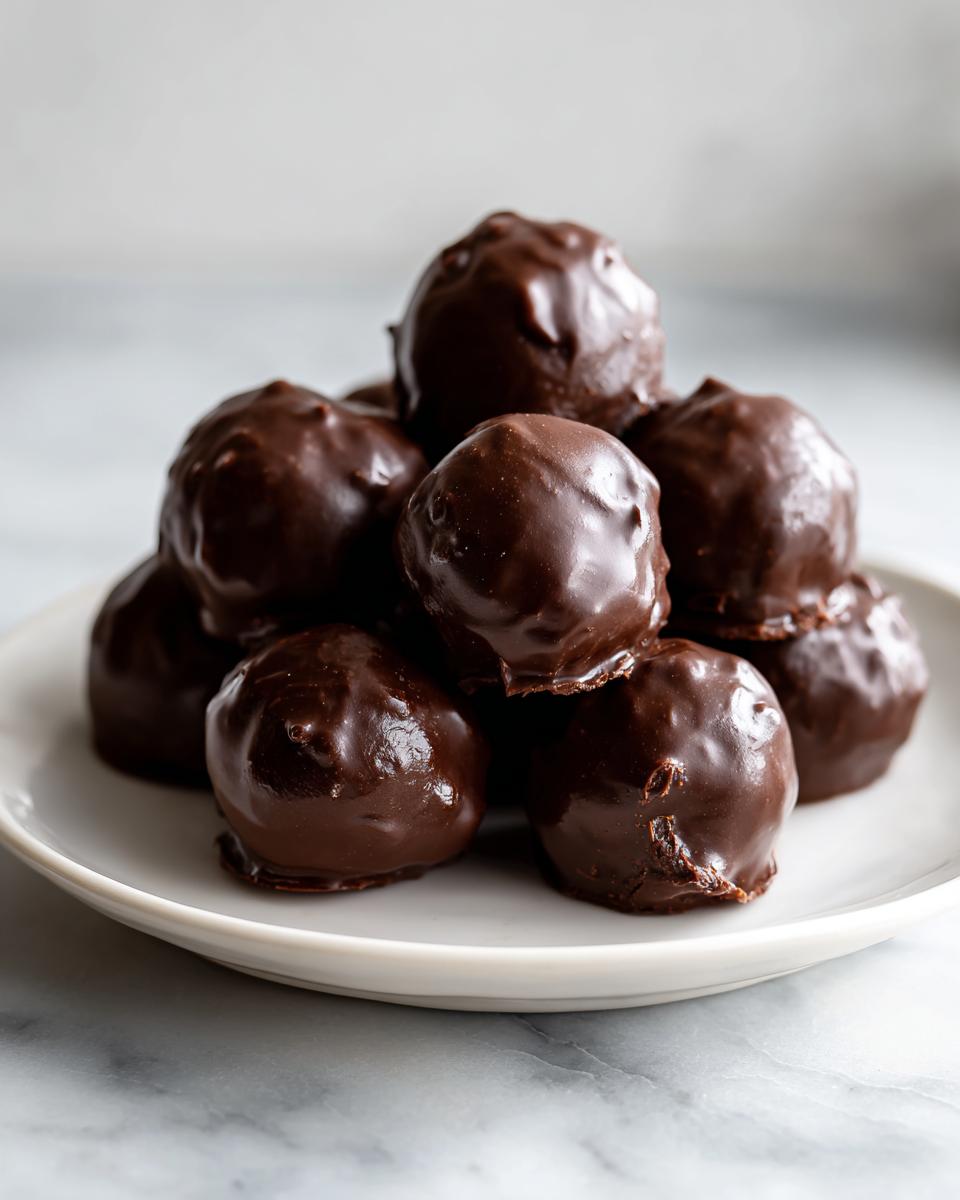
Once these gorgeous little spheres are hardened up, the fun part of presenting your party desserts begins! Because they are so rich, they are best served slightly chilled, straight from the refrigerator. They’re the ultimate bite sized sweets, which means people tend to grab two or three before they even realize what they’ve done!
For holidays, like Christmas, these are such perfect holiday candy because you can dress them up so easily. Throw a little coarse sea salt on the top of the dark chocolate coating, or drizzle them with contrasting white chocolate. Or, if you are making them for a cookie swap, line them up on a tiered serving tray—they look so elegant nestled next to cookies or fudge. Seriously, nobody will ever guess they took less than an hour of effort!
When it comes to what to drink alongside these, simplicity rules. A cold glass of milk is the absolute classic pairing, bringing back those childhood vibes. But if you’re serving these after dinner as a refined treat, a hot cup of strong black coffee or even a fancy espresso cuts right through the sweetness of the chocolate and cream cheese center perfectly. They are so versatile; you can put them on any dessert platter and watch them disappear!
Storage and Make Ahead Dessert Tips for Oreo Balls
This is one of my very favorite things about making oreo balls: they are total champions when it comes to planning ahead! If you’re making them for a big event or need something ready to go for a busy week, you don’t have to stress about making them the day of. Honestly, these actually taste better the next day once everything has settled in that rich, creamy center.
The absolute best way to store your finished, coated balls is in a sturdy, airtight container. You need to make sure they have a lid that seals tightly, especially if you’re transporting them! I always recommend lining the bottom of the container with a small piece of parchment paper just to prevent any chance of sticking to the plastic or glass.
As for how long they last? Since they contain cream cheese, we treat them like a dairy product. In the refrigerator, these make ahead dessert gems will keep beautifully for up to two weeks. Yes, two full weeks! You just pull them out about 15 or 20 minutes before you plan to serve them so the chocolate coating isn’t quite so hard and brittle. That slight softening makes them absolutely divine.
If you need to freeze them—maybe you made a triple batch for the holidays—they freeze great too! Just place the tray of coated balls in the freezer until they are solid first. Then, you can transfer them to a freezer-safe, airtight bag or container. They hold up really well for about two months in the freezer. When you need them, just thaw them overnight in the fridge. This ability to prep them way ahead of time is why these are my go-to make ahead dessert option!
Variations on Classic Oreo Balls
While the classic black and white version remains my absolute champion for a reason—it’s just pure, perfect chocolate-and-cream goodness—sometimes I get that urge to jazz things up! Especially when I’m making a huge batch and want to give some away, offering different flavors is such a nice touch. This simple base for our oreo balls is incredibly flexible; it’s practically begging you to play around with it. You own the kitchen, so flavor combinations are totally up to you!
You asked about using different cookies because you love experimenting with oreo cookie recipes? Go for it! If you swap in Mint Oreos, you suddenly have a cool, refreshing truffle that screams winter holiday without needing any special additions. Red Velvet Oreos give you a beautiful, slightly tangy pink center—perfect if you’re leaning into Christmas candy color schemes. Just remember to stick to the three-ingredient rule for the base; that’s the only way to guarantee they set up right!
Beyond the cookie flavor, the coatings offer endless fun. We covered using shortening to make the chocolate extra smooth, but what about the chocolate itself? Semisweet is standard, but try dark chocolate if you prefer less sugar; the slight bitterness pairs unbelievably well with the sweet cream filling. Or, go totally decadent and use all white chocolate. White chocolate is trickier to melt smoothly, so really focus on that tiny addition of coconut oil!
If you feel like adding a tiny flavor boost to the dough—remember, we are keeping this simple, so don’t add too much!—a half teaspoon of peppermint extract mixed in with the cream cheese, especially if you used Mint Oreos, takes these from a great treat to an amazing one. For a slightly richer flavor when you want to show off your skills a bit more, try swapping out the plain cream cheese for one with a hint of subtle citrus. A tablespoon of lemon zest mixed into the dough before rolling absolutely elevates these into something spectacular. But honestly, even just alternating the dipping chocolate is enough fun to keep things interesting!
Frequently Asked Questions About Oreo Balls
I get so many emails asking about every little detail when it comes to these oreo balls, and that’s totally fair! When something is this easy, it’s natural to wonder if you can shortcut things. I’ve pulled together the most common questions right here so you can skip the guesswork.
Can I use cookies other than classic Oreos?
Yes, you absolutely can! While the classic cookie gives you the rich, familiar flavor people expect from these cream cheese desserts, feel free to experiment. Golden Oreos create a lighter, almost cheesecake-like truffle, and specialty flavors like mint or birthday cake work beautifully, too. Just stick to packaged cookies with the cream filling intact for the proper texture balance!
What if I don’t have cream cheese? Can I skip it?
This is the big one! Please don’t skip the cream cheese. It acts as the binder, the softener, and adds that amazing slight tang that cuts through all that chocolate. Without it, you just have dry cookie crumbs, and they won’t hold their shape at all. For a dairy-free option, you might try a vegan cream cheese alternative, but for the classic recipe, cream cheese is key.
How do I stop my melted chocolate from seizing up?
Nobody wants seized chocolate when making chocolate coated balls; it turns into a crumbly mess! The two main enemies are water and microwaving too long. Make absolutely sure your bowl and spatula are bone dry—even a drop of water will ruin it. When microwaving, never go longer than 30 seconds at a time and stir thoroughly between each interval. If it starts looking dull or thickening up, add that teaspoon of shortening or oil we talked about—that usually saves the day!
Can these be made ahead of time?
They totally can! In fact, I recommend it. These are fantastic make ahead dessert options. They keep great in the fridge for up to two weeks in an airtight container. Letting them chill overnight really lets the flavors marry up perfectly.
Nutritional Estimates for Oreo Balls
Now, listen, I’m a home cook, not a certified nutritionist, so please take these numbers with a grain of salt—or maybe a sprinkle of sea salt, which I prefer on top!
Because these oreo balls rely on simple ingredients like cream cheese and chocolate coating, they are certainly a decadent treat. These estimates below are based on using the full package of Oreos, 8 ounces of cream cheese, and standard semisweet melting chocolate, yielding about 30 balls. If you use dark chocolate or add extra drizzle, those numbers will shift, of course!
Here’s what the numbers generally look like:
- Serving Size: 1 ball
- Calories: About 150 for a 1-inch ball
- Sugar: Roughly 15 grams
- Fat: Around 10 grams (that’s the good, rich coating!)
- Protein: Around 2 grams
Remember, this is a rich, sweet confection, not a health food! We make these because they are celebratory and delicious, and knowing the basics is just part of being a responsible cook. These estimates are solely for guidance based on standard ingredient usage.
PrintThe Ultimate 3-Ingredient No-Bake Classic Oreo Balls (Perfect for Parties)

Make these easy Oreo Balls, also known as Oreo Truffles, using only three ingredients. This no-bake dessert is rich, chocolatey, and perfect for holiday candy swaps or any party dessert.
- Prep Time: 20 min
- Cook Time: 10 min
- Total Time: 2 hours 30 min
- Yield: About 30 balls 1x
- Category: Dessert
- Method: No-Bake
- Cuisine: American
- Diet: Vegetarian
Ingredients
- 1 package (14.3 ounces) Oreo cookies
- 8 ounces cream cheese, softened
- 16 ounces melting chocolate (semisweet or milk chocolate)
Instructions
- Place all Oreo cookies, filling included, into a food processor. Pulse until you have fine crumbs.
- Transfer the Oreo crumbs to a medium bowl. Add the softened cream cheese. Mix with a hand mixer or by hand until the mixture is completely combined and forms a thick dough.
- Roll the dough into small balls, about 1 inch in diameter. Place the balls on a baking sheet lined with parchment paper.
- Chill the Oreo balls in the refrigerator for at least 30 minutes until firm.
- Melt the chocolate according to package directions. You can use a double boiler or microwave in 30-second intervals, stirring between each interval.
- Dip each chilled Oreo ball into the melted chocolate, ensuring it is fully coated. Use a fork to lift the ball out, tapping the fork gently on the side of the bowl to remove excess chocolate.
- Return the coated balls to the parchment-lined baking sheet.
- If desired, drizzle with melted white chocolate or add holiday sprinkles immediately after coating.
- Refrigerate the finished Oreo Balls for at least 1 hour, or until the chocolate coating is set. Store them in an airtight container in the refrigerator.
Notes
- For a smoother coating, add 1 teaspoon of vegetable shortening or coconut oil to the melting chocolate.
- If you do not have a food processor, place cookies in a large zip-top bag and crush them thoroughly with a rolling pin.
- These make-ahead desserts keep well in the refrigerator for up to two weeks.
Nutrition
- Serving Size: 1 ball
- Calories: 150
- Sugar: 15
- Sodium: 75
- Fat: 10
- Saturated Fat: 6
- Unsaturated Fat: 4
- Trans Fat: 0
- Carbohydrates: 15
- Fiber: 0
- Protein: 2
- Cholesterol: 10