
If you’re looking for a dessert that screams “special occasion” but doesn’t require you to spend all afternoon fussing in the kitchen, I have your back. Sometimes, only pure, deep chocolate will do, right? That’s why I guard this recipe for the flourless chocolate torte so closely. It’s my secret weapon for looking like a culinary genius with very little effort. This isn’t just some cake; it’s that dense, unbelievably rich, fudgy profile we all crave when only the best will do. My grandmother always whipped up something rich like this for holidays when things got hectic, and this recipe, being naturally gluten-free, fits right into our modern, busy lives. Trust me, this Ultimate Easy & Fudgy version is going to wow everyone at your next dinner party.
- Why This Flourless Chocolate Torte is Your New Go-To Elegant Chocolate Dessert
- Gathering Ingredients for Your Rich Fudgy Cake Recipe
- Essential Equipment for Making the Flourless Chocolate Torte
- Step-by-Step Instructions for the Easy Chocolate Torte
- Tips for Success When Making Your Gluten Free Torte
- Presentation Ideas for Your Flourless Chocolate Torte
- Storage and Reheating Instructions for This Decadent Chocolate Dessert
- Frequently Asked Questions About the Flourless Chocolate Torte
- Estimated Nutritional Data for This Intense Dark Chocolate Treat
Why This Flourless Chocolate Torte is Your New Go-To Elegant Chocolate Dessert
Why complicate things when pure chocolate is already perfect? This torte cuts right to the chase. It’s the ultimate crowd-pleaser because it delivers that intense chocolate hit without any fuss. If you’re hunting for special occasion cake ideas that leave everyone talking, this is it.
- It’s naturally gluten-free, making it accessible for everyone at your table.
- The prep time is crazy short! You’ll be done mixing before your coffee gets cold.
- It creates such an impressive dinner party dessert—it looks like it took you days!
We’re talking about a true velvety chocolate dessert here. You can find more of my favorite easy ideas over in my best dessert recipes collection.
Achieving That Perfect Melt In Your Mouth Cake Texture
The secret to that incredible chew and velvety collapse? It’s literally right in the name: no flour! Since we skip the flour entirely, the texture relies completely on the quality of the bittersweet chocolate and the magic made by whipping those eggs. The air beaten into the egg whites gives the torte its lift, while the melted chocolate and butter create that dense, fudgy foundation. When properly chilled, you get that fantastic melt in your mouth cake experience every single time.
Gathering Ingredients for Your Rich Fudgy Cake Recipe
Okay, for this rich fudgy cake recipe, we are keeping the ingredient list super tight because we want the chocolate flavor to be the absolute star of the show. Seriously, skip the cheap stuff here—it makes a massive difference when there are so few components!
You’ll need to measure out:
- 8 ounces high-quality bittersweet chocolate (I insist on 60-70% cacao here), chopped finely.
- 1/2 cup (that’s one stick!) of good unsalted butter, cut into little pieces so it melts evenly.
- 3 large eggs, and you’ll need to separate them—this is vital!
- 1/4 cup granulated sugar.
- 1/4 cup packed light brown sugar for that little bit of molasses depth.
- 1 teaspoon of pure vanilla extract.
- Just a tiny pinch of salt to help everything sing.
- And finally, 1 tablespoon of unsweetened cocoa powder, just for dusting the top when we’re done. That’s it! Simple, elegant, and ready to deliver incredible flavor.
Essential Equipment for Making the Flourless Chocolate Torte
Even though this is an easy torte, you do need the right gear to get that perfect structure. Don’t worry, nothing fancy like a vacuum sealer or a blast chiller is required! We just need a couple of basics to handle the melting and the folding process smoothly.
First things first, you absolutely need an 8-inch springform pan. This cake is delicate, especially when it’s ultra-fudgy, and trying to wrestle it out of a regular cake pan is just asking for kitchen tears. The removable sides are what save the day! Make sure to grease it up well and line that bottom with parchment paper—I even sometimes put parchment just up the sides, too, just to be safe when dealing with such a gooey base.
Beyond the pan, you’ll want two reliable mixing bowls. One needs to be large enough to hold the chocolate and yolk mixture, and the other needs to be spotlessly clean and grease-free for whipping those egg whites into stiff peaks. A rubber spatula is your best friend for gently folding everything together; speed isn’t what we’re going for here, gentleness is! If you want my tips on other simple baking projects, check out my easy recipes for moist cakes.
And of course, you’ll need something to create that double boiler for melting the chocolate. A saucepan with water simmering gently beneath a heatproof bowl does the trick perfectly. No need for special double boilers!
Step-by-Step Instructions for the Easy Chocolate Torte
Alright, let’s get baking! This is where the magic happens, and trust me, it moves fast. Remember to preheat that oven to 350 degrees F before you even think about opening a chocolate wrapper. Get your 8-inch springform pan greased up and line that bottom with parchment paper—I really don’t want you struggling to get this gorgeous thing out later!
Melting Chocolate and Butter Base
We’re sticking to the old-school, controlled method here. Place your chopped chocolate and those pieces of butter into a heatproof bowl. Pop that bowl over a saucepan where the water is just gently simmering—we call that a double boiler, and it keeps the chocolate from scorching. Stir it carefully until it’s totally melted and smooth as silk. Once it’s all liquid, pull it off the heat and just let it chill out for about 5 minutes. That slight cool-down time stops it from scrambling the egg yolks later.
Folding in the Egg Whites for Lightness
This next part is critical for achieving that light, airy structure since we don’t have any flour structure holding things up! Once your chocolate base is ready, whisk your yolks with the sugar and vanilla until they’re pale and fluffy. Then you gently whisk that slightly cooled chocolate mixture into the yolks. Now, beat those egg whites with a pinch of salt until they form stiff peaks—you know, when you lift the beaters, they stand straight up like little soldiers. Take about a third of those magnificent whites and stir them into the chocolate batter to loosen it up. Then, and this is the most important tip: gently fold the rest of the whites in slowly, in batches. You MUST work gently here; we are trying to preserve every single tiny air bubble we created! You only fold until you stop seeing streaks of white.
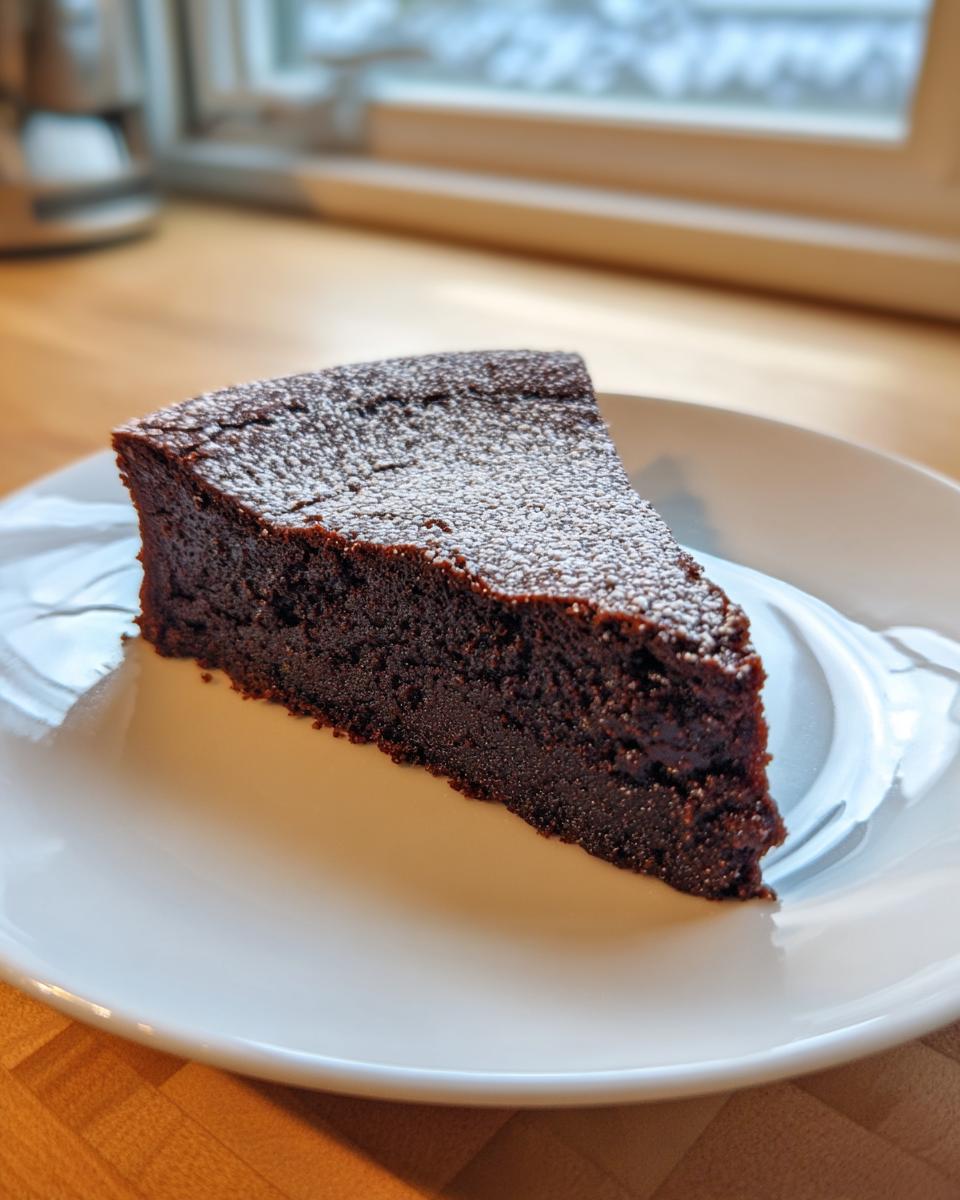
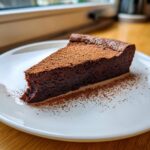
Pour that beautiful batter into your prepared pan. Bake it for just 30 to 35 minutes. I watch the edges—they should look set, but the very center *must* look soft and slightly jiggly. If it looks too firm, you’ve baked it too long, and it won’t be that incredible melt-in-your-mouth texture we want! Let it cool completely in the pan; it will sink a little, which is totally normal for this intense dark chocolate treat. Once it’s cooled, release the sides and dust it generously before serving!
Tips for Success When Making Your Gluten Free Torte
I’ve made this decadent chocolate dessert enough times to know exactly where things can go sideways, but honestly, this recipe is pretty foolproof if you respect two ingredients: the chocolate and the oven thermostat. Since there’s nothing to hide behind—no flour, no big fillings—the quality of your starting ingredients really shines through. If you want the absolute best flourless chocolate cake experience, don’t skimp on the chocolate!
Speaking of secrets, I read an article about technique that really cemented some of my own intuition. If you want detailed professional insight into getting that perfect texture, you should definitely check out this resource on the flourless chocolate torte secrets. It covers things like why temperature control is everything here.
The biggest mistake people make? Overbaking! I know, I know, we’re all scared of soggy desserts, but this one is designed to set up as it cools. Pull it out when the center still looks a little soft and glossy. It will firm up dramatically as it chills. Undercooking it slightly is far better than drying it out!
And speaking of chilling, this is perhaps the simplest pro-tip for turning a great torte into an legendary one: patience! You MUST chill this torte for at least four hours. Overnight is even better. When it’s cold, the texture transforms from slightly soft and pudding-like to that intensely dense, unbelievably smooth bite that makes this the ultimate chocolate lovers dessert. People often think they messed up when it sinks slightly after cooling, but that sinking is proof it’s going to be perfectly fudgy when sliced cold. If you are serving this during the holidays, maybe try my chocolate pecan pie the next day!
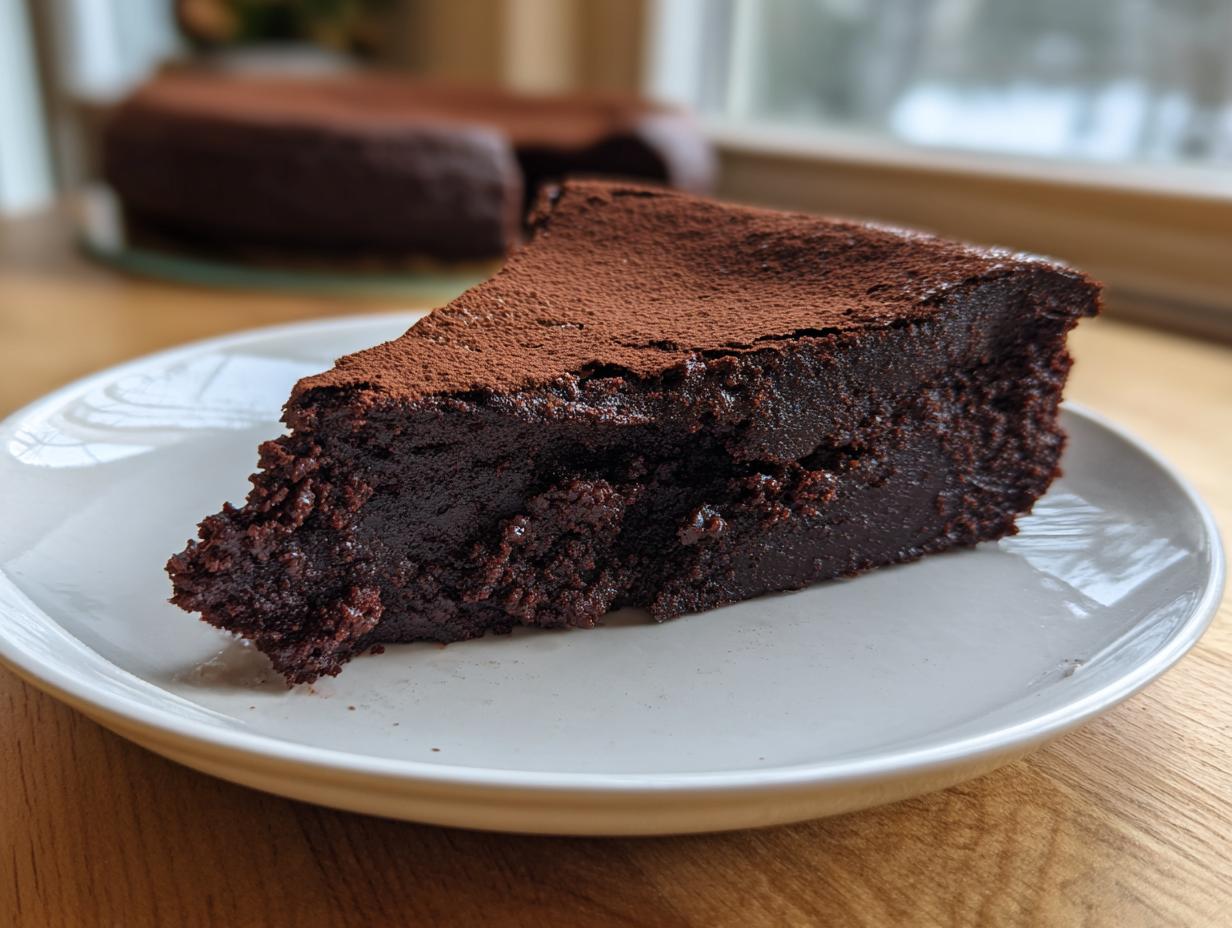
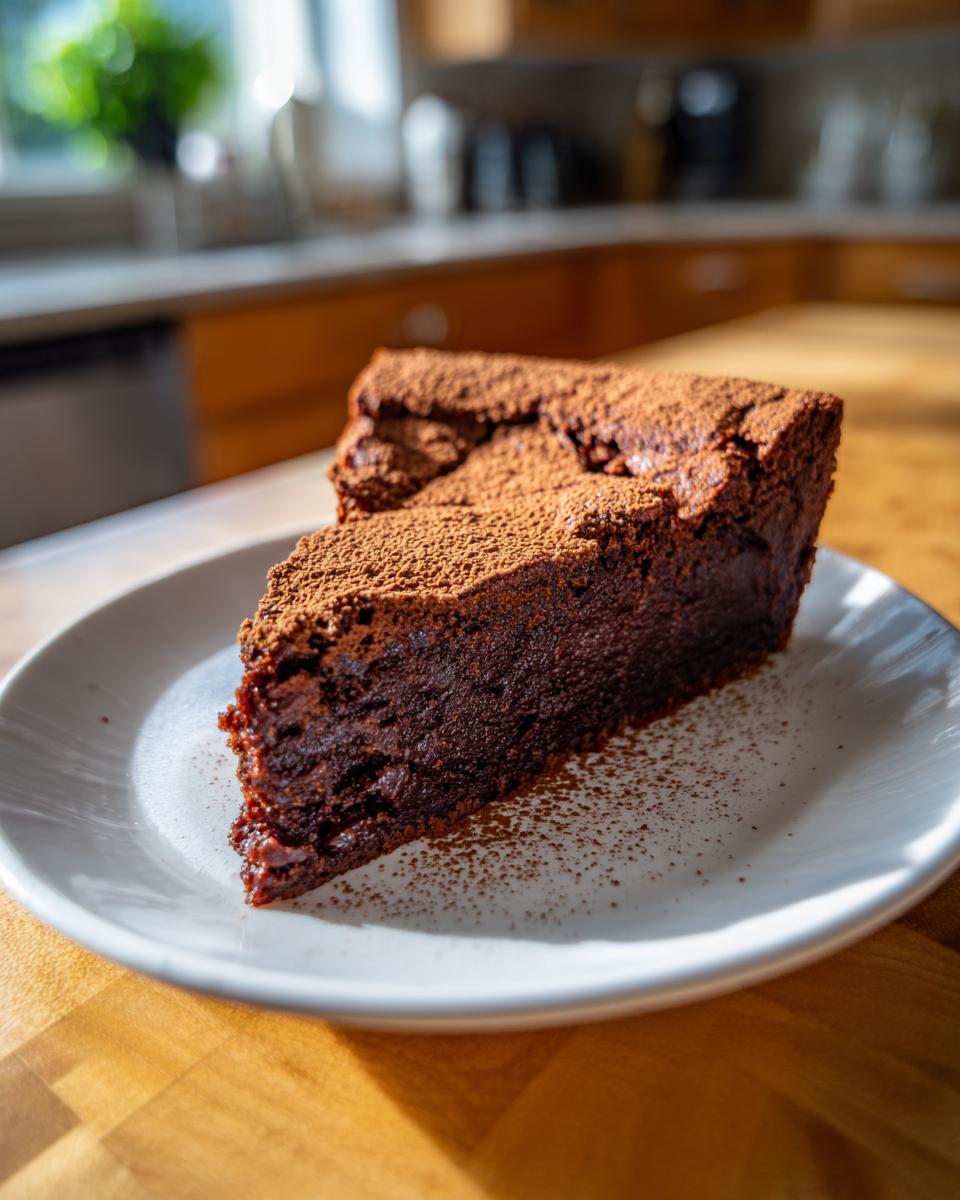
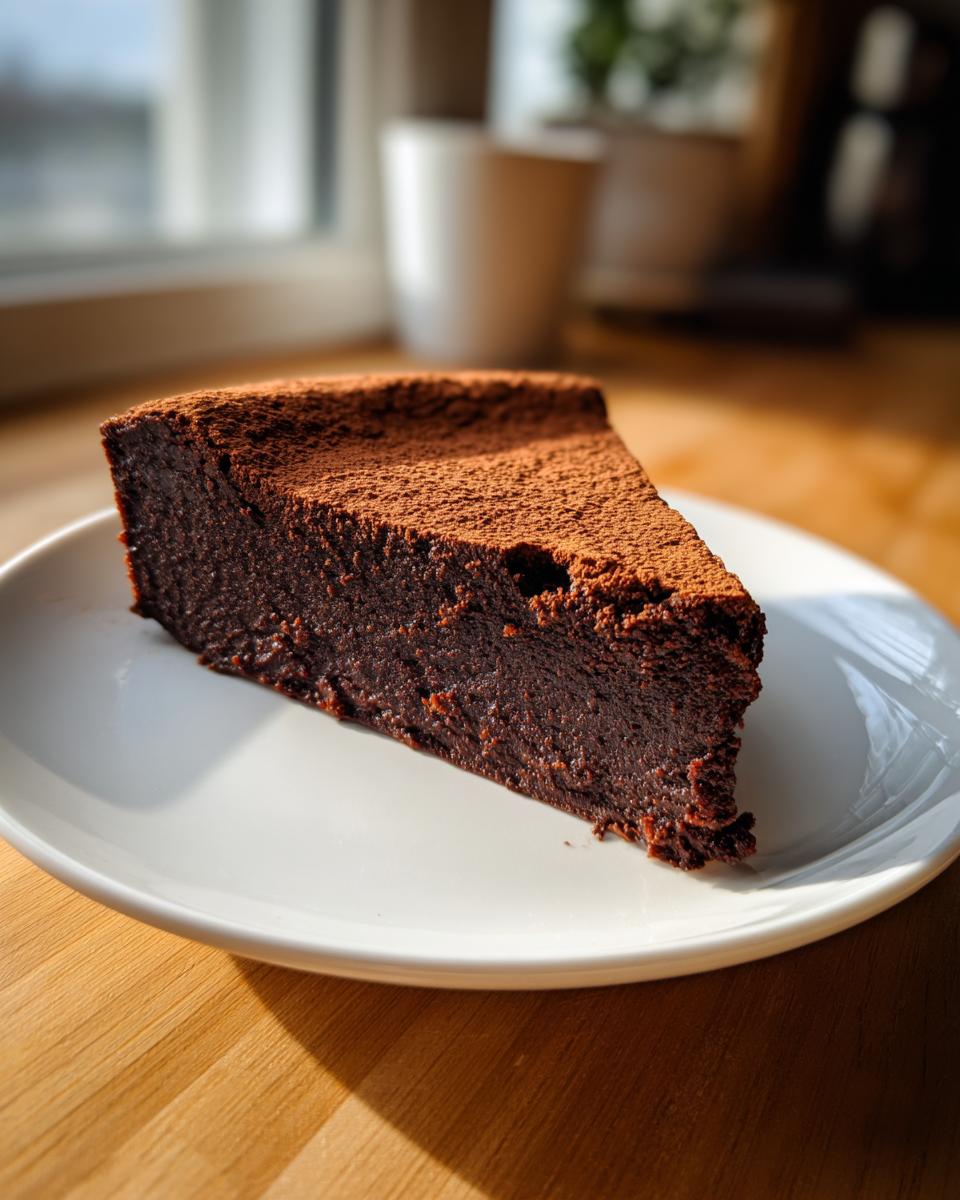
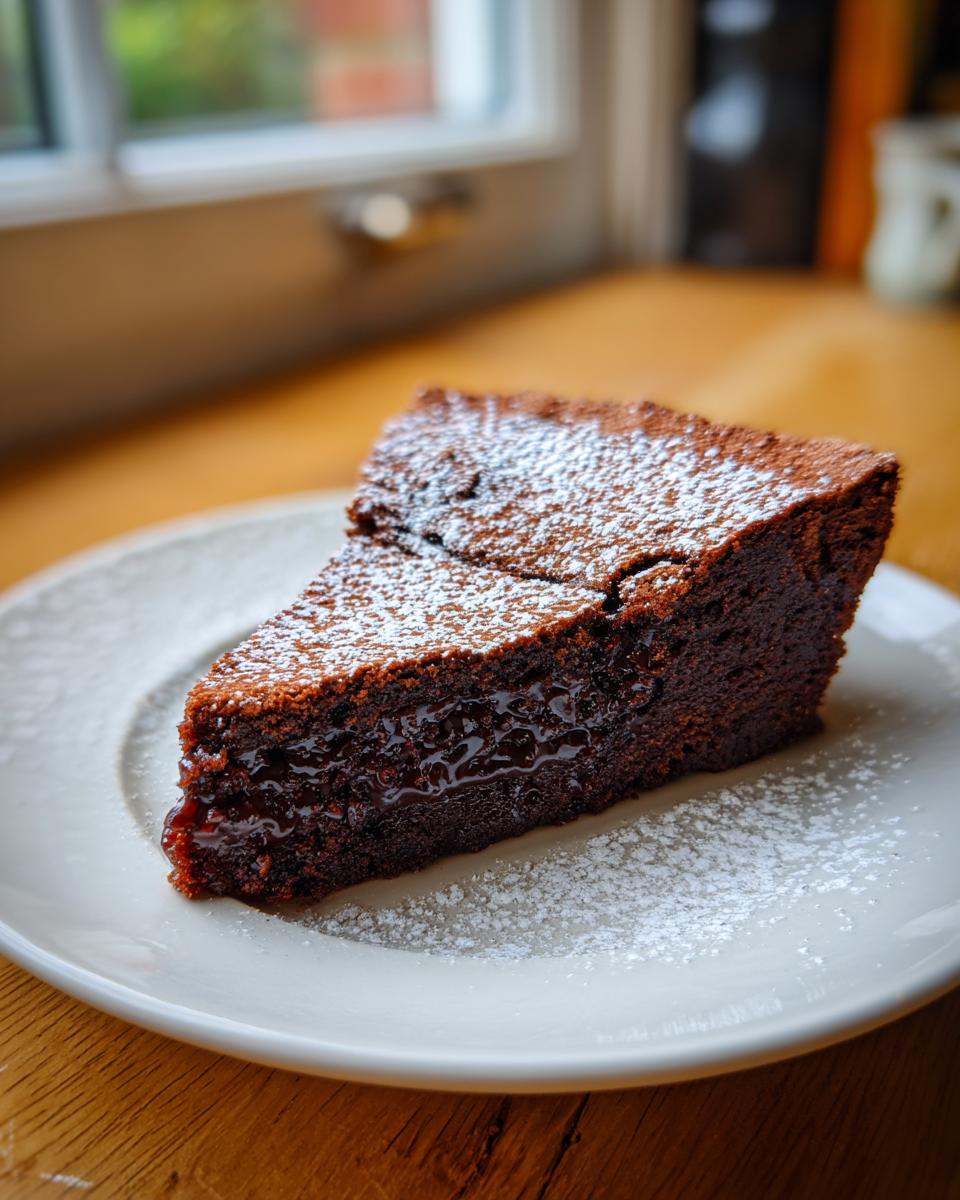
Presentation Ideas for Your Flourless Chocolate Torte
Now that you’ve got this decadent, rich, fudgy cake baked and chilled, it’s time to make it look as gorgeous as it tastes! Since this is such an elegant chocolate dessert on its own, we don’t need much fuss. My favorite, no-fail method is just dusting it liberally with unsweetened cocoa powder right before serving. It gives it that sophisticated, dark matte finish.
But if you want a little color contrast, you can’t go wrong pairing a slice with sharp, bright fruit. Fresh raspberries are just stunning against the deep chocolate. Or, if you’re feeling extra generous, a dollop of freshly whipped cream really complements the intensity. Want to go the extra mile? I have a great recipe for chocolate-covered strawberries that look amazing alongside a slice of this torte!
Storage and Reheating Instructions for This Decadent Chocolate Dessert
This is one of those fabulous desserts that actually improves with age—a definite win for busy people like us! Because this decadent chocolate dessert relies on eggs and butter rather than flour for its structure, it *needs* to be stored properly to maintain that incredible fudgy density.
Always keep the finished, dusted torte tightly wrapped in plastic wrap and store it in the refrigerator. It should keep beautifully for up to four days. Honestly, I find day two is when it really hits its peak! When you pull it straight from the fridge, it will be firmer, almost like a piece of fudge, which is exactly what we want for clean slices.
If you plan to serve it cool, just let it sit on the counter for about 15 to 20 minutes before slicing. That little bit of warmth just takes the edge off the chill without losing that signature velvety mouthfeel. Don’t worry about reheating slices in the microwave; trust me, you don’t want to melt away all that hard-earned structure! Serving it cool or barely tempered is the way to enjoy this intense, rich treat.
Frequently Asked Questions About the Flourless Chocolate Torte
Can I use semi-sweet or milk chocolate instead of bittersweet?
You really want to stick to bittersweet or dark chocolate, aiming for that 60% to 70% cacao range. Since there’s no flour here, the chocolate is doing all the heavy lifting for structure and flavor! If you use semi-sweet, it will be much sweeter, and if you go for milk chocolate, you might find the torte won’t set up quite as well because the fat content is different. For the richest flavor profile, dark chocolate wins every time. It’s the secret to getting that truly intense dark chocolate treat you promised yourself!
Why did my rich fudgy cake sink in the middle after baking?
Oh, don’t panic! If your flourless chocolate torte sinks a little in the center, that’s actually a badge of honor! It proves you didn’t overbake it, and it’s exactly how this cake is supposed to behave. Unlike a sponge cake that needs structure, this is designed to be dense and fudgy. The rising comes from the air whipped into the egg whites, and as it cools and settles, it collapses slightly into that rich, dense center we are aiming for. If you want to read more about how to achieve this perfect texture, I shared some insights here on keeping things simple!
Since this is an easy chocolate torte, can I make it completely ahead of time?
Yes, please do make it ahead of time! This is one of the greatest parts of this gluten free torte; in fact, it tastes *better* the next day. The chilling time allows the fats to solidify and the texture to become perfectly dense and smooth—that signature melt-in-your-mouth quality really develops overnight in the fridge. So, bake it the day before your party, keep it wrapped up, and just dust it with cocoa powder right before you serve it. It’s the definition of a stress-free, elegant dessert!
What is the best way to serve this impressive dinner party dessert?
As I mentioned in the presentation section, keeping it cool is ideal. You can serve it straight from the fridge for a firm, fudge-like slice, or let it sit on the counter for about 20 minutes for a slightly softer texture. For an extra special touch, look at how this recipe presents theirs! A little fresh whipped cream or some tart raspberries are my favorite things to serve alongside it. The tang cuts through the intense richness perfectly, making every bite feel balanced.
Estimated Nutritional Data for This Intense Dark Chocolate Treat
Now, I know how important it is to have a rough idea of what you’re eating, especially when you’re indulging in something this phenomenal. Keep in mind that because we are using real, high-quality ingredients like butter and bittersweet chocolate here, this flourless chocolate torte is certainly rich. Think of these numbers as a good guideline—your actual results might vary a tiny bit based on the exact brands of chocolate or butter you use.
These estimates are based on 8 generous servings of this decadent chocolate dessert, sliced evenly:
- Serving Size: 1 slice
- Calories: Around 350 (It’s a treat, not a diet food, right?)
- Fat: Roughly 25 grams (Most of this comes from that gorgeous butter and high-quality chocolate!)
- Carbohydrates: About 28 grams
- Sugar: Approximately 20 grams
- Protein: Around 7 grams
- Fiber: About 3 grams
It’s a dense dessert, so the rich flavor profile packs a punch in a small serving! That’s why the dusting of cocoa powder on top is perfect—it adds visual appeal without adding a ton of extra sugar. Enjoy every single, wonderfully rich moment of this melt in your mouth cake!
PrintThe Ultimate Easy & Fudgy Flourless Chocolate Torte (Naturally Gluten-Free)
Make this rich, decadent flourless chocolate torte for your next special occasion. This recipe delivers an intense, velvety texture without any flour, making it a naturally gluten-free dessert that impresses every time.
- Prep Time: 15 min
- Cook Time: 35 min
- Total Time: 50 min
- Yield: 8 servings 1x
- Category: Dessert
- Method: Baking
- Cuisine: American
- Diet: Gluten Free
Ingredients
- 8 ounces high-quality bittersweet chocolate (60-70% cacao), chopped
- 1/2 cup (1 stick) unsalted butter, cut into pieces
- 3 large eggs, separated
- 1/4 cup granulated sugar
- 1/4 cup packed light brown sugar
- 1 teaspoon vanilla extract
- Pinch of salt
- 1 tablespoon unsweetened cocoa powder, for dusting
Instructions
- Preheat your oven to 350 degrees F. Grease an 8-inch springform pan and line the bottom with parchment paper.
- Place the chopped chocolate and butter in a heatproof bowl set over a saucepan of simmering water (a double boiler). Stir occasionally until completely melted and smooth. Remove from heat and let cool slightly, about 5 minutes.
- In a separate medium bowl, whisk together the egg yolks, granulated sugar, brown sugar, and vanilla extract until the mixture is pale yellow and slightly thickened.
- Gently whisk the slightly cooled chocolate mixture into the egg yolk mixture until just combined. Do not overmix.
- In a clean, dry bowl, beat the egg whites with the pinch of salt using an electric mixer until stiff peaks form. The whites should hold their shape when you lift the beaters.
- Gently fold one-third of the beaten egg whites into the chocolate mixture to lighten it. Then, carefully fold in the remaining egg whites in two additions until no white streaks remain. Work gently to keep the air in the batter.
- Pour the batter into the prepared springform pan.
- Bake for 30 to 35 minutes. The edges should look set, but the center will still look slightly soft and fudgy. Do not overbake; this is key for a melt-in-your-mouth texture.
- Let the torte cool completely in the pan on a wire rack. The center will sink slightly as it cools, which is normal for this rich, fudgy cake.
- Once cool, carefully run a thin knife around the edge before releasing the springform side. Dust the top generously with cocoa powder before slicing and serving.
Notes
- For the best, densest texture, chill the torte for at least 4 hours or overnight before serving.
- Use high-quality chocolate; since there is no flour, the chocolate flavor is the star of this dessert.
- Serve slices with fresh raspberries or a dollop of unsweetened whipped cream for contrast.
Nutrition
- Serving Size: 1 slice
- Calories: 350
- Sugar: 20
- Sodium: 80
- Fat: 25
- Saturated Fat: 15
- Unsaturated Fat: 10
- Trans Fat: 0
- Carbohydrates: 28
- Fiber: 3
- Protein: 7
- Cholesterol: 120