
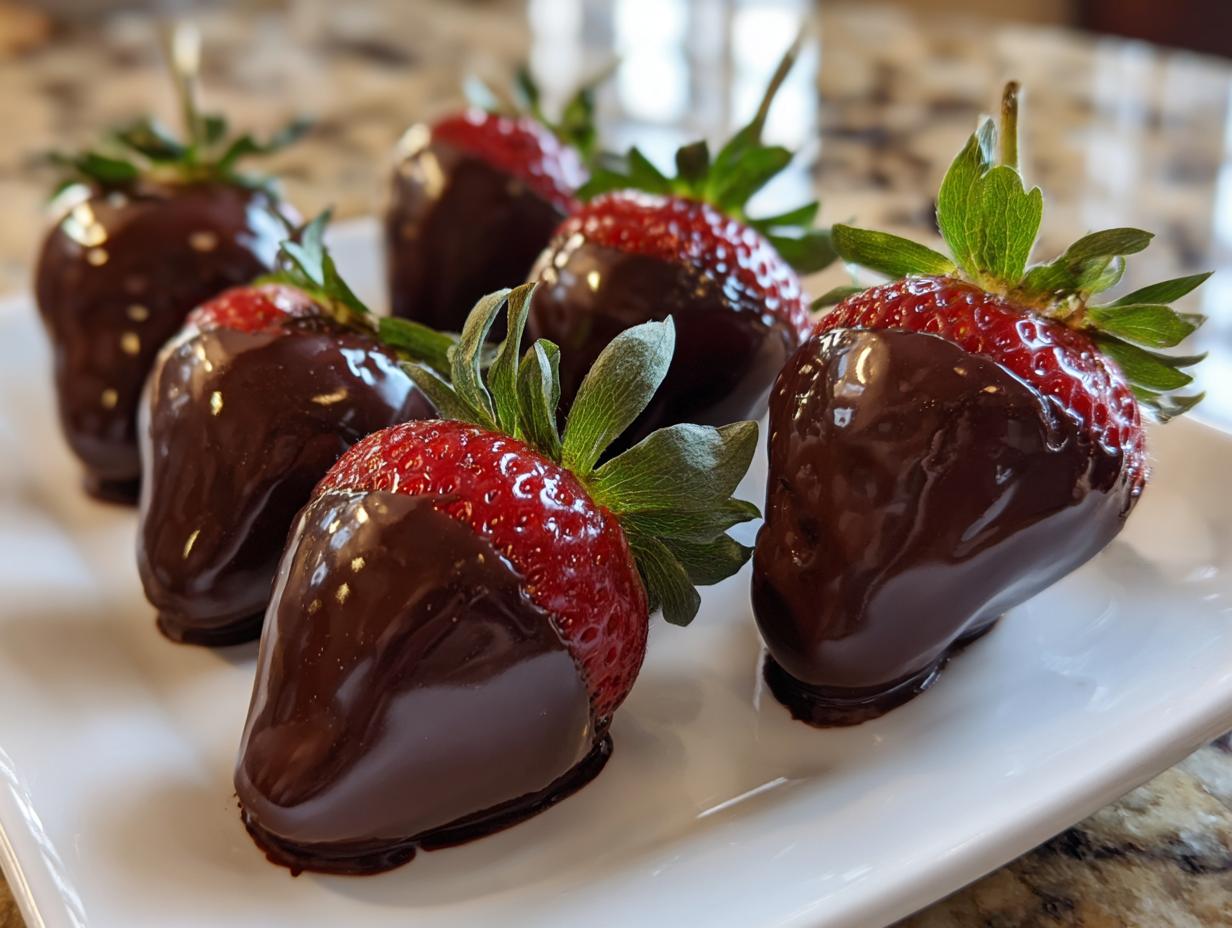
Sometimes you just need a treat that looks like it took hours of delicate work but actually came together in minutes, right? That’s the magic of chocolate covered strawberries! They pull double duty: feeling incredibly romantic for Valentine’s Day or anniversaries, but also being totally perfect for just cheering up a Tuesday evening. Forget those fussy cake recipes; I’ve poured all my energy into this ultimate easy and foolproof recipe meant to deliver that high-end, glossy chocolate coating every single time. No smudges, no lumps—just pure, decadent fruit perfection. We’re making moments special without spending all afternoon fussing in the kitchen, I promise! If you love making special treats easily, you should check out all my favorites in the delicious dessert recipes collection.
- Why You'll Love This Easy Chocolate Covered Strawberries Recipe
- Ingredients for Gourmet Homemade Chocolate Berries
- The Best Chocolate Coating for Strawberries: Melting Techniques
- How to Make Chocolate Covered Strawberries: Step-by-Step Instructions
- Variations for Party Ready Chocolate Fruits
- Storage and Serving Tips for Fresh Strawberry Chocolate Treats
- Frequently Asked Questions About Chocolate Covered Strawberries
- Nutritional Estimates for Simple 3 Ingredient Fruit Dessert
- Share Your Homemade Chocolate Dipped Berries
- Nutritional Estimates for Simple 3 Ingredient Fruit Dessert
- Share Your Homemade Chocolate Dipped Berries
Why You’ll Love This Easy Chocolate Covered Strawberries Recipe
I know you’re busy, so I distilled this down to the absolute essentials. This isn’t just another recipe; it’s a time-saver that still delivers that ‘wow’ factor. Every point below is why I default to this method:
- Speed Demon: Seriously, it’s a Quick Strawberry Dessert Idea. Prep to chill is well under 30 minutes. You’ll have a platter ready before the guests even arrive!
- Foolproof Gloss: We use one little optional ingredient—coconut oil—that guarantees that mirror-like, professional shine without needing any fancy tempering skills.
- Minimal Ingredients: You really only need three things: berries, good chocolate, and maybe that oil. Simple ingredients mean less stress.
- Looks Expensive, Isn’t: These Easy Chocolate Covered Strawberries look like they came from a fancy downtown chocolatier, but you made them while listening to your favorite podcast.
- Perfect for Gifting: If you need something impressive for a last-minute hostess gift or Valentine’s Day, this is your secret handshake.
- Customizable Fun: You control the chocolate type—dark, milk, or white—and the texture. Crushed nuts? Sprinkles? Go wild!
Ingredients for Gourmet Homemade Chocolate Berries
When we talk about making these look gourmet, we aren’t talking about tons of complicated stuff. No! We’re talking about using good quality ingredients and treating them right. Since this recipe moves fast, having everything prepped beside you when you start melting the chocolate is everything. Trust me on this one; you don’t want to be hunting for sprinkles while your chocolate starts to seize up!
Here is what you need for about 18 to 20 of these beautiful treats, depending on how much chocolate you load on there:
- One pound of the freshest strawberries you can find. They must be washed and, I mean, completely dried. I can’t stress this enough—moisture means sad, clumpy chocolate.
- 12 ounces of good quality chocolate. I prefer high-quality dark chocolate, really good stuff that melts nicely. If you want to do a batch of White Chocolate Covered Strawberries Recipe, use good quality white chocolate, too, but watch it carefully when melting!
- One teaspoon of coconut oil or vegetable shortening. This is totally optional, but oh boy, does it help! This is our little secret weapon for that super shiny finish.
- If you want to jazz them up, grab your toppings! We love chopped nuts, rainbow sprinkles, or maybe some crushed Oreo crumbs. Put these in shallow little bowls so the dipping process is super smooth.
The Best Chocolate Coating for Strawberries: Melting Techniques
Okay, let’s talk about the chocolate itself. This is where most people think they need to be a candy-making genius, but trust me, they don’t! The entire success of achieving that smooth, professional-looking finish—that gorgeous Glossy Chocolate Dipping Technique—comes down to how you handle the melting process. Quality chocolate is important, but technique is EVERYTHING.
I strictly stick to the microwave for speed, but you have to be patient, even when you’re excited to dunk those berries. Pop your chocolate into a microwave-safe bowl first. Then, you hit it in short bursts—30 seconds at a time. After each zap, you stir really well. The goal is to get most of the chocolate melted through residual heat, not direct heat. If you blast it too long, it gets gritty!
Now for the magic smoothing trick: that tiny bit of coconut oil or vegetable shortening, if you’re using it. Stir that in right at the end when the chocolate is *almost* smooth. The fat smooths out the chocolate structure and gives you that incredible shine that makes people think you bought these from a bakery case. I learned years ago that if the chocolate starts getting too thick halfway through dipping, just give it 10 more seconds in the microwave. Never let it get hard!
For other amazing recipes where texture and shine matter, like getting icing to dry beautifully hard, my guide on how to get cookie icing to dry hard and glossy has some tips that apply here too!
Tips for Perfect White Chocolate Covered Strawberries Recipe
If you’re going for the White Chocolate Covered Strawberries Recipe variation, you need to tread a little lighter. White chocolate actually contains milk solids, which means it burns or seizes up way faster than dark or milk chocolate. It’s delicate!
My advice? Use the microwave even more cautiously—maybe 20-second bursts only, stirring constantly. If you find even after careful microwaving the white chocolate is just refusing to get smooth and beautiful, don’t fight it! Switch to a double boiler setup. Gently melt the white chocolate over simmering—not boiling!—water, making sure no steam or water drops get anywhere near that bowl. Low and slow is the only way to keep white chocolate looking perfectly creamy for dipping.
How to Make Chocolate Covered Strawberries: Step-by-Step Instructions
Now that our chocolate is perfectly glossy and ready to go, it’s time for the fun part—turning basic fruit into these gorgeous, decadent treats! Learning how to make chocolate covered strawberries that look professionally done is all about a couple of key moves in this sequence. Pay attention to that very first step, because it dictates the success of everything that follows.
First thing’s first: your berries need to be bone dry. I mean, dry-as-a-bone dry. If there is *any* water left on them from washing, the melted chocolate will immediately seize up, get lumpy, and slide right off. Use paper towels and gently pat every single one. Remember to leave those cute green caps and stems attached! They are your handles, saving you from dipping your fingers in chocolate and giving a beautiful little pop of color when they are done.
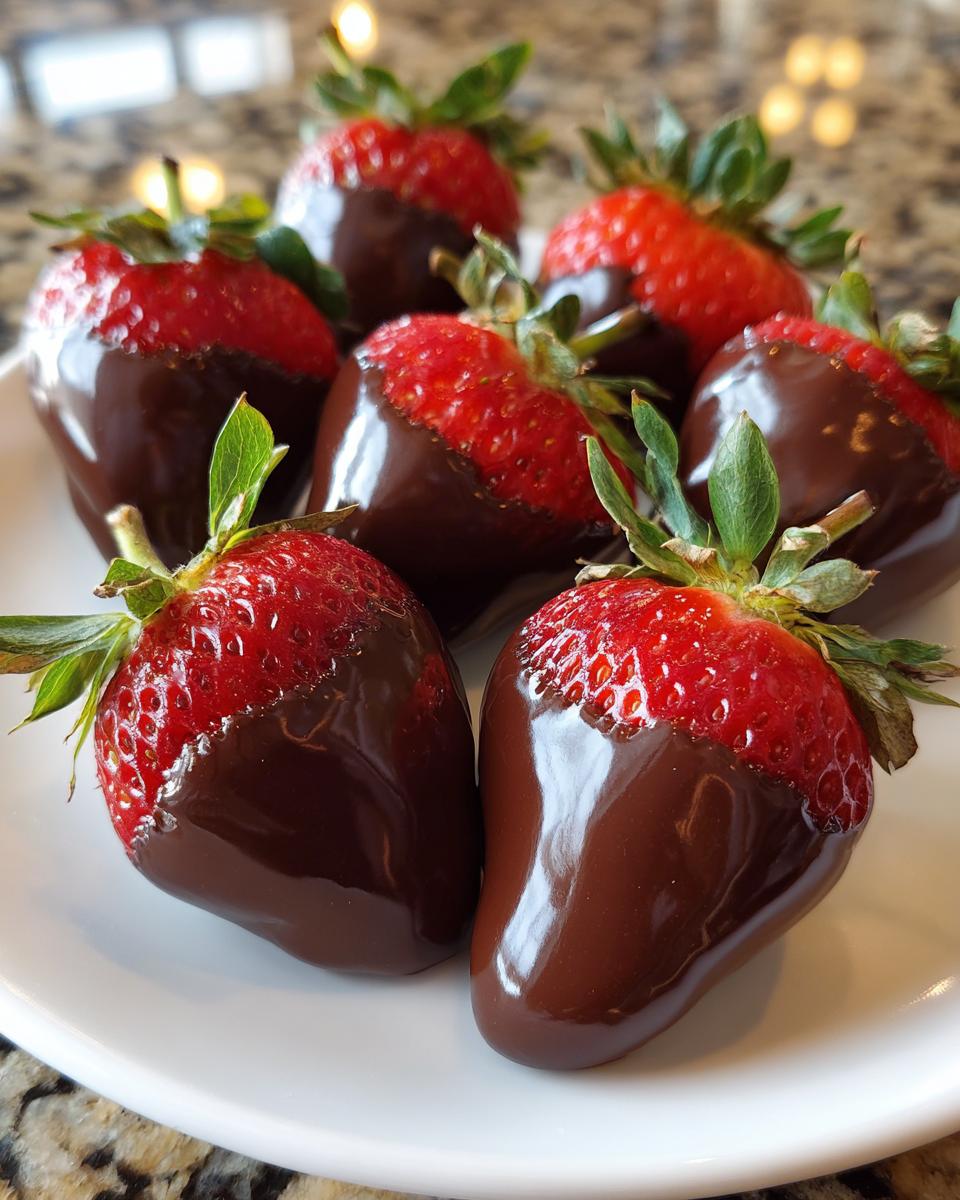
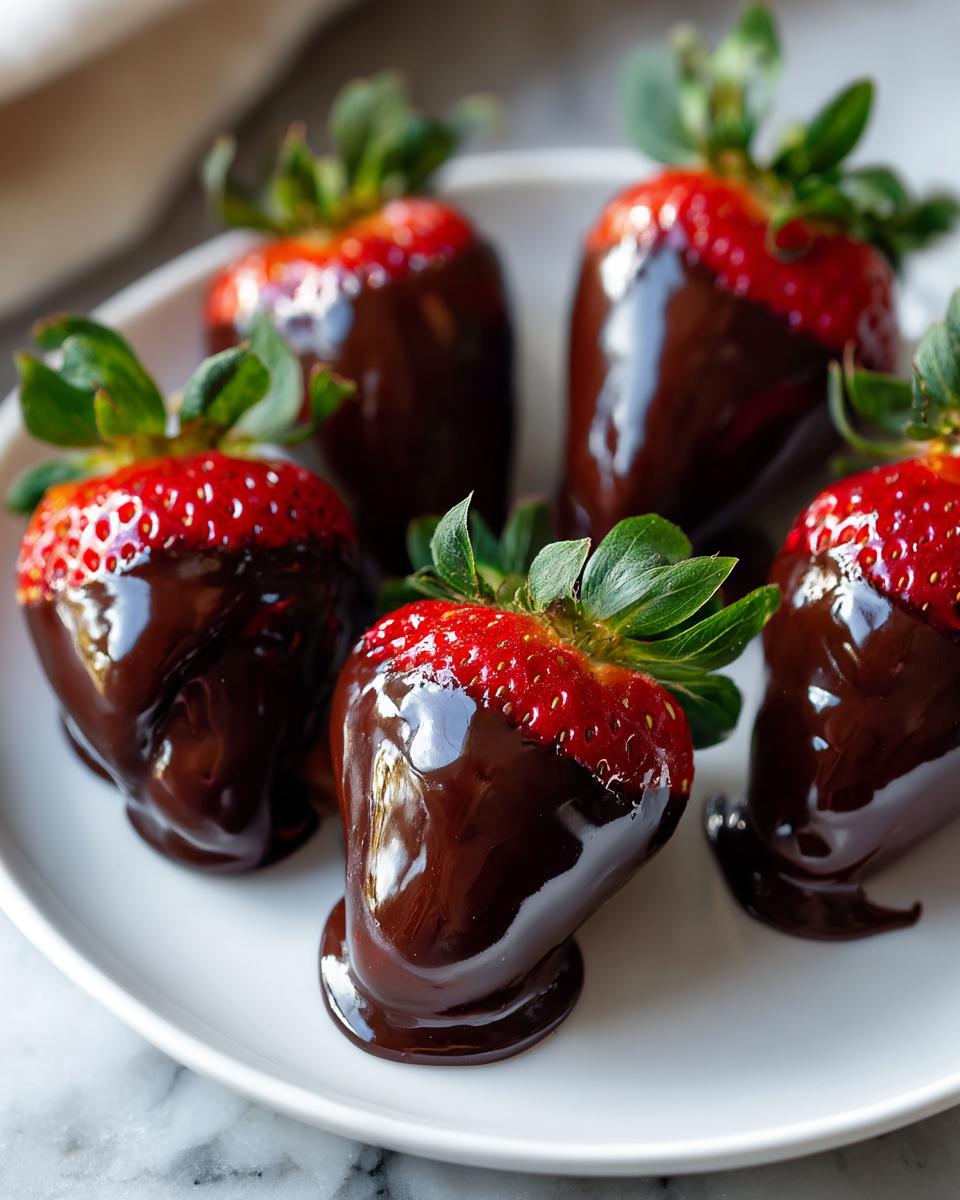
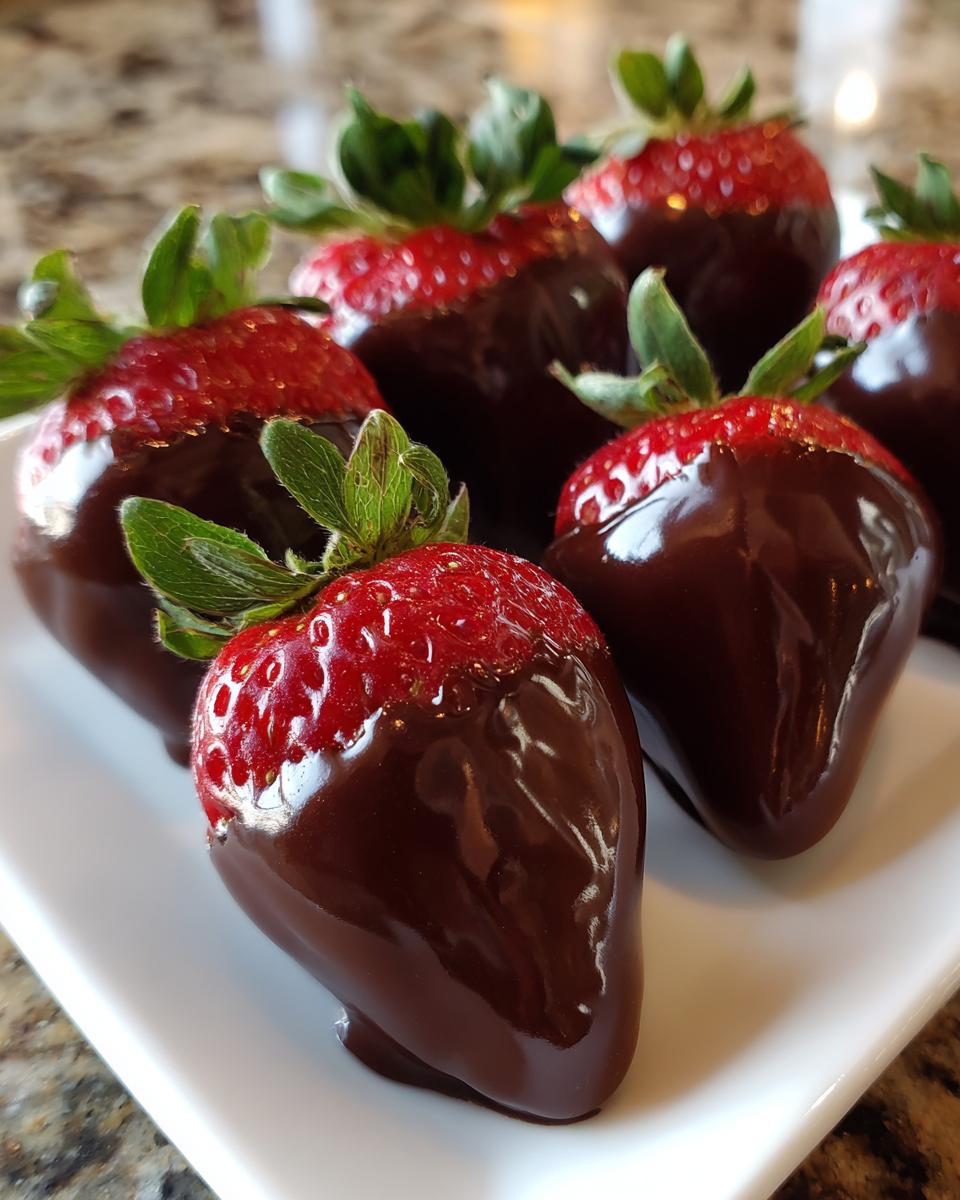
Once you have your dipping station ready—the lined baking sheet right next to your melted chocolate bowl—you grab the stem firmly. Dip the berry straight down into the chocolate, swirling it around. You only need to cover about three-quarters of the fruit; you want that red peeking out! Lift it up high and let the excess chocolate drip right back into the bowl. This dripping time is crucial, so give it five full seconds before moving on.
If you’re adding toppings, you need to move *fast* here. As soon as that excess chocolate has dripped off, immediately roll the coated section into your sprinkles or nuts, or just quickly sprinkle them on top while the chocolate is still wet and sticky. If you wait even a minute, the coating will start to skin over and the toppings won’t stick! For more great tips on this process, you can check out the folks over at Grain Free Table.
Preparing Your Chocolate Dipped Fruit for Gifts
When you’re dipping, hold that berry nice and steady by the stem. Don’t rush the swirl! A slow, even dip ensures you get a thick enough layer of chocolate that won’t immediately crack when you bite into it later. Think of it like giving the berry a nice, soft chocolate blanket. Then, lift it straight up and let gravity work its magic, shaking off the heaviest drips. That little bit of residual drip will smooth out on the tray, leaving you with that classic, slightly tapered look we all love for chocolate dipped fruit for gifts.
Setting and Chilling the Chocolate Covered Strawberries
As soon as the berry hits the parchment paper, you’re done with that one! Don’t try to smooth it out or touch the chocolate again, or you’ll ruin that perfect coat. Move right onto the next one. Once all your beautiful berries are resting on the parchment paper—which is non-negotiable, trust me, otherwise they stick everywhere—they need to chill out. Pop that whole sheet pan directly into the refrigerator. They generally take about 15 to 20 minutes to get completely firm and set. You’ll know they are ready when the chocolate snaps cleanly if you gently touch it. Don’t leave them in too long, though, or the strawberries can start to get a bit watery.
If you happen to be making a big batch for a party or maybe just need a quick snack inspiration, I have a bunch of fun ideas over in my guide for easy breakfast recipes that might surprise you!
Variations for Party Ready Chocolate Fruits
Once you nail that basic dip, it’s time to get creative! This is where we turn simple chocolate covered strawberries into show-stopping centerpieces for your dessert table. Adding flavor right into the chocolate coating is my favorite way to keep things interesting. Remember that little bit of coconut oil we use for gloss? That’s also the perfect carrier for other flavors!
For a rich, wintry treat, stir just half a teaspoon of instant espresso powder into your melted dark chocolate. Wow! It deepens the chocolate flavor beautifully—it makes them taste almost mocha-like. If you’re doing a holiday party, try a tiny splash—maybe a quarter teaspoon—of peppermint extract mixed into the white chocolate. It gives them a clean, minty finish that everyone goes crazy for.
Don’t forget the outside texture! Beyond the standard sprinkles and nuts, think about making custom mixes for your next gathering. A mix of toasted coconut flakes and sea salt? Heavenly. Or, for a salty-sweet punch, try mixing finely crushed pretzel pieces with a dusting of brown sugar. These kinds of personalized touches make them truly Party Ready Chocolate Fruits. If you love mixing sweet and salty things, you absolutely have to see my recipe for easy toffee pretzels—it follows the same principle of balancing big flavors!
And if you want to move beyond just dipping the whole berry? Try drizzling! Once your first layer of dark chocolate is completely set (give it that 15 minutes chilling time!), melt a little bit of contrasting white chocolate. Use a fork, holding it about six inches above the berries, and quickly flick your wrist back and forth over the platter. It creates those gorgeous, professional-looking streaks. It’s surprisingly easy and always gets huge compliments. For those who want to see some amazing professional techniques used on strawberries, check out the inspiration over at Recipes Food.
Storage and Serving Tips for Fresh Strawberry Chocolate Treats
Alright, you’ve made these stunning chocolate covered strawberries, and now you’re wondering how long you can keep them around before they disappear! Since we are dealing with fresh fruit here, we have to be smart about storage. While the chocolate coating is sturdy, the berry underneath is still fresh produce. The lifespan isn’t like a batch of cookies, but we can definitely maximize that time!
The best place for your finished Fresh Strawberry Chocolate Treats is definitely the refrigerator. Pop them onto a tray piled with parchment paper (or the original sheet you set them on) and place them into an airtight container. If you don’t have a container that seals tightly, you can use plastic wrap over the tray, but make sure it’s sealed well so they don’t absorb any weird fridge smells. They should keep beautifully for up to two days. Honestly, they rarely last that long in my house because they are too tempting!
Now, here’s the key serving tip that separates a good bite from a great one. If they’ve been chilling in the fridge, that chocolate coating gets super hard and brittle. If you bite into it straight from the cold, the chocolate might crack off in a big shard, leaving you with just a cold, mushy berry. Yuck! That’s not the experience we want.

So, right before you serve them, take the container out of the fridge and let them sit on the counter for about 15 to 20 minutes. This little warming period softens the chocolate just enough so that it gives a satisfying *snap* when you bite it, followed immediately by that juicy, soft strawberry center. It’s the perfect temperature contrast, I’m telling you! If you want more amazing, practical dessert ideas that are built for real life, poke around my full list of favorite delicious dessert recipes.
Frequently Asked Questions About Chocolate Covered Strawberries
I get so many messages asking the same great questions after people try this recipe! It shows you’re paying attention to the details, which is what separates good treats from truly amazing ones. Honestly, these little issues are usually super easy fixes once you know what you’re looking for. Here are some of the things I hear most often about making these chocolate covered strawberries.
Why is my chocolate coating cracking on the chocolate covered strawberries?
Oh, that’s the most frustrating thing! You get that perfect dip, everything looks glossy, and then 20 minutes later, it looks like shattered stained glass. This almost always comes down to temperature shock or moisture sneaking in. If your berries are pulled straight from a very cold fridge, they are too cold when they hit the warm, melted chocolate. That drastic temperature difference makes the chocolate tighten up too fast and it cracks as it shrinks.
The fix? Always let your completely washed and dried berries sit on the counter for about 20 minutes before you even start melting the chocolate. You want them cool, yes, but not ice-cold. If you followed my melting steps using the coconut oil, moisture shouldn’t be an issue, but if you see any lumps or cracks, check the berry surface again—even a tiny bit of water on the fruit will ruin that smooth adhesion!
Can I make these ahead of time for a party?
Yes, you absolutely can! Since these are meant to be party ready, it’s great to prep ahead for your party ready chocolate fruits. As I mentioned in the storage section, they hold up great in an airtight container in the fridge for about 36 to 48 hours. The real key is letting them temper out on the counter for about 15 to 20 minutes before anyone eats them. That prevents the chocolate from being rock-hard when they take their first bite!
What is the best chocolate to use for a super smooth coating?
Forget those waxy chips that claim they are ‘for melting.’ They usually contain stabilizers that make them dull and thick. For the best results—the kind of smooth, deep coating people rave about—you need high-quality chocolate bars chopped up into small pieces. I prefer using 60% to 70% cacao dark chocolate bars. If you’re looking for the easiest way to get a beautiful finish with minimal fuss, this Simple 3 Ingredient Fruit Dessert idea is the way to go because the chocolate quality is actually what shines through!
How do I get that fancy drizzle effect on the chocolate covered strawberries?
That drizzle is pure showmanship, and it requires two coats! Step one: dip the whole berry and let that coat set completely hard in the fridge (about 15 minutes). Then, melt a small amount of contrasting chocolate—white chocolate over dark, or vice versa. Put that melted chocolate into a small Ziploc bag, snip the tiniest corner off with scissors, and hold that tiny opening a few inches above the set berries. Flick your wrist back and forth quickly over the platter. Keep that movement fast and light, and you’ll get those lovely, professional-looking streaks. It’s easier than trying to use a pastry bag, I promise! For lovely visual inspiration on dipping and drizzling, take a peek at the great ideas shared by Meal Min.
Nutritional Estimates for Simple 3 Ingredient Fruit Dessert
I always encourage you to focus on enjoyment when making treats like this, not fretting over the numbers! However, because we are dealing with only a few ingredients, the nutritional breakdown for these chocolate covered strawberries is pretty straightforward compared to, say, a frosted cake. Keep in mind these estimates are based on using standard dark chocolate and no extra toppings.
- Serving Size: 1 strawberry
- Calories: Around 120
- Sugar: About 12g
- Fat: Roughly 8g (depending heavily on your chocolate type!)
- Protein: About 2g
It’s a wonderful, relatively light way to have a decadent treat!
Share Your Homemade Chocolate Dipped Berries
I absolutely live for seeing what you all create in your kitchens! When you try out this recipe and achieve that perfectly glossy, professional-looking coat on your Easy Chocolate Covered Strawberries, please snap a picture and tag me! I want to see your toppings, your drizzles, and your beautiful platters.
If you loved this recipe as much as I love making it, please leave me a rating and a few stars right here on the page—it truly helps other home cooks find these practical recipes! And if you have questions or want to share a twist you tried (maybe that espresso powder idea?), shoot me a note over on the contact page. Happy dipping! If you need more sweet ideas for your next project, check out the wonderful treats shared by Karla Culinary for more inspiration.
Nutritional Estimates for Simple 3 Ingredient Fruit Dessert
I always encourage you to focus on enjoyment when making treats like this, not fretting over the numbers! However, because we are dealing with only a few ingredients, the nutritional breakdown for these chocolate covered strawberries is pretty straightforward compared to, say, a frosted cake. Keep in mind these estimates are based on using standard dark chocolate and no extra toppings.
- Serving Size: 1 strawberry
- Calories: Around 120
- Sugar: About 12g
- Fat: Roughly 8g (depending heavily on your chocolate type!)
- Protein: About 2g
It’s a wonderful, relatively light way to have a decadent treat!
Share Your Homemade Chocolate Dipped Berries
I absolutely live for seeing what you all create in your kitchens! When you try out this recipe and achieve that perfectly glossy, professional-looking coat on your Easy Chocolate Covered Strawberries, please snap a picture and tag me! I want to see your toppings, your drizzles, and your beautiful platters.
If you loved this recipe as much as I love making it, please leave me a rating and a few stars right here on the page—it truly helps other home cooks find these practical recipes! It’s so important for me to know that these recipes are working for your busy lives. Don’t hesitate to reach out if you have any last-minute questions or want to share a neat decoration idea; you can always send me a note over on the contact page.
Happy dipping, everyone! It’s these little treats that make the everyday special, isn’t it? And if you need more inspiration for quick, impressive desserts, go check out the wonderful ideas shared by Karla Culinary when you’re done here!
PrintThe Ultimate Easy & Foolproof Chocolate Covered Strawberries Recipe

Make professional-looking, glossy chocolate covered strawberries quickly. This simple recipe uses minimal ingredients and a foolproof dipping technique perfect for gifts or parties.
- Prep Time: 15 min
- Cook Time: 0 min
- Total Time: 35 min
- Yield: About 18-20 servings 1x
- Category: Dessert
- Method: Dipping
- Cuisine: American
- Diet: Vegetarian
Ingredients
- 1 pound fresh strawberries, washed and completely dried
- 12 ounces high-quality dark chocolate, chopped (or use white chocolate for variation)
- 1 teaspoon coconut oil or vegetable shortening (optional, for gloss)
- Toppings: Chopped nuts, sprinkles, or crushed Oreo crumbs (optional)
Instructions
- Prepare the strawberries: Gently wash the strawberries and dry them completely. Moisture is the enemy of smooth chocolate; use paper towels to pat them dry. Leave the green stems intact for easy dipping and presentation.
- Melt the chocolate: Place the chopped chocolate in a microwave-safe bowl. Microwave in 30-second intervals, stirring well after each interval, until the chocolate is mostly melted. Stir until completely smooth. If using, stir in the coconut oil or shortening for extra gloss.
- Prepare the dipping station: Line a baking sheet with parchment paper. Set up your optional toppings in small, shallow bowls nearby.
- Dip the berries: Hold a strawberry by the stem. Dip it into the melted chocolate, swirling to coat about three-quarters of the berry. Lift the berry out, letting excess chocolate drip back into the bowl.
- Add toppings (optional): Immediately after dipping, gently roll the coated section in your chosen topping, or sprinkle toppings over the wet chocolate.
- Set the chocolate: Place the dipped strawberry onto the prepared parchment-lined baking sheet.
- Chill: Place the baking sheet in the refrigerator for 15 to 20 minutes, or until the chocolate is completely set and firm.
- Serve or store: Serve immediately or store in an airtight container in the refrigerator for up to two days.
Notes
- The key to glossy chocolate is ensuring the strawberries are completely dry before dipping.
- For a white chocolate drizzle, melt white chocolate separately and use a fork or piping bag to drizzle over the set dark chocolate.
- If the chocolate thickens while working, microwave it for 10 seconds to restore the smooth consistency.
Nutrition
- Serving Size: 1 strawberry
- Calories: 120
- Sugar: 12
- Sodium: 5
- Fat: 8
- Saturated Fat: 5
- Unsaturated Fat: 3
- Trans Fat: 0
- Carbohydrates: 14
- Fiber: 1
- Protein: 2
- Cholesterol: 0