
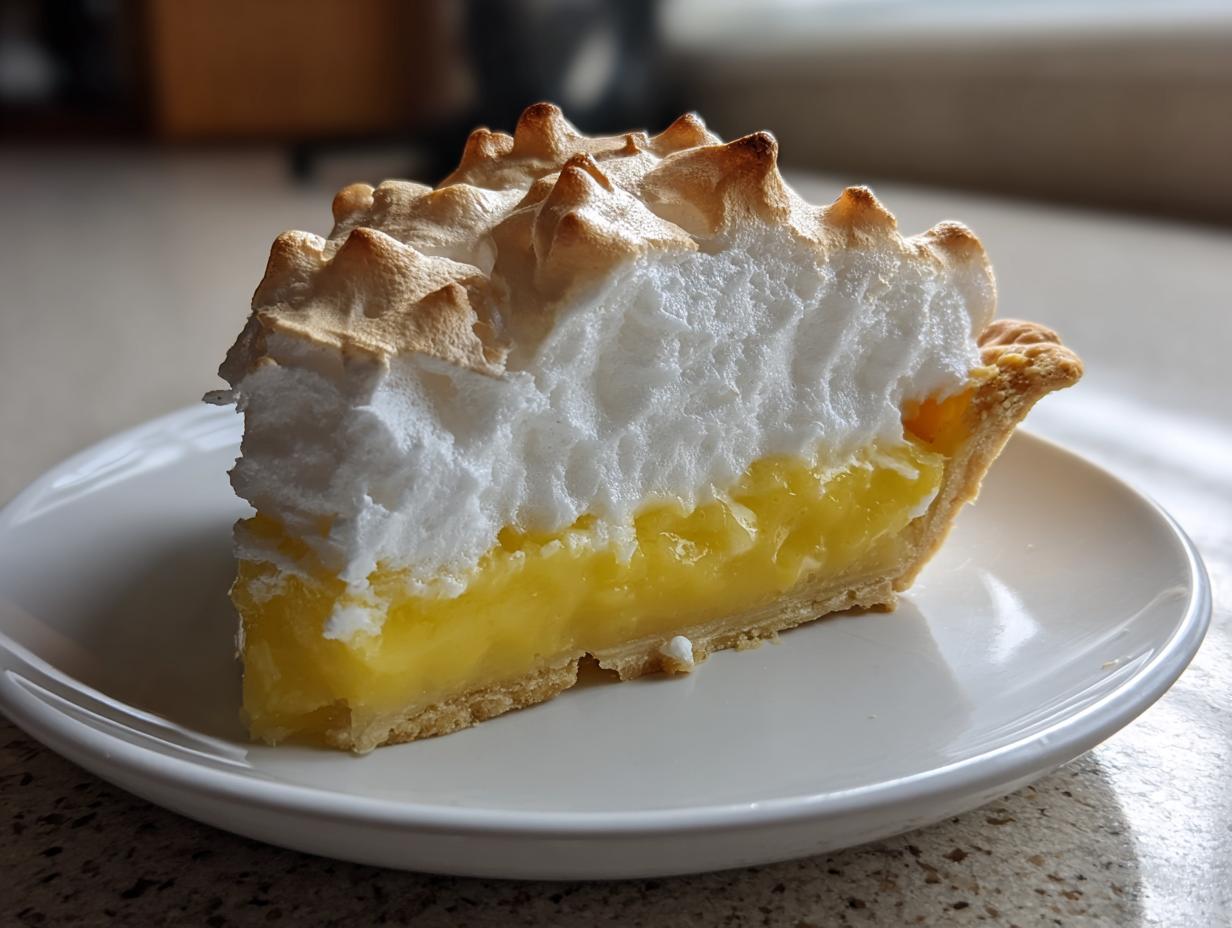
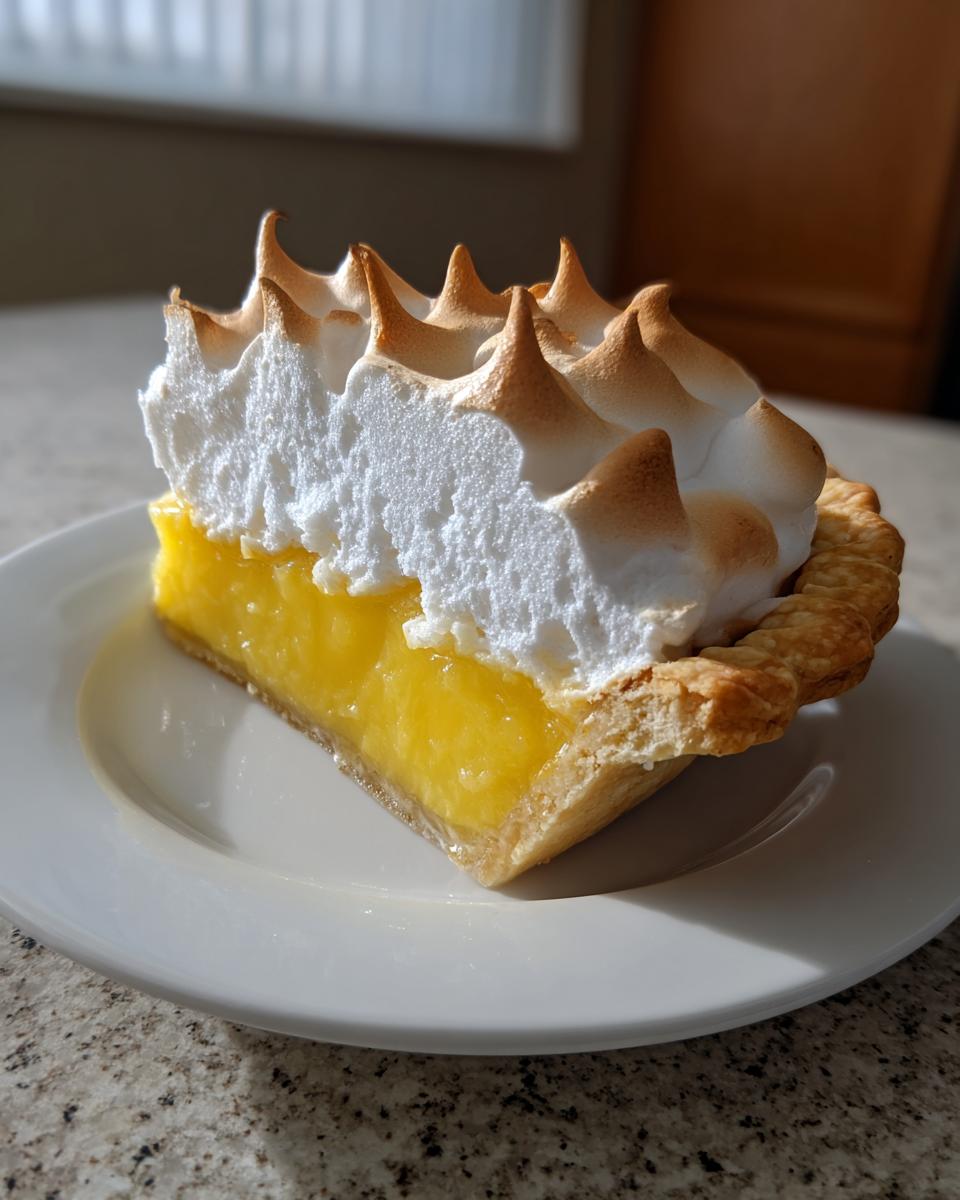
Oh, there’s just nothing like a towering, classic pie, is there? That moment when you see the golden peaks of meringue holding all that vibrant, sunny filling—it just screams special occasion! I am so thrilled to share what I call Grandma’s Classic Lemon Meringue Pie Recipe. Forget those sad, boxed versions; this one is made completely from scratch, and I even dedicated extra time developing the perfect technique to ensure that beautiful, fluffy meringue topping doesn’t weep all over your counter. I learned the basics of pie architecture from my mom watching her—stool and all!—back in our Ohio kitchen, and hitting that stable lemon meringue has always been the key to keeping Grandma proud. To learn more about why we share these treasured family flavors, you can check out our story right here at The YumMagnet Recipe Box.
- Why This Classic Lemon Meringue Recipe Is Your New Favorite
- Ingredients for Your Homemade Lemon Pie From Scratch
- Step-by-Step Instructions for the Best Lemon Meringue
- Tips for Success with Your Classic Lemon Pie
- Storage & Reheating Instructions for Lemon Meringue
- Frequently Asked Questions About Lemon Meringue Pie Recipe
- Estimated Nutritional Data for This Lemon Meringue
- Share Your Zesty Lemon Dessert Experience
Why This Classic Lemon Meringue Recipe Is Your New Favorite
I know there are a million recipes out there, but this one stands apart because it actually works every single time, even when you’re rushing! We do this entirely from scratch, which makes a huge difference in flavor. Honestly, if you follow these steps, you’re going to end up with the best lemon meringue you’ve ever had. It’s just that good!
Achieving the Perfect Tart and Sweet Lemon Meringue Balance
The filling is what it’s all about, right? If it’s too sweet, you lose that bright punch. My recipe uses a precise amount of fresh lemon juice and zest to deliver that perfect zing. It cooks up thick and creamy, giving you that amazing tart and sweet pie experience. This is the definition of a truly zesty lemon dessert—bright, bold, and beautiful!
The Secret to a Fluffy Meringue Topping That Stays Put
Okay, let’s talk about the dreaded weeping meringue. Nobody wants watery sugar slides on their perfect pie! That’s why we pay attention to a few key things—these are my best no weep lemon meringue tips. We use cream of tartar—it’s cheap insurance for stability—and we make absolutely sure those egg whites are at room temperature before whipping. Those two little steps guarantee you get that high, fluffy meringue topping that browns perfectly without shrinking or weeping.
Ingredients for Your Homemade Lemon Pie From Scratch
When you’re making something homemade lemon pie from scratch, you have to be honest about your ingredients. No corners cut here, right? Getting the measurements exact is how we guarantee that gorgeous, zesty filling. I’ve listed everything you need right here. Don’t worry if you’re new to this—just measure carefully, and we’ll be fine!
- For the Lemon Filling: 1 1/2 cups granulated sugar
- 1/4 cup cornstarch
- 1/4 teaspoon salt
- 1 1/2 cups cold water
- 4 large egg yolks, lightly beaten—make sure you keep the whites aside!
- 1/2 cup fresh lemon juice—use real lemons, trust me on this!
- 1 tablespoon lemon zest
Then we move onto that spectacular topping structure. You’ll need:
- 4 large egg whites, and they absolutely MUST be at room temperature.
- 1/4 teaspoon cream of tartar
- 1/2 cup granulated sugar (this is separate from the sugar in the filling!)
Pre-Baked Buttery Pie Crust Tutorial Requirements
The absolute first thing you need is a reliable 9-inch pie crust, and yes, it has to be baked! This pie relies on a sturdy base, so if you need a great starting point for a buttery pie crust tutorial, check out my foolproof recipe for a crust that never shrinks on you. Crucially, that baked shell needs to be totally cool before you pour in that hot lemon filling. Don’t rush this part!
Step-by-Step Instructions for the Best Lemon Meringue
Now here is where the magic really starts to happen! Follow these steps exactly, and you won’t have any guesswork. Because we are working with hot filling and delicate egg whites, timing and checking your progress are everything. If you have any questions as you go through these steps, please don’t hesitate to reach out to me! You can always drop a line over at my contact page.
Making the Zesty Lemon Filling
First thing first, grab your cooled pie shell. For that filling, we’re mixing the 1 1/2 cups of sugar, cornstarch, and salt in a saucepan. Whisk in the cold water—slowly. Then, place it on medium heat and you have to stir constantly until it gets thick and starts to boil, and here’s your first timing check: boil it for a full minute. Take it off the heat right after that minute!
Now for tempering, which sounds fancy but stops sad, scrambled yolks. Take about a cup of that hot sugar goo and whisk it into your already-beaten egg yolks—slowly! Then, pour that warm yolk back into the main saucepan. Put it back on medium heat and stir until it thickens up again, then you quickly stir in your fresh lemon juice and zest. Pour this hot lemon filling right into that cooled crust immediately.
How to Make Perfect Meringue for Your Lemon Meringue Pie Recipe
Time for the cloud on top! Make sure that mixing bowl is sparkling clean—I mean grease-free! Get your room-temperature egg whites and cream of tartar going on medium speed until you get those beautiful soft peaks. This is crucial for a high, fluffy meringue topping. Now, start adding that final 1/2 cup of sugar, just a little bit at a time, while you keep beating. Crank the speed up high once the sugar is in and beat it until you have stiff, glossy peaks. This is the secret to a stable topping in this lemon meringue pie recipe.
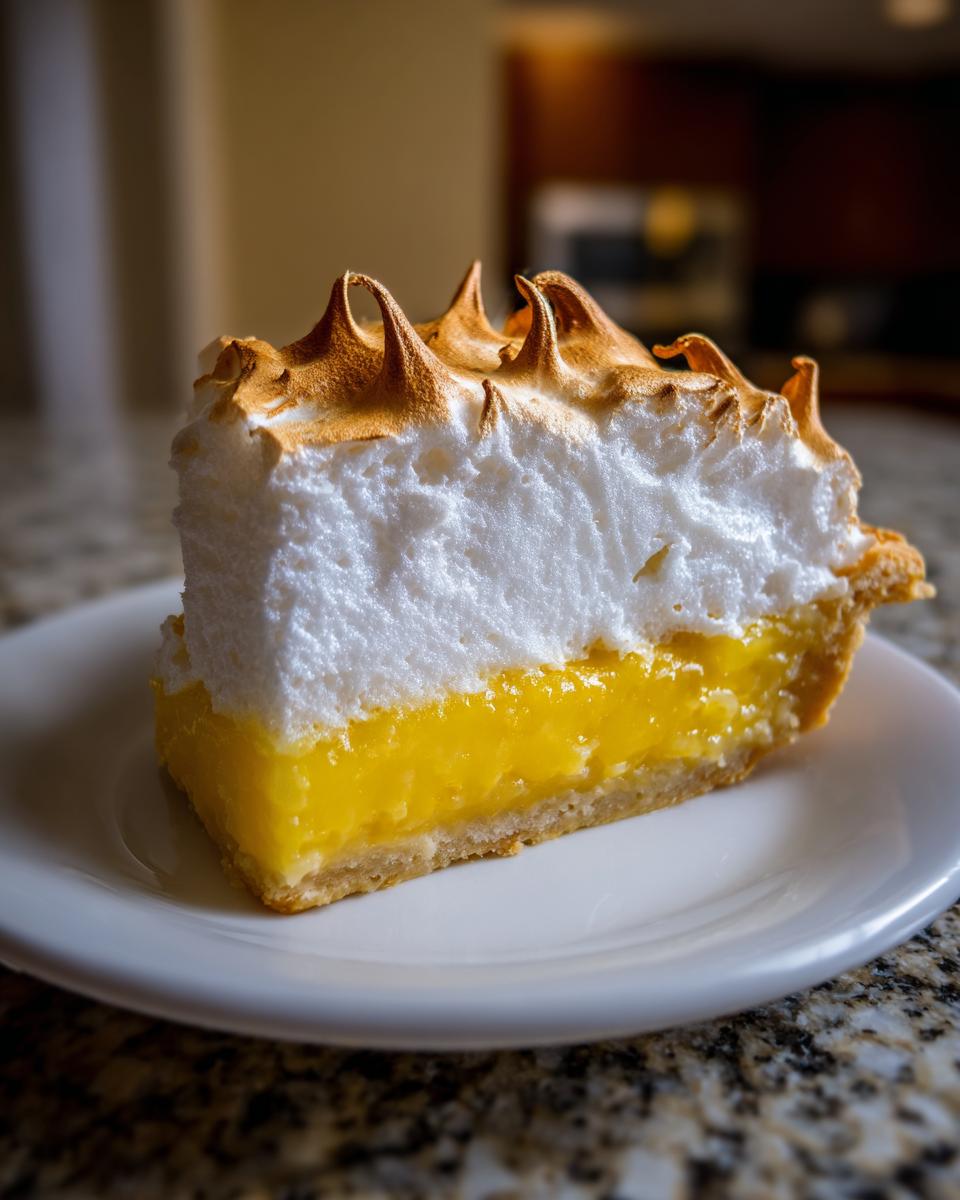
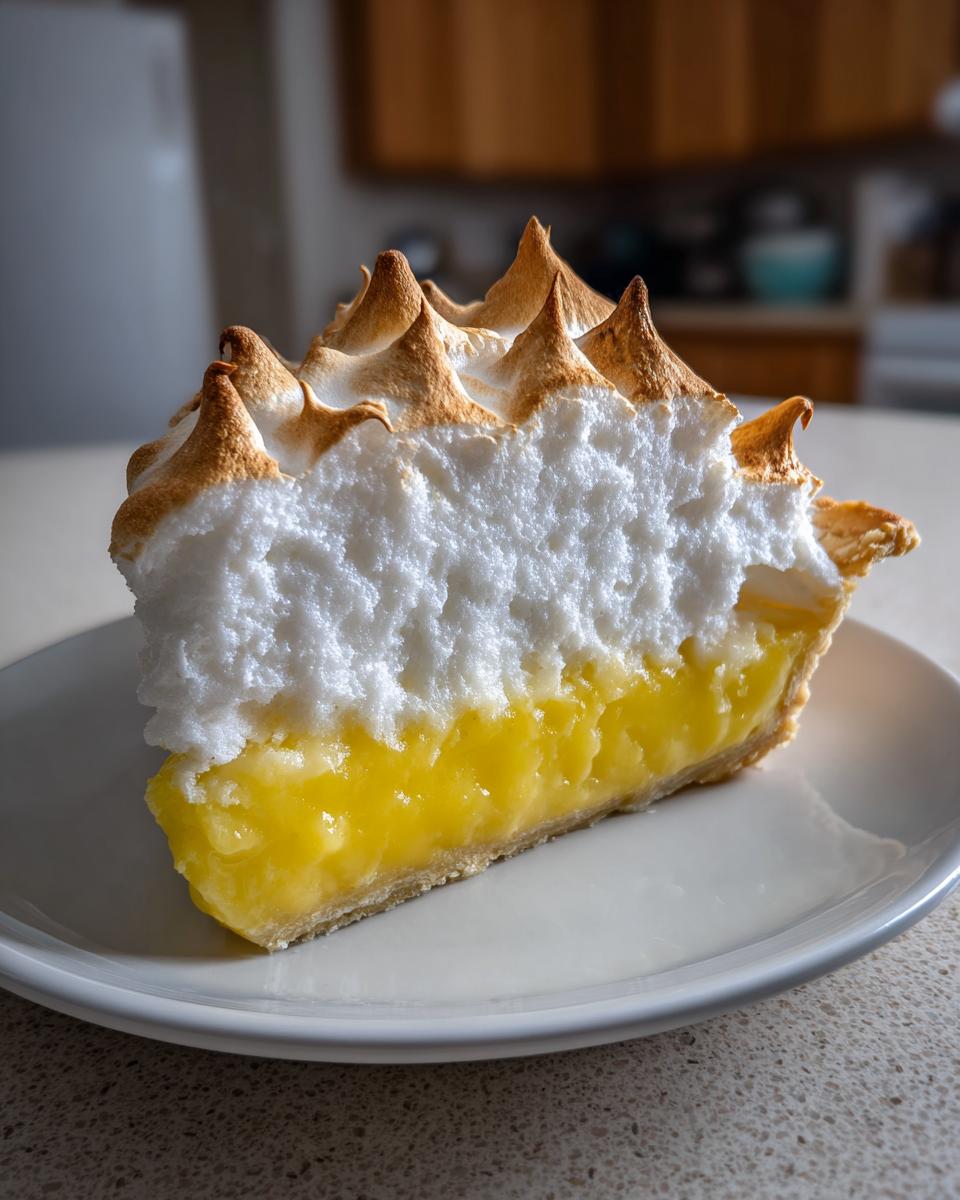
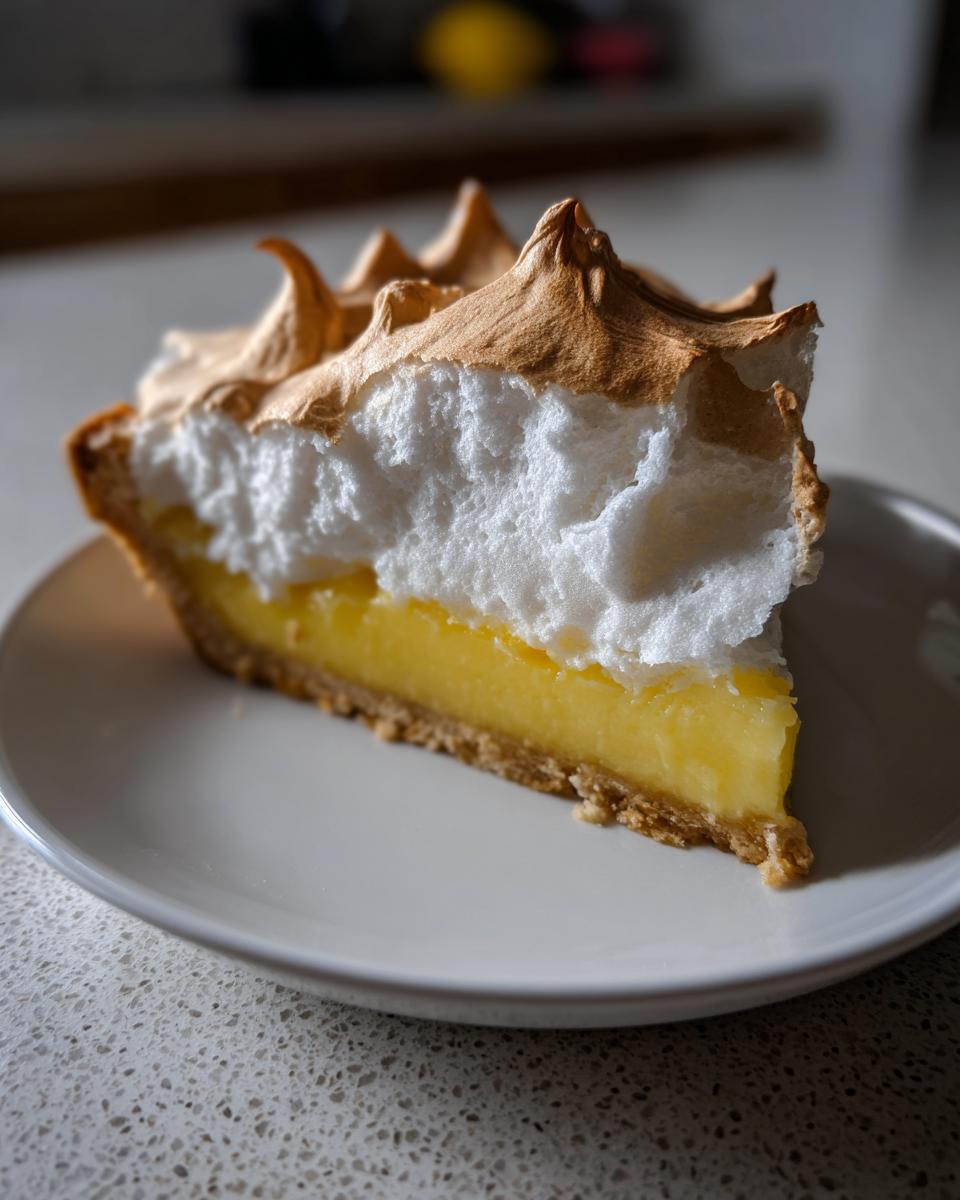
Baking and Cooling for a Showstopper Dessert
Spread that meringue right over that hot filling, paying special attention to making sure it seals all the way to the crust edge—this is one of my best no weep lemon meringue tips. Pop the pie into a 350°F oven for about 12 to 15 minutes until those peaks turn golden brown. This pie is a true showstopper dessert! After baking? You have to let it cool down on a wire rack for a minimum of four hours at room temperature. Don’t put it near the fridge right away, or the meringue will sweat!
Tips for Success with Your Classic Lemon Pie
Making this pie can feel kind of intimidating because it’s such a picture-perfect dessert, but trust me, it’s easy once you know the little tricks!
The biggest thing, and paying attention here is key to those no weep lemon meringue tips, is that bowl for the egg whites needs to be spotless. I mean, completely grease-free—not a drop of fat or yolk residue allowed! If you see anything, give the bowl a quick wipe with some lemon juice and paper towel.
Also, when you top that hot filling, make sure you really seal the meringue right to the edges of the crust. This traps the heat and flavor in the filling and stops the meringue from shrinking down the sides.
If you take the time to create those dramatic swirls on top with the back of a spoon, you’ll end up with a real showstopper dessert. For more insight on getting that perfect tangy-to-sweet ratio, you might enjoy checking out this great tip from The Recipe Rebel over at this link.
Storage & Reheating Instructions for Lemon Meringue
I know this is the question everyone asks as soon as the pie is gone: how do I store this beauty?
Remember my big warning about cooling? That applies here too! You absolutely must let your lemon meringue cool completely on the counter for at least four hours before you even *think* about covering it. If you wrap it while it’s warm, the steam gets trapped, and hello, weeping meringue!
Once it’s fully cooled, I cover it loosely with plastic wrap—just tented, not sealed tight—and put it in the fridge. It’s best eaten within two days, honestly; that meringue starts to get a little unstable after that.
Reheating? Don’t even bother! This pie is meant to be served cool and tangy. Just pull it out of the fridge about 20 minutes before serving so the filling can soften up just a tiny bit.
Frequently Asked Questions About Lemon Meringue Pie Recipe
I get so many messages asking little things about this pie, which is wonderful! It just means you guys are excited to bake it this weekend. Here are some of the most common questions I get about making this absolutely perfect lemon meringue pie recipe.
Can I make the lemon filling ahead of time for my lemon meringue?
Oh yes, you totally can! That’s a great trick for busy days. You can cook the lemon filling completely, but here’s the catch: you must let it cool just slightly—warm, not hot—before you spread it into that fully cooled pie crust. If you add the meringue to a piping hot filling, the temperature shock will start that weeping process we talked about. If you make it the day before, just cover the warm filling with plastic wrap pressed right against the surface to stop a skin from forming, and chill it.
What is the best way to get a high, fluffy meringue topping?
It all comes down to two things we covered earlier, but they bear repeating because they are THAT important for achieving how to make perfect meringue! First, your egg whites must be fully at room temperature. Cold whites just don’t whip up with the volume they need to.
Second, and I can’t stress this enough, the bowl has to be spotlessly clean—zero grease! Seriously, wipe it down with a little vinegar or lemon juice first. Those two actions combined with gradually adding the sugar give you that high, stable, fluffy meringue topping that stays put.
Are there variations like mini lemon meringue tarts I can try?
Absolutely! I love seeing pictures of these made into individual servings. The filling recipe works wonderfully baked in pre-baked tart shells. If you go that route, your baking time for the meringue will be much shorter—maybe only 8 to 10 minutes. These mini lemon meringue tarts look so fancy, but they use the exact same, trusted filling, so you know the flavor will be spot on!
Estimated Nutritional Data for This Lemon Meringue
Okay, now for the numbers! I want to be super clear that any nutrition info calculated for a recipe like this gorgeous lemon meringue is just an estimate, you know? We all use slightly different brands of sugar or butter, so results will vary!
These figures look at a standard serving size of one slice of this classic lemon pie. We’re looking at about 380 calories, 45 grams of sugar, and 18 grams of fat per slice. Because we use all that fresh lemon and egg whites, the numbers aren’t too scary for a dessert this amazing!
Remember to check out our privacy policy if you’re curious about how we handle data from your visits here at The YumMagnet site. And if you want another peek at a fantastic version of this pie, take a look over at Hayley’s recipe when you get a chance at this link!
Share Your Zesty Lemon Dessert Experience
Now it’s your turn! I truly hope you love making this pie as much as I love sharing it. Once you’ve nailed that beautiful bake on top, I’d be so thrilled if you came back here and let me know how it went! Did your meringue stay perfectly stiff? Did you get that perfect level of tanginess in your zesty lemon dessert? Drop a rating below or leave me a comment—I read every single one!
PrintGrandma’s Classic Lemon Meringue Pie Recipe

Make this classic lemon meringue pie from scratch. It balances a tart, zesty lemon filling with a sweet, fluffy meringue topping over a buttery crust. This recipe focuses on achieving a stable meringue.
- Prep Time: 30 min
- Cook Time: 35 min
- Total Time: 4 hours 5 minutes
- Yield: 8 servings 1x
- Category: Dessert
- Method: Baking
- Cuisine: American
- Diet: Vegetarian
Ingredients
- 1 recipe for a 9-inch buttery pie crust (pre-baked)
- 1 1/2 cups granulated sugar
- 1/4 cup cornstarch
- 1/4 teaspoon salt
- 1 1/2 cups cold water
- 4 large egg yolks, lightly beaten
- 1/2 cup fresh lemon juice
- 1 tablespoon lemon zest
- 4 large egg whites, room temperature
- 1/4 teaspoon cream of tartar
- 1/2 cup granulated sugar (for meringue)
Instructions
- Prepare your 9-inch pie crust and bake it according to your preferred recipe. Let the crust cool completely.
- For the lemon filling, whisk together 1 1/2 cups sugar, cornstarch, and salt in a medium saucepan. Gradually stir in the cold water.
- Cook the mixture over medium heat, stirring constantly until it thickens and boils. Boil for one minute, stirring constantly. Remove from heat.
- Temper the egg yolks by slowly whisking about 1 cup of the hot sugar mixture into the lightly beaten egg yolks.
- Pour the tempered yolk mixture back into the saucepan with the remaining hot mixture. Cook over medium heat, stirring constantly, until the filling thickens again and just begins to bubble. Do not boil.
- Remove the filling from the heat. Stir in the lemon juice and lemon zest. Pour the hot lemon filling immediately into the cooled, pre-baked pie crust.
- For the fluffy meringue topping, place the room temperature egg whites and cream of tartar in a clean, grease-free mixing bowl. Beat with an electric mixer on medium speed until soft peaks form.
- Gradually add the remaining 1/2 cup of sugar, one tablespoon at a time, while beating continuously. Increase the speed to high and beat until stiff, glossy peaks form. This step is key for a stable meringue.
- Spread the meringue over the hot lemon filling, making sure the meringue touches the edge of the crust all the way around to seal it. This helps prevent meringue weeping.
- Bake at 350°F (175°C) for 12 to 15 minutes, or until the meringue peaks are golden brown.
- Cool the pie completely on a wire rack at room temperature for at least 4 hours before slicing. Avoid placing it in the refrigerator immediately to prevent the meringue from weeping.
Notes
- To prevent weeping meringue, make sure your mixing bowl for the egg whites is completely free of grease or yolk residue.
- For a showstopper dessert, use the back of a spoon to create dramatic swirls and peaks in your meringue before baking.
- If you are worried about the filling being runny, ensure you boil the cornstarch mixture for the full minute as directed.
- This recipe is perfect for spring baking or summer gatherings.
Nutrition
- Serving Size: 1 slice
- Calories: 380
- Sugar: 45g
- Sodium: 180mg
- Fat: 18g
- Saturated Fat: 5g
- Unsaturated Fat: 13g
- Trans Fat: 0g
- Carbohydrates: 52g
- Fiber: 1g
- Protein: 6g
- Cholesterol: 110mg