
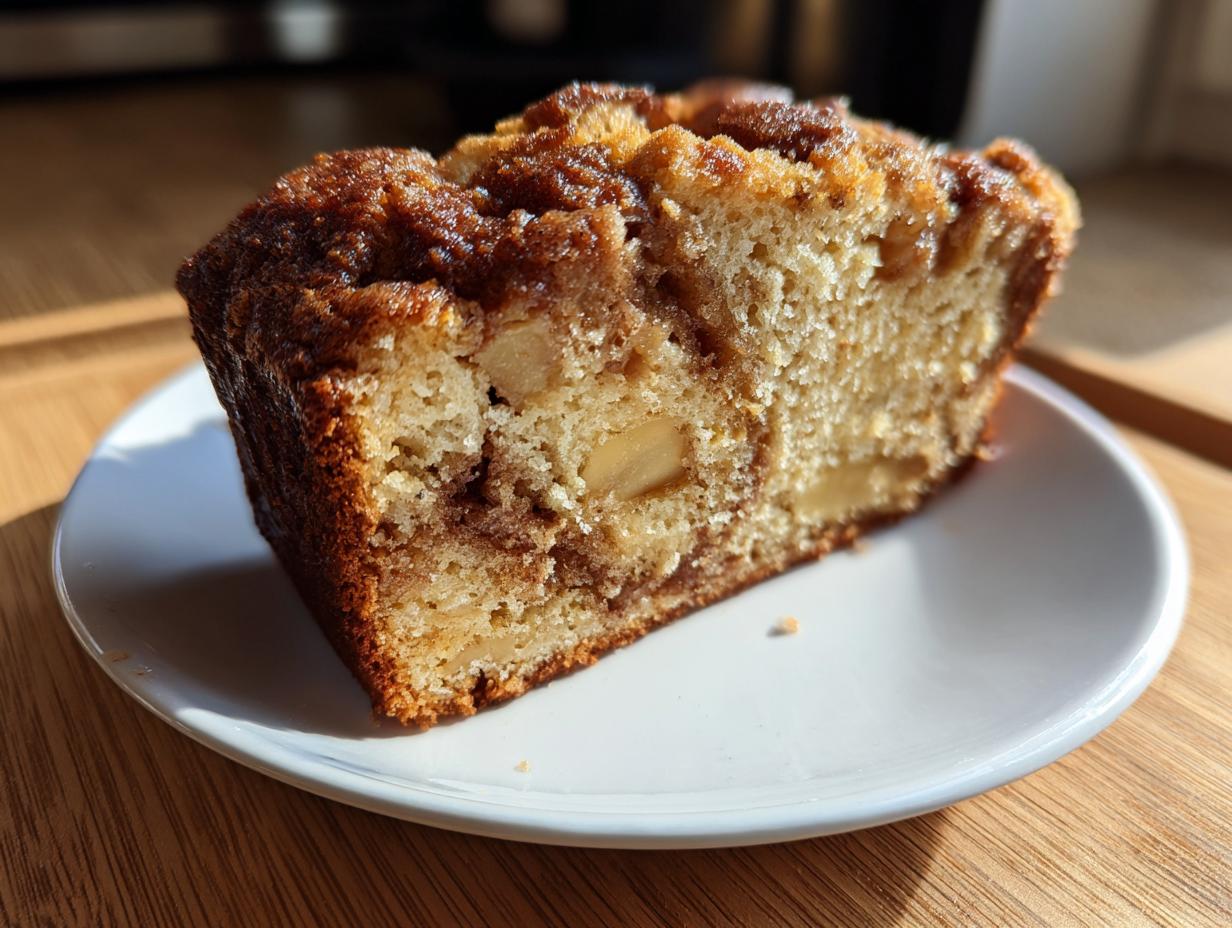
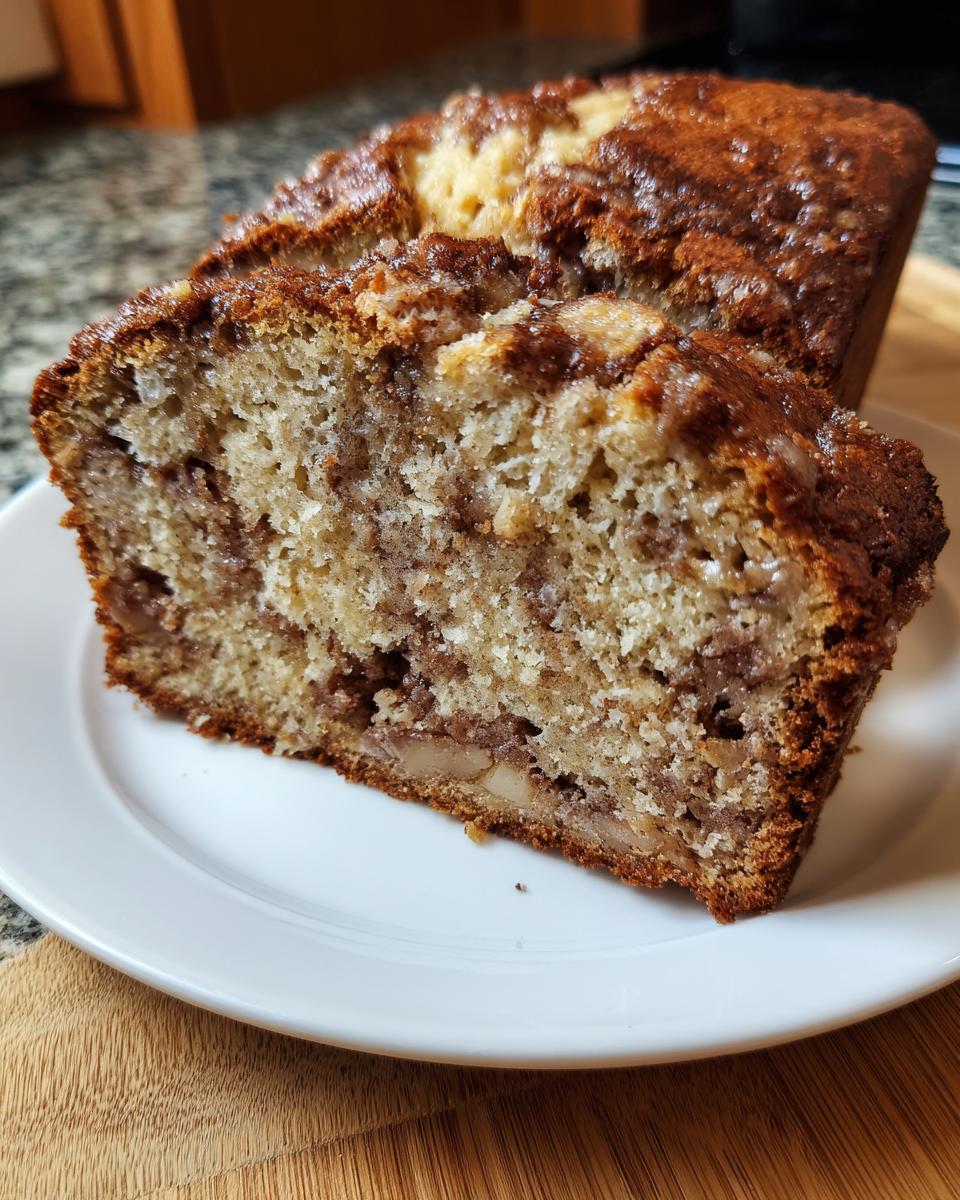
Oh, you guys, when the air gets that crisp edge and I start raiding my pantry for spices, I know it’s time for my absolute favorite fall bake! Forget those dry, crumbly loaves you occasionally run into. We are talking about the ultimate Cozy Apple Treats here. This Moist Apple Cinnamon Bread, especially with that gooey brown sugar swirl, is the definition of comfort right out of the oven. My mission, just like when I started The YumMagnet Recipe Box, is to take those rich, slow-simmered flavors our families love and condense them into something doable for a busy Tuesday night. This incredible apple bread proves you never have to sacrifice that wonderful, moist texture for speed! If you love date and nut loaves, you’ll see similar moisture magic here—check out my easy moist date nut bread recipe for comparison!
- Why This Is the Best Apple Bread Recipe You Will Make
- Gathering Ingredients for Your Apple Bread
- Step-by-Step Instructions for Easy Apple Bread Recipe
- Tips for Success Making Sweet Spiced Apple Bread
- Variations on Your Favorite Apple Bread
- Serving Suggestions for Breakfast Apple Bread
- Storage and Reheating Instructions for Your Homemade Quick Breads
- Frequently Asked Questions About Making Apple Bread
- Estimated Nutritional Data for This Apple Bread
- Share Your Cozy Apple Treats
Why This Is the Best Apple Bread Recipe You Will Make
I know, I know, there are a million quick bread recipes out there, but this one truly separates itself from the pack. I wouldn’t share it unless it delivered that bakery-quality, comforting slice every single time. It’s all about maximizing flavor and moisture without demanding your entire afternoon.
- The warmth from the spices—cinnamon, nutmeg, and allspice—creates that perfect autumn aroma we live for.
- It’s fast! You’re looking at about 20 minutes of actual work before it goes into the oven.
- The moisture level is unbeatable, which is why I call it my go-to comfort food loaf.
Achieving Ultimate Moist Apple Bread Texture
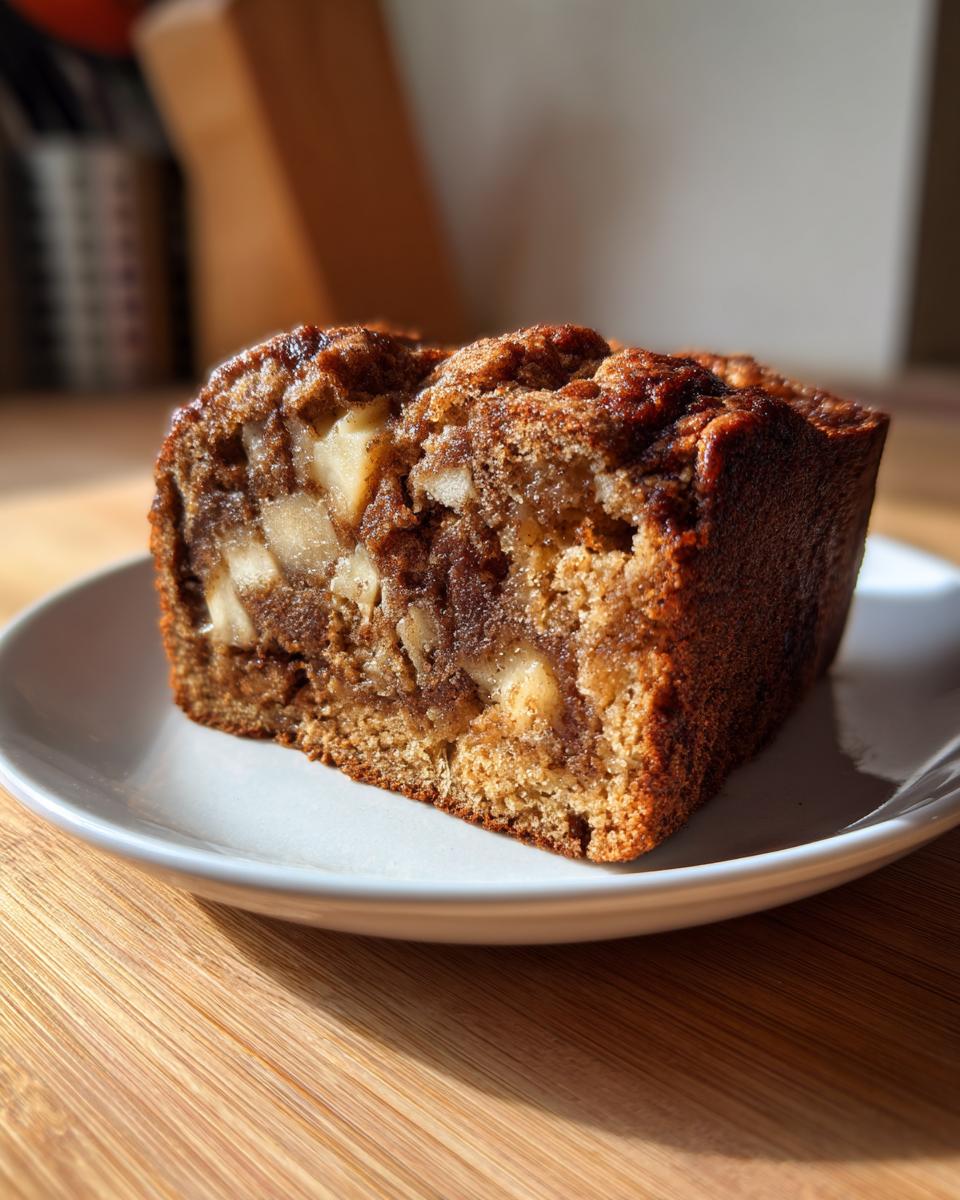
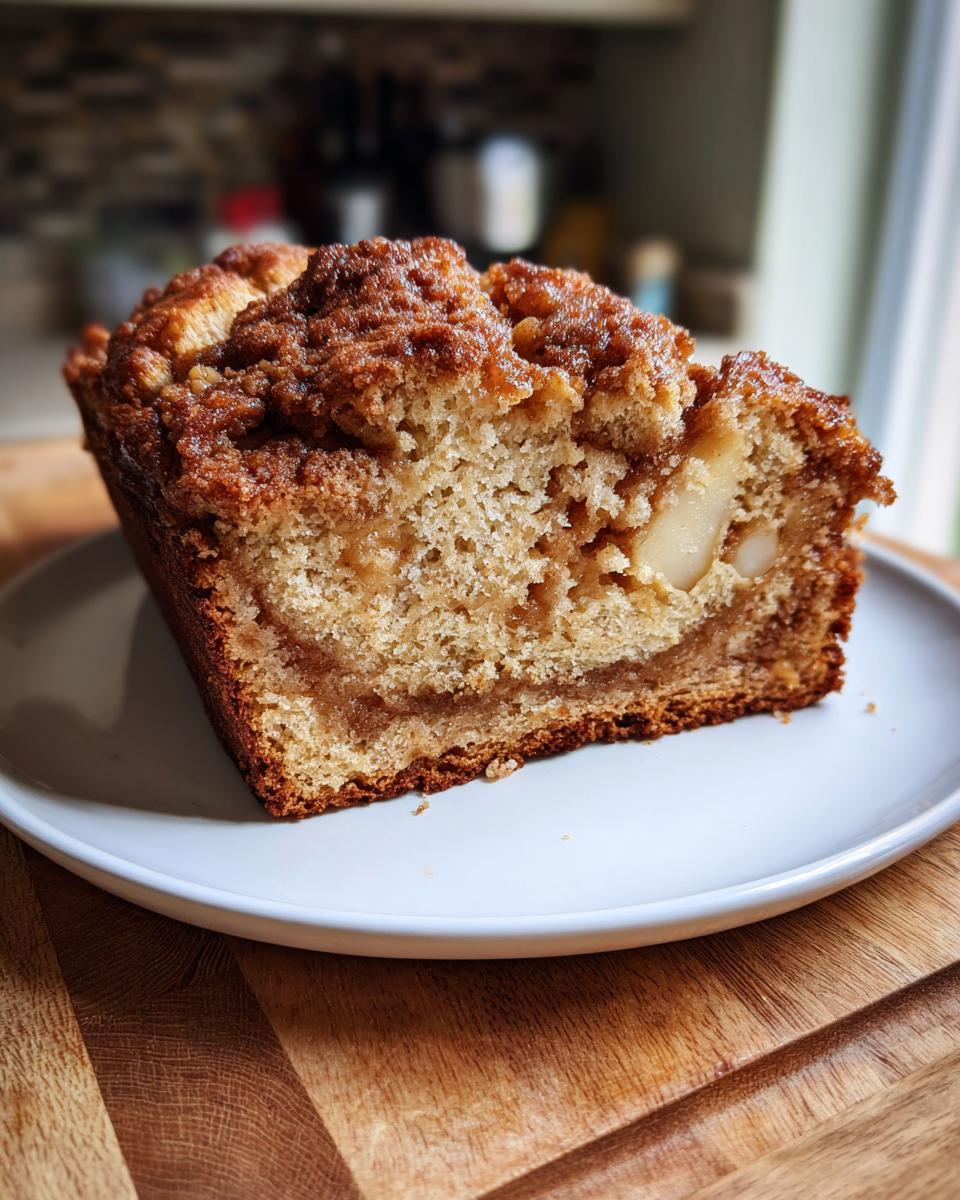
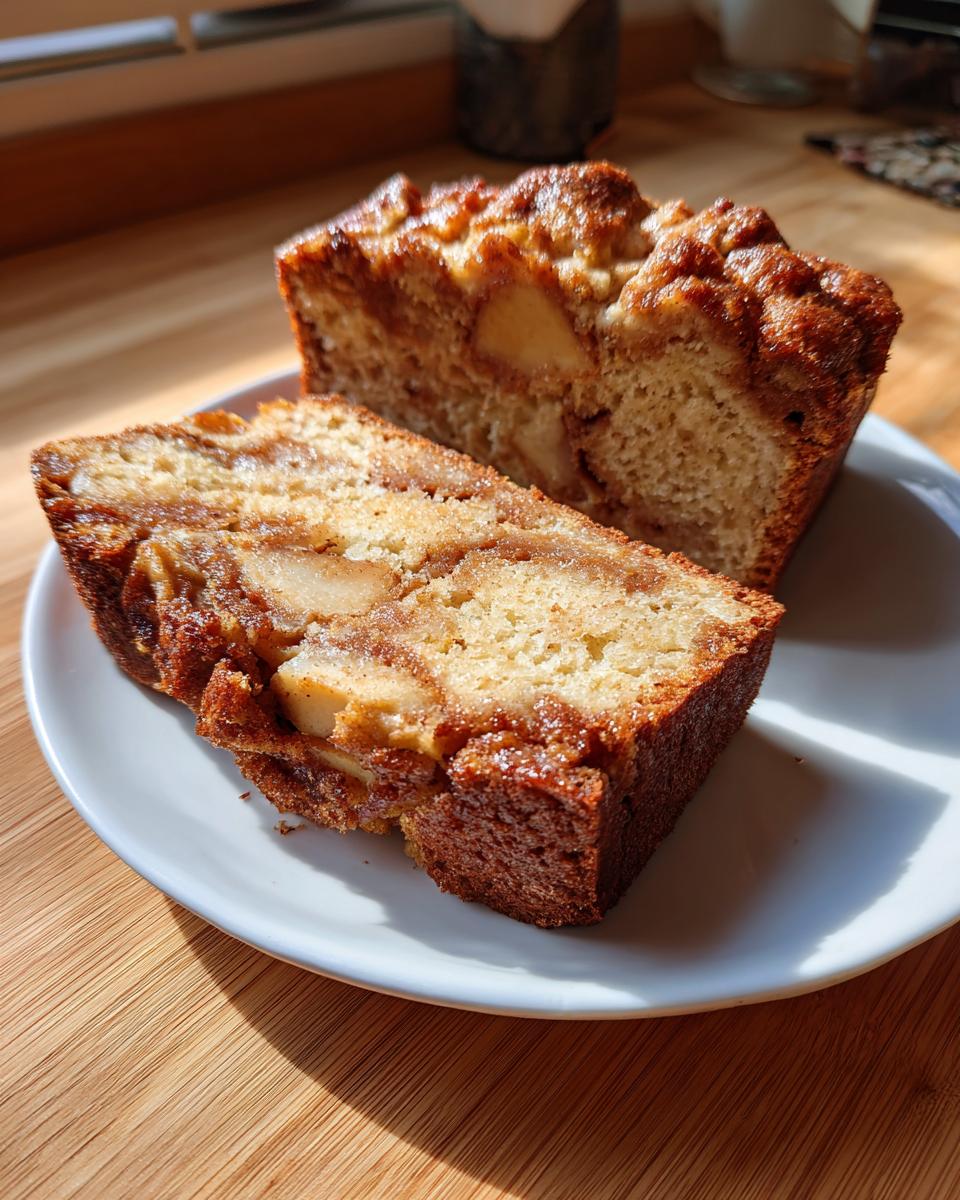
Getting that heavenly Moist Apple Bread texture is thanks to two secrets I learned from watching my mom. First, we cream the butter and sugars really well—that incorporates air for a tender crumb. Second, we toss the chopped apples right into some of the flour mixture before folding them in. Trust me, coating them stops them from dumping all their water into the batter and making the loaf soggy!
The Secret to Perfect Cinnamon Swirl Quick Bread
If you skip the swirl, you’re missing half the fun! That rich, dark ribbon running through the middle isn’t just pretty; it’s flavor concentrated sunshine. Creating this Cinnamon Swirl Quick Bread component is unbelievably easy—just mixing brown sugar and extra cinnamon. As it bakes, it melts slightly, creating those dense, sweet pockets of autumn goodness. Speaking of great texture, if you want a similar moistness in your morning routine, check out my oatmeal muffins!
Gathering Ingredients for Your Apple Bread
Okay, let’s talk ingredients. Because this is a recipe built for the real world—your world—you won’t need any specialty store runs! Everything you need for this amazing apple bread should be sitting right in your pantry or fridge, or easily grabbed during your next quick trip. When I adapted our family’s old recipe cards, I made sure we weren’t hunting for obscure items. Simplicity here means you can actually make it when the craving strikes! If you are looking for more ideas like this to keep your fall baking simple and cozy, you should check out my guide on easy fall baking ideas.
Dry Ingredients and Warm Spices for Apple Bread
We start by making sure our foundational dry elements are perfectly balanced. This includes the flour, of course, but the real stars here are the spices that give this bread that cozy, autumnal depth. You’ll want baking soda, salt, and then we layer it on with the warmth—plenty of cinnamon, a touch of nutmeg, and just a hint of allspice. Those spices work together; they don’t fight each other, they just create this incredible aroma that fills the kitchen!
Wet Ingredients and Fresh Apples
For the moisture magic to happen, we rely on softened butter—and yes, it absolutely must be real butter; don’t even think about substitutes here! We combine that with both brown sugar and granulated sugar for complexity. You’ll need three eggs and some milk, but the most crucial part? The fresh apples! I always grab Granny Smith or Honeycrisp because they hold their shape nicely while baking. Remember to peel and finely chop them!
Components for the Brown Sugar Swirl and Glaze
Don’t forget the components for our signature ribbon! You’ll need a bit more packed light brown sugar and cinnamon dedicated just to the swirl layer. That gets layered right in the middle. As it bakes, it melts slightly, creating those dense, sweet pockets of autumn goodness. Now, the vanilla extract is listed with the wet ingredients, but I want to call out the optional glaze separately. If you want that extra bakery touch, you’ll need powdered sugar and a splash of milk. It’s totally optional, but wow, does it dress up an already fantastic homemade apple loaf!
Step-by-Step Instructions for Easy Apple Bread Recipe
I promise, following these steps is like a comforting dance around the kitchen! This is where we turn those beautiful ingredients into the Easy Apple Bread Recipe everyone raves about. Take your time with the creaming step; that’s non-negotiable for that tender crumb you want. If you are looking for more ideas for your morning baking sessions, make sure you check out my guide on easy breakfast recipes!
Preparing the Pan and Dry Mixture
First things first: get that oven warm! We need it heated up to 350°F (175°C) before anything else happens. While it’s heating, make sure you grease and flour that 9×5 inch loaf pan really well—we don’t want any sticking accidents later! In a separate bowl, use a whisk to combine your flour, baking soda, salt, and all those fantastic spices (cinnamon, nutmeg, allspice). Whisking them together acts like sifting and ensures everything is evenly distributed right away.
Creaming Fats and Sugars for a Tender Apple Bread
Now for the batter base. In your big mixing bowl, beat that softened butter with both the brown and granulated sugars. You have to whip it until it turns pale and looks genuinely light and fluffy—don’t stop early! This traps the air that makes the final loaf tender. Once that’s perfect, beat in your eggs one at a time, making sure each one is completely incorporated before adding the next, followed by the vanilla extract.
Coating Apples and Combining Batter Layers
Here’s a little trick to keep the fruit where it belongs: take your finely chopped apples and toss them with about two tablespoons of that dry flour mixture we made earlier. This coating keeps the apples from sinking straight to the bottom! Next, you’re going to alternate adding the dry ingredients and the milk into your butter mixture. Start and end with the dry stuff. Mix on low speed until it *just* comes together. Seriously, stop mixing the second you don’t see flour streaks, and then gently fold in those coated apples.
Creating the Swirl and Baking the Loaf
Time to build the layers! Pour about half of your batter into that prepared pan. Now, take your dedicated swirl mixture—that extra brown sugar and cinnamon—and sprinkle it evenly over this first batter layer. Pour the remaining batter on top. Use a knife or a skewer and just make a gentle S-motion over the top a few times; don’t over-swirl! Pop it in the oven for about 55 to 65 minutes. You’ll know it’s done when a wooden skewer comes out clean. Let it cool in the pan for 15 minutes, then flip it out onto a rack to cool completely before drizzling that optional glaze!
Tips for Success Making Sweet Spiced Apple Bread
Baking is supposed to be fun, not frustrating! Since this Sweet Spiced Apple Bread is based on tried-and-true family methods, a few small tweaks can guarantee you a phenomenal outcome every time. We want that perfect balance between tender crumb and moist structure, and it all comes down to handling those apples and knowing when to put the mixer down! If you need more simple inspiration later, don’t forget to check out my guide on easy fall baking ideas.
Choosing the Right Apples for Your Homemade Apple Loaf
If you want that tart-sweet combination that cuts through the richness of the butter and brown sugar, you have to be choosy about your apples. I swear by Granny Smith because they hold their shape, or Honeycrisp if you want them slightly sweeter. The key, though, is the chop! Don’t grate them; we want distinct little chunks suspended throughout the loaf. Keep the pieces small—about a half-inch dice maximum—so they distribute evenly and don’t weigh down the batter too much.
Avoiding Overmixing in Quick Bread Recipes
This is where so many people accidentally turn their perfect loaf batter into something rubbery! Quick breads, unlike yeasted breads, rely on a chemical reaction (baking soda/powder) to rise. The second you dump in that final bit of flour and start mixing vigorously, you start developing gluten. Too much gluten means your beautiful, tender Homemade Apple Loaf will turn tough and dense. That’s why I stress mixing on low and stopping the second you don’t see dry streaks! A few lumps are totally fine—they usually bake right out.
Variations on Your Favorite Apple Bread
I just love how versatile this basic apple bread is! Once you master the core recipe—that perfect moist crumb thanks to the apples and careful creaming—you can start playing around. Think of this as your autumn blueprint. If you’re looking for a change of pace or just have some extras lying around, these little tweaks can turn your familiar loaf into something totally new and exciting. Before we dive in, if you needed some inspiration for other fruit bakes, you absolutely have to check out my blueberry scone recipe—it has that same rustic, just-made feel!
Adding Nuts or Dried Fruit to this Apple Bread
If you want some crunch or extra chew, adding nuts or dried fruit is the easiest way to upgrade this quick bread. I highly suggest pecans or walnuts if you go the nut route; they toast up beautifully in the oven. If you decide to throw in a half-cup of chopped nuts or maybe some dried cranberries, make sure you toss them in that little bit of flour mixture right alongside the fresh apples back in instruction step five. That coating principle works perfectly for nuts and dried fruits too, stopping them from sinking to the very bottom of the pan!
Making it an Apple Fritter Bread Inspiration
Who doesn’t love that sugary, slightly crunchy topping you get on an apple fritter fresh from the stand? We can totally sneak that vibe into our loaf! To get this Apple Fritter Bread Inspiration going, after you’ve poured the second half of the batter over the swirl layer, take just one extra tablespoon of that reserved swirl mixture (if you happen to have extra cinnamon/brown sugar left) and sprinkle it lightly over the top surface. It melts down and creates these delicious, slightly crispy cinnamon-sugar patches on the crust. If you want more ideas on cozy fall bakes, this apple cinnamon bread guide has some great flavor suggestions!
Serving Suggestions for Breakfast Apple Bread
The best part about having this Breakfast Apple Bread cooling on the rack is deciding how you’re going to eat the first slice! While it’s heavenly warm straight from the pan, it’s sturdy enough to handle toppings when fully cooled too. This loaf is honestly perfect for those slow weekend mornings when you have time to actually sit down and enjoy a cup of coffee or tea. If you love a good morning bake, you might want to compare this to my recipe for fluffy pancakes!
Pairing Your Loaf with Coffee or Tea
If you’re serving this for breakfast, a simple smear of softened salted butter enhances the spice blend beautifully. It needs nothing else! If you’re having it later as a midday snack, just a plain cup of black coffee or a hot mug of spiced cider works wonders. The mild sweetness of the bread means you don’t need to add sugar to your drink at all—let the cinnamon sugar swirl do all the sweetening work!
Storage and Reheating Instructions for Your Homemade Quick Breads
You did the hard part—you baked this gorgeous, fragrant apple bread! Now, we need to make sure it stays just as perfect, day after day. Nobody wants dry bread the next morning, right? Storing Homemade Quick Breads like this one properly is super important, especially since it’s loaded with fresh fruit. I have a couple of non-negotiable rules to lock in that moisture we worked so hard to create in the oven. If you ever need fantastic tips on storing leftovers for other meals, you can look at my guide for easy chicken fried rice!
How to Keep This Apple Bread Fresh for Days
The cooling process is critical here. You must let the loaf cool completely on the wire rack before you even think about wrapping it up. If you wrap it warm, all that steam gets trapped and turns your beautiful crust soggy. Once it is totally cool—and I mean *totally* cool—you want to wrap it up tightly. I usually use plastic wrap first, just one good layer, and then I might follow that with a layer of foil or put the whole wrapped loaf into a large zip-top bag. This seals out the air. Stored this way at room temperature, it stays wonderfully moist for about three to four days. It’s still amazing the day after, but honestly, sometimes the spices taste even better on day two!
Freezing and Reheating Tips for Comfort Food Bread Loaf
If you know you won’t eat the whole thing in four days, go straight to the freezer! Freezing works beautifully for this loaf. My big tip here is to slice the bread *before* you freeze it. If you freeze it as a whole loaf, thawing takes forever, and you end up cutting a slice that thaws unevenly. Slice it up, wrap each individual slice tightly in plastic wrap, then foil, and drop them in a freezer bag. They keep great for up to three months!
When you’re ready for a slice of this amazing Comfort Food Bread Loaf, you have two great reheat options. If you just want one slice warmed up fast, pop it in the microwave for about 15 seconds—it gets soft and steamy right away. If you’re serving it for breakfast and want it slightly crisp on the edges again, use the oven. Set your oven to about 300°F (150°C), place the slice on a baking sheet, and heat it for about 5-7 minutes. It brings back that fresh-baked quality beautifully! For more inspiration on cozy fall bakes ready to save for later, check out this advice on cinnamon apple bread.
Frequently Asked Questions About Making Apple Bread
I know when you’re trying a new recipe, especially an apple bread recipe, you always have a few burning questions! That’s totally normal. I’ve collected the ones I get asked most often about this loaf to make sure your baking experience is smooth and delivers that perfect slice of fall flavor. Building trust means answering the tough questions, so let’s clear these up before you even preheat that oven! If you want to know more about our philosophy on practical, real-life cooking, you can read all about it on my About Page.
Can I use applesauce instead of fresh apples in this apple bread?
This is a good question, especially if you are trying to use up something in the fridge! While you absolutely *can* substitute applesauce for some or even all of the chopped fresh apples, I highly warn you against it if you want the best results. Fresh apples are what give this loaf its structure and those wonderful little bursts of sweet/tart flavor. Applesauce adds moisture, sure, but it turns the bread much denser, almost like a cake, and you lose that lovely texture we worked so hard for. If you must substitute, try swapping only half the fresh apples for applesauce and see how you like it!
What is the best way to store leftover apple cinnamon bread?
Remember what I said about sealing out the air? That’s your rule of thumb for storing any apple cinnamon bread! The absolute best way to keep this loaf as moist as possible, especially for up to four days, is to let it cool completely first. Then, wrap it tightly, plastic wrap first, then maybe foil or a sealed bag. It needs to be airtight to prevent that dreaded staleness. If you see any moisture on the plastic wrap after a day, that means the bread is still releasing steam, so just let it breathe for an hour before wrapping it back up tightly!
Can this be made as a muffin recipe?
Yes, you absolutely can transform this recipe into individual muffins! They become perfect little grab-and-go treats, ideal for an easy breakfast. You’ll use the same batter, but instead of baking for 60 minutes in a loaf pan, you’ll fill your muffin tins about two-thirds full and bake at the same temperature (350°F or 175°C). The bake time will drop significantly, usually down to just 20 to 25 minutes. You might even be able to sprinkle a tiny bit of that brown sugar swirl mix right on top of the muffin batter before baking for a little crust!
Estimated Nutritional Data for This Apple Bread
Just for those of you who like to keep track—myself included sometimes!—I wanted to share the estimated nutritional breakdown for a slice of this delicious apple bread. Now, please take this with a giant grain of salt, okay? Because this is a recipe loaded with real butter, fresh apples, and that glorious brown sugar swirl, the exact numbers will bounce around based on the brand of butter you use or exactly how much glaze you drizzle on top. This is just a good guideline, not gospel!
This calculation is based on one serving size (one generous slice) from the full loaf, assuming you use the optional glaze. If you skip the glaze, you’ll bring that sugar count down slightly, which is something to keep in mind if you’re making this for a grab-and-go breakfast. If you ever have questions about my process or want to chat about recipe tweaks, please feel free to reach out via my contact page!
- Serving Size: 1 slice
- Calories: 350
- Sugar: 30g (Yes, that swirl packs a punch, but oh is it worth it!)
- Fat: 18g
- Saturated Fat: 11g
- Carbohydrates: 45g
- Protein: 4g
- Sodium: 250mg
- Fiber: 2g
See? It’s a treat, not a diet food, and that’s precisely how it should be when you’re making homemade apple baking creations! Enjoy every single bite, knowing you made something spectacular from scratch.
Share Your Cozy Apple Treats
This is where my heart is happiest—seeing you all enjoy the food we create together! I pour hours into perfecting these recipes so that they work perfectly in your real kitchens. When you bake this apple bread, I genuinely want to know what you think. Did the kids devour it before breakfast? Did you use pecans in yours? Don’t hold back!
Please, please drop a comment below once you’ve tried this! Tell me how it went, rate the recipe so others know it’s worth their time, and if you happen to snap a picture of that gorgeous cinnamon swirl peaking out, tag me on social media. Seeing your successes—especially with those tricky quick breads—makes all the testing worth it. Let’s keep the warmth of these delicious dessert recipes spreading!
PrintMoist Apple Cinnamon Bread with Brown Sugar Swirl
Bake this incredibly moist apple bread, packed with fresh apples and warm spices, featuring a rich brown sugar cinnamon swirl. This quick bread is perfect for a cozy breakfast, snack, or fall dessert.
- Prep Time: 20 min
- Cook Time: 60 min
- Total Time: 80 min
- Yield: 1 loaf (about 10 servings) 1x
- Category: Baking
- Method: Baking
- Cuisine: American
- Diet: Vegetarian
Ingredients
- 2 1/2 cups all-purpose flour
- 1 teaspoon baking soda
- 1/2 teaspoon salt
- 2 teaspoons ground cinnamon
- 1/4 teaspoon ground nutmeg
- 1/4 teaspoon ground allspice
- 1 cup (2 sticks) unsalted butter, softened
- 1 cup packed light brown sugar
- 1/2 cup granulated sugar
- 3 large eggs
- 2 teaspoons vanilla extract
- 3 medium apples (like Granny Smith or Honeycrisp), peeled and finely chopped
- 1/2 cup milk
- For the Swirl: 1/2 cup packed light brown sugar
- For the Swirl: 1 teaspoon ground cinnamon
- For the Glaze (Optional): 1 cup powdered sugar
- For the Glaze (Optional): 2 tablespoons milk
Instructions
- Preheat your oven to 350°F (175°C). Grease and flour a 9×5 inch loaf pan.
- In a medium bowl, whisk together the flour, baking soda, salt, cinnamon, nutmeg, and allspice. Set this dry mixture aside.
- In a large bowl, cream together the softened butter, brown sugar, and granulated sugar until light and fluffy. This step helps create a moist loaf.
- Beat in the eggs one at a time, mixing well after each addition. Stir in the vanilla extract.
- In a small bowl, toss the chopped apples with 2 tablespoons of the flour mixture to coat them lightly. This prevents them from sinking.
- Alternate adding the dry ingredients and the milk to the butter mixture, beginning and ending with the dry ingredients. Mix until just combined; do not overmix.
- Gently fold in the coated apples.
- In a separate small bowl, mix the swirl ingredients: 1/2 cup brown sugar and 1 teaspoon cinnamon.
- Pour half of the batter into the prepared loaf pan. Sprinkle the entire brown sugar swirl mixture evenly over the batter. Top with the remaining batter.
- Use a knife or skewer to gently swirl the top layer of batter to create ribbons of cinnamon sugar throughout the loaf.
- Bake for 55 to 65 minutes, or until a wooden skewer inserted into the center comes out clean.
- Let the apple bread cool in the pan for 15 minutes before inverting it onto a wire rack to cool completely.
- If using the glaze, whisk together the powdered sugar and milk until smooth. Drizzle over the cooled loaf before slicing and serving.
Notes
- For the best flavor and texture, use firm, slightly tart apples like Granny Smith.
- If you skip the optional glaze, the bread remains delicious and moist on its own.
- This bread freezes well; wrap cooled slices tightly in plastic wrap and foil.
Nutrition
- Serving Size: 1 slice
- Calories: 350
- Sugar: 30g
- Sodium: 250mg
- Fat: 18g
- Saturated Fat: 11g
- Unsaturated Fat: 7g
- Trans Fat: 0.5g
- Carbohydrates: 45g
- Fiber: 2g
- Protein: 4g
- Cholesterol: 75mg