
The holidays! They sneak up on us every year, right? One minute you’re thinking about Halloween candy, and the next you’re staring down a massive bird and a table that needs way too many side dishes. If you’re anything like me a few years ago, you dread the stuffing. It’s either a dry, crumbly brick or a soggy mess lurking under the turkey—never the perfect balance.
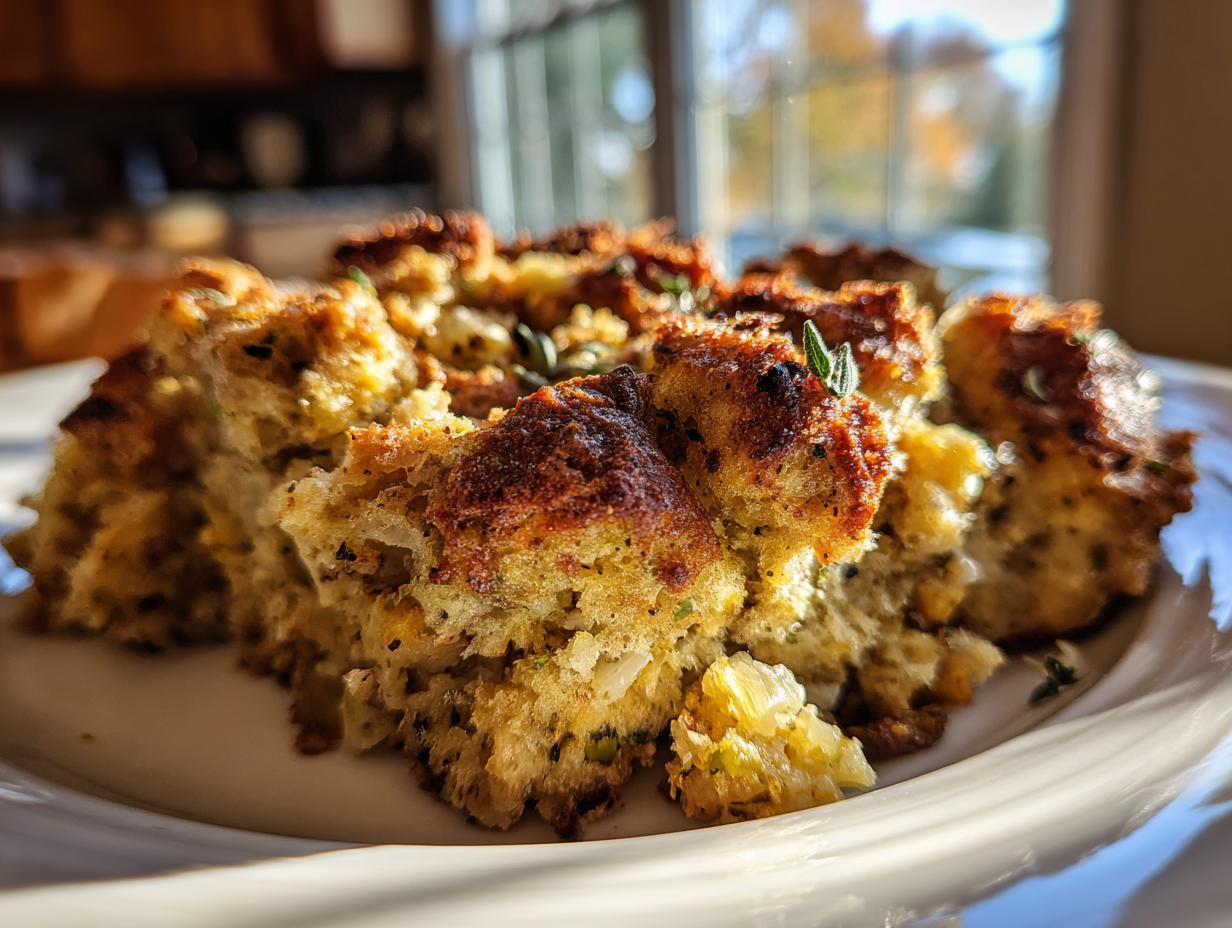
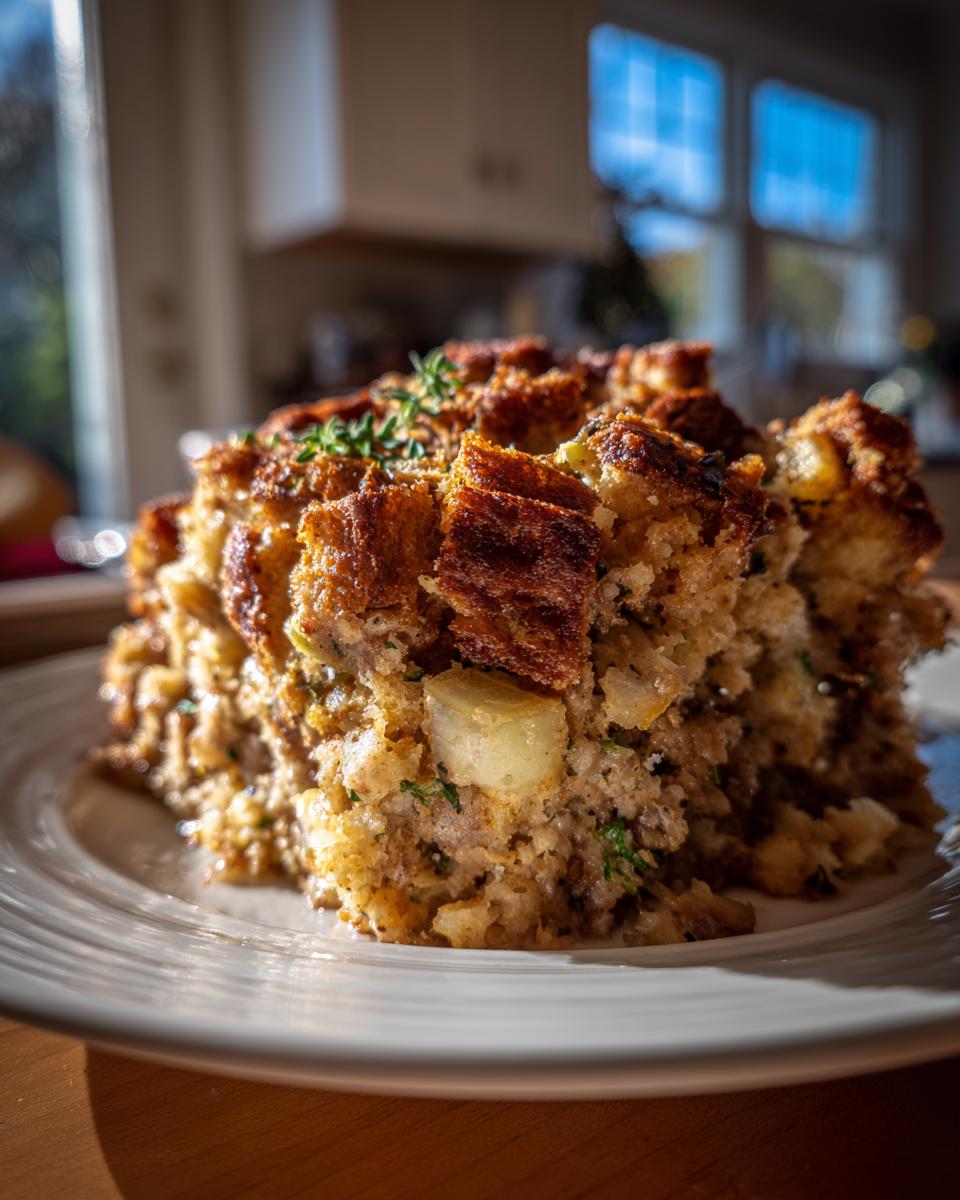
That’s why I’m sharing The Best Homemade Sausage Stuffing with Apples and Sage. My mission here at The YumMagnet Recipe Box, born out of my own kitchen chaos, is to simplify those high-impact dishes. This savory sausage stuffing is designed for you: it guarantees a deeply flavorful taste, a wonderfully moist interior, and that non-negotiable golden, crispy exterior. Trust me, this recipe is the one you’ll save for every big meal. You can find other great options for putting together a full meal here: family dinner recipes.
- Why This Sausage Stuffing Recipe is Your Perfect Holiday Side Dishes Solution
- Ingredients for the Best Homemade Sausage Stuffing
- Step-by-Step Instructions for Moist and Crispy Sausage Stuffing
- Tips for Success: Mastering Classic Sausage Dressing
- Make-Ahead and Storage Instructions for Your Holiday Feast Essentials
- Serving Suggestions for Your Savory Side Dish
- Frequently Asked Questions About Sausage Stuffing
- Estimated Nutritional Data for This Recipe
- Share Your Perfect Holiday Side Dish Experience
Why This Sausage Stuffing Recipe is Your Perfect Holiday Side Dishes Solution
I’ll be honest with you—I used to dread making stuffing. For years, I served up sad, dry stuffing that tasted like seasoned cardboard, even when my entire meal centered around those hearty easy breakfast recipes inspiration struck! It made me feel like I was falling short on my promise to create memorable meals.
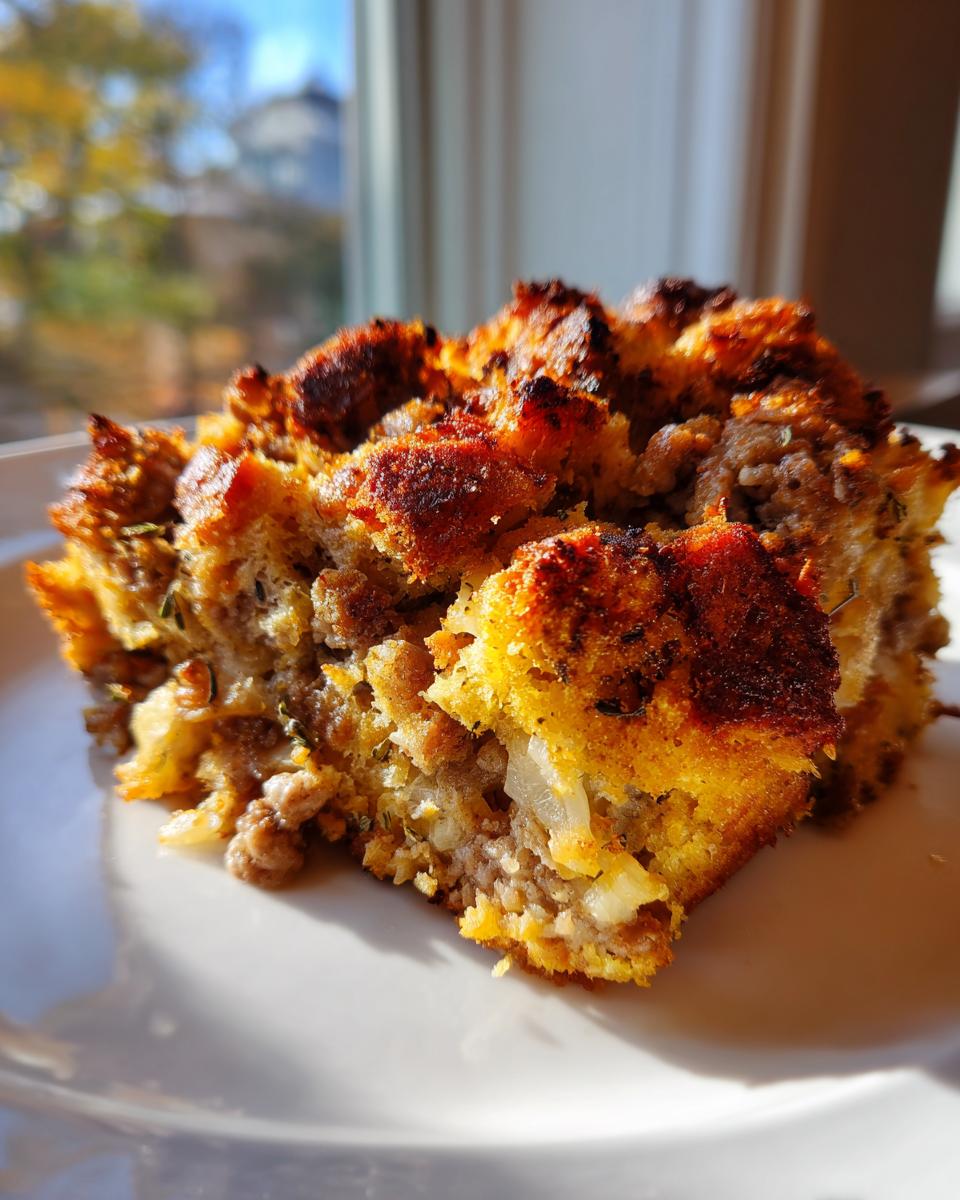
This sausage stuffing recipe fixed everything. The flavor is just miles ahead of anything store-bought because we start with good quality sausage. We’re talking savory depth that makes it one of the best Holiday Side Dishes you’ll ever put out.
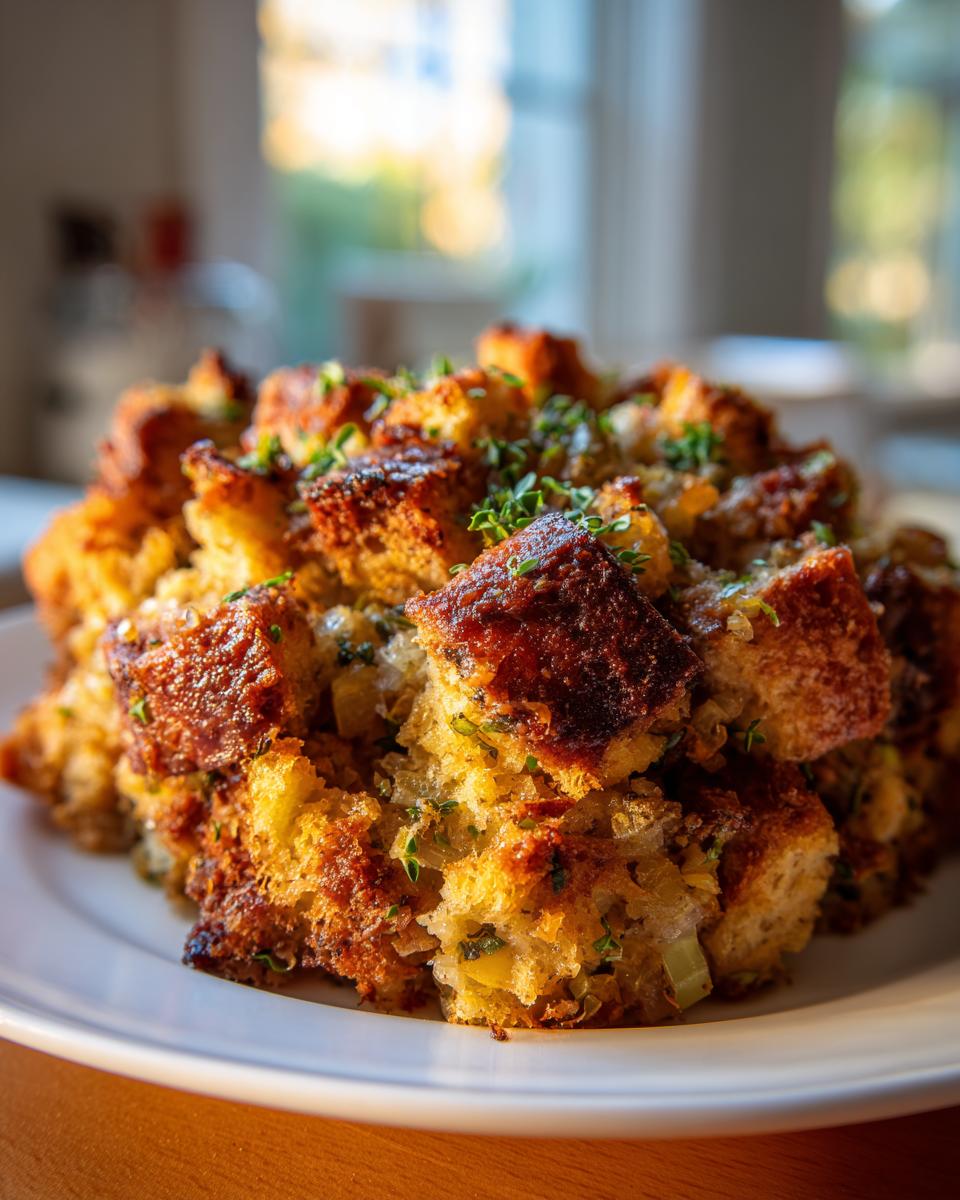
But the real reason this is my go-to is the texture. I cracked the code! We use a specific liquid-to-bread ratio and a two-step baking process that locks in moisture while perfectly crisping the top. That means every scoop gives you that satisfying crunch followed by an unbelievably fluffy interior. It means we’re serving up real Comfort Food Sides that guests actually look forward to.
If you’re planning a big feast, stop wasting time stressing over a side dish that usually lets you down. This one is reliable, flavorful, and frankly, it tastes like home.
Ingredients for the Best Homemade Sausage Stuffing
Okay, let’s get down to business. The flavor of this stuffing relies almost entirely on grabbing quality ingredients, especially that sausage! You’ll need one pound of bulk Italian sausage or your favorite breakfast sausage. That’s the savory backbone of the whole dish.
Here’s the exact list of what you’ll need for this incredibly flavorful Savory Bread Stuffing:
- 1 pound bulk Italian sausage or breakfast sausage
- 1 large yellow onion, chopped
- 2 celery stalks, chopped
- 1 large Granny Smith apple, peeled and diced
- 1/2 cup (1 stick) unsalted butter
- 1 tablespoon fresh sage, chopped
- 1 teaspoon dried thyme
- 1/2 teaspoon salt
- 1/4 teaspoon black pepper
- 14 cups dried bread cubes (use a mix of white and whole wheat for best texture)
- 2 large eggs, lightly beaten
- 2 1/2 cups chicken or turkey broth (low sodium)
- 1/2 cup milk (whole or 2%)
Ingredient Notes and Substitutions for Savory Bread Stuffing
Don’t just grab the first bread you see! I insist on mixing white bread (for softness) and whole wheat (for structure and that deeper flavor). If you’re unsure where to find good bread, check out my tips for making a great crusty loaf; you can use that day-old bread too!
Regarding the sausage, if you can’t find bulk sausage, just buy links and remove the casings. If you aren’t a fan of Italian spice, use mild breakfast sausage and maybe add a little pinch of dried rosemary for extra herbaceous flavor. Also, using low-sodium broth is important because the sausage is already salty!
Step-by-Step Instructions for Moist and Crispy Sausage Stuffing
This is where the magic happens, folks. Making the absolute best Moist and Crispy Stuffing isn’t just about throwing things in a dish; it’s about preparation. We have two non-negotiable texture secrets here: drying your bread properly and using a very specific baking method. Follow these steps exactly, and you won’t ever serve a dry side dish again! If you need inspiration for another oven-baked favorite, check out my notes on easy oven BBQ chicken thighs.
- Prepare the bread: Spread those 14 cups of bread cubes on a big baking sheet. You gotta dry these out—this stops the final product from getting soupy. Bake them at 300°F (150°C) for about 15 to 20 minutes until they feel like croutons, but please, don’t let them actually brown! Set them aside.
- Cook the sausage: Get your skillet hot over medium heat. Cook that sausage until it’s all browned up, using your spoon to break it into nice little chunks. Drain off almost all the fat, but leave about 2 tablespoons—that flavor is gold!
- Sauté aromatics: Toss in the onion and celery into that little bit of rendered fat. Let them soften up for about 5 to 7 minutes. Then, add the diced apple, fresh sage, thyme, salt, and pepper. Cook just until you can smell the sage waking up, maybe 3 more minutes.
- Combine ingredients: Scoop that entire sausage mixture right into a huge bowl. Add all those dried bread cubes you set aside earlier. Give it a gentle toss, just enough so everything is looking mixed up.
The Secret to a Fluffy Stuffing Recipe: Binder Preparation
Listen up, this is vital for that light, Fluffy Stuffing Recipe texture. Don’t just pour the liquid over the dry ingredients! In a separate bowl, whisk together those 2 eggs, the chicken broth, and the milk until they are totally incorporated. When you whisk them together first, you create a uniform binder.
If you just dump the liquids in separately, you risk big soggy spots or pockets of unmixed egg. We want that liquid to coat every single bread cube evenly. Trust me on this tiny extra step; it makes a huge difference in preventing that dense, gummy texture underneath the crust!
Baking Techniques for Perfect Sausage Stuffing Texture
Now that everything is combined loosely in your baking dish—remember, don’t pack it down!—we bake in two stages. This is the real trick for the ultimate texture balance.
First, cover that baking dish TIGHTLY with aluminum foil. Bake it at 375°F (190°C) for 30 minutes. This traps all the steam inside, which gently cooks the center and ensures it gets ridiculously moist. After those 30 minutes, pull off the foil. Continue baking uncovered for 15 to 20 minutes. This second stage blasts the top layer with dry heat, making it golden brown and wonderfully crisp. That’s how you nail that perfect Moist and Crispy Stuffing!
Tips for Success: Mastering Classic Sausage Dressing
Even though this Classic Sausage Dressing recipe is pretty straightforward, I always have a few little extra tricks up my sleeve that I swear by when I’m cooking for a big crowd. These small adjustments take the flavor from ‘really good’ to ‘I need that recipe now!’ level.
First, let’s talk about the sausage flavor. If you are using Italian sausage, you have two options: use plain sweet Italian sausage, or use the hot variety if you like a little kick. If you only have mild breakfast sausage, you absolutely have to boost the herbs. I’d sneak in an extra half teaspoon of dried sage, or even add a quarter teaspoon of ground dried fennel seed. Fennel really loves pork, and it mimics that slightly anise flavor you get in good Italian sausage!
My second tip is about seasoning adjustment, which is critical. Because we are using low-sodium broth initially, you need to taste your mixture before the binder goes in. After you mix the sausage, onions, celery, and apples (Step 4 in the recipe), take a tiny bit on a spoon, taste it, and see if it needs more salt or pepper. Once the bread is added, it’s almost impossible to adjust flavor evenly, so get it right here!
Finally, and this is just for me, I love a little tanginess. That diced apple helps, but if you want to really make it pop, stir in about a tablespoon of Dijon mustard right when you mix in the binder liquid. It disappears into the final product, but it brightens up all that rich sausage flavor. Honestly, it’s one of my favorite little secrets for making any savory side dish feel more sophisticated.
Make-Ahead and Storage Instructions for Your Holiday Feast Essentials
Since I know how hectic the day of the big meal can be, this recipe is amazing because it’s fantastic for planning ahead! You can absolutely prepare the entire mixture—from cooking the sausage and chopping the veggies right through to tossing it with the liquid binder—up to 24 hours in advance. Seriously, that’s one less major step on Thanksgiving morning!
If you mix it the day before, remember that the bread will absorb a little more liquid while chilling. Just add an extra 1/4 cup of broth to your binder mixture when you stir it all together the first time. Cover the dish tightly with plastic wrap and tuck it into the fridge.
When it’s time to bake those Holiday Feast Essentials, keep the texture perfect. Pop the dish into the oven covered at 375°F (190°C) for about 40 minutes to allow it to warm through evenly. Then, take the foil off and bake it uncovered for that final 15 to 20 minutes to get that crispy top we worked so hard for. If you’re using a slow cooker instead of the oven, check out my notes on easy crockpot chili for general heat guidelines!
Serving Suggestions for Your Savory Side Dish
This sausage stuffing is so rich and flavorful, it really plays well with a lot of traditional roast flavors. Once you pull that perfectly crisp dish out of the oven, you need to know what to serve it alongside to make your whole meal shine! My rule is that anything rich needs something bright or something super smooth to balance it out.
For the absolute dream team pairing, you can’t beat roasted poultry. The savory herbs and sausage in the stuffing soak up gravy like a sponge. If you’re doing turkey, make sure you have plenty of thick, rich gravy to spoon over everything. It’s just classic comfort food.
If you are looking for another side to round out your plate—something creamy to contrast that crispy top—you have to try my recipe for ultimate creamy Southern cheese grits. Yes, grits with Thanksgiving dinner! Trust me, the creamy texture is incredible next to the hearty sausage stuffing.
And never, ever forget the tang! A bright, sharp cranberry sauce—homemade is best, but any good tart sauce works—cuts right through the richness of the sausage beautifully. It cleanses the palate so you’re ready for the next decadent bite. If you need more inspiration for pulling that whole holiday meal together, check out some great ideas for improving on classics over here: Why This Sausage Stuffing Tastes Better Than Ever.
Frequently Asked Questions About Sausage Stuffing
Can I use pre-made stuffing mix instead of drying my own bread cubes for this recipe?
Oh, I totally get the desire to skip a step! While you *could* technically use pre-made stuffing mix, I wouldn’t recommend it for this recipe, especially if you are chasing that perfect texture. The whole point of my technique for that Moist and Crispy Stuffing is controlling the moisture absorption. Pre-made cubes are often too processed or too fine. They tend to dissolve rather than create that lovely fluffy-yet-structured interior we want. Stick to crusty, stale bread cubes so they can soak up the binder without turning into mush!
What kind of sausage works best for this recipe? I only have links.
The best sausage really depends on your preference! If you want that rich, savory, slightly garlicky flavor, Italian sausage is fantastic. If you prefer something milder, use bulk breakfast sausage. If you only have links, just slice open the casing with a small paring knife and squeeze the meat out right into the pan. It works perfectly! We want that rich pork fat rendering out to cook the veggies. For more savory ideas, take a peek at my easy chicken parmesan recipe!
Can I bake this sausage stuffing in a slow cooker instead of the oven?
You absolutely can adapt this to be a Make Ahead Stuffing that just sits in the slow cooker until dinner, but you have to manage expectations on crispness. The slow cooker excels at moisture—it’s hard to dry out! You’ll still want to mix everything the same way, pressing it lightly into the slow cooker insert. Cook on LOW for about 3-4 hours. To get any crispness at all, you *must* remove the lid for the last 30 minutes of cooking. It won’t be as perfectly golden as the oven version, but it will be wonderfully moist!
My family loves herbs. Can I add more fresh herbs to this stuffing?
Yes, please! That’s the beauty of a scratch recipe. If you want an even more intense aroma, doubling up on the fresh sage is always a winner, or you could swap the thyme for some fresh rosemary—just remember rosemary is potent, so stick to maybe 1/2 teaspoon chopped. The more fresh herbs, the better this Herb Stuffing tastes! If you liked the tips on texture improvement on another site, you might enjoy comparing notes here: Moist & Crispy Sausage Stuffing Recipe: Perfect Holiday Side Dish.
Estimated Nutritional Data for This Recipe
I know some of you are watching macros or just planning out how much you can eat later (I see you!), so I put together the estimated nutritional breakdown for one serving of this incredible stuffing. It’s hearty, but remember, it’s a foundational side dish for a big feast!
This data is based on dividing the recipe evenly into 10 servings, but things change depending on the exact sausage fat content or the bread brand you grab. So take these numbers as a great guideline, not gospel!
- Serving Size: 1 cup
- Calories: 380
- Fat: 22g (with 8g Saturated Fat)
- Carbohydrates: 35g
- Protein: 14g
- Sugar: 4g
Please keep in mind that these are just our best estimates based on standard ingredients. If you use leaner sausage or lighter milk, you’ll shift those numbers a bit! If you want to check out how we handle data privacy here at The YumMagnet Recipe Box, you can read our full policy here: Privacy Policy. Happy feasting!
Share Your Perfect Holiday Side Dish Experience
Alright, my friends, we’ve made it to the best part: sharing the joy! I truly believe that the heart of The YumMagnet Recipe Box is when you all try these recipes and tell me how they worked in *your* kitchens. I pour my heart into these tried-and-true methods so you don’t have to stress over your Perfect Holiday Side.
So, once you’ve pulled this amazing sausage stuffing out of the oven and that crispy top is glistening, I need you to tell me all about it! Please take a moment to leave a rating below—if you loved the moisture level, give it five stars!
Tell Me Your Favorite Part!
When you leave a comment, don’t just say “It was good.” Get specific! Did the apples add that perfect bit of tart sweetness? Was the herb combination spot on? I’m most curious: which part did you nail—the super moist inside or that glorious crusty top? Every single piece of feedback helps the next home cook feel confident when they try this recipe. We build our kitchen knowledge together!
If you snapped a picture of this beauty sitting on your holiday table, I would absolutely love to see it! Tag us on social media so I can share your success stories with the whole community. Seeing your delicious Festive Side Dish creations really makes my day!
And hey, if you have burning questions or just want to share kitchen wins in general, please don’t hesitate to reach out directly via my contact page. We are a community of home cooks dedicated to making real food for real life. If you’re interested in learning more about the mission behind this whole site, check out the About page!
PrintThe Best Homemade Sausage Stuffing with Apples and Sage for a Moist and Crispy Finish

This recipe delivers the ultimate savory sausage stuffing, ensuring a perfectly moist interior and a golden, crispy top every time. It uses classic ingredients like Italian sausage, fresh sage, and apples for deep holiday flavor.
- Prep Time: 25 min
- Cook Time: 50 min
- Total Time: 75 min
- Yield: 10 servings 1x
- Category: Side Dish
- Method: Baking
- Cuisine: American
- Diet: Vegetarian
Ingredients
- 1 pound bulk Italian sausage or breakfast sausage
- 1 large yellow onion, chopped
- 2 celery stalks, chopped
- 1 large Granny Smith apple, peeled and diced
- 1/2 cup (1 stick) unsalted butter
- 1 tablespoon fresh sage, chopped
- 1 teaspoon dried thyme
- 1/2 teaspoon salt
- 1/4 teaspoon black pepper
- 14 cups dried bread cubes (use a mix of white and whole wheat for best texture)
- 2 large eggs, lightly beaten
- 2 1/2 cups chicken or turkey broth (low sodium)
- 1/2 cup milk (whole or 2%)
Instructions
- Prepare the bread: Spread the bread cubes on a large baking sheet. Bake at 300°F (150°C) for 15 to 20 minutes until dry but not browned. Set aside.
- Cook the sausage: In a large skillet over medium heat, cook the sausage, breaking it up with a spoon, until browned. Drain off most of the fat, leaving about 2 tablespoons in the pan.
- Sauté aromatics: Add the chopped onion and celery to the skillet. Cook until softened, about 5 to 7 minutes. Add the diced apple, sage, thyme, salt, and pepper. Cook for 3 more minutes until the sage is fragrant.
- Combine ingredients: Transfer the sausage mixture to a very large bowl. Add the dried bread cubes. Toss gently to combine.
- Prepare the binder: In a separate medium bowl, whisk together the eggs, chicken broth, and milk until fully blended. This liquid mixture is key for a moist interior.
- Moisten the stuffing: Pour the liquid binder evenly over the bread and sausage mixture. Toss gently until all the bread is lightly coated. Do not overmix.
- Prepare for baking: Lightly grease a 9×13 inch baking dish. Transfer the stuffing mixture to the dish, mounding it slightly. Do not pack it down tightly; keep it loose for fluffiness.
- Bake for moisture and crispness: Cover the dish tightly with aluminum foil. Bake at 375°F (190°C) for 30 minutes.
- Create the crust: Remove the foil and continue baking for another 15 to 20 minutes, or until the top is golden brown and crispy.
- Rest before serving: Let the stuffing rest for 10 minutes before scooping and serving. This allows the moisture to redistribute.
Notes
- For make-ahead convenience, prepare the entire mixture (Steps 1 through 4) and store it, covered, in the refrigerator for up to 24 hours. Add an extra 1/4 cup of broth when mixing if preparing ahead.
- To achieve the best crispy exterior, place the baking dish on the lower-middle rack during the final uncovered baking stage.
- If you prefer a richer flavor, substitute half of the chicken broth with dry white wine when mixing the binder.
Nutrition
- Serving Size: 1 cup
- Calories: 380
- Sugar: 4
- Sodium: 550
- Fat: 22
- Saturated Fat: 8
- Unsaturated Fat: 14
- Trans Fat: 0.5
- Carbohydrates: 35
- Fiber: 2
- Protein: 14
- Cholesterol: 65