
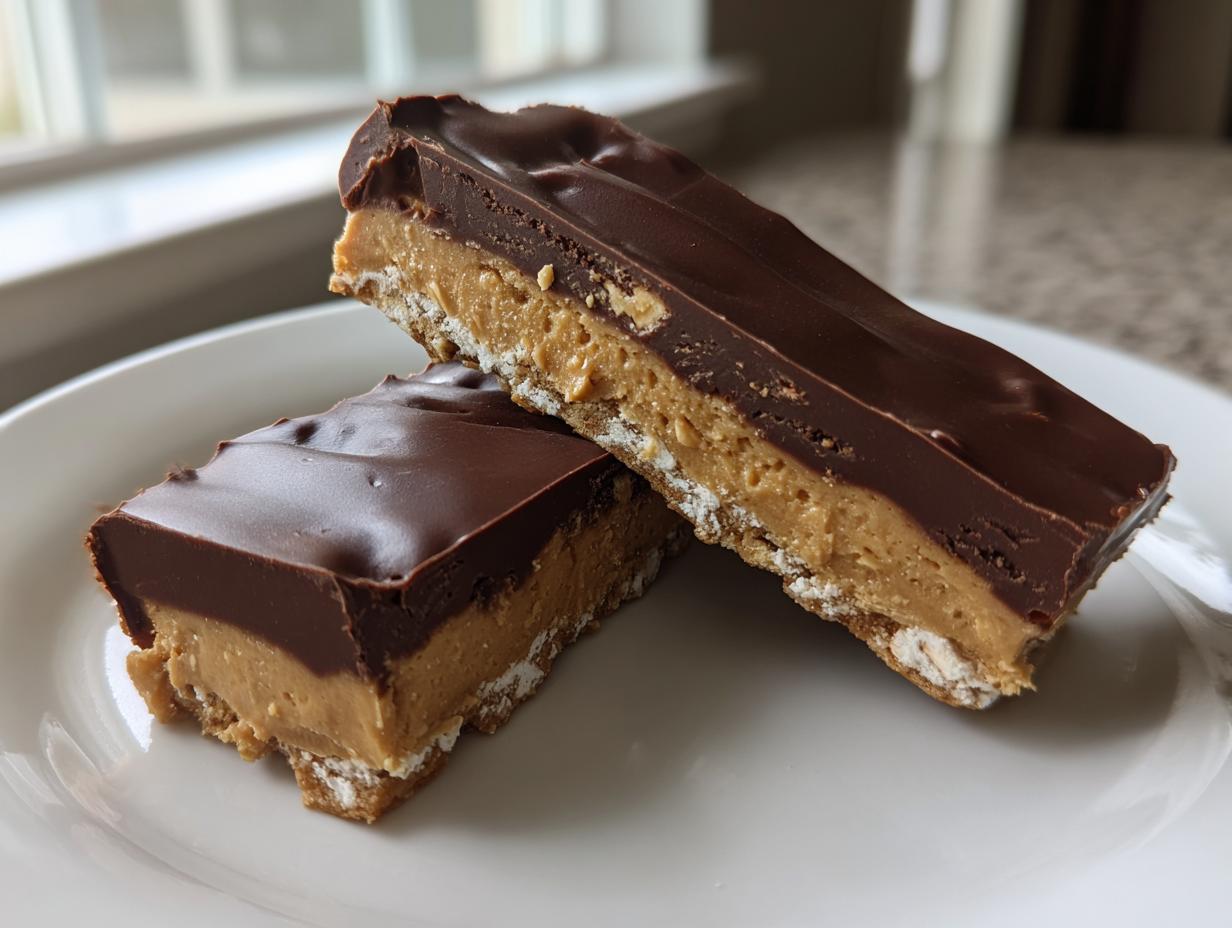
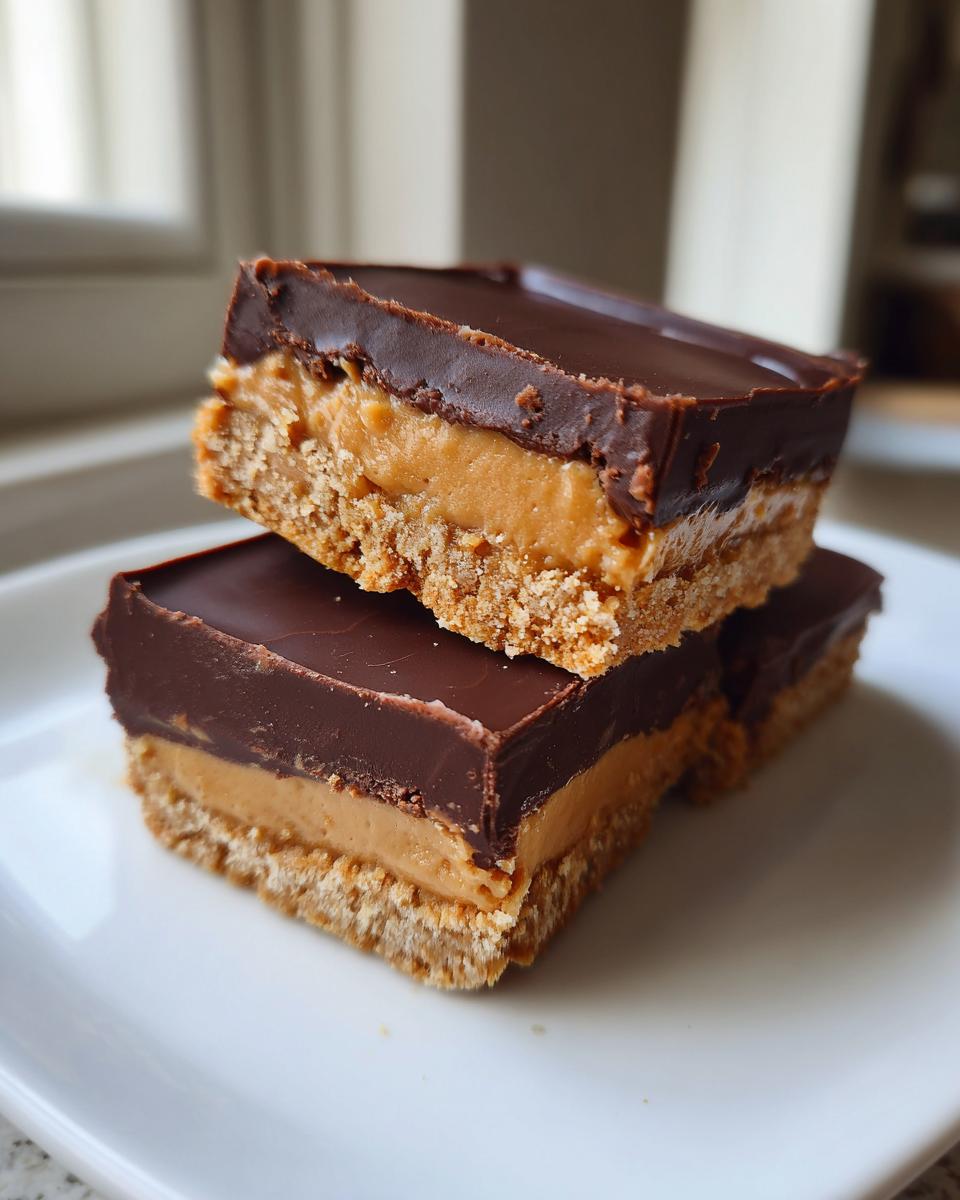
When the craving hits for something rich, chocolatey, and perfectly peanut-buttery, you don’t always have time for all that holiday baking fuss, right? That’s why I’m so thrilled to share what I think is the ultimate fix: our recipe for **buckeye graham crackers**. Trust me, this no-bake version takes that famous, nostalgic candy flavor and slaps it right onto a crunchy, satisfying graham cracker base. It’s pure genius for busy afternoons or when company drops by unexpectedly!
Here at The YumMagnet Recipe Box, my goal—and it comes straight from my own hectic life as a working mom—is simplifying those treasured flavors. My mom and grandma taught me how to cook magic, but they didn’t have to manage zoom meetings and soccer practice! These chocolate dipped treats are the perfect example: maximum payoff with minimum effort. You truly won’t believe how fast these come together, and since we don’t even need the oven, it’s clean, quick fun for everyone.
If you’re searching for delicious dessert recipes that satisfy that deep sweet tooth without requiring hours of work, then you’ve landed in the right spot. Let’s get started on this incredible, easy snack!
- Why You Will Love These Buckeye Graham Crackers (Crowd Pleasing Party Food)
- Essential Ingredients for Buckeye Graham Crackers
- Step-by-Step Instructions for No Bake Peanut Butter Treats
- Tips for Perfect Buckeye Graham Crackers Every Time
- Storage and Making Ahead with Your Graham Cracker Candy Recipe
- Serving Suggestions for Easy Chocolate Dipped Desserts
- Frequently Asked Questions About Buckeye Graham Crackers
- Nutritional Estimates for Peanut Butter Chocolate Bars
- Share Your Homemade Buckeye Graham Crackers
Why You Will Love These Buckeye Graham Crackers (Crowd Pleasing Party Food)
When I bring these out, they vanish before any cookies that took hours to bake! Seriously, these little bites solve so many dessert dilemmas. They are proof that you don’t need complicated techniques to make something people rave about.
- No Oven Required! That’s right, these are fantastic No Oven Dessert Recipes. Since we aren’t turning on the heat, it saves energy and keeps the kitchen cool, which is a win in my book, especially in the summer.
- They are the definition of Crowd Pleasing Party Food. The salty peanut butter mingling with sweet, melty chocolate layered over a crunchy base sounds complicated, but it’s just pure, simple deliciousness that everyone loves.
- Talk about speedy assembly! You can whip up the filling and sandwich the crackers in about 20 minutes. They become one of the best Quick Dessert Ideas when you need something impressive fast. I’ve served these when I thought company was arriving in an hour!
- They are perfectly portioned! Because we cut them into small bars, they are easier to serve than a big fussy cake, and they make wonderful, portable snacks. They travel beautifully, too!
Plus, they remind everyone of that classic Ohio candy! If you enjoy that nostalgic flavor but need something sturdy and easy to manage, these Peanut Butter Chocolate Bars are your ticket. You might even want to check out my ideas for easy breakfast recipes for your non-dessert cravings!
Essential Ingredients for Buckeye Graham Crackers
Gathering your ingredients is the easiest part of this recipe because most of this stuff is probably already hanging out in your pantry. Seriously, these Peanut Butter Chocolate Bars are built on simple components, but their quality really matters for the final result. I listed everything out below just so you can grab what you need at the store!
- 1 cup creamy peanut butter (I used the standard Jif or Skippy type; the natural runny kind can make the filling too loose!)
- 1/2 cup unsalted butter, softened to actual room temperature (This is key! If it’s cold, it won’t cream properly.)
- 3 cups powdered sugar (Make sure it’s measured correctly—usually by spooning it lightly into the cup, not scooping it straight from the bag.)
- 1/2 teaspoon vanilla extract (Just a splash for that warmth.)
- 1 box (14.4 ounces) graham crackers, must be whole sheets, not crumbs
- 12 ounces semi-sweet chocolate chips (My preferred choice for that classic tang against the sweet peanut butter.)
- 2 tablespoons shortening or coconut oil (This isn’t optional for the dip; it helps the chocolate set smooth and shiny.)
With these few power players, we’re ready to make magic happen without ever touching the stove top for heat!
Ingredient Notes and Substitutions for Buckeye Graham Crackers
I always get questions when folks try this recipe for the first time, especially about the peanut butter and chocolate part. Honestly, achieving that authentic Buckeye texture means sticking close to the plan, but substitutions are usually fine!
If you absolutely prefer texture over silkiness, feel free to swap that creamy peanut butter out for crunchy peanut butter in the filling. You’ll get a nice little resistance when you crunch into it, which is fun! Just realize it might make the filling a touch stiffer.
That little bit of shortening or coconut oil mixed with the chips is non-negotiable for the coating. Why? Because melting pure chocolate chips alone makes them seize up or turn dull when they cool. The fat helps create that perfect, smooth, slightly soft shell around the filling, just like genuine No Bake Peanut Butter Treats should have.
And for the chocolate type? If semi-sweet isn’t your jam, go for it! Milk chocolate makes them sweeter, and dark chocolate gives you a sharper chocolate contrast. Honestly, I keep a bag of dark chocolate chips handy for when I am serving these to grown-ups. You can check out some of my other easy meals over here if you need something savory to balance all this sweetness: amazing salmon recipes are always a hit!
Step-by-Step Instructions for No Bake Peanut Butter Treats
Okay, we’ve got our ingredients ready to roll, and trust me, these No Bake Peanut Butter Treats come together faster than you think. Since there’s no baking involved, our main enemy is time—specifically, making sure your layers are set so the dipping goes perfectly smoothly. Follow these steps exactly, especially the chilling time, and you won’t have any melty chocolate messes!
Making the Creamy Peanut Butter Filling
First things first, we need that decadent filling! Grab a decent-sized bowl—one that gives your mixer (or your arm!) some room to work. You’re going to combine the peanut butter, the softened butter, all that powdered sugar, and that little bit of vanilla. You need to beat this mixture until it’s truly smooth. I mean it, until you can’t see any streaks of butter or lumps of sugar. It should look light and creamy, almost like fluffy icing. If it seems too stiff right away, don’t panic; keep mixing! With that much powdered sugar, it takes a minute to blend everything into perfection.
Assembling and Chilling the Buckeye Graham Crackers Layers
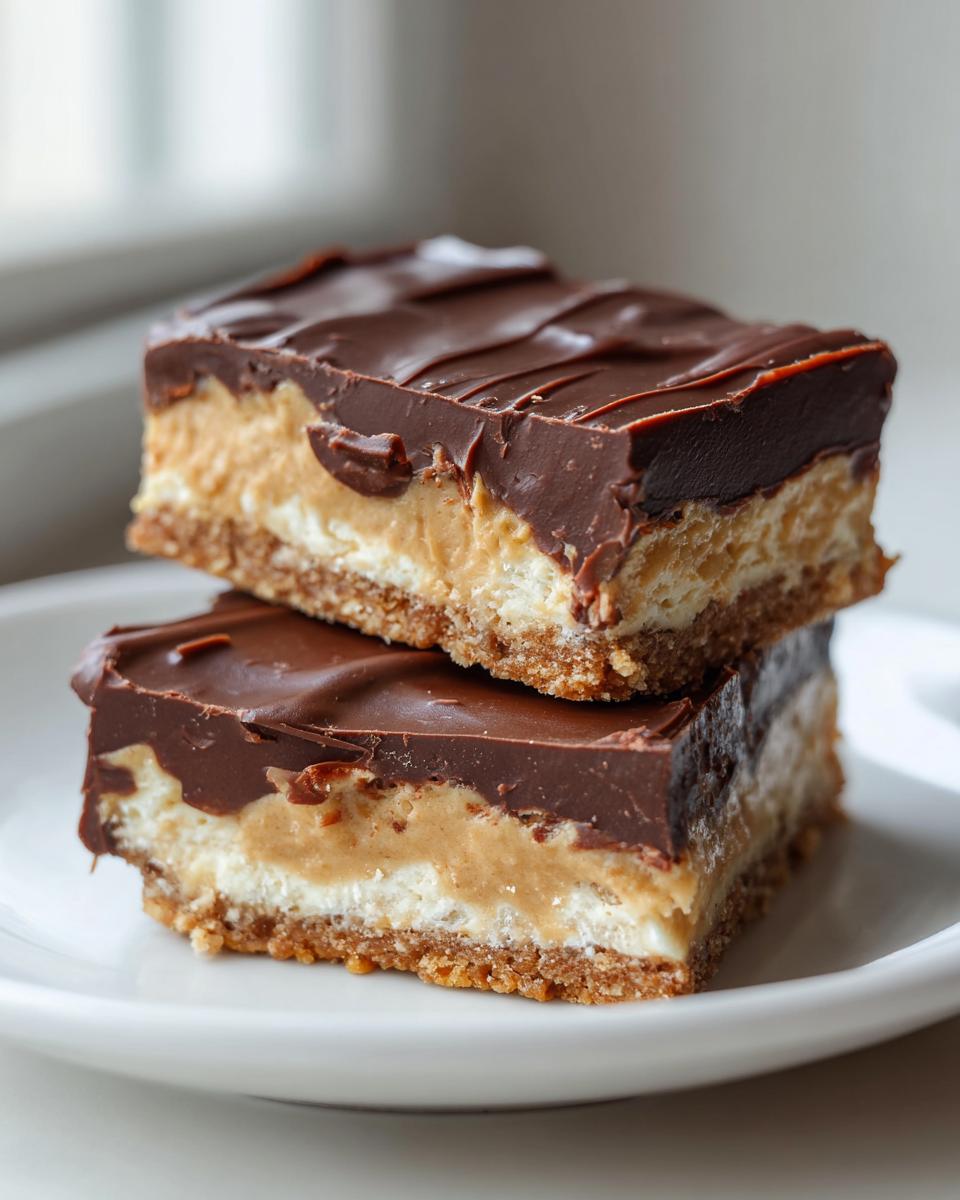
This is where precision comes in handy, but don’t stress! Get out your parchment-lined baking sheet so cleanup is a breeze later. Take one whole graham cracker sheet and spread about a tablespoon of that gorgeous peanut butter mixture evenly over the top. Don’t glob it on; we want it spread to the edges so it holds its shape. Then, carefully top it with a second whole graham cracker sheet, making a sandwich. Now, here’s my pro tip: press down gently, just enough so the two crackers stick together without squishing all the filling out the sides. Once you have your sandwiches made, slice each one neatly into two small rectangles. You should end up with about 24 little bars. Toss the whole sheet into the freezer for at least 30 minutes. This chilling is non-negotiable; if they aren’t cold, they disintegrate when you try to dip them!
Perfecting the Chocolate Dipped Finish
While the bars are getting frosty, let’s melt that chocolate. Combine your chocolate chips and the shortening or coconut oil in a microwave-safe bowl. Remember, chocolate burns faster than you can blink! Microwave it for 30 seconds, stir it really well, then another 30 seconds, and keep going in small bursts until it’s totally smooth and shiny. We want it liquid, not hot enough to scald your fingers.
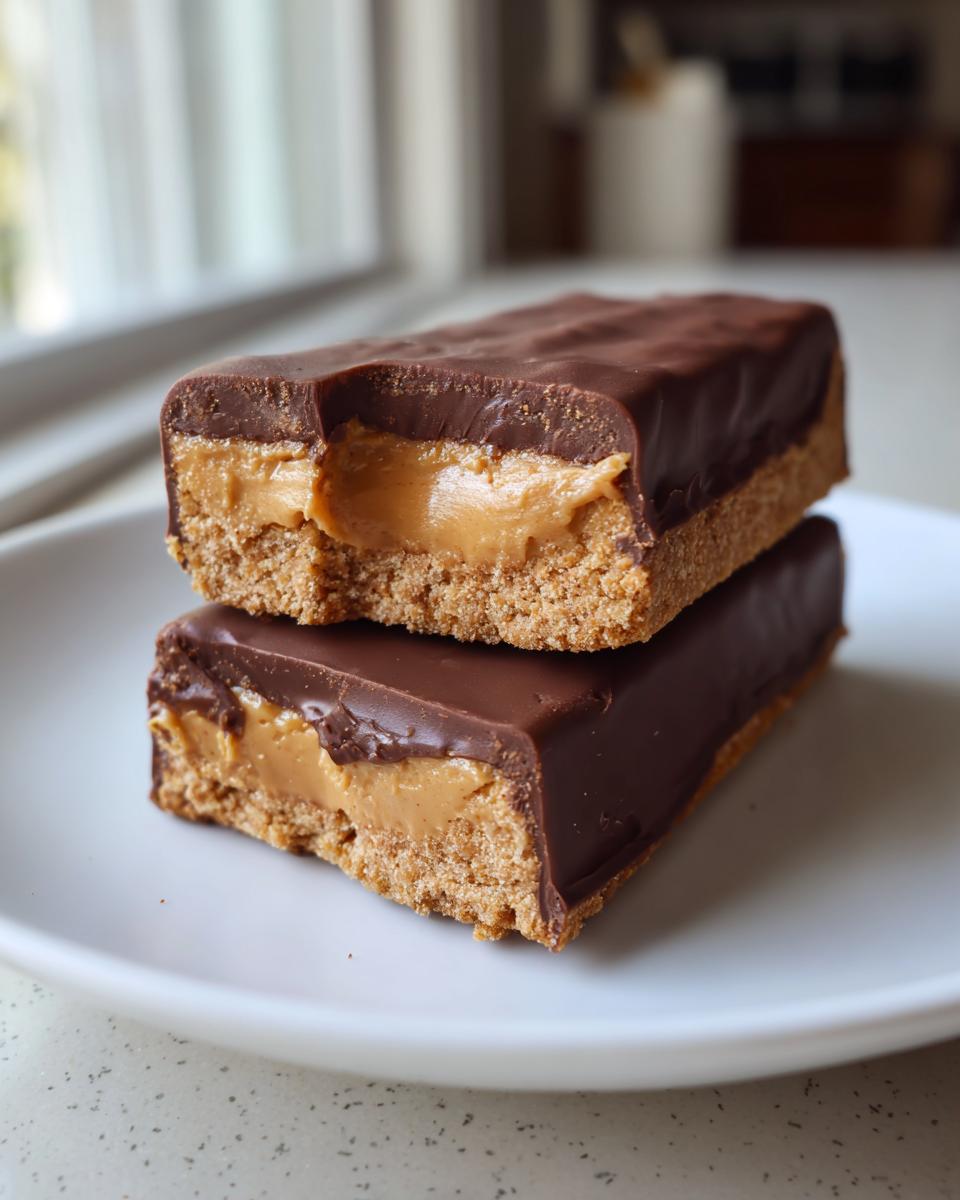
Okay, bars should be rock hard now! Take them out, and quickly dip each one into that warm, smooth chocolate. Here’s how you get that classic Buckeye look: dip most of the bar, but leave just a small “peak” of the peanut butter layer showing at the top! After dipping, place the bar back onto the parchment paper. Let them sit right there until the chocolate hardens up naturally or pop them back into the fridge for maybe 15 minutes if you’re in a rush. If you need savory ideas after all that sugar, feel free to check out my recipe for easy chicken parmesan!
Tips for Perfect Buckeye Graham Crackers Every Time
I’ve made these buckeye graham crackers so many times I could probably do it with my eyes closed, but even a simple recipe benefits from a few tried-and-true tricks. These tips, learned through a few slightly messy kitchen disasters, guarantee you get that perfect texture and clean dip every single time. It’s all about the setup!
First, let’s talk about that butter. I cannot stress this enough: your 1/2 cup of butter for the filling needs to be genuinely soft, not melted! If you microwave it until it’s oily, your filling will be too soft once you start adding the powdered sugar, and you’ll end up needing to add a whole extra cup of sugar just to make it manageable. Set it out on the counter for about an hour before you plan to start. You should be able to press your finger into it easily without the butter breaking or sticking to your hand. That’s the sweet spot!
Second, when you’re assembling the cracker sandwiches, don’t be too aggressive when you press them together. Remember, the peanut butter filling is squishy! If you smash it down hard, the filling will ooze out the sides, and when you go to dip it chocolate, you’ll end up with a lumpy, uneven coating. Just a gentle press—enough so the crackers adhere—is all you need. We want neat little blocks, not blobs!
Third, once they come out of the freezer after that 30-minute chill, you need to work fast when dipping. Chocolate hardens quickly when it hits that cold peanut butter layer. If you place a cold bar in the chocolate and wait too long before pulling it out, the chocolate coating can actually crack as the peanut butter warms up slightly on the counter. It’s a race! If you notice your chocolate getting too thick and sluggish while you work, just pop the bowl back in the microwave for 10 seconds to loosen it up again. It keeps everything moving nicely!
Finally, when setting them to dry, make sure they have enough space on that parchment paper. If two bars are touching while the chocolate sets, you’ll end up fusing them together, and nobody wants to wrestle their dessert apart! For more great ideas on making family favorites work with busy schedules, feel free to browse my section on family dinner recipes. We always need something yummy ready to go!
Storage and Making Ahead with Your Graham Cracker Candy Recipe
One of the best things about these incredible buckeye graham crackers is that they are totally make-ahead friendly! Since they are no-bake, they naturally lend themselves to being prepped in advance, which is a lifesaver when you’re planning a big event or just trying to keep snacks stocked for the week. I always make a double batch because they disappear so fast—and they taste even better the next day!
When it comes to storage for this Graham Cracker Candy Recipe, you have a few really easy options, and they all keep the chocolate coating perfectly intact.
For short-term storage, like if you plan on eating them within a couple of days, the refrigerator is your best friend. You absolutely must store your bars in a well-sealed, airtight container. The cold temperature keeps that peanut butter filling nice and firm, and it prevents the chocolate from getting soft or sticky, especially if your kitchen runs a little warm. They’ll stay wonderfully fresh in the fridge for about 5 to 7 days.
But if you need them for a holiday party next week or are prepping a batch for lunches, you can totally freeze these! These are fantastic Freezer Friendly Sweets. I like to lay them out on a baking sheet first, ensuring they aren’t touching, and freeze them for about an hour until the chocolate is completely solid. Once they’re hard, you can transfer them into a heavy-duty freezer bag or airtight container. You want to get rid of as much air as possible before sealing them up tight. The recipe notes say they last about three months in the freezer, and honestly, they taste just as good as the day you made them!
When it’s time to serve them after freezing? Just pull out what you need and let them thaw on the counter for about 15 to 20 minutes. They are delicious when they’re chilled like that! If you are looking for other make-ahead goodness that doesn’t need an oven, check out my recipe for easy moist date nut bread—it’s another family favorite that tastes better the next morning!
Serving Suggestions for Easy Chocolate Dipped Desserts
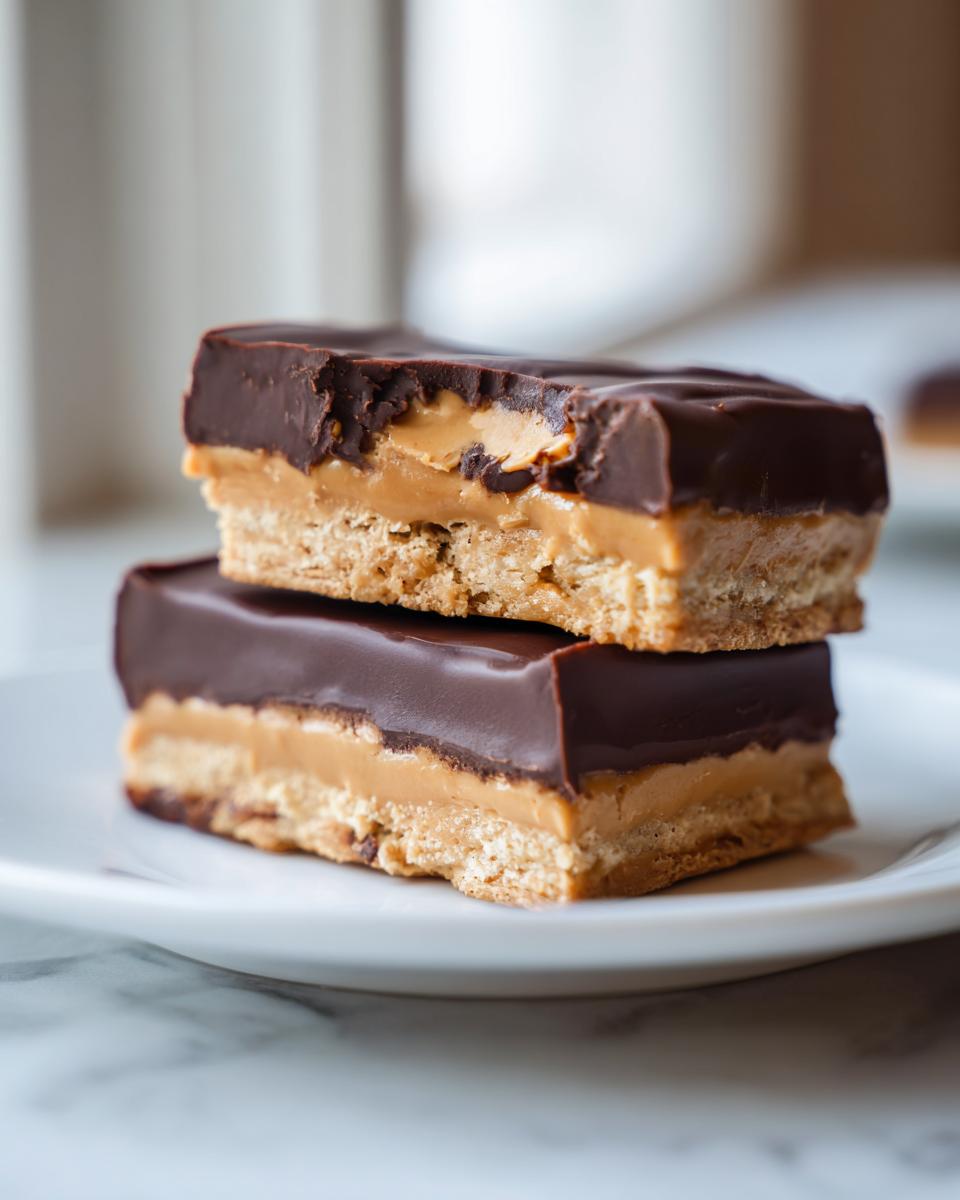
You’ve made them, you’ve chilled them, and now comes the best part: showing off these spectacular buckeye graham crackers! Because they are so rich and satisfying, you don’t need a huge platter of things to serve alongside them. They truly stand on their own as one of the best Easy Chocolate Dipped Desserts you can make!
My favorite way to present them is super simple, actually. I arrange them neatly on a tiered serving tray along with some fresh fruit—maybe some crisp strawberries or raspberries. The tartness of the fruit cuts right through the sweet peanut butter and chocolate, making everything feel a little less heavy. They look beautiful arranged simply on a white platter dusted lightly with powdered sugar, too!
If you are setting these out for an afternoon get-together or an evening dessert spread, I always make sure there’s a pot of strong coffee nearby. That slight bitterness from the dark roast is the absolute perfect companion to these sweet bars. The way the warm coffee hits that cold, crumbly texture? Heavenly!
For parties, especially cookie exchanges where you need a good variety, try having a bowl of them next to something salty, like seasoned popcorn or pretzels. That sweet and salty contrast is what keeps people coming back for one more bar! For more simple, impressive recipes that pair well with entertaining, you should absolutely check out my recipe for ultimate creamy Southern cheese grits—you’ll thank me later!
Frequently Asked Questions About Buckeye Graham Crackers
I totally get it; when you’re trying a new quick recipe, you always have a couple of burning questions! Since these **buckeye graham crackers** are based on a classic candy, sometimes people wonder about tweaking the core components. Don’t worry, I’ve worked out all the kinks so you don’t have to waste time experimenting.
Here are my answers to the most common things people ask about these easy chocolate dipped desserts before mixing up a batch.
Can I use crunchy peanut butter in this Buckeye Graham Crackers recipe?
Yes, you absolutely can, but you need to know what you’re signing up for! If you substitute creamy peanut butter with crunchy peanut butter when making the filling, it will give you an extra fun texture layer. However, crunchy peanut butter has less fat and can make that peanut butter layer feel a little stiffer or drier once it chills up. If you do this, you might need to mix it a bit longer just to get everything smooth before you sandwich those crackers. It’s a perfectly fine swap if you love that extra crunch, though!
How do I prevent the chocolate from cracking when dipping?
This is the number one source of frustration when dealing with chocolate coatings, and it all comes down to temperature control! The main reason the chocolate cracks once it sets is that the freezing cold peanut butter layer warms up too fast against the room temperature chocolate, causing expansion and contraction. My biggest tip here is to ensure your bars are truly frozen solid from that 30-minute chill time. Then, when you dip, work quickly—don’t let the bar sit submerged for more than two seconds. The chocolate should feel slightly warm but totally liquid, not scorching hot. If your chocolate starts to look dull or thick while you’re working through the batch, just give it 10 more seconds in the microwave. Quick dips on cold bars equal perfect, uncracked shells every time!
Also, remember these are great for packed lunches, but make sure they are perfectly set before sealing them up, or they might stick together! If you need some ideas for pairing these with dinner, I always recommend checking out my recipe for easy oven BBQ chicken thighs; sometimes you need savory after all that sugar!
Nutritional Estimates for Peanut Butter Chocolate Bars
Now, I know sometimes we look at a delightful treat like these **Peanut Butter Chocolate Bars** and worry about the nutrition label. Hey, I totally understand! When I’m cooking for my family, I want to know what we’re eating, even if it’s a party snack. Since these are homemade and use standard brand products, the numbers can vary a bit depending on exactly which peanut butter or chocolate chips you grab.
Below are the estimated nutritional facts based on using the ingredients listed above, calculated per one bar (since we get 24 bars out of the recipe). Keep in mind this is just a guideline, not a precise medical measurement, but it gives you a good idea of what you’re enjoying!
- Serving Size: 1 bar
- Calories: 245
- Sugar: 22g
- Sodium: 110mg
- Fat: 15g
- Saturated Fat: 6g
- Unsaturated Fat: 9g
- Trans Fat: 0g
- Carbohydrates: 25g
- Fiber: 1g
- Protein: 5g
- Cholesterol: 15mg
It’s important to remember that these are treats, meant for enjoying at gatherings or as an occasional special snack! If you’re looking for ways to keep meals lighter during the week, you might want to check out my favorite healthy lunch ideas. But for today? Enjoy the sweet reward of these amazing, simple bars!
Share Your Homemade Buckeye Graham Crackers
Now that you’ve got a tray of these unbelievably easy **buckeye graham crackers**, I really want to hear about them! Honestly, knowing that you took a few minutes out of your busy day to whip up something delicious for your family or friends is the whole reason I share these secrets.
Did they turn out perfectly? Did you manage to follow my tip about only dipping most of the bar so that little peanut butter peak showed? I’m dying to know what everyone thinks!
Please, please leave a rating for the recipe right here on the page! Tell me if these became your new favorite No Bake Peanut Butter Treats or if you served them at a party. If you snapped a picture of those shiny chocolate coatings, I would absolutely love it if you shared it on social media and tagged me. You can also connect with me directly over at my contact page if you have any super specific questions!
We all need those simple, satisfying fixes, and sharing the success stories helps the entire YumMagnet community keep cooking with confidence. For more ideas, if you haven’t checked it out already, see what other folks are making, like the original recipe inspiration found here: Kid Friendly No Bake Buckeye Graham Crackers. Happy snacking, everyone!
PrintThe Ultimate No-Bake Buckeye Graham Crackers: Peanut Butter Chocolate Crunch Bars
Make these easy, no-bake Buckeye Graham Crackers that combine creamy peanut butter filling and rich chocolate coating on a crunchy graham cracker base. This simple dessert is perfect for quick snacks or crowd-pleasing party food.
- Prep Time: 20 min
- Cook Time: 5 min
- Total Time: 25 min
- Yield: 24 servings 1x
- Category: Dessert
- Method: No-Bake
- Cuisine: American
- Diet: Vegetarian
Ingredients
- 1 cup creamy peanut butter
- 1/2 cup unsalted butter, softened
- 3 cups powdered sugar
- 1/2 teaspoon vanilla extract
- 1 box (14.4 ounces) graham crackers, whole sheets
- 12 ounces semi-sweet chocolate chips
- 2 tablespoons shortening or coconut oil
Instructions
- Prepare the peanut butter filling: In a medium bowl, beat together the peanut butter, softened butter, powdered sugar, and vanilla extract until the mixture is smooth and creamy.
- Assemble the bars: Place one whole graham cracker sheet on a plate or baking sheet lined with parchment paper. Spread about 1 to 1.5 tablespoons of the peanut butter mixture evenly over the graham cracker. Top with a second whole graham cracker sheet to create a sandwich. Gently press the layers together.
- Cut the sandwiches: Slice each graham cracker sandwich into two equal rectangles. You should have 24 small bars total. Place these bars on a parchment-lined baking sheet and place them in the freezer for at least 30 minutes to firm up. This step is important for easy dipping.
- Melt the chocolate coating: In a microwave-safe bowl, combine the chocolate chips and shortening (or coconut oil). Microwave in 30-second intervals, stirring well after each interval, until the chocolate is completely smooth and melted.
- Dip the bars: Remove the chilled bars from the freezer. Dip each bar into the melted chocolate, leaving a small portion of the peanut butter layer exposed at the top, mimicking the classic Buckeye candy look.
- Set the chocolate: Place the dipped bars back onto the parchment-lined sheet. Allow the chocolate to set completely at room temperature, or speed up the process by chilling them in the refrigerator for about 15 minutes.
- Serve or store: Serve immediately or store your **Peanut Butter Chocolate Bars** in an airtight container in the refrigerator.
Notes
- For a slightly different texture, you can use crunchy peanut butter in the filling.
- If you are making these for a large gathering, you can easily double the recipe.
- These **No Bake Peanut Butter Treats** freeze very well. Store them in a freezer-safe container for up to three months.
- If you prefer milk or dark chocolate, substitute the semi-sweet chips accordingly.
Nutrition
- Serving Size: 1 bar
- Calories: 245
- Sugar: 22
- Sodium: 110
- Fat: 15
- Saturated Fat: 6
- Unsaturated Fat: 9
- Trans Fat: 0
- Carbohydrates: 25
- Fiber: 1
- Protein: 5
- Cholesterol: 15