
Oh, doesn’t the very thought of those classic drugstore candies just take you straight back in time? I remember standing on my tippy-toes in my grandmother’s kitchen, watching her delicate hands work with sugar and chocolate. Those treats felt truly gourmet, reserved only for holidays! Well, I am here to tell you, my friend, you absolutely do not need a fancy candy shop to get that incredible experience. We are unlocking the secrets to making authentic, melt-in-your-mouth chocolate covered cherries right here at home. The magic boils down to getting that perfect, sweet fondant layer surrounding the juicy maraschino cherry before we coat it all in gorgeous, rich chocolate. This recipe is one of my favorites to share when I’m putting together a collection of delicious dessert recipes. Trust me, this is easier than you think, and I’m sharing every little tip I learned from my family’s recipe cards.
- Why You Will Love This Homemade Chocolate Covered Cherries Recipe
- Essential Ingredients for Perfect Chocolate Covered Cherries
- Equipment Needed for Your Chocolate Covered Cherries
- Step-by-Step Instructions for Making Chocolate Covered Cherries
- Tips for Success with Your Homemade Chocolate Covered Cherries
- Variations on Classic Chocolate Covered Cherries
- Storing and Serving Your Gourmet Chocolate Covered Cherries
- Frequently Asked Questions About Chocolate Covered Cherries
- Sharing Your Chocolate Covered Cherries Creations
Why You Will Love This Homemade Chocolate Covered Cherries Recipe
I know you’re busy, so I made sure this recipe fits right into your real-life schedule. Forget those complicated, grainy versions you might have tried years ago! This recipe is designed for the home cook who wants that wow factor with minimal fuss.
- It delivers that highly sought-after gooey, liquid center that makes cordial cherries so special.
- The ingredients are simple, affordable, and easy to find at your regular grocery store.
- These make absolutely stunning, thoughtful gifts, especially around Valentine’s Day or Christmas.
- Honestly, they taste so much richer than anything you can buy in a box!
Essential Ingredients for Perfect Chocolate Covered Cherries
When you’re making candy, preparation is everything, and that starts with having your ingredients perfectly measured and ready to go. We aren’t substituting much here because these classic components work together to create that signature texture we love. Gathering these items before you start mixing means your hands stay free for the actual crafting!
- 1 (10 ounce) jar maraschino cherries, drained well
- 1/4 cup butter, softened to room temperature
- 1/2 teaspoon vanilla extract
- 3 cups powdered sugar, sifted thoroughly to remove clumps
- 1/4 cup maraschino cherry juice (you save this right from the jar!), reserved
- 1 pound dark or milk chocolate, for dipping (your preference!)
- 1 tablespoon shortening or coconut oil (this is optional, but trust me, it helps the chocolate flow), for smoother dipping
Equipment Needed for Your Chocolate Covered Cherries
Before you even think about creaming that butter, let’s make sure you have your station set up. Good tools make candy making so much less stressful, especially when you are dealing with sticky fondant and hot chocolate. Organization is the secret ingredient for any successful batch of easy chocolate candy, so grab these essentials now!
- A sturdy medium mixing bowl for making the fondant dough.
- A box grater or food processor if you’re struggling to dry those cherries—just kidding! You just need good paper towels.
- Parchment paper or a silicone baking mat. These are non-negotiable for preventing sticking! I always use parchment for my cookie sheets.
- A double boiler setup, or simply a heat-safe bowl that fits perfectly over a saucepan for gently melting your chocolate.
- Dipping tools! You can use specialized candy forks, but two regular kitchen forks work just fine. Just remember those forks will be a little messy after this!
- A whisk or electric mixer for creaming the butter and sugar for the fondant.
Step-by-Step Instructions for Making Chocolate Covered Cherries
Alright, this is where the magic happens, and where you get to feel like a true confectioner! Don’t let the multiple steps intimidate you; it’s mostly waiting time. Remember how I mentioned that easy chocolate candy is all about patience? That stands true here, especially with the chilling phases. We need everything rigid before we introduce warm, melted chocolate. Follow these steps closely, especially focusing on drying those cherries, and you’ll have professional-looking treats in no time!
Preparing the Maraschino Cherries and Fondant Dough
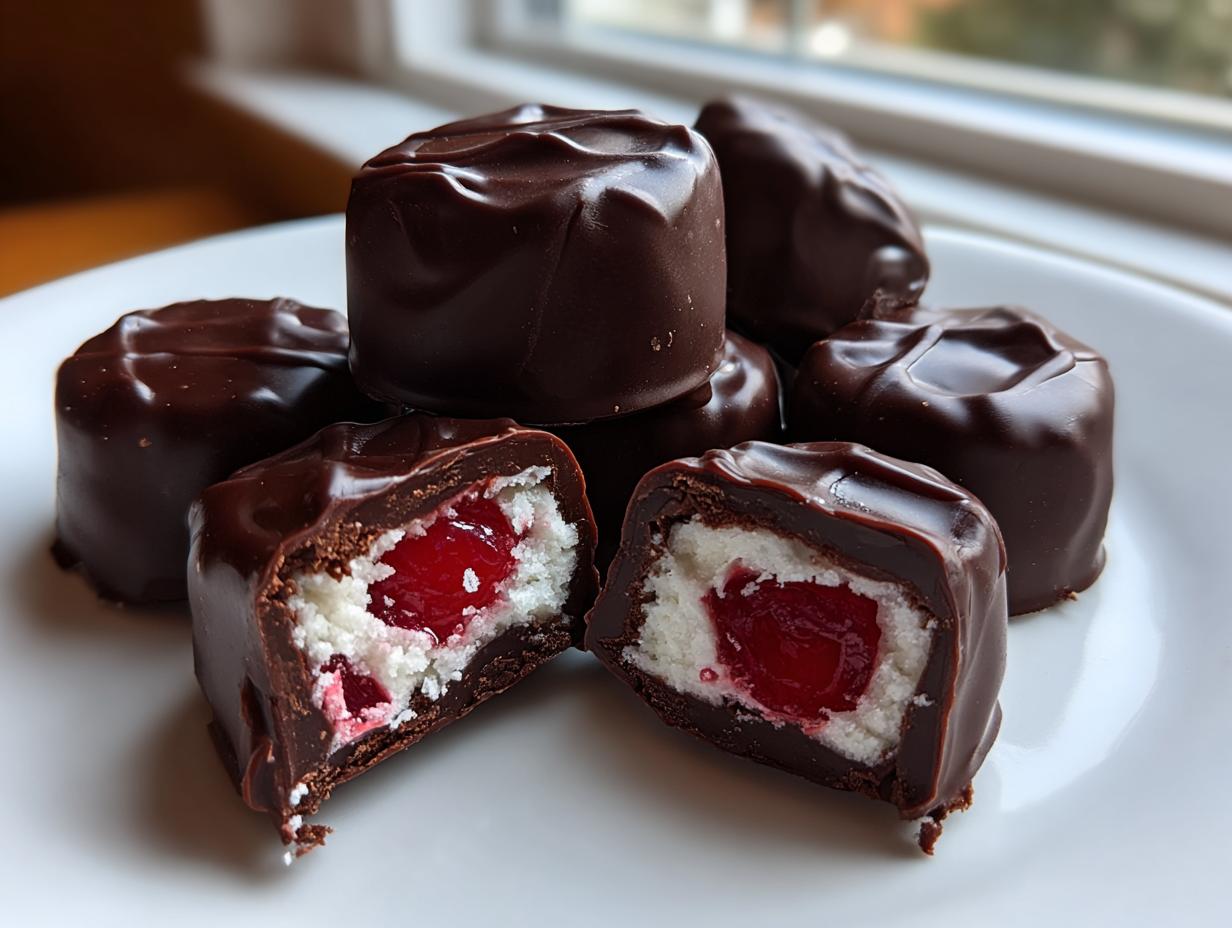
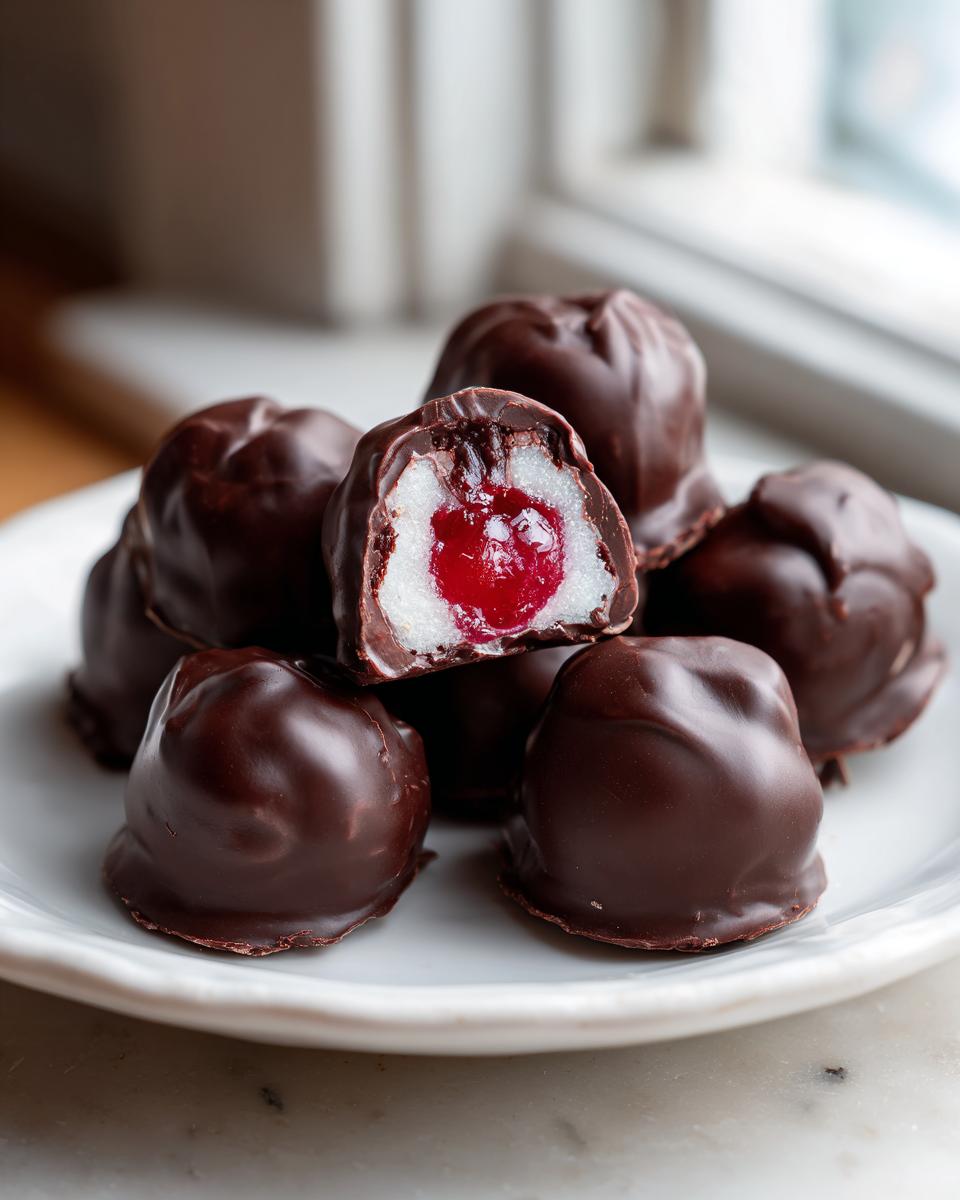
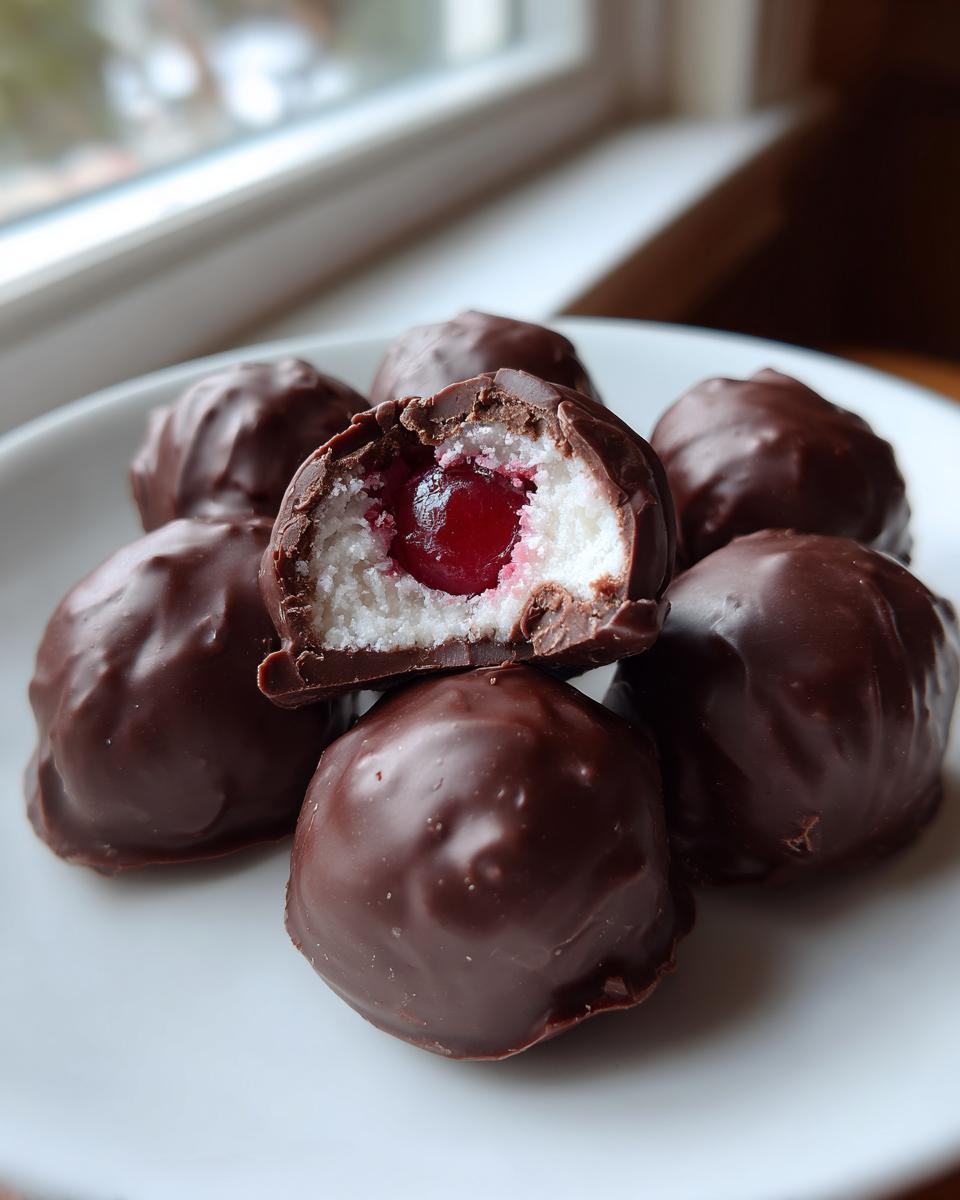
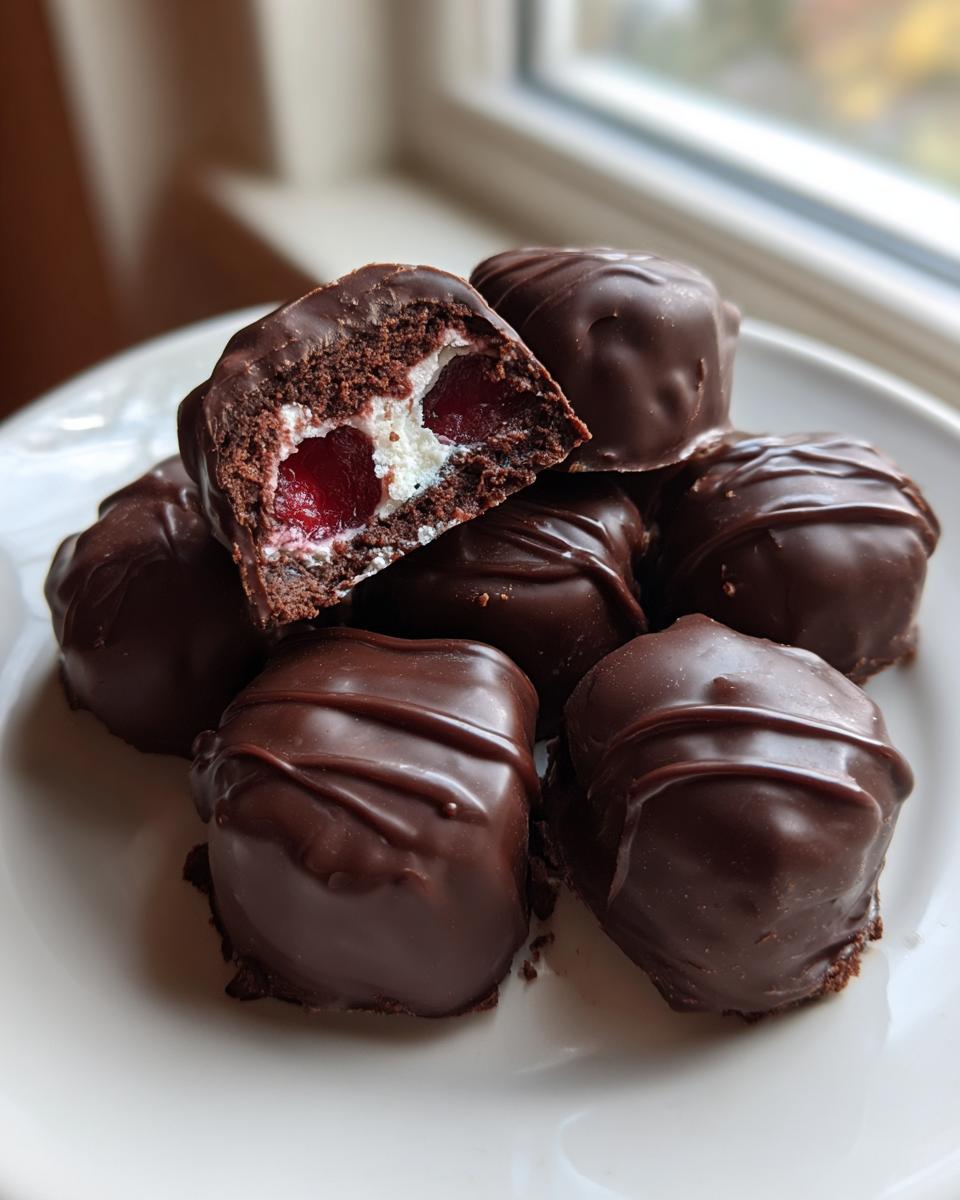
First things first—hydration is the enemy of good candy! Take your jar of maraschino cherries and drain them completely. Then, you must pat them until they are ridiculously dry with paper towels. Seriously, pat, press, and blot. If they are even slightly damp, your fondant will get sticky later. While those dry, stir your softened butter and vanilla until it looks creamy in a bowl. Now, gradually add that powdered sugar, alternating it with splashes of the reserved cherry juice. Keep mixing until you have a stiff, slightly pliable sugar dough. It should look like real play-dough that holds its shape well—knead it gently a couple of times if you need to smooth it out.
Wrapping and Chilling the Chocolate Covered Cherries Centers
Time to wrap them up! Pinch off a piece of the fondant dough, about the size of a plump little teaspoon, and flatten it right in your palm. Place one of those bone-dry cherries smack in the middle. Now, gently bring the fondant up and around the entire cherry, making sure that dough seals up perfectly with no cherry peeking out. If you have any gaps, chocolate will seep right through! Place these little wrapped balls onto your parchment-lined sheet. Stick the whole tray into the refrigerator for a minimum of two long hours. They have to be super firm before dipping, or they’ll just fall apart in the chocolate bath!
Melting Chocolate and Simple Dipping Techniques
Once your centers are chilled solid, focus on the chocolate. I always melt mine over a gentle double boiler—low and slow is the way to go, or you risk scorching it. If you’re using the microwave, you must stir every 30 seconds so it melts evenly. If you want that professional, high-gloss finish that’s super easy to work with, stir in that teaspoon of shortening or coconut oil now. It keeps the chocolate liquid longer and gives you a thinner coating that’s perfect for that first dip. Use your forks to lower the chilled cherry in, let the excess drip off for a second, and place it back on the parchment paper.
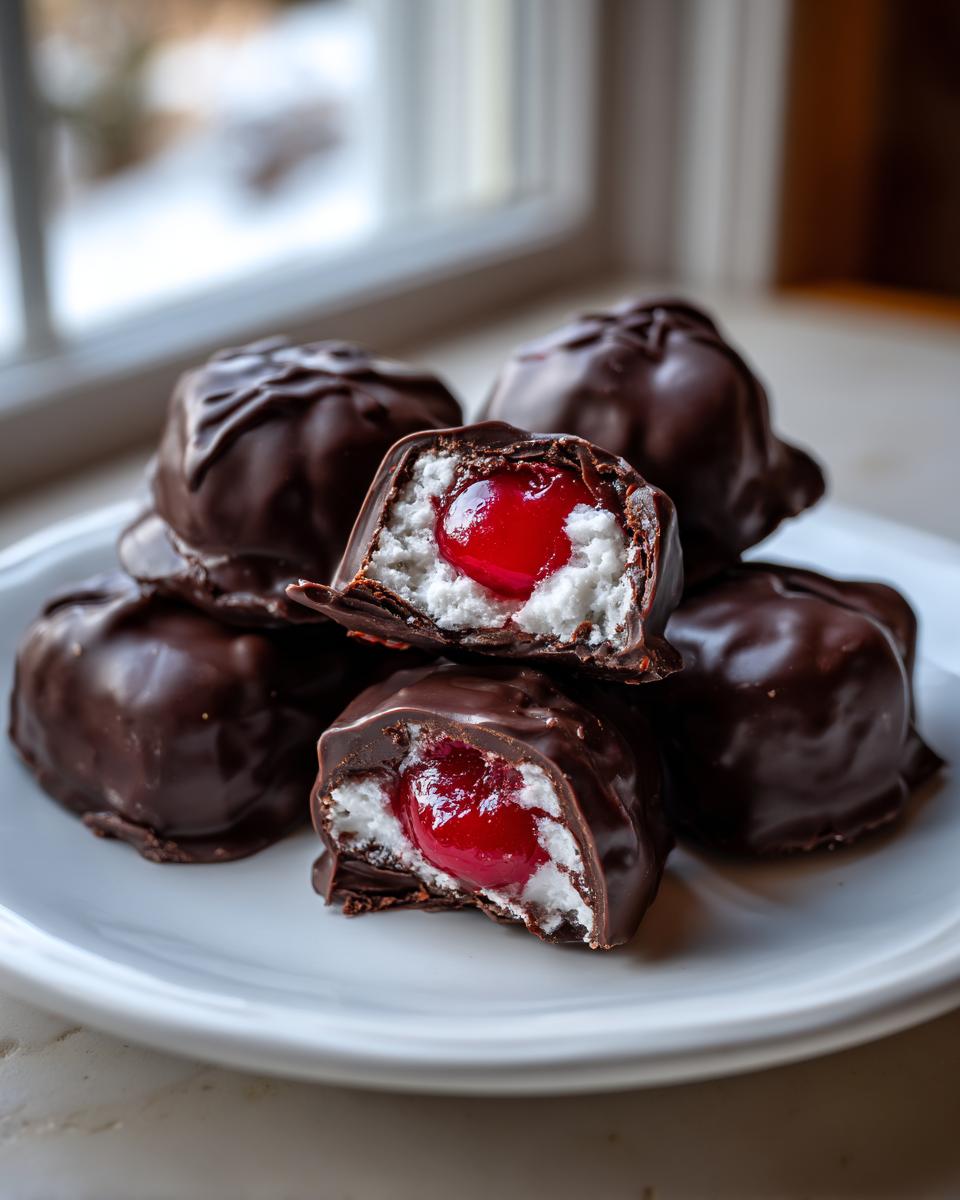
Achieving the Liquid Center in Your Chocolate Covered Cherries
Want that satisfying burst of juice when you bite into it? That happens naturally! If you want a thicker chocolate shell, let that first dip set up completely—maybe 15 minutes on the counter. Then, dip them a second time for serious coverage. But the real secret for that cordial experience is storage: don’t stick the finished candies in the fridge! Keep them at a cool room temperature for several days. The sugar in the now-set fondant starts drawing the moisture out of the cherry, and voila—perfectly juicy centers!
Tips for Success with Your Homemade Chocolate Covered Cherries
Making these feel like something from a gourmet candy shop is really all about avoiding three common kitchen mishaps. Firstly, I cannot stress this enough: those maraschino cherries need to be practically desert-dry before they even see the fondant. Blot them like you mean it! Secondly, when mixing the fondant, if it feels too stiff right away, add just a *tiny* extra splash of cherry juice. If it’s too watery, add a sprinkle more powdered sugar—aim for that smooth but firm dough feel. This recipe is one of my favorite easy moist date nut bread recipe companions because both rely on good textural control!
For the chocolate, remember the shortening or coconut oil I mention? That little addition drastically improves your chocolate dipping experience, giving you a really beautiful, glossy finish without the need for actual tempering. If you want to see a truly impressive chocolate dipped treats result that fools everyone into thinking you bought them, pay attention to that melting and dipping step. You’re doing great!
Variations on Classic Chocolate Covered Cherries
While the classic dark chocolate and vanilla fondant is unbeatable, sometimes I like to switch things up just a touch, especially when I’m making a big batch for holiday gifting. You never lose that wonderful core structure, but you get to play with flavor profiles!
If you’re using white chocolate for dipping, you’ll want the dark chocolate flavor built into the center. Try swapping out the vanilla extract in the fondant for about 1/4 teaspoon of bitter almond extract instead—it gives the interior a gorgeous, slightly sophisticated flavor kick. Or, easily switch to semi-sweet chocolate if milk chocolate is a bit too sweet for your crowd. These simple changes make you feel like you invented a brand new kind of chocolate dipped treat!
Storing and Serving Your Gourmet Chocolate Covered Cherries
This is the step where most people accidentally ruin their beautiful work! If you want those gooey, liquid centers in your chocolate covered cherries, you cannot store them in the fridge. Cold temperatures stop that osmosis process where the sugar draws moisture from the cherry. Keep them in an airtight container at cool room temperature—like a pantry—for up to two weeks. This lets the cordial effect happen! You can get even more great ideas on achieving that perfect center when you check out other people’s takes on making homemade chocolate covered cherry cordials.
If you accidentally double-dipped and want them to stay firm, then the fridge is fine, but they won’t have that signature liquid center. When serving, let them sit out for about 15 minutes before your guests dig in. They look absolutely magnificent next to other delicious dessert recipes on a pretty platter!
Frequently Asked Questions About Chocolate Covered Cherries
When folks try making these beauties for the first time, they often have the same few thoughts about the process or the ingredients. It’s totally normal! Candy making—even this easy version—feels a little precise, but once you know the little tricks, it becomes second nature. Here are a few things I hear most often when readers are looking for advice on making their own easy chocolate candy or preparing for holiday treats!
Can I use fresh cherries instead of maraschino cherries for chocolate covered cherries?
Oh, I get this question a lot! The short answer is no, not for this specific recipe. We rely on maraschino cherries because they are already preserved in a sugary syrup. If you try to use a fresh, raw cherry—even one you pit yourself—it has too much water content inside. That excess moisture will absolutely leak out once wrapped in the fondant, making your soft dough turn into sticky goo, and it’ll spoil much faster. To use fresh cherries, you’d need a whole separate candying process first, so stick to the jarred ones to keep this simple!
How long does it take for the liquid center to form in homemade candy?
This is totally dependent on how you store them! Remember when I said chilling them stops the liquid center? That’s right. If you want that classic, melting-in-your-mouth cordial effect, you *must* let them cure at a cool room temperature for a few days—usually three to five days is perfect. The sugar in that fondant we made starts acting like a sponge, slowly pulling the syrup out of the preserved cherry. It’s neat science, really! Store them somewhere cool, but not the fridge, and they’ll be perfect.
Are these chocolate covered cherries suitable for Valentine’s Day candy gifts?
Absolutely! These are the definition of an elegant, thoughtful gift from the kitchen. Because they look so glossy and professionally done—especially if you manage that double-dipped coat—no one ever believes they are homemade! They make wonderful chocolate dipped treats for any romantic holiday or winter celebration. Just be sure to wrap them nicely in a decorative tin or box.
Sharing Your Chocolate Covered Cherries Creations
Now that you’ve gone through all the effort—drying those cherries, wrapping that fondant, and patiently dipping—I really want to hear how they turned out! Honestly, seeing your success stories is what keeps me going here in The YumMagnet Recipe Box. Did you find the perfect chocolate you loved? Did the liquid center form just the way you hoped?
Please, please don’t be shy! Drop a comment below and give this recipe a star rating so other home cooks know what you thought. If you snapped a picture of these gorgeous chocolate covered cherries, tag me on social media! I absolutely love seeing your holiday spreads or how you packaged them up as thoughtful homemade gifts. If you want to share any little secret tweaks that worked perfectly for your kitchen setup, head over to my contact page and send me a note. Happy baking, and check out how others made their own chocolate dipped cherries for inspiration!
PrintHomemade Chocolate Covered Cherry Cordials

Make classic, decadent chocolate covered cherries at home using a simple fondant center that surrounds a juicy maraschino cherry, all coated in rich chocolate. These are perfect for gifting.
- Prep Time: 45 min
- Cook Time: 15 min
- Total Time: 60 min
- Yield: About 2 dozen 1x
- Category: Dessert
- Method: No-Bake/Dipping
- Cuisine: American
- Diet: Vegetarian
Ingredients
- 1 (10 ounce) jar maraschino cherries, drained well
- 1/4 cup butter, softened
- 1/2 teaspoon vanilla extract
- 3 cups powdered sugar, sifted
- 1/4 cup maraschino cherry juice (from the jar)
- 1 pound dark or milk chocolate, for dipping
- 1 tablespoon shortening or coconut oil (optional, for smoother dipping)
Instructions
- Drain the maraschino cherries thoroughly. Pat them very dry with paper towels. Set aside.
- In a medium bowl, cream together the softened butter and vanilla extract until smooth.
- Gradually add the sifted powdered sugar to the butter mixture, alternating with the reserved cherry juice, until a stiff dough forms. You may need slightly more or less juice.
- Knead the dough briefly until smooth.
- Take a small piece of fondant dough (about 1 teaspoon) and flatten it into a circle in your palm. Place one dried cherry in the center. Gently wrap the fondant around the cherry, sealing it completely to form a ball. Place the wrapped cherry on a parchment-lined baking sheet. Repeat with all cherries.
- Chill the fondant-covered cherries in the refrigerator for at least 2 hours, or until firm. This step is important for successful dipping.
- Melt the chocolate and shortening (if using) in a double boiler or in the microwave in 30-second intervals, stirring until smooth.
- Dip each chilled cherry into the melted chocolate using a dipping tool or two forks. Allow excess chocolate to drip off.
- Place the dipped cherries back onto the parchment-lined baking sheet.
- If you want a thicker shell, allow the first layer to set completely (about 15 minutes at room temperature or 5 minutes in the refrigerator), then dip them a second time.
- Allow the chocolate to set completely before serving or storing. For a liquid center, store them at room temperature for several days; the sugar in the fondant will draw moisture from the cherry, creating the cordial effect.
Notes
- Drying the cherries completely before wrapping them in fondant prevents the dough from becoming sticky.
- For a smoother chocolate coating, add a teaspoon of shortening or coconut oil to the melted chocolate.
- These homemade candy treats are best stored at cool room temperature for up to two weeks to maintain the liquid center.
Nutrition
- Serving Size: 1 piece
- Calories: 180
- Sugar: 25g
- Sodium: 15mg
- Fat: 9g
- Saturated Fat: 5g
- Unsaturated Fat: 4g
- Trans Fat: 0g
- Carbohydrates: 26g
- Fiber: 1g
- Protein: 2g
- Cholesterol: 10mg