
Oh, you know that moment when only something golden, crispy, and oozing with cheese will satisfy a craving? I live for those moments, and I have the perfect go-to solution that always wows a crowd: Easy Cheesy Arancini! These aren’t just any little bites; they are authentic Italian rice balls, and trust me, they are the ultimate party appetizer idea for game days or just a fun Friday night in. Here at The YumMagnet, my mission is to take those incredible, classic recipes—the ones that seem intimidating—and tweak them for your busy life. This Arancini recipe is straight from my family-tested file. It solves the chaos of feeding a group by using smart shortcuts, proving you don’t need hours to make something truly spectacular. If you’re planning for a big game day spread, don’t forget to check out my recipe for easy Rotel dip while you’re here!
- Why You Will Make These Crispy Fried Rice Balls Often
- Gathering Ingredients for Your Homemade Rice Balls
- Expert Tips for Perfect Italian Rice Balls (Arancini)
- Step-by-Step Instructions for Making Arancini Rice Balls
- What to Serve with Your Italian Rice Balls
- Storage and Reheating Tips for Leftover Rice Balls
- Frequently Asked Questions About Making Rice Balls
- Estimated Nutritional Data for Cheesy Rice Bites
- Share Your Experience Making These Italian Rice Balls
Why You Will Make These Crispy Fried Rice Balls Often
Listen, I know we’re all short on time, but that doesn’t mean we have to skip the comfort food. When I pull these out, people immediately stop talking because the sound of that first crunch is just irresistible. They are perfect for making ahead too, which is a huge win for busy hosts! If you’re looking for more quick, impressive snacks, you absolutely have to check out my recipe for zucchini pizza bites.
- The Crunch Factor is Unbeatable: Seriously, these create the best crispy fried snacks you’ve ever had. The outside shatters perfectly when you bite into it.
- Built-In Leftover Magic: This recipe shines when made with day-old risotto. It saves you a whole step, making it incredibly fast for weeknight assembly after a big dinner!
- Ultimate Make-Ahead Appetizer: You can form and bread all the rice balls the day before, just keep them covered in the fridge. Then, fry them right before your guests arrive.
- Cheesy Surprise Every Time: Who doesn’t love cheese pulling out of their food? That shock of melted mozzarella inside the savory rice is pure joy.
- Versatile for Any Crowd: These are amazing party appetizer ideas. They work for potlucks, game days, or even tucked into a bento box for lunch the next day.
- Quick Frying Time: Because they are already cooked and just need heating and crisping, the actual frying only takes about four minutes per batch!
Gathering Ingredients for Your Homemade Rice Balls
Okay, gathering supplies for these is half the fun! Because we rely on cold, leftover risotto, this recipe comes together so fast—you probably have most of this lying around already. Remember, the more attention you pay to the quality of these components, the better your homemade rice balls will be. I broke down the shopping list for you here so you don’t miss a thing.
- 3 cups cooked risotto (which really needs to be day-old!)
- 1 cup shredded mozzarella cheese (make sure it’s good quality!)
- 1/2 cup grated Parmesan cheese
- 1/4 cup finely chopped ham or sweet peas (if you’re keeping them vegetarian, skip the ham!)
- 1 large egg, lightly beaten (this is for binding the rice)
- 1/2 cup all-purpose flour
- 2 large eggs, beaten for dredging (this is step two!)
- 1 1/2 cups plain breadcrumbs
- Vegetable oil, for frying—and trust me, use enough to get that deep, even color.

Expert Tips for Perfect Italian Rice Balls (Arancini)
You know, cooking is all about knowing those little secrets that make a dish go from just ‘good’ to ‘oh my gosh, what is this magic?’ For these rice balls, using risotto that’s chilly—at least a day old—is non-negotiable! When the rice is cold, it firms up beautifully, which is essential for getting those smooth, tight spheres that won’t fall apart when they hit the hot oil. We want that perfect, golden-brown exterior without any greasy sadness, and that all comes down to temperature when you fry. If you’re looking for other super-fast sauce recipes to go with these, you must check out my recipe for best 5-minute creamy peanut sauce recipe, even though these Italian bites really shine on their own!
The Secret to Shaping Firm Rice Balls
When you’re stuffing these gems, you have to be firm but gentle. Take about two tablespoons of your cold rice mixture and flatten it right in your palm. Pop that little cube of mozzarella—or whatever you are tucking inside—dead center. Now, this is key: you need to wrap the rice entirely around the center ingredient, spinning it a bit like you’re making a snowball, until you have a perfectly sealed sphere. I look for seams, and if I see one, I press it closed right away. That mozzarella needs to be totally encased, or it’ll escape and make a mess in your oil!

Setting Up Your Breading Station for Crispy Rice Bites
Your breading station needs to be organized like a tiny factory line, trust me. You’ll need three dishes set up in order: flour first, then the beaten egg wash, and finally your breadcrumbs. Every single rice ball needs a full coat in all three stages. After you dip it in the egg wash, let the excess drip off just a little bit before it hits the breadcrumbs. And when it gets to those breadcrumbs? Don’t just roll it; actually press the crumbs onto the surface gently with your fingers. That extra tactile step ensures you get that thick, protective shell that becomes wonderfully golden and truly crispy when frying.
Step-by-Step Instructions for Making Arancini Rice Balls
This is where the magic happens, and honestly, it moves fast once you get started, especially since we’re using chilled risotto! If you want to see how I make killer crispy potato cakes while I wait for my oil to heat up, check out my post on mashed potato cakes recipe easy crispy. Before you start frying, make sure your oil is really at 350°F (175°C); getting that temperature right is the secret to crispy, non-greasy rice balls.
- First things first: gently mix your chilled risotto with the mozzarella, Parmesan, and any ham or peas you are adding, just until they’re barely combined. Don’t overmix!
- Scoop about two tablespoons of this mix and flatten it in your hand. If you are stuffing them, put that extra mozzarella cube right in the middle, then roll it tightly into a sphere, about an inch and a half wide.
- Set up your dredging station in a row: flour, then the two beaten eggs, and finally your breadcrumbs.
- Dredge each ball first in the flour, shaking off the excess so you just have a light dusting.
- Next, dip it right into the egg wash, letting the extra drip off the bottom, and then toss it straight into the breadcrumbs. You really need to press those crumbs on there so they stick like glue!
- Carefully pour about two inches of vegetable oil into a deep pot and heat it up to exactly 350°F.
- When the oil is ready, gently drop in only three or four of your coated rice balls. Don’t overcrowd the pot, or the temperature will drop!
- Fry them for just 3 to 4 minutes, tumbling them with a slotted spoon so they turn golden brown evenly all over.
- Pull them out, let them drain for a second on paper towels, and serve them hot! They are perfect with a little marinara or just as they are.

What to Serve with Your Italian Rice Balls
So, you’ve got this massive pile of perfectly golden, crispy, cheesy rice balls cooling down. Amazing! Now, the real question is, what do you serve them with? Because these are so rich and satisfying on their own, you really don’t need a ton of fuss. They are fantastic on their own as finger food, but a little dip or a splash of acidity cuts through the richness beautifully.
For simple pairing, I almost always go with a classic, slightly tangy marinara sauce for dipping. Heating that sauce up keeps everything warm and comforting. If you’re hosting a bigger party and need a solid dip alongside the Arancini, I highly recommend checking out my recipe for easy bruschetta dip. The fresh tomatoes and basil offer a bright contrast to the fried rice.
If you are serving these as part of a larger appetizers spread, a simple, lightly dressed green salad is a great palate cleanser. Think arugula with a sharp lemon vinaigrette. It gives everyone a moment to breathe between those glorious, cheesy bites of appetizers with rice. Keep the sides simple; the Arancini are definitely the star of the show!
Storage and Reheating Tips for Leftover Rice Balls
If you manage to have any of these cheesy beauties left over—which, honestly, is a feat because they vanish so fast—you’ll want to know the trick to keeping them tasty. The goal is always to bring that exterior crispiness back to life. I treat these like any fried finger food; they need to be stored properly so they don’t get soggy halfway through the next day.
For storage, the most important thing is cooling them down completely first. Once they aren’t steaming hot, place the cooled Arancini in a single layer on a baking sheet lined with a paper towel, then cover the whole thing loosely with plastic wrap before chilling in the fridge. If you pack them tight while they are warm, that trapped moisture turns the crispy coating soft instantly, and we absolutely cannot have that for our leftover meal prep!
When you’re ready to eat them again, forget the microwave! Microwaving steam-cooks the outside and turns your beautiful rice balls into chewy little dough spheres. Instead, you want dry heat, which is why the oven or air fryer is your best friend for reheating these make ahead appetizers. Preheat your oven to about 375°F (190°C) and spread the cold Arancini on a baking sheet. Bake them for about 10 to 12 minutes. If you’re using the air fryer, 350°F for about 6 minutes works like a charm to crisp them up perfectly again. They’ll taste almost as good as fresh!
Frequently Asked Questions About Making Rice Balls
It’s funny how once you nail one recipe, a whole bunch of little questions pop up! People always ask me about adapting this recipe, especially since Arancini are traditionally made with leftovers. I’m happy to tackle some of the most common ones I get about creating these fantastic appetizers with rice. If you’re looking for other easy comfort food ideas that shine when prepped ahead, you should definitely bookmark my recipe for the easy rice casserole!
Can I make these Arancini without leftover risotto?
Oh, absolutely you can! That’s a perfect question if you decide you want to make these right now instead of waiting until tomorrow. If you don’t have day-old risotto hanging around, you can certainly cook fresh Arborio rice specifically for this. The key, based on the notes I keep scribbled in the margin of my recipe card, is that you have to cook it wetter than usual. You’ll need to add extra broth according to the package directions—more than you think! We want that finished rice to be super creamy, almost soupy, when it’s done. Once it cooks, spread it out thinly on a sheet pan and let it chill completely in the fridge until it’s cold. That chilling process is what firms up the starches so you can shape those lovely, tight rice balls.
Are these rice balls suitable for meal prep?
Yes! I already mentioned they are great for making ahead, and that absolutely counts as meal prep for me! They are wonderful for those busy work weeks when you need satisfying, savory snacks ready to go. You can assemble and bread the raw balls the day before, like I explained, but if you’ve already fried them, you just need to remember the reheating trick. Never default to the microwave!
To keep that gorgeous, crispy exterior we worked so hard for, you must use dry heat. Either spread them on a baking sheet in a 375°F oven or toss them in the air fryer for about 6 minutes. That blast of dry heat re-crisps the breading instantly, making your reheated snack recipes taste freshly fried!

Estimated Nutritional Data for Cheesy Rice Bites
Now, I know many of you are tracking macros or just curious about what you’re serving up, especially when fried snacks are involved! I always try to give you a snapshot of what’s in these amazing cheesy rice bites. Keep in mind, since we are using leftover risotto and depending on how much ham, cheese, or oil you use, these numbers are an estimate based on the core ingredients listed in the recipe.
I pulled the math based on dividing the recipe into 12 servings, which gives you a nice, appetizer-sized portion. This helps you budget those weekend treats!
- Serving Size: 1 ball
- Calories: 210
- Fat: 12g (including 6g Saturated Fat)
- Carbohydrates: 19g
- Protein: 7g
- Sugar: 1g
- Sodium: 350mg
- Fiber: 1g
Just a quick note, because this is important for trust: This nutritional information is only an estimate based on the specific ingredients listed above and standard product calculations. If you use specialty cheeses or a different type of oil, your final count for these incredible homemade rice balls might shift a tiny bit. But hey, they are worth every single calorie!
Share Your Experience Making These Italian Rice Balls
I truly, deeply hope you love making these crispy, cheesy Arancini as much as I love developing them for you! Getting these golden-brown Italian rice balls right is such a fantastic little achievement, and I want to hear all about it the second you pull them out of the oil. Did they stay perfectly round? Were they piping hot?
The absolute best part of running The YumMagnet is hearing from you folks about your kitchen adventures. Did you stick with the traditional ham filling, or did you sneak in some roasted mushrooms instead? Tell me your secrets! Drop a rating for the recipe right here in the comments below—five stars if they made your house smell like a Sicilian street stall!
And please, if you snapped a picture of your beautiful mound of crispy goodness, tag me on social media! Seeing your versions of these amazing finger food ideas makes my entire week. It shows me that these recipes are truly working for your busy day-to-day life. If you have any questions moving forward or need clarification on anything, don’t hesitate to reach out directly via my contact page. Happy frying, everyone!
PrintEasy Cheesy Arancini: Crispy Fried Rice Balls

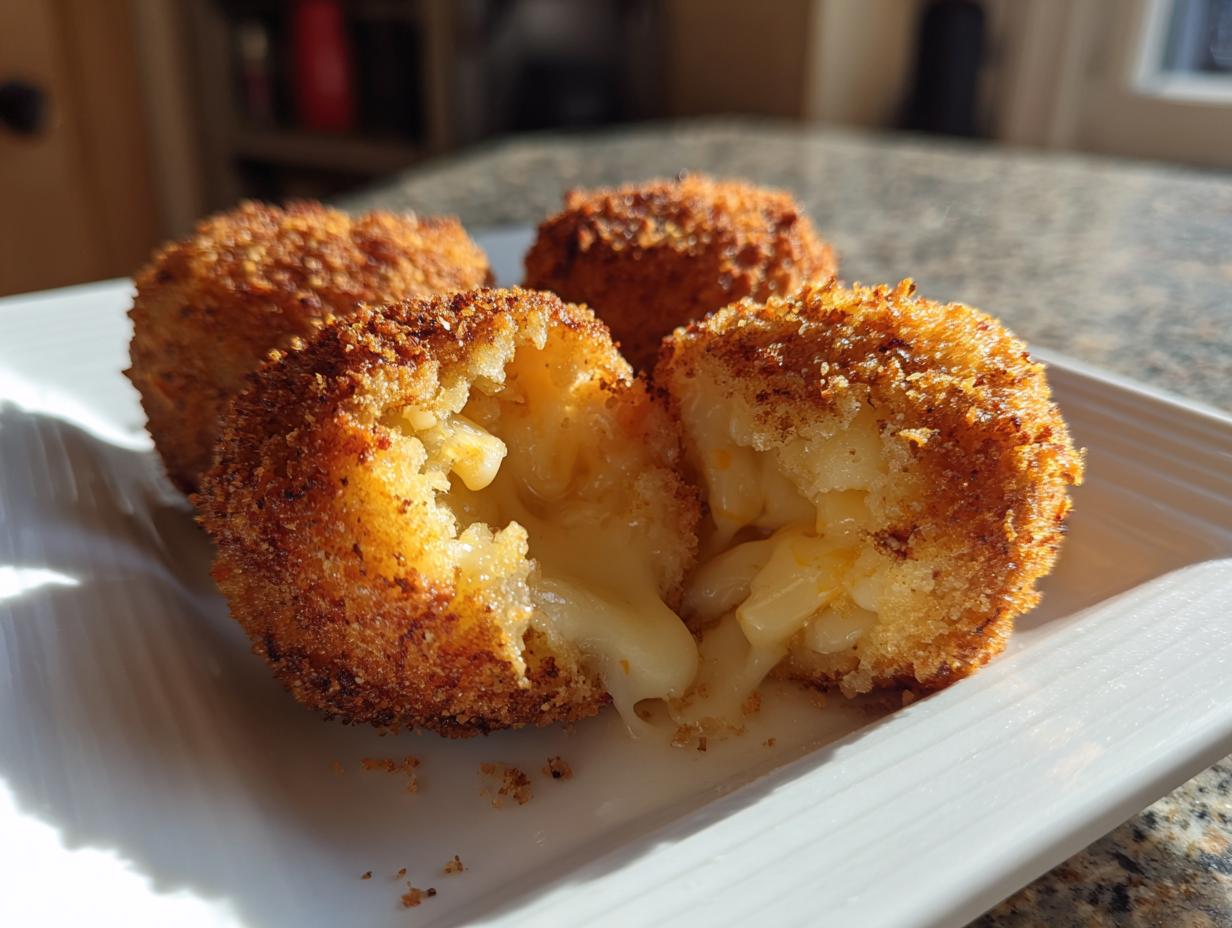
You can make these classic Italian rice balls, Arancini, at home. This recipe uses leftover risotto to create crispy, golden fried snacks stuffed with melted cheese. They make a great appetizer or finger food idea.
- Prep Time: 20 min
- Cook Time: 15 min
- Total Time: 35 min
- Yield: 12 servings 1x
- Category: Appetizer
- Method: Deep Frying
- Cuisine: Italian
- Diet: Vegetarian
Ingredients
- 3 cups cooked risotto (preferably day-old)
- 1 cup shredded mozzarella cheese
- 1/2 cup grated Parmesan cheese
- 1/4 cup finely chopped ham or peas (optional filling)
- 1 large egg, lightly beaten
- 1/2 cup all-purpose flour
- 2 large eggs, beaten for dredging
- 1 1/2 cups plain breadcrumbs
- Vegetable oil, for frying
Instructions
- In a medium bowl, combine the cooked risotto, mozzarella cheese, Parmesan cheese, and any optional filling. Mix gently until just combined.
- Scoop about 2 tablespoons of the rice mixture and flatten it in your palm. Place a small cube of mozzarella in the center, if desired, and form the rice around it to create a tight ball, about 1 1/2 inches in diameter.
- Set up a standard breading station: place flour in one shallow dish, the two beaten eggs in a second dish, and breadcrumbs in a third dish.
- Roll each rice ball first in the flour, shaking off excess. Dip it into the beaten eggs, allowing excess to drip off. Finally, roll it thoroughly in the breadcrumbs, pressing lightly to make sure the coating adheres completely.
- Heat about 2 inches of vegetable oil in a deep, heavy-bottomed pot or Dutch oven to 350°F (175°C). Use a thermometer to monitor the temperature.
- Carefully place 3 or 4 rice balls into the hot oil, ensuring you do not overcrowd the pot.
- Fry for 3 to 4 minutes, turning occasionally, until they are deep golden brown and crispy on all sides.
- Remove the Arancini with a slotted spoon and place them on a plate lined with paper towels to drain excess oil.
- Serve the crispy fried rice balls immediately while the cheese is melted.
Notes
- Using cold, day-old risotto helps the rice balls hold their shape during forming and frying.
- If you do not have leftover risotto, cook Arborio rice according to package directions, adding extra broth for a creamier texture.
- For a quick lunch idea, these reheat well in an oven or air fryer.
Nutrition
- Serving Size: 1 ball
- Calories: 210
- Sugar: 1
- Sodium: 350
- Fat: 12
- Saturated Fat: 6
- Unsaturated Fat: 6
- Trans Fat: 0
- Carbohydrates: 19
- Fiber: 1
- Protein: 7
- Cholesterol: 55