

Oh, that craving! You know the one—you need that deep, dark, slightly bitter hit of chocolate, but you also need that perfect chewiness that only happens when you skip the box mix. That’s why I fought so hard to nail down these Oreo Brownies. When I first started developing recipes for The YumMagnet Recipe Box, I knew I had to bring some of my family’s best chocolate traditions into my crazy, busy modern life. Forget those cakey, dry brownies you sometimes get! We’re making The Ultimate Fudgy & Chewy Oreo Brownies (From Scratch) right here. I promise you, 10 minutes of mixing, and you’ll have a treat so decadent, nobody will ever guess how easy it was. If you want to know more about how we adapt classic flavors for real life, check out our story over at The YumMagnet Recipe Box.
- Why You Will Make These Oreo Brownies Again and Again
- Gathering Ingredients for Your Oreo Brownies
- Essential Equipment for Perfect Oreo Brownies
- How to Make the Ultimate Fudgy & Chewy Oreo Brownies
- Tips for Perfect Fudgy Texture in Your Oreo Brownies
- Storage and Reheating Instructions for Decadent Chocolate Bars
- Serving Suggestions for These Cookies and Cream Brownies
- Frequently Asked Questions About Oreo Brownies
- Share Your Homemade Oreo Brownies
Why You Will Make These Oreo Brownies Again and Again
Honestly, I’ve tossed so many sad, cakey brownie recipes over the years. We don’t have time for subpar desserts, right? These cookies and cream brownies are different. They tick every single box for what a truly excellent chocolate bar needs to be. Since I started sharing these with friends who were juggling jobs and school runs, they quickly became the go-to request for potlucks. If you are looking for more simple treats, you can check out our collection of delicious dessert recipes.
- They are unbelievably fudgy and have that perfect, satisfying chewiness—that’s the secret to making truly amazing chocolate baked goods tutorial!
- No mixer fuss here! We’re talking under 10 minutes of active prep time. Seriously, you can start these before the coffee finishes brewing.
- They’re totally customizable; you can swap in mint Oreos or even peanut butter versions if you get creative!
- These freeze beautifully, making them one of the best options for making ahead for events.
Achieving the Best Fudgy Texture
So, what makes these fudgy brownies so incredibly dense and rich? It all comes down to the fat-to-flour ratio. We use a generous amount of melted butter paired with *both* granulated and brown sugar. This heavy dose of fat, relative to the small amount of flour, means the batter stays wet and decadent. It’s basic science, but when you get that ratio right, you lock in that incredible, gooey fudgy texture baking result every single time. It’s the secret to turning out the best homemade brownies!
Prep Time Focus: Quick Dessert Recipes
I know you’re busy. That’s why I targeted a prep time under ten minutes. While they do need time to cool down (the hardest part, trust me!), the active time spent stirring and mixing is minimal. This makes them perfect for those evenings when you suddenly realize you need a showstopper for the next day. These absolutely fit the bill for any quick dessert recipes need you might have. You whisk the wet ingredients, whisk the dry ingredients, mix them together, and you’re done stirring!
Gathering Ingredients for Your Oreo Brownies
Alright, let’s talk about what you need to pull off these incredible oreo brownies. Because we aren’t using a box mix, the quality of your ingredients really shines through. Luckily, this list is pretty simple, and I guarantee you have most of it in your pantry already. Having these items ready is key to sticking to that super quick 10-minute prep time!
Here is exactly what you need to grab. Please pay attention to the state of the butter—it needs to be melted!
- 1 cup (2 sticks) unsalted butter, melted
- 2 cups granulated sugar
- 1 cup packed light brown sugar
- 4 large eggs
- 1 tablespoon vanilla extract
- 1 cup all-purpose flour
- ¾ cup unsweetened cocoa powder
- 1 teaspoon salt
- ½ teaspoon baking powder
- 1 cup semi-sweet chocolate chips
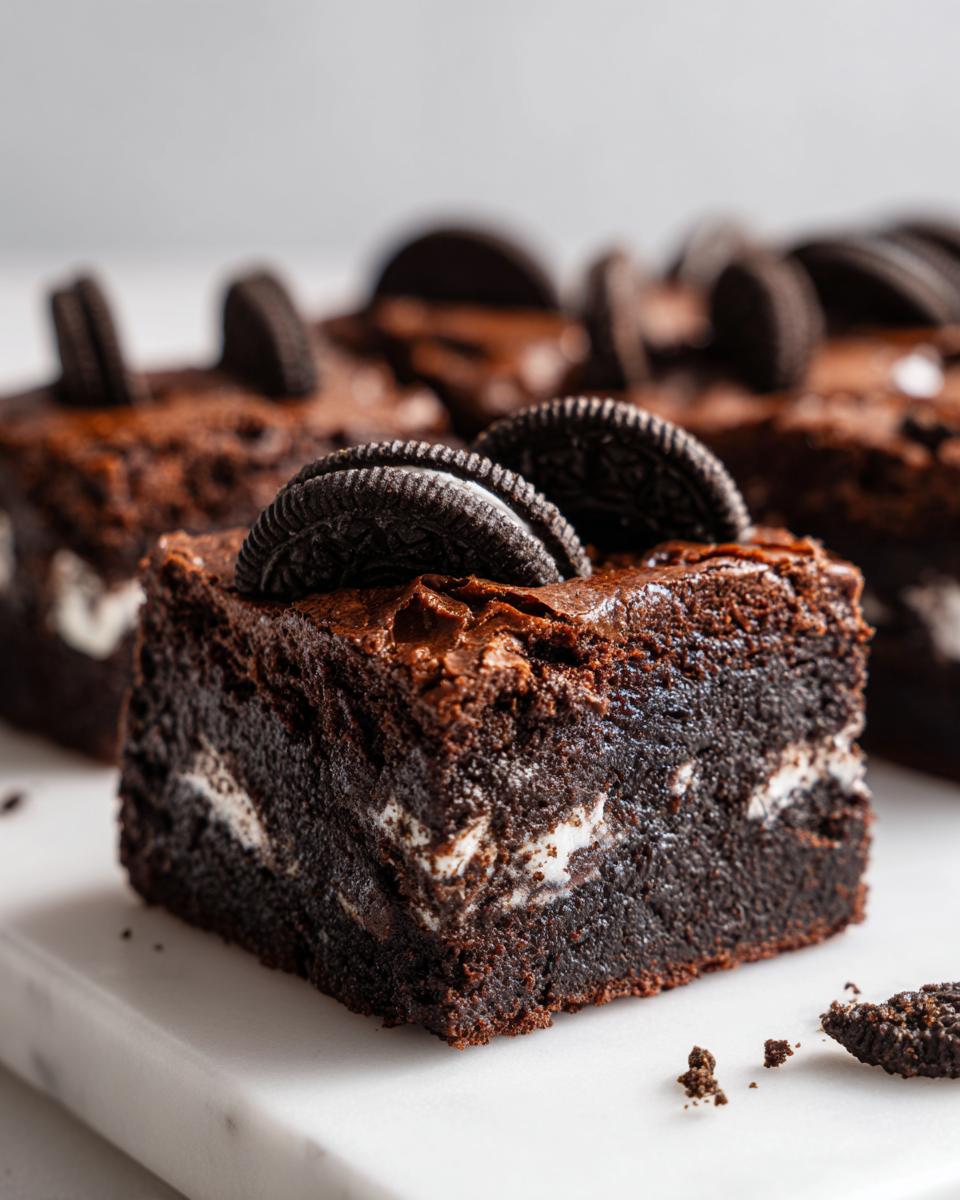
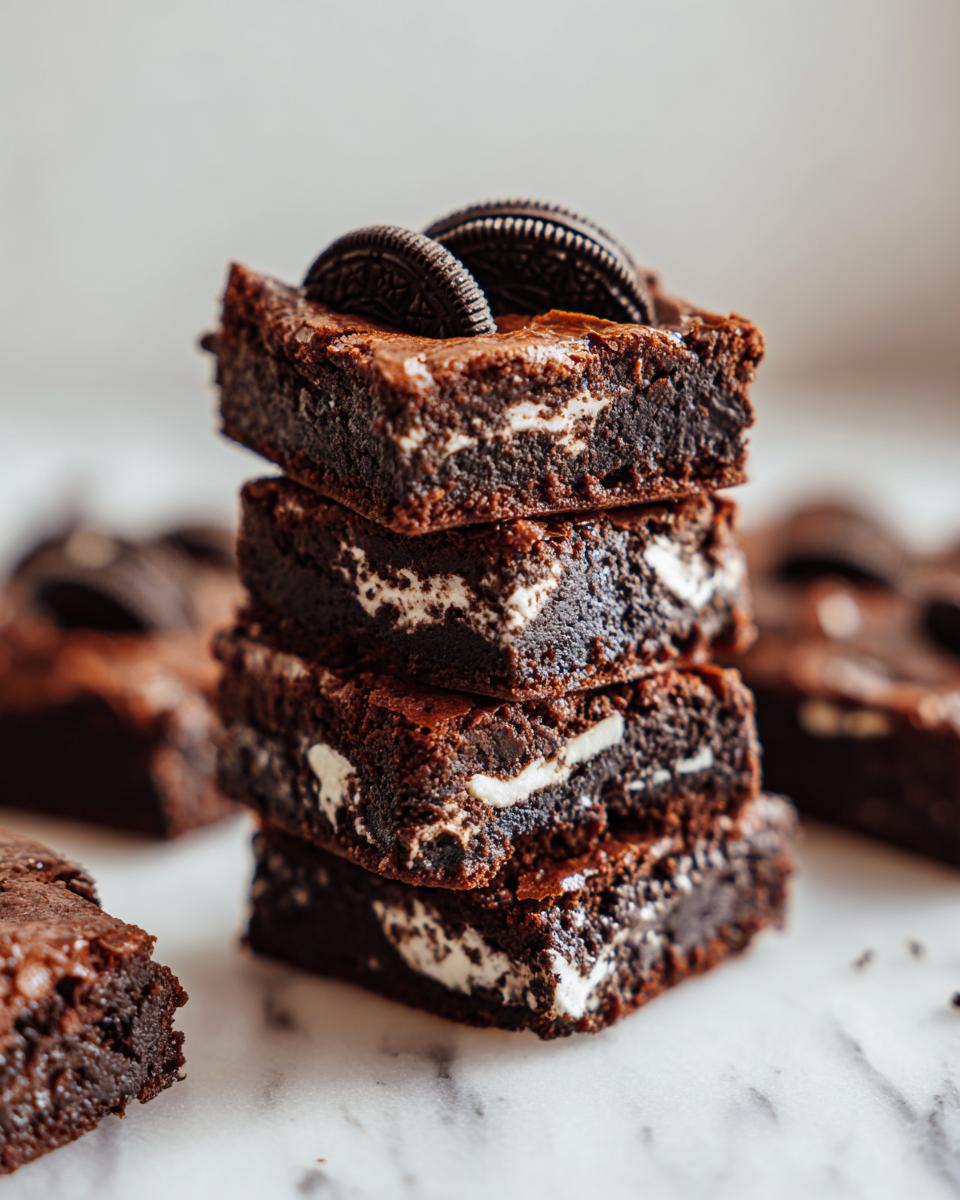
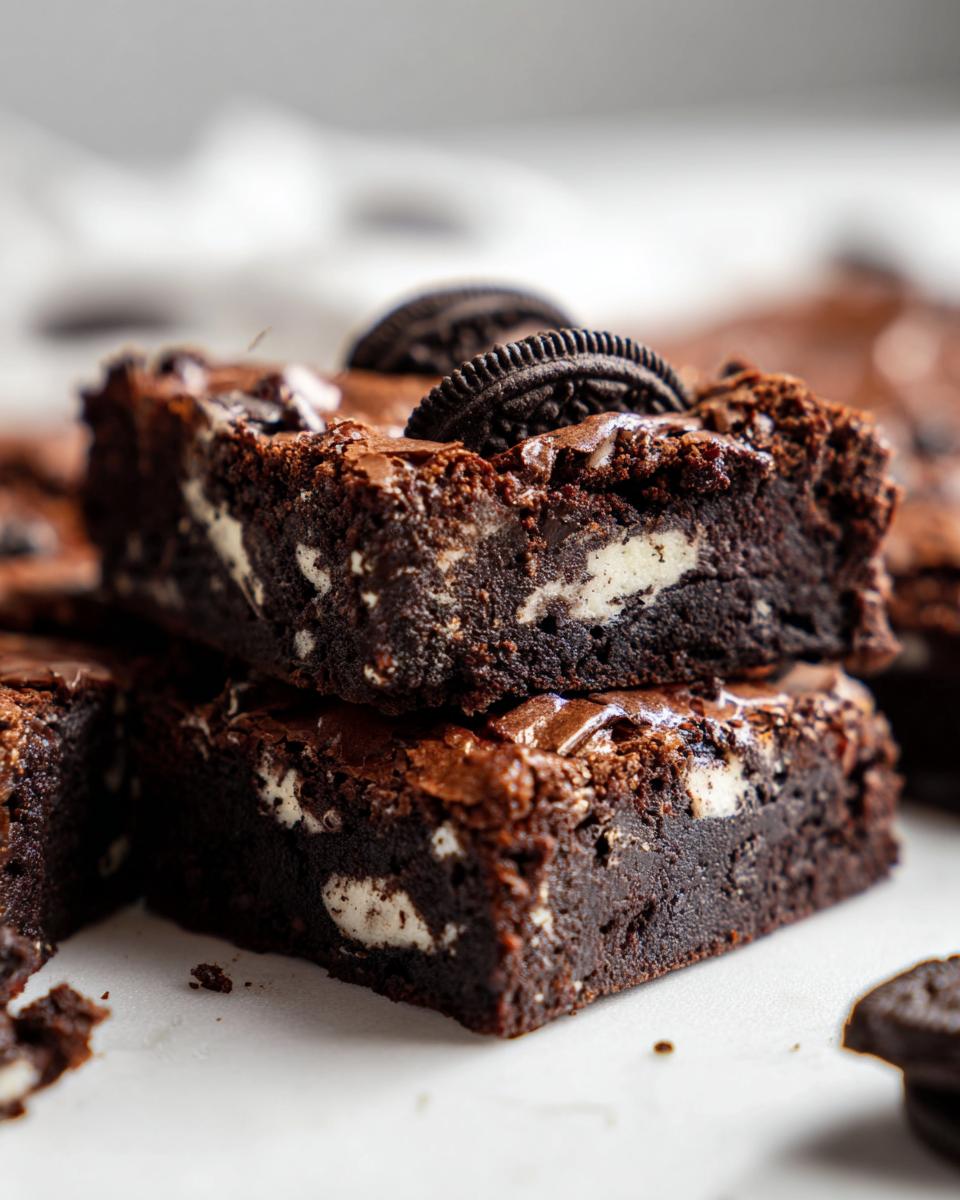
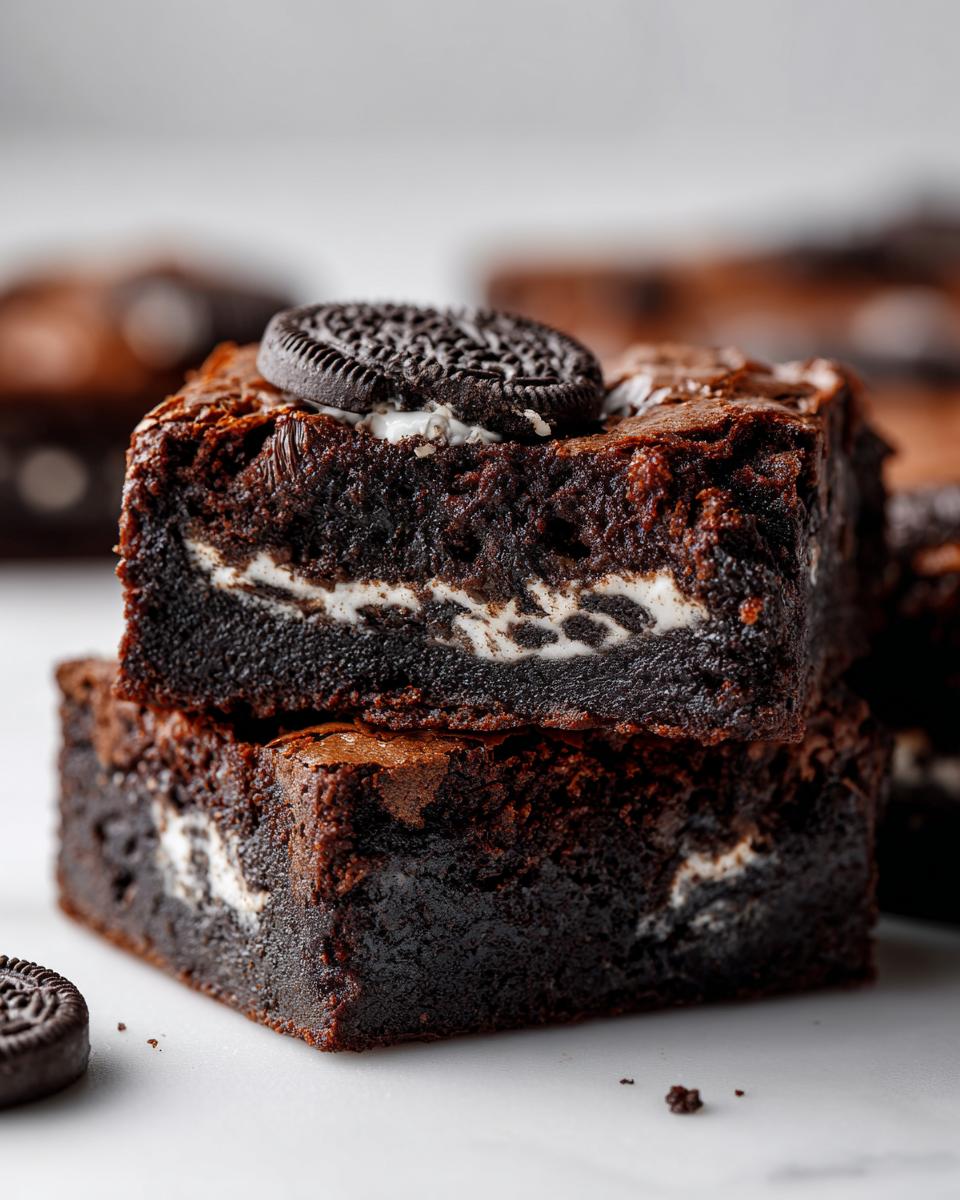
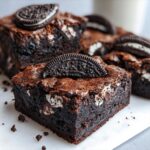
- 12 Oreo cookies, roughly chopped (plus 4 extra whole cookies for topping)
See? Not scary at all! The combination of the two sugars is what contributes to that depth of flavor we talked about earlier. Those 12 chopped Oreos are going right into the batter for that surprise factor inside, and the 4 whole ones are just for show on top—because presentation matters!
Ingredient Notes and Substitutions for Oreo Brownies
If you’re standing in front of the cookie aisle wondering what you can tweak, I have good news! My philosophy is all about making things work for *your* life. While the recipe here calls for standard Oreos, that’s just a starting point for some really fun brownie variations.
If you grab a package of Mint Oreos, suddenly you have the most amazing peppermint-chocolate treat! Or maybe you’ve got Golden Oreos lying around—those work wonderfully, though they’ll lighten the batter color a bit. You can also use dark cocoa powder if you feel like things aren’t chocolatey enough; it just amps up that bitter contrast against the sweet filling. Basically, if it’s an Oreo, crush it up and throw it in there! That flexibility is what takes something satisfying and turns it into the best brownie recipe guide for your family.
Essential Equipment for Perfect Oreo Brownies
Now that you’ve got your ingredients lined up—and trust me, having everything ready is half the battle for getting these done in 10 minutes—let’s talk about the gear. You don’t need a fancy stand mixer for these oreo brownies, thankfully! That’s one of my favorite things about this recipe; we’re keeping things simple and accessible, just like we do here at The YumMagnet.
You need the right vessel to bake them in to guarantee that perfect, thick, fudgy bar shape. Here’s my quick checklist of what you absolutely have to have before you start whisking.
- A sturdy, large mixing bowl. Since we are whisking actively, grab one that won’t slide all over the counter while you work.
- A whisk and a flexible silicone spatula. The spatula is crucial for making sure you scrape down every drop of that sugary, eggy goodness into the dry ingredients.
- A 9×13 inch baking pan. This is the magic size for these brownies! It gives us the perfect balance between thick bars and a relatively quick baking time. If you use something smaller, they might bake too long and lose that essential fudgy center.
- Parchment paper. Listen to me on this one, folks, this is non-negotiable for perfect release! This is how we get those gorgeous, clean cuts for serving.
The parchment paper is the real MVP in this situation. You want to cut a sling—a piece of parchment that’s long enough to hang over both of the longer sides of your 9×13 pan. This acts as a handle. Once they’re cool, you just lift the entire slab of decadent chocolate bars right out of the pan. Trust me, trying to scoop them out while they’re still warm and gooey never ends well. It’s part of how to make perfect brownies!
How to Make the Ultimate Fudgy & Chewy Oreo Brownies
This is where the magic happens! We’re keeping this super streamlined because these oreo brownies are designed for speed and flavor. First things first: always preheat your oven to 350°F (175°C). While that’s warming up, get your 9×13 pan lined with that parchment paper sling we talked about. You want those handles ready to go!
Start with your wet ingredients in that big bowl. Whisk together the melted butter, granulated sugar, and that lovely brown sugar until they are happy together. Then, we add the four eggs one by one, whisking each in thoroughly before adding the next, followed by the vanilla. Next, whisk your dry ingredients—the flour, cocoa powder, salt, and baking powder—in a separate bowl. This keeps everything evenly distributed!
Now we combine! Gently fold the dry mix into the wet mix until you just *barely* see the flour disappear. And this is crucial for that chewy chocolate dessert quality: do NOT overmix! Stir in your chocolate chips and those chopped Oreos. Pour that gorgeous batter into your prepared pan, sprinkle those last four cookies right on top, and pop it in the oven. You’re looking for 28 to 32 minutes. Remember, for fudgy brownies, we pull them slightly early. If a toothpick near the edge comes out with moist crumbs, you’re golden. You can find more of my favorite easy baking projects right here!
Pro Tip for a Shiny Top Crust on Your Oreo Brownies
Okay, if you’ve ever scrolled online looking at those super glossy, crackly tops on the best homemade brownies and wondered how people do that, I’m letting you in on a little secret that’s right here in my notes. Before you add that melted butter to the sugars, take one extra minute to whisk the eggs and both sugars together—I mean *really* whisk them—until the mixture lightens up and looks a little fluffy. That intense agitation helps dissolve the sugar crystals, which is what creates that signature shiny, thin crust when it bakes. It’s a tiny extra step, but it makes these rich chocolate treat bars look like they came straight from a bakery!
Tips for Perfect Fudgy Texture in Your Oreo Brownies
If you take away only one thing from this entire recipe, let it be this: the path to the perfect fudgy texture baking lies in controlling how much you mix the batter and when you pull it out of the oven. Getting that dense, moist center is what separates a good brownie from the absolute best! I learned this spending afternoons watching my mom try to wrestle her box mix into submission, only to end up with something closer to cake. We aren’t doing that here with these incredible oreo brownies.
When you are mixing in those dry ingredients—flour, cocoa powder, salt, and baking powder—be gentle! As soon as you stop seeing streaks of flour, stop stirring. Seriously, walk away from the bowl for a second. Seriously! Overmixing develops gluten, and gluten brings structure, leading to a chewier, tougher result instead of the melt-in-your-mouth fudginess we are chasing. We want that batter to look a little shaggy when the chips and Oreos go in; that’s perfect.
The second massive tip is pulling them out just before you think they are done. I know it’s scary when you’re used to baking cakes where you need bone-dry results. But for the ultimate best brownie recipe guide, we have to embrace the moist center. If a toothpick comes out perfectly clean, you’ve baked it too long, and the residual heat will cook them drier as they cool. You want that toothpick to come out holding just a few moist, fudgy crumbs clinging to it, especially if you pull the pan out around the 28-minute mark. That slight under-baking ensures they set up perfectly on the cooling rack into the ideal chewy chocolate dessert.
For great visual support on achieving that stunning top layer, I always look at the photos my friend over at Daisy’s site because she captures that crackle so well. That shiny top, combined with the dense interior, is the dream when it comes to decadent chocolate bars!
Storage and Reheating Instructions for Decadent Chocolate Bars
Okay, so you made a full 9×13 pan of these unbelievably good oreo brownies, and now you have to decide how to keep them from disappearing overnight! Since these are so rich and full of fat, they hold up really well, which is wonderful news for any busy cook. They are definitely one of those indulgent homemade sweets that actually taste better the next day.
For daily snacking, I stick to room temperature storage. Just make sure you’ve let them cool completely before you even think about cutting or stacking them. Once they are cut, store them tightly wrapped in plastic wrap inside an airtight container at room temperature. They should stay perfectly soft and fudgy for a good three to four days. The plastic wrap is crucial—it keeps all that moisture locked into our decadent chocolate bars!
Can I Freeze These Cookies and Cream Brownies?
Absolutely! If you somehow manage to have leftovers past day four, freezing is your friend. I always recommend cutting them into individual squares *before* freezing. Place wax paper or parchment squares between the layers of brownies in a freezer-safe container. They keep wonderfully for up to three months this way, ready whenever a sudden craving for chocolate hits. When you want one, just pull out a piece!
The Best Way to Reheat Your Brownie Square
I very rarely reheat these because honestly, they are fantastic at room temperature, but if you want that “freshly baked” gooey factor—that melty center of chocolate chips and softened Oreo cookie bits—a quick zap in the microwave works wonders. Don’t even try the oven unless you want the edges to turn rock hard! For one square, 10 to 15 seconds is usually enough. You want it just warm enough for the chocolate to soften, but not so long that it gets hot enough to start steaming. This works perfectly for turning a standard leftover into a truly rich chocolate treat in seconds!
Serving Suggestions for These Cookies and Cream Brownies
So, you’ve let them cool (good job, resisting temptation!), and now you’re ready to dig in. While frankly, these oreo brownies are perfect standing completely alone, sometimes you want to elevate the experience, right? They are so rich and satisfying, they don’t need much dressing up, but I always have a few secret weapons I keep stocked for serving these cookies and cream brownies.
The very simplest way to serve them, especially if you’re enjoying them as a midday snack with your afternoon coffee, is just a quick dusting of powdered sugar. It looks so elegant against that dark, deep chocolate background, and it cuts through the richness just a tiny bit. No need to fuss with a full glaze when you’ve got all those whole Oreos already sitting on top!
- The Ice Cream Test: If you absolutely must serve these warm—and I only suggest this if you warmed them up just briefly—you *have* to pair them with vanilla ice cream. The cold, creamy vanilla melts just slightly into the warm, fudgy center of the brownie. It makes for an almost ridiculously good experience.
- Coffee Companion: If you’re having these after dinner, skip the extra sugar in your drink. A strong, hot cup of black coffee, or even one of our creamy lattes made using our favorite hot cocoa mix, is the perfect partner to cut through the chocolate intensity.
- Fresh Fruit Contrast: This might sound strange for such a heavy dessert, but sharp raspberries or sliced strawberries served on the side offer a beautiful, tart contrast that cleanses your palate between bites of the rich chocolate treat.
Honestly, these cookies and cream brownies are so loaded with flavor and texture from the crushed cookies that they do most of the heavy lifting themselves. Whatever you choose, just make sure you have a tall glass of milk nearby—you’re going to need it!
Frequently Asked Questions About Oreo Brownies
I know you might have a few burning questions before you dive into making these, or maybe you’re just double-checking the science behind achieving that epic texture. That’s smart thinking! We deal in textures here, and I want to make sure everyone who tries these gets the absolute best result possible. Ask away! If you’re looking for even more quick inspiration after these are done, check out our collection of easy dessert recipes.
Are these ‘from scratch brownie recipe’ better than a mix?
Oh, honey, yes! There is no comparison, and I say that as someone who sometimes *needs* the box mix on a super chaotic Tuesday. But when you want that truly indulgent, deep chocolate flavor and that dense, slightly sticky, fudgy texture baking promises when controlled, the from-scratch method wins every single time. We control the sugar, we control the fat, and most importantly, we control the crunch factor with those Oreos. You end up with the rich, decadent bars that everyone considers the best homemade brownies because you made them with care. Box mixes just can’t compete with that level of fudgy control!
How do I know exactly when an Oreo Brownie is done baking?
This is where most people accidentally turn a dreamy chewy chocolate dessert into something closer to a hockey puck! Since we are aiming for fudgy, not cakey, you cannot wait for a perfectly clean toothpick. Pull the pan out when your timer hits 28 minutes, and gently poke a toothpick into the center area (not right near the edge). If it comes out with wet, gooey batter clinging to it, set the timer for 3 more minutes and check again. If it comes out with moist, soft crumbs clinging to it, that’s your cue! That slight under-doneness is what guarantees the gooiness once these cookies and cream brownies cool down.
Can I use different types of Oreos or other cookies in these?
You absolutely can! This is my favorite part of this chocolate cookie brownies recipe because it’s so adaptable. I mentioned Mint Oreos earlier, and they are fantastic for a holiday batch of cookies and cream brownies. If you use Golden Oreos, you’ll lose some of the dark chocolate visual contrast, but they still taste wonderful. Even the seasonal flavors work! Just remember to chop them roughly if they go into the batter, so you consistently get bits of the cream filling spread throughout your rich chocolate treat.
How far ahead of time can I make these decadent chocolate bars?
These are fantastic to make ahead! Since they are so moist and dense, they actually hold up beautifully. I usually aim to bake them the day before I plan to serve them, as they firm up nicely overnight. You can safely store these in an airtight container at room temperature for up to four days, and frankly, they taste just as good, if not better, on day two once those flavors have settled. They are seriously one of the easiest easy dessert recipes when you need something done in advance!
Share Your Homemade Oreo Brownies
Now the real fun begins! You’ve mixed, baked, cooled, and hopefully tasted the fudgiest, chewiest oreo brownies to ever come out of your oven. I really, truly want to hear about your results! Seriously, don’t be shy. Did you manage to get that shiny top crust? Were you shocked at how fast they came together? Tell me everything!
The heart of The YumMagnet Recipe Box is knowing that these recipes are working in real kitchens just like yours. So please, hop down into the comments section below and leave a rating. If you were able to achieve that perfect, dense, melt-in-your-mouth center, tell everybody how you did it!
And if you took a gorgeous picture of your final batch of indulgent homemade sweets—especially if you drizzled them with a little something extra or paired them with ice cream—please share it on Instagram or Facebook and tag me! Nothing makes me happier than seeing my family’s tried-and-true favorites become your new holiday or weeknight staples. If you need to reach out about a specific ingredient swap or question, you can always connect with me through our contact page. Happy baking; I can’t wait to see what you created!
PrintThe Ultimate Fudgy & Chewy Oreo Brownies (From Scratch)
Make the best homemade brownies packed with Oreo cookies. This recipe delivers a rich, fudgy texture and chewy bite, proving superior to boxed mixes. It is an easy dessert that takes minimal prep time.
- Prep Time: 10 min
- Cook Time: 30 min
- Total Time: 40 min
- Yield: 16 servings 1x
- Category: Dessert
- Method: Baking
- Cuisine: American
- Diet: Vegetarian
Ingredients
- 1 cup (2 sticks) unsalted butter, melted
- 2 cups granulated sugar
- 1 cup packed light brown sugar
- 4 large eggs
- 1 tablespoon vanilla extract
- 1 cup all-purpose flour
- ¾ cup unsweetened cocoa powder
- 1 teaspoon salt
- ½ teaspoon baking powder
- 1 cup semi-sweet chocolate chips
- 12 Oreo cookies, roughly chopped (plus 4 extra whole cookies for topping)
Instructions
- Preheat your oven to 350°F (175°C). Line a 9×13 inch baking pan with parchment paper, leaving an overhang on the sides for easy removal. Lightly grease the paper.
- In a large bowl, whisk together the melted butter, granulated sugar, and brown sugar until fully combined.
- Whisk in the eggs one at a time until the mixture is smooth. Stir in the vanilla extract.
- In a separate bowl, whisk together the flour, cocoa powder, salt, and baking powder.
- Gradually add the dry ingredients to the wet ingredients, mixing only until just combined. Do not overmix.
- Stir in the chocolate chips and the roughly chopped Oreo cookies.
- Pour the batter into the prepared pan and spread evenly. Arrange the remaining whole Oreo cookies on top of the batter.
- Bake for 28 to 32 minutes. For fudgy brownies, the center should still look slightly underdone when you remove it. A toothpick inserted near the edge should come out with moist crumbs attached, not wet batter.
- Let the brownies cool completely in the pan on a wire rack before lifting them out using the parchment paper overhang.
- Cut into squares. These cookies and cream brownies are best served at room temperature or slightly chilled.
Notes
- For an extra rich chocolate treat, use dark cocoa powder instead of standard unsweetened cocoa.
- If you prefer a shinier top crust, whisk the sugar and eggs vigorously for one minute before adding the melted butter.
- You can use any Oreo variety, such as Mint Oreos, for a brownie variation.
Nutrition
- Serving Size: 1 square
- Calories: 310
- Sugar: 35
- Sodium: 150
- Fat: 18
- Saturated Fat: 10
- Unsaturated Fat: 8
- Trans Fat: 0.5
- Carbohydrates: 37
- Fiber: 1
- Protein: 4
- Cholesterol: 65