
If you are anything like me, you know that the best party food disappears first, and nothing vanishes faster than something warm, cheesy, and requiring zero forks. That’s why I’m thrilled to share what I call the Ultra Easy Baked Pepperoni Pizza Sliders on Hawaiian Rolls with Garlic Butter Glaze. Yes, that’s a mouthful, but trust me, they are worth bragging about! Here at The YumMagnet Recipe Box, I’m Jessica Thompson, and I focus on making real food for real, busy lives. I took my family’s need for fast, delicious meals and turned it into this absolute showstopper. These simple pizza sliders are what I whip up when the game is on or when I need a fun, quick dinner the kids actually cheer for. Don’t forget, if you want to step up the pizza sauce game a bit, checking out my recipe for easy homemade tomato sauce is always a good idea!
- Why These Easy Pizza Sliders Are Your New Go-To Party Food Ideas
- Gathering Ingredients for Your Pepperoni Pizza Sliders Recipe
- How to Make Pizza Sliders: Step-by-Step Baking Instructions
- Tips for Success When Making Baked Pizza Sliders
- Storage and Reheating Instructions for Leftover Pizza Sliders
- Variations: Customizing Your Cheesy Sliders
- Serving Suggestions for These Crowd Pleasing Finger Food
- Frequently Asked Questions About Pizza Sliders
- Estimated Nutritional Information for Pizza Sliders
Why These Easy Pizza Sliders Are Your New Go-To Party Food Ideas
Listen, when I’m planning for a big crowd—whether it’s the Super Bowl or just a Tuesday when everyone suddenly decided they were starving—I need recipes that deliver maximum payoff for minimal effort. That’s precisely what these easy pizza sliders do!
They’ve replaced almost every other appetizer in my rotation because they tick every single box for game day appetizers.
- They are ridiculously fast—we’re talking 10 minutes of active work before they hit the oven!
- The sweet Hawaiian rolls keep them perfectly soft, preventing that dry slider syndrome.
- They are truly crowd pleasing finger food; nobody can eat just one.
- Cleanup is a dream! You just wipe down the pan—another huge win for me.
If you need more inspiration for your next viewing party, check out my super simple easy Rotel dip recipe, too!
Gathering Ingredients for Your Pepperoni Pizza Sliders Recipe
Okay, getting ready for these pepperoni pizza sliders recipe is half the fun because the ingredient list is so short and simple. Seriously, you probably have most of this stuff staring back at you from your pantry right now! The star of the show here, without a doubt, has to be the King’s Hawaiian Sweet Rolls. Their slight sweetness is what balances out the saltiness of the pepperoni and makes these irresistible pull-apart sandwiches so famous.
For the main layers, you’ll need that whole 12-count package of rolls, sliced right down the middle. Then you load up on that gooey factor: one cup of mozzarella cheese and one heaping cup of your favorite pepperoni slices. Tip from my kitchen to yours: If you buy the thicker, high-quality pepperoni, it curls up just a little when it bakes, which gives you those perfect little cheese-cup pockets. Love that!
For the Garlic Butter Sliders Glaze
This topping is what truly elevates these above just plain pizza sandwiches, and it all comes together in one tiny bowl. You’re going to melt together 1/4 cup of unsalted butter—and please, use real butter, we’re not skimping here! To that melted goodness, we add 1 teaspoon of garlic powder and 1/2 teaspoon of dried Italian seasoning. Just whisk that up until it smells amazing.
The final flourish before the oven is 1/4 cup of grated Parmesan cheese sprinkled right over that butter mixture. That Parmesan gets toasty and golden brown, adding a salty kick that is just divine.
How to Make Pizza Sliders: Step-by-Step Baking Instructions
Okay, putting this whole delicious creation together is shockingly fast. You’ll see why this is one of my favorite quick dinner slider recipe options when you realize how quickly you move from ingredients to oven. Remember, for any good baked good, preheating is crucial, so get that oven warmed up to 350 degrees Fahrenheit first. Lightly grease whatever 9×13 inch dish you’re using before you even touch the rolls!
Assembling the Hawaiian Roll Pizza Sliders
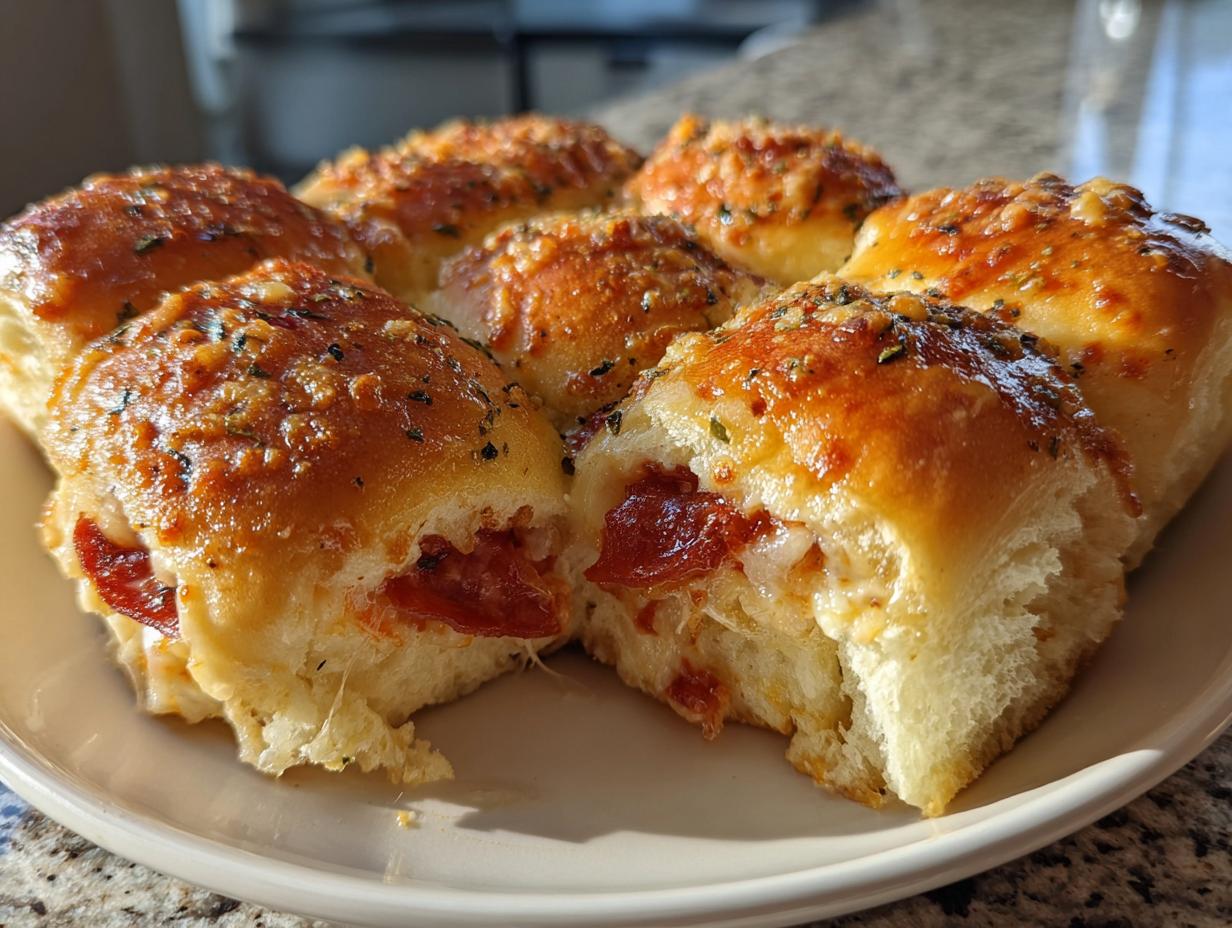
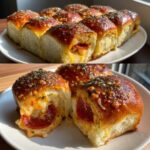
This is where the magic starts. Take that whole package of rolls and, very carefully—I mean *very* carefully—slice them all the way through horizontally. You want the bottom and top halves to stay connected as much as possible while you work, which really helps when transitioning them into the pan in one giant piece. Place the bottom section into your greased dish.
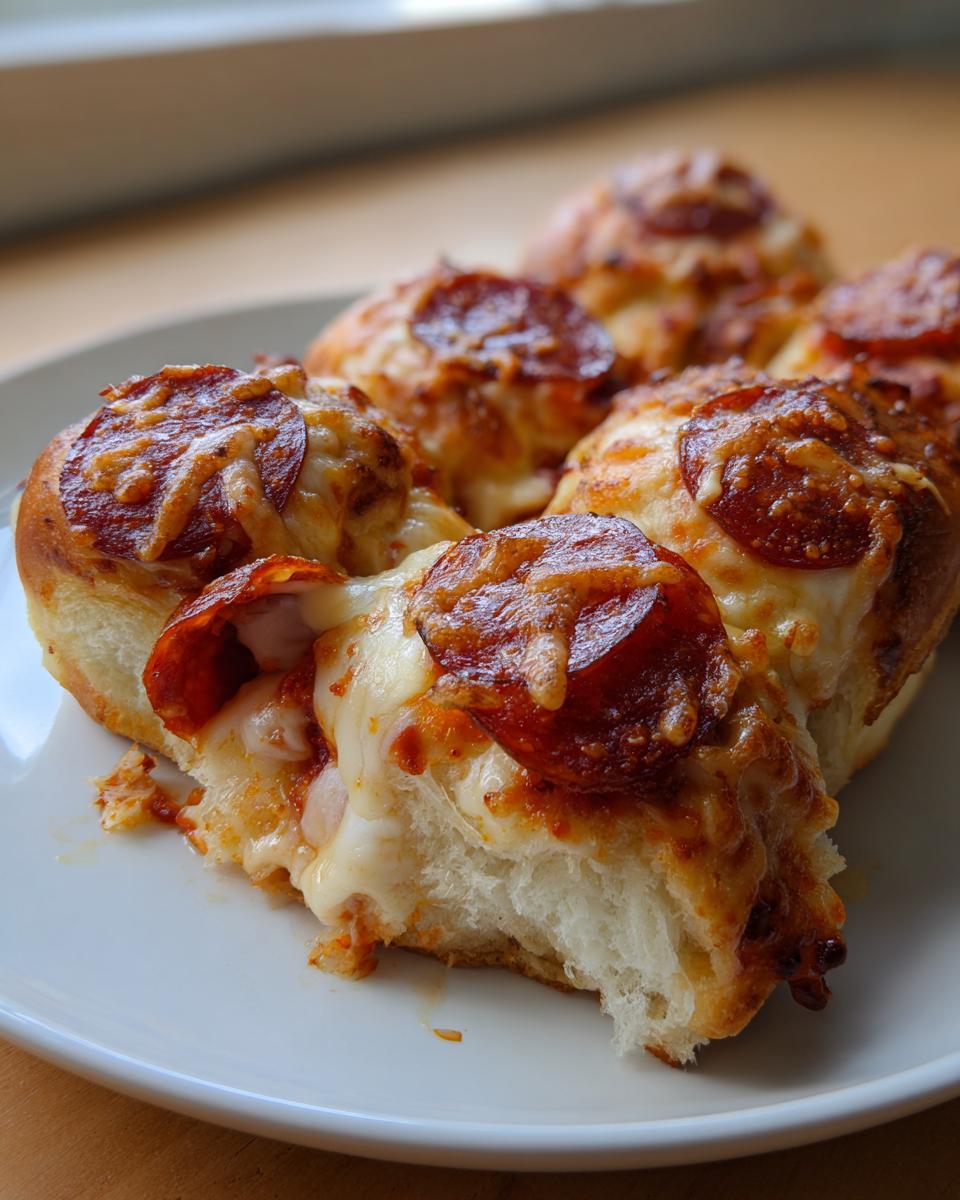
Next, spread a good, even layer of your pizza sauce over those bottom rolls. Next up is the cheese! Sprinkle that cup of mozzarella right over the sauce. Don’t be shy here, we want maximum melt! Then, layer on all your pepperoni slices until the cheesy base is well covered. Now, just gently place the top half of the rolls right back on top, matching them up as best you can. This assembly ensures you get perfectly formed pizza sliders ready for baking.
Applying the Garlic Butter Glaze and Baking
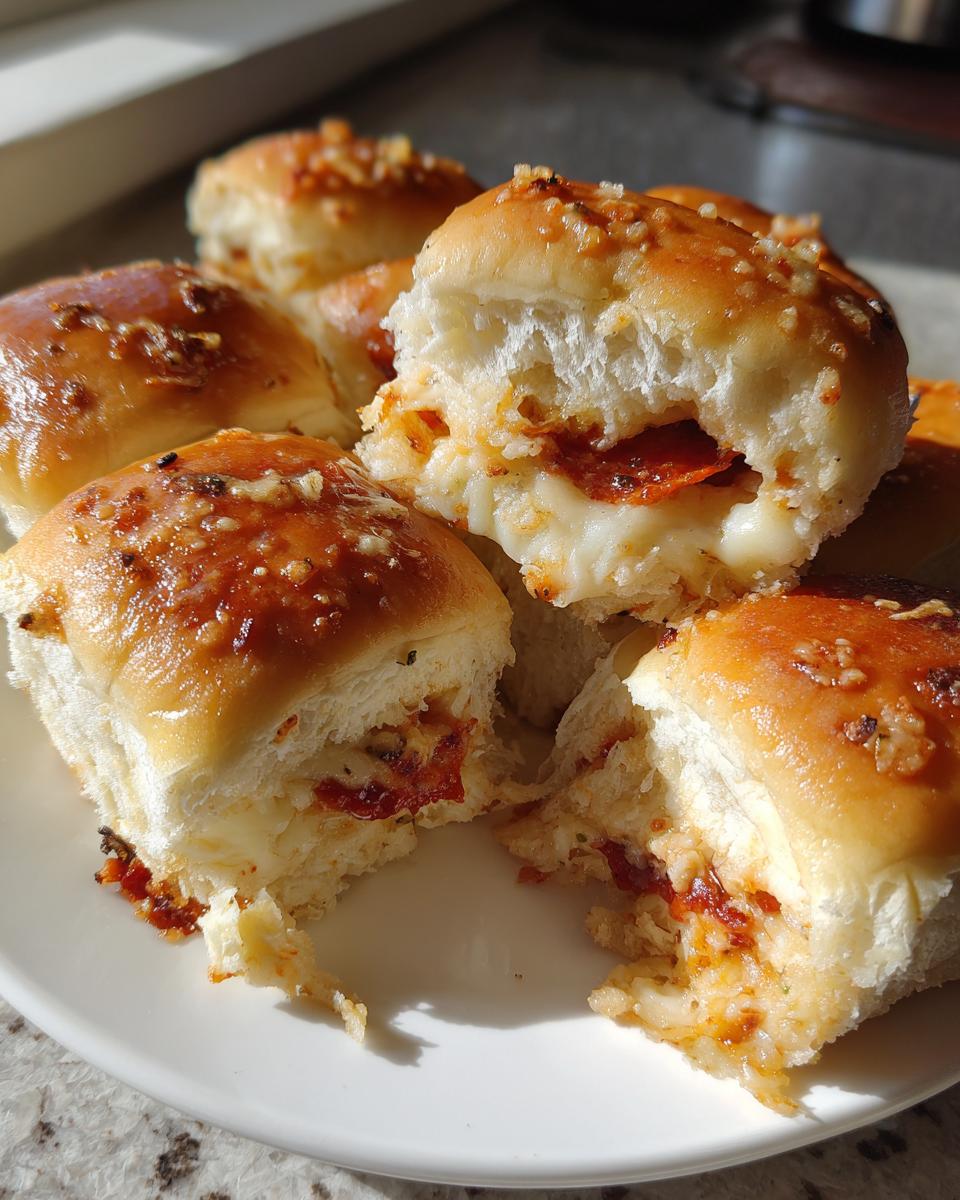
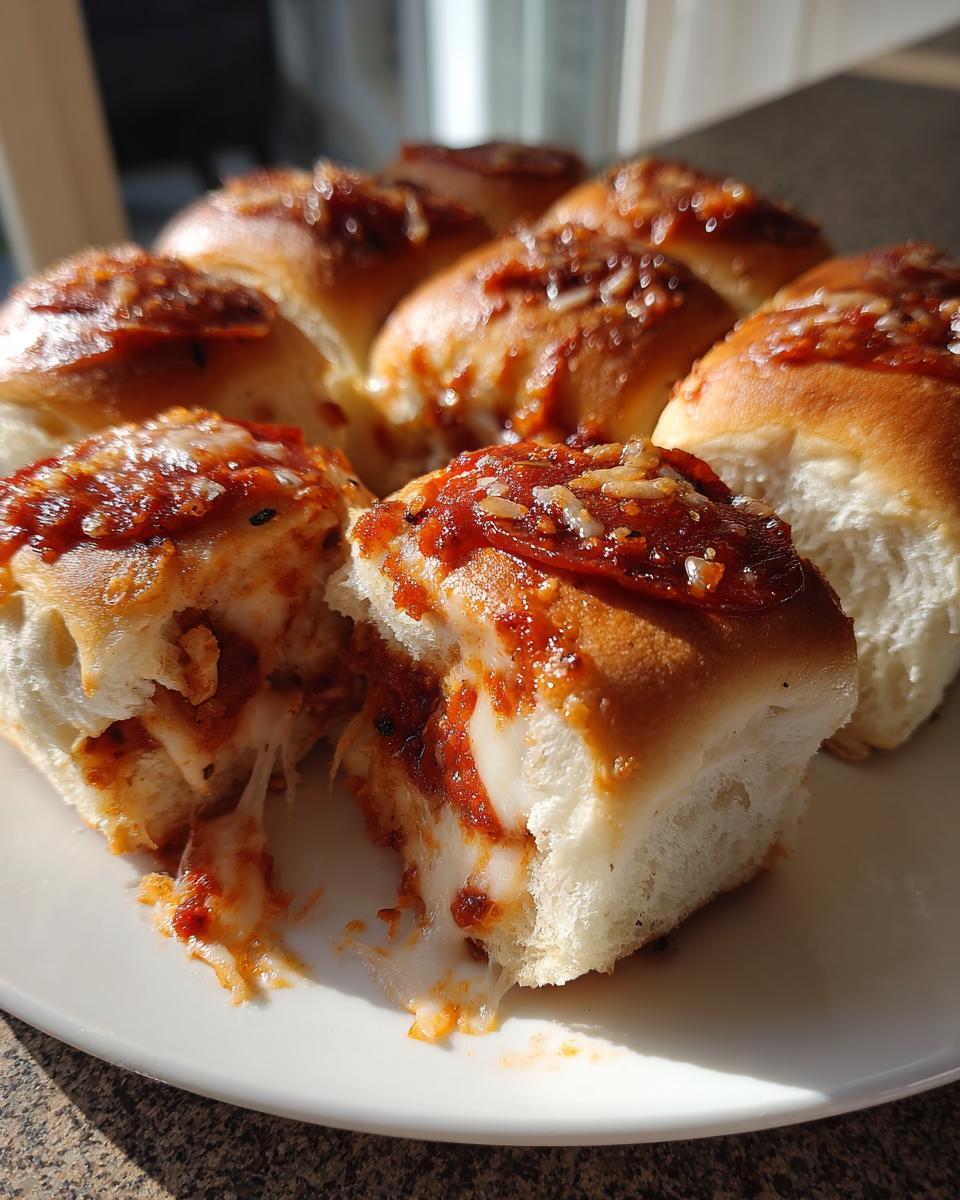
Once everything is stacked, grab that bowl of garlic butter glaze we mixed up. Brush that glorious, garlicky mixture evenly all over the top of the entire bread block. This step prevents drying and gives you that irresistible golden crust. Finish by sprinkling that grated Parmesan cheese right over the butter. Now, cover your dish tightly with foil.
We bake this in two stages. First, pop it into that 350-degree oven for 15 minutes while everything steams nicely together. Then, pull it out, take that foil off, and bake for another 5 to 7 minutes uncovered until the tops are golden brown and the cheese is bubbling like crazy. Seriously, watch for that cheese pull! Before you eat them—and I know you’ll want to dig in immediately—let these amazing pull apart pizza sandwiches rest for just 5 minutes. This lets the cheese set up just enough so they slice apart cleanly.
If you want to see another great way to use that savory flavor profile in a small bite, check out my recipe for easy chicken parmesan!
Tips for Success When Making Baked Pizza Sliders
Getting these baked pizza sliders right is all about avoiding sogginess and ensuring that cheese pull is legendary. My number one tip, straight from my notes, is to apply the sauce sparingly. You only need a thin layer of pizza sauce over the bottom rolls; too much, and you end up with mushy bottoms! Remember, we are aiming for cheesy sliders, not soup sandwiches.
If you want to kick up the richness factor, try taking one of my recipe notes: slather a super thin layer of cream cheese on the bottom rolls before you hit them with the sauce. That little bit of fat acts like a moisture barrier. Also, never skip that final 5-minute rest after they come out of the oven. It lets the internal steam settle, which really helps them hold their shape when you pull them apart. For other great flavor boosters, check out my recipe for the quick creamy garlic sauce!
Storage and Reheating Instructions for Leftover Pizza Sliders
Now, what happens if you actually have leftovers? Because honestly, it’s a rare occurrence around here! If you end up with any of these amazing mini pizza buns, treat them right. Store them tightly in an airtight container. They’ll be perfectly good in the fridge for about three days. Make sure they aren’t squished!
When you’re ready for a repeat performance, forget the microwave if you can. The best way to revive them and get that buttery top crisp again is by reheating them in a toaster oven or a regular oven set around 325 degrees Fahrenheit for about 8 to 10 minutes until they are warmed through. That’s how you keep them tasting fresh!
Variations: Customizing Your Cheesy Sliders
As much as I love the classic look of those pepperoni pizza sliders recipe, sometimes you just need to switch things up! These rolls are such a great vehicle for flavor, and I’ve played around with other combinations when I need something different for a crowd. The base structure—sauce, cheese, meat—is already perfect, so you just swap out the stars!
If you’re looking for a little heat, try subbing out half the pepperoni for diced jalapeños or even some thin slices of spicy Italian sausage. You could also swap the mozzarella for a blend of provolone and Monterey Jack for an extra gooey texture. For something totally different but still super satisfying, check out my recipe for easy baked buffalo chicken sliders; they use the exact same assembly method, just completely different fillings!
Another fun option for cheesy sliders is making a veggie-forward version. A thin layer of finely chopped mushrooms and green peppers works beautifully under that blanket of cheese. Just make sure whatever you add isn’t too watery so you keep that amazing crust!
Serving Suggestions for These Crowd Pleasing Finger Food
While these crowd pleasing finger food sliders are certainly hearty enough to be their own meal, serving them with a light counterbalance cuts through all that melted cheese beautifully. I keep things super simple!
For a fresh side, you absolutely cannot go wrong with a simple green salad. My recipe for the best Caesar salad is always ready in the fridge. If you need something green and warm, steamed broccoli seasoned lightly with garlic salt is perfect.
And don’t forget the dipping sauce! The recipe notes mentioned serving these with extra marinara, and I agree 100%. Dipping those cheesy bites into warm pizza sauce just makes them taste even more like a deluxe pizza night. Keep it easy, keep it tasty!
Frequently Asked Questions About Pizza Sliders
I get asked a lot of questions about tweaking this recipe—which is great because it shows how much you all love making these pizza sliders for your families! Here are the top things I hear:
Can I use regular slider buns instead of Hawaiian rolls?
Yes, absolutely! While I swear by the slight sweetness of the King’s Hawaiian Rolls because they make the best mini pizza buns, you can certainly use any soft slider bun you have on hand. Just know that if you use a less sweet roll, you might want to add an extra pinch of sugar to your garlic butter glaze to balance out that savory pepperoni flavor.
How do I stop my pizza sliders from getting soggy on the bottom?
This is the number one concern for anyone making baked pizza sliders! The trick is twofold, honestly. First, don’t overload the sauce; keep it thin. Second, make sure you cover the pan tightly with foil for the first 15 minutes of baking. That steams everything together without letting the bottom crust sit fully exposed to the direct heat too soon. If you’re prepping these ahead of time for a quick dinner slider recipe, make sure your sauce is thick, not watery!
Are these good for making ahead of time (meal prep)?
These are great for assembling ahead of time! You can layer everything in your pan—sauce, cheese, pepperoni, top buns—and cover it tightly with plastic wrap. Keep it refrigerated for up to 12 hours. Just remember to pull it out about 30 minutes before baking to let it come closer to room temperature. This ensures they bake evenly. For best results, you know I always recommend baking them fresh, but this works in a pinch!

If you are looking for another easy, make-ahead friendly flavor, you should try my easy chicken tinga recipe!
Estimated Nutritional Information for Pizza Sliders
I know some of you lovely folks are tracking macros or just like to know what you’re feeding the crew, so I wanted to give you a baseline for these pizza sliders. Remember, this is just an estimate based on the specific ingredients called for in the recipe, especially using those sweet rolls and standard pepperoni. If you swap out your cheese or use a different kind of sausage, these numbers will swing, of course!
| Nutrient | Amount (Per Slider) |
|---|---|
| Calories | 280 |
| Total Fat | 14g |
| Carbohydrates | 28g |
| Protein | 11g |
| Sugar | 8g |
There’s a little bit of everything in these cheesy sliders to keep everyone happy. It’s comfort food that packs a punch, but hey, that’s why we love pizza, right? Just enjoy them warm out of the oven!
PrintUltra Easy Baked Pepperoni Pizza Sliders on Hawaiian Rolls with Garlic Butter Glaze
Make these easy pizza sliders using soft Hawaiian rolls for a crowd-pleasing appetizer or quick dinner. They feature pepperoni, mozzarella, and a savory garlic butter topping, baked until warm and cheesy.
- Prep Time: 10 min
- Cook Time: 22 min
- Total Time: 32 min
- Yield: 12 sliders 1x
- Category: Appetizer
- Method: Baking
- Cuisine: American
- Diet: Vegetarian
Ingredients
- 1 (12 count) package King’s Hawaiian Sweet Rolls
- 1 cup pizza sauce or marinara sauce
- 1 cup shredded mozzarella cheese
- 1 cup sliced pepperoni
- 1/4 cup unsalted butter, melted
- 1 teaspoon garlic powder
- 1/2 teaspoon dried Italian seasoning
- 1/4 cup grated Parmesan cheese
Instructions
- Preheat your oven to 350 degrees Fahrenheit. Lightly grease a 9×13 inch baking dish.
- Carefully slice the entire package of Hawaiian rolls in half horizontally, keeping the rolls connected. Place the bottom half of the rolls in the prepared baking dish.
- Spread the pizza sauce evenly over the bottom layer of rolls.
- Sprinkle the mozzarella cheese over the sauce.
- Arrange the pepperoni slices over the cheese layer.
- Place the top half of the rolls over the pepperoni.
- In a small bowl, whisk together the melted butter, garlic powder, and Italian seasoning to create the garlic butter glaze.
- Brush the garlic butter mixture evenly over the top of the assembled sliders.
- Sprinkle the grated Parmesan cheese over the buttered tops.
- Cover the baking dish tightly with aluminum foil.
- Bake for 15 minutes.
- Remove the foil and bake for an additional 5 to 7 minutes, or until the cheese is fully melted and the tops are lightly golden brown.
- Let the pizza sliders rest for 5 minutes before slicing between the rolls and serving.
Notes
- For extra flavor, add a thin layer of cream cheese to the bottom roll before adding the sauce.
- If you do not have Hawaiian rolls, you can use any soft slider buns.
- Serve these sliders with extra marinara sauce on the side for dipping.
Nutrition
- Serving Size: 1 slider
- Calories: 280
- Sugar: 8
- Sodium: 650
- Fat: 14
- Saturated Fat: 7
- Unsaturated Fat: 7
- Trans Fat: 0.5
- Carbohydrates: 28
- Fiber: 1
- Protein: 11
- Cholesterol: 35