
Oh, game day, holidays, neighborhood parties—I love them all, but hosting always brings the same panic: what in the world do I serve for appetizers that everyone actually devours? I’ve wasted so many afternoons stressing over fussy snacks that ended up flat and untouched by halftime. That’s why I rely on tried-and-true winners, and folks, this **corn dip** is the KING of the crowd-pleaser category. It taps into that deep-seated comfort food craving; it’s intensely cheesy, perfectly creamy, and it comes out of the oven bubbling hot—exactly what you want when guests arrive. If you’re looking for the kind of dip that disappears ten minutes into the event, stick with me. I promise this specific baked version will become your go-to party staple, just like it did for my family!
Speaking of guaranteed winners, if you ever need another foolproof hot appetizer that handles a crowd, you absolutely have to check out my easy Rotel dip recipe. It uses similar principles of cheesy goodness!
- Why This Baked Corn Dip is Your Next Party Appetizer Corn Dip (E-E-A-T Focus)
- Gathering Ingredients for Your Cheesy Corn Dip Recipe
- Step-by-Step Instructions for Baking the Best Corn Dip
- Tips for Success: Making Your Corn Dip Recipe Foolproof
- Serving Suggestions for This Crowd Pleaser Corn Dip
- Storing and Reheating Leftover Corn Dip
- Frequently Asked Questions About Making Corn Dip
- Estimated Nutritional Profile for This Corn Dip
- Share Your Game Day Dip Ideas
Why This Baked Corn Dip is Your Next Party Appetizer Corn Dip (E-E-A-T Focus)
I get it—you need a dip that holds up. Game day means guests are moving around, dips are getting stirred, and you can’t be tied to the stove the whole time. That’s precisely why this **Cheesy Corn Dip** is the real MVP. After years of trial and error, I landed on this formula because it solves the eternal hostess dilemma: big flavor without big effort. This isn’t one of those flimsy, cold dips that needs constant attention; this is sturdy, satisfying, and pure comfort food.
When I need a reliable centerpiece for a party, I turn here because it delivers the deliciousness people expect from a great appetizer without demanding all my energy. If you try my buffalo chicken sliders next, you’ll see they share the same ‘set it and forget it’ spirit!
Quick Prep Time for the Ultimate Corn Dip
Seriously, you won’t believe how fast this comes together. We are talking 10 minutes max to mix everything up! That’s barely enough time to unpack your chips. This genuinely is one of the best Quick & Easy Dips you’ll ever make for a last-minute gathering. You just mix the ingredients in one bowl and dump it into your baking dish. That efficiency is what saves me every single time!
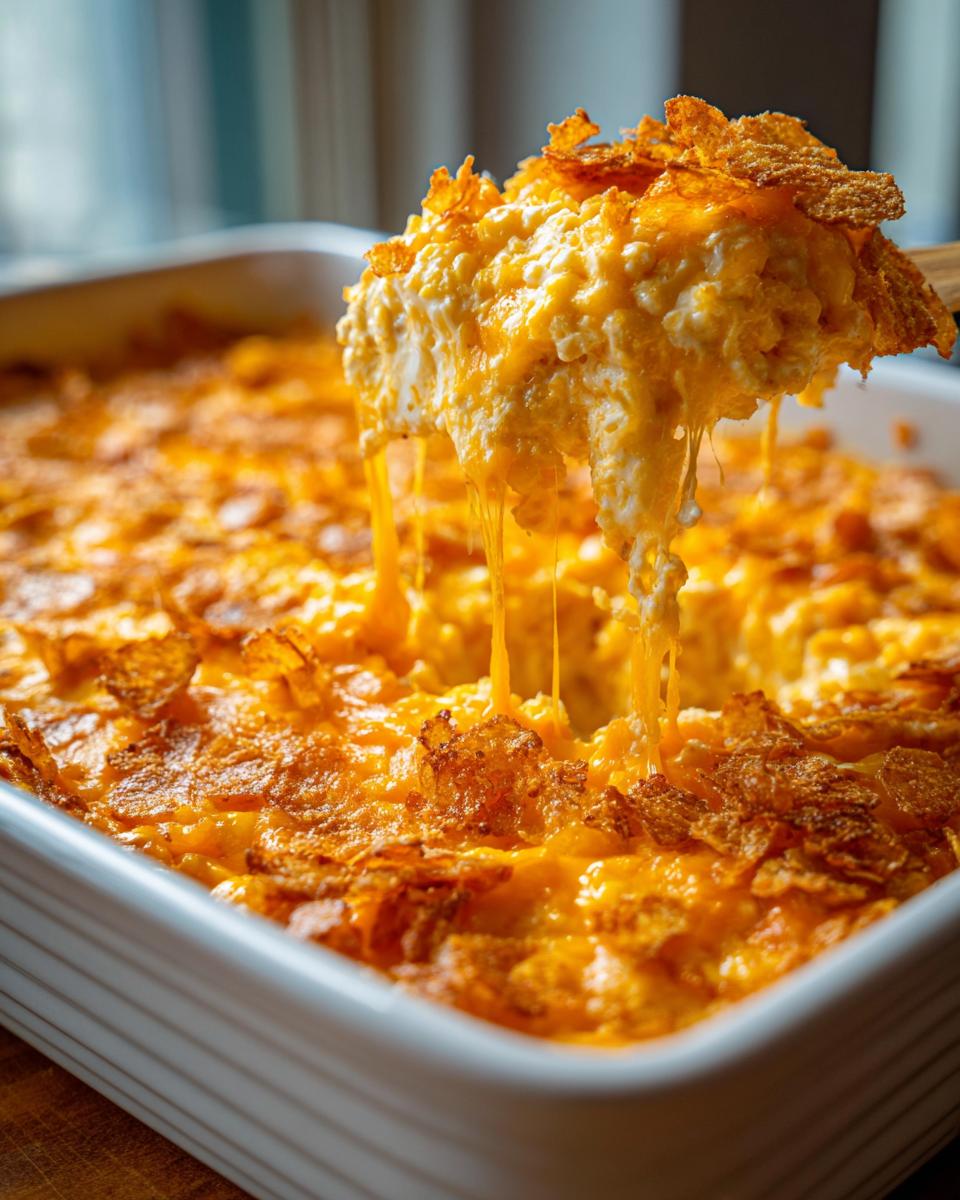
Achieving the Perfect Warm Corn Dip Texture
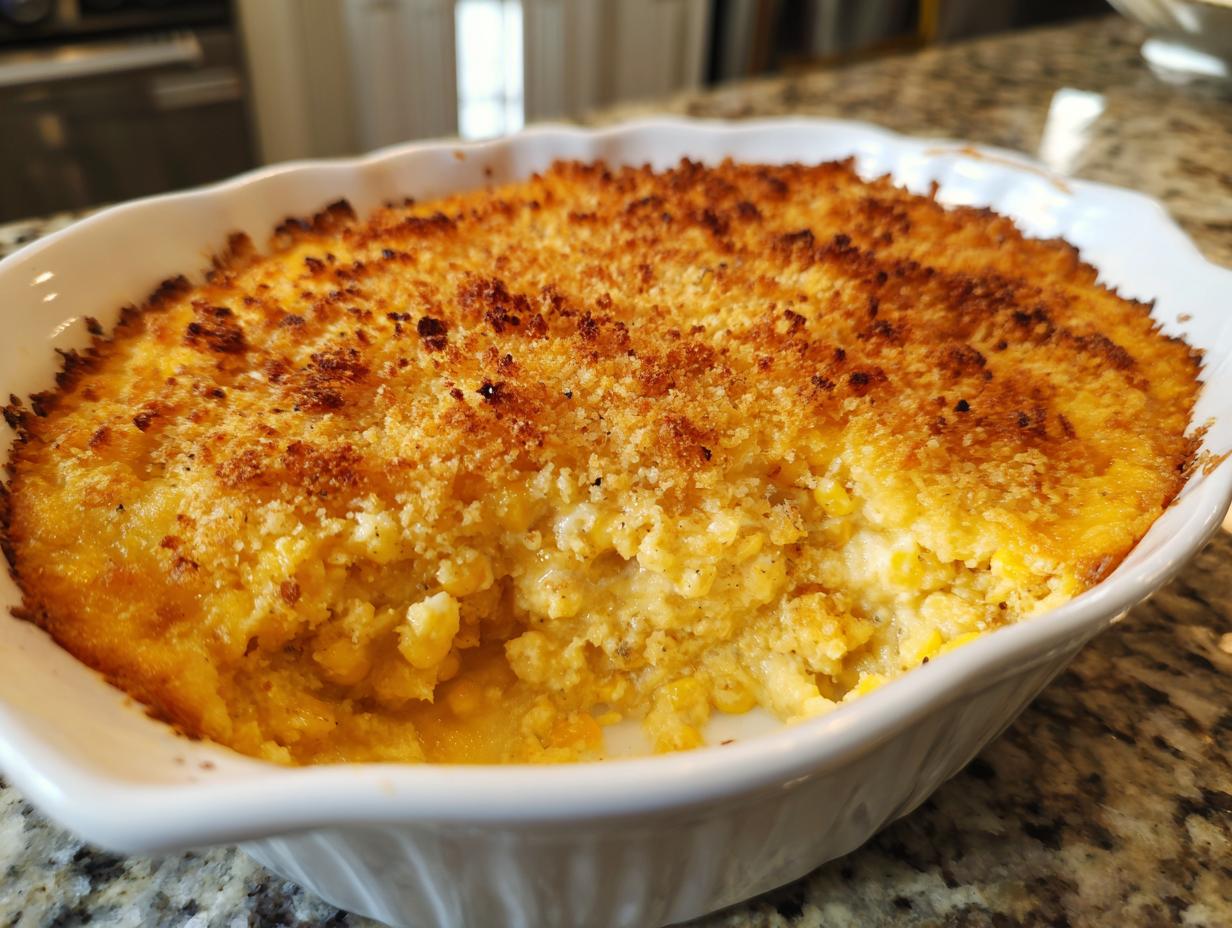
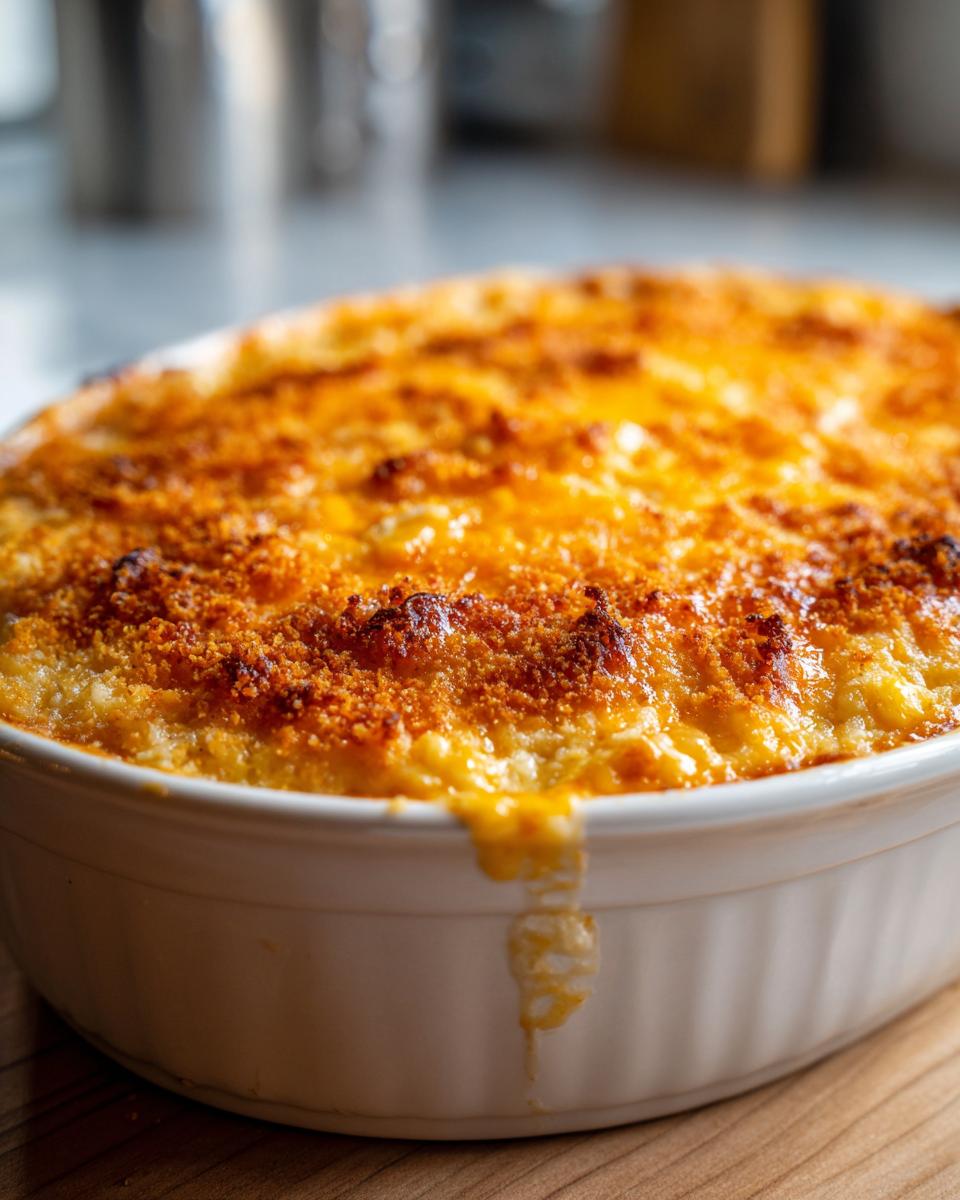
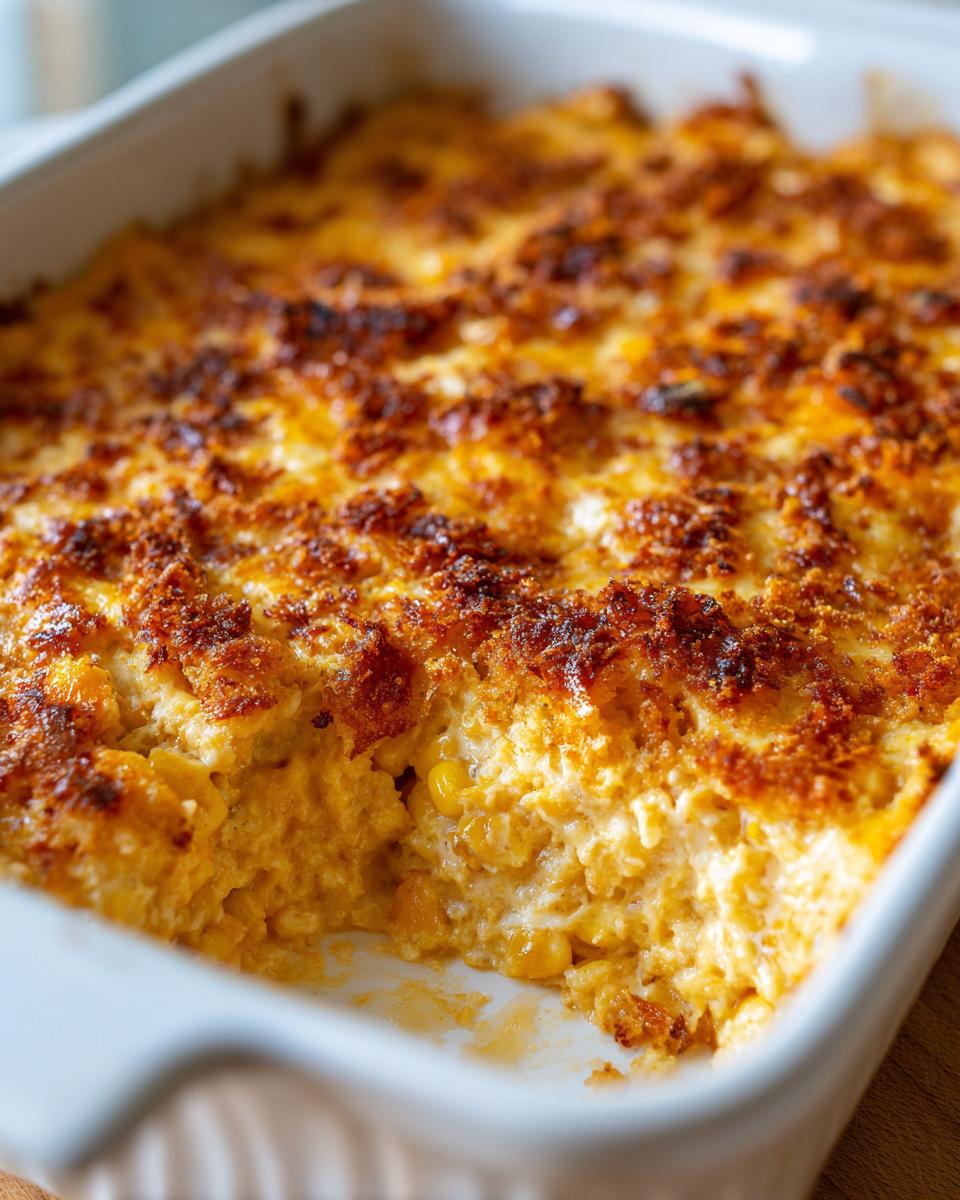
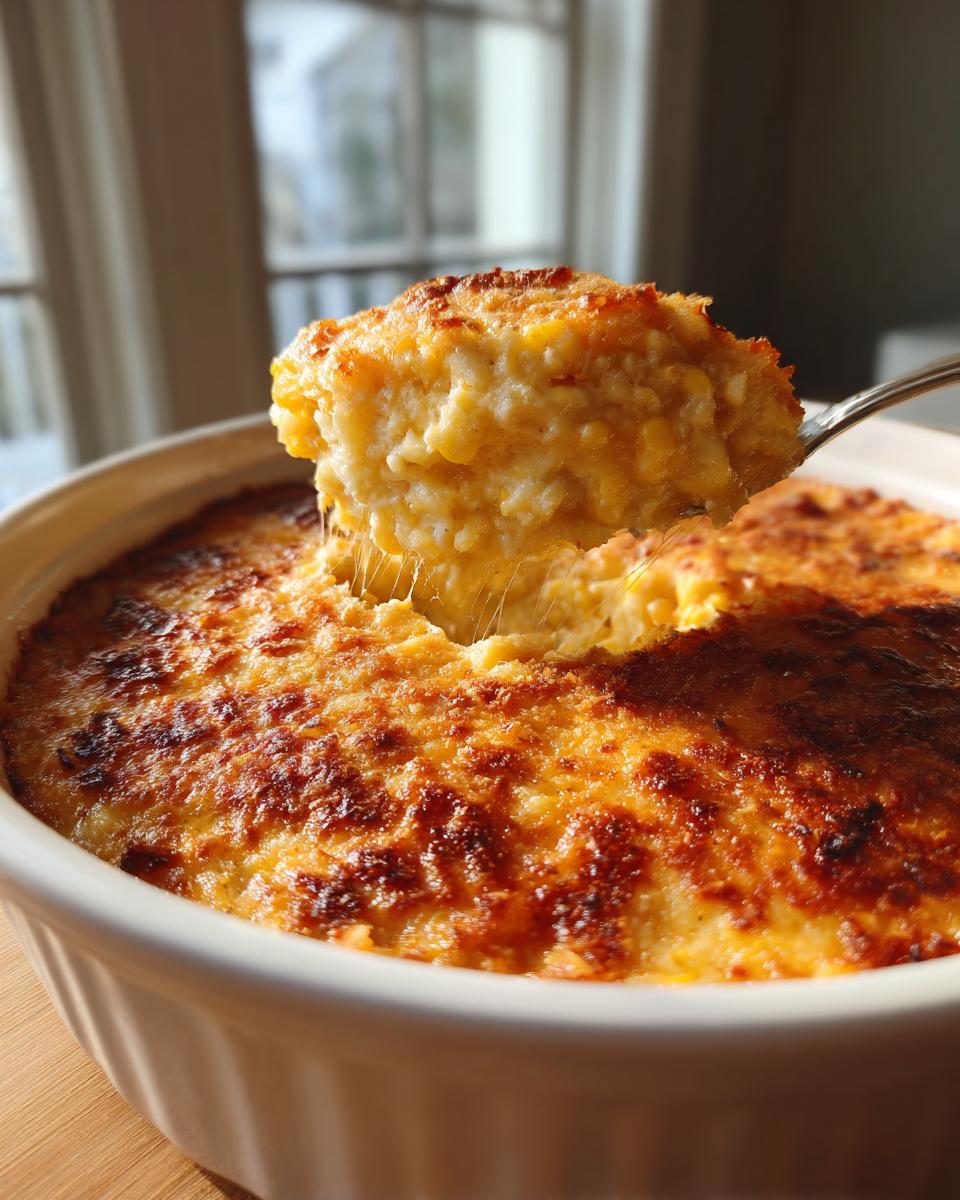
This isn’t just cheese suspended in corn; it’s a deeply satisfying texture experience. The base is incredibly rich thanks to the softened cream cheese, mayo, and sour cream combo, giving you that luxurious mouthfeel everyone craves in a Warm Corn Dip. Then, we top it with panko breadcrumbs before baking. That topping crisps up beautifully while the inside stays molten. It’s the contrast between the creamy center and that crunchy top layer that makes everyone dive in for seconds!
Gathering Ingredients for Your Cheesy Corn Dip Recipe
To make sure this dip lives up to the hype—and to ensure it sets up perfectly when it bakes—we need to be precise with our ingredients. Think of this as the foundational step where we build that creamy, unforgettable flavor. I keep all my dairy items chilling until the last minute, except for the cream cheese, which needs to be totally ready for mixing. When you gather your items, you’ll see we’re leaning heavily on staple, easy-to-find groceries. That’s the whole point, right? No crazy hunting for specialty items!
If you want to try another creamy, cheesy sensation once you master this, you should bookmark my recipe for quick, creamy homemade nacho cheese. It uses similar concepts for ultimate meltiness!
Essential Components for Creamy Corn Dip
This is where the richness comes from. The combination of cream cheese, sour cream, and mayonnaise is what separates a standard corn side dish from a truly amazing party dip. The key here is having 8 ounces of **cream cheese** that is truly softened—I mean, leave it out for an hour soft, not microwave-softened soft!
- We need one standard 15-ounce can of whole kernel corn, but you MUST drain that water off completely. Dry kernels are important for texture.
- For ultra creaminess, we add one 15-ounce can of cream style corn, but *don’t* drain that one! That runny, starchy liquid helps everything bind together.
- You’ll need 1 cup each of Monterey Jack and sharp Cheddar cheese, freshly shredded if you have time. Pre-shredded bags just don’t melt as beautifully, trust me on this one.
Flavor Enhancers for This Amazing Corn Dip
While the dairy gives us the creamy texture, these additions are what elevate this from good to ‘Can I have the recipe?’ territory. We’re adding fresh brightness with green onion and cilantro (if you’re a cilantro fan, otherwise skip it—no judgment here!).
The spice blend is simple but crucial for that little bit of warmth—we aren’t going for heat yet, just depth. You’ll mix together chili powder, cumin, garlic powder, salt, and pepper. And don’t forget the grand finale topping: Panko breadcrumbs! They give you the necessary crunch on top of all that wonderful richness in the base.
Step-by-Step Instructions for Baking the Best Corn Dip
Okay, now for the fun part—assembling the dip! Don’t let the ingredient list scare you; putting this together is so fast it hardly counts as cooking. We’re going to make sure we follow the steps in order so the cream cheese gets fully incorporated and everything melts perfectly in the oven. Remember, we preheated that oven to 375 degrees Fahrenheit first, and we greased that 8×8 dish. That prep work makes cleanup a breeze later, which is always a win in my book!
If you want another foolproof oven appetizer for when you’re ready to pull this out, you should check out my creamy baked bread dip. It shares that golden-crust appeal!
Mixing the Creamy Corn Dip Base
Grab your biggest mixing bowl because we are dumping everything in there! You mix the drained whole kernel corn, the cream style corn (undrained!), the softened cream cheese, both cheeses, mayo, sour cream, green onions, cilantro, and all those lovely spices—cumin, chili powder, garlic powder, salt, and pepper. You need to stir and fold this mixture until it’s completely smooth and you don’t see any big white streaks of cream cheese remaining. It should look like a thick, creamy, colorful batter ready for baking.
Once it’s smooth, spread that mixture out evenly in your prepared dish. Don’t skimp on spreading it edge-to-edge! Then, sprinkle that glorious 1/2 cup of panko breadcrumbs right over the top. Give the crumbs a gentle pat down so they stick slightly.
Baking Time and Temperature for Perfect Corn Dip
Slide that dish into your 375°F oven and set a timer for 20 minutes. Honestly, your dip is done when it’s piping hot all the way through—I mean, you should see it bubbling happily around the edges—and that panko topping has turned a beautiful, light golden brown. This usually takes about 20 to 25 minutes, depending on your oven. Resist the urge to dig in right away, though! Seriously, let it sit cooling on the counter for about five minutes. This helps the dip set up just enough so it doesn’t run everywhere when you scoop it the first time.
Tips for Success: Making Your Corn Dip Recipe Foolproof
This amazing **corn dip** recipe is so forgiving, which is why I trust it for busy days or when I’m slightly distracted while hosting. Even when you’re trying to manage a main dish and keep the kids entertained, these little tweaks will ensure your dip comes out tasting like you spent hours on it. It’s all about planning ahead for the spice level and knowing your appliance options. We’ve got plenty of options for dipping too; keep some classic cheese straws on hand if bread and crackers aren’t enough for your crowd!
Spice Variations for Your Corn Dip
If your crew likes things with a little fire, you have to use the jalapeno tip I included! It’s super simple: just grab one small jalapeno, seed it out (unless you *really* love the burn—then leave some seeds in!), mince it finely, and toss it right into the mixing bowl with the other ingredients. That fresh, sharp heat cuts through the richness of the cream cheese perfectly. It really elevates the flavor profile!
Alternative Cooking Methods for Corn Dip
What if you don’t want to heat up the oven, or maybe you’re bringing this to a potluck and need it to stay hot all afternoon? That’s where the slow cooker comes in handy! Just combine all the ingredients—leave off the breadcrumbs for now—and set your cooker to low for about two hours, or high for one hour. Stir it halfway through cooking so everything melts evenly. My trick? Add those breadcrumbs on top during the last ten minutes on the high setting just so they can toast a little bit without burning!
Serving Suggestions for This Crowd Pleaser Corn Dip
Okay, the oven timer went off, the dip is bubbly, and you waited that mandatory five minutes for it to cool down slightly so nobody burns their mouths off on that molten cheese! Now comes the best part: deciding what vehicle you’re using to get this amazing **corn dip** from the dish to your face. Since this is a rich, heavy dip, sturdy dippers are absolutely essential. If you serve flimsy chips, you’re setting everyone up for failure and broken chip shards at the bottom of the dish, and nobody wants that mess!
When aiming for those classic Dip Recipes Crowd Pleaser vibes, you need things that can handle the weight of the cheesy mixture. I always make sure I have a variety ready so there’s something for everyone, whether they’re after salty crunch or something healthier!
- Tortilla Chips: This is non-negotiable, especially for game day. Go for the thick, restaurant-style or Scoops-brand chips. They have the sidewalls necessary to lift a hefty scoop of this warm corn dip without folding mid-air.
- Sturdy Crackers: Think crisp water biscuits or maybe even some hearty rye crackers if you want a little extra flavor contrast. Avoid anything too delicate here.
- Fresh Veggies: For a lighter option, celery sticks, bell pepper strips, or thick slices of cucumber are fantastic. They offer a cool, crisp counterpoint to the heat and richness of the baked dip.
If you’re looking for another great crispy side to serve alongside dips, you have to try making my homemade potato chips. They bake up beautifully crisp and are perfect for scooping!
Storing and Reheating Leftover Corn Dip
Listen, I hope this doesn’t happen because this cheesy corn dip is *always* the first thing gone at a party, but sometimes you end up with leftovers. And that’s okay! The good news is that rich, dairy-heavy dips like this one store relatively well, provided you keep a few things in mind so the texture doesn’t turn weird when you reheat it later. Trust me, eating this cold straight from the fridge is just wrong—it needs that warmth to bring those spices and cheese back to life!
The biggest thing to remember is that after baking, the texture changes slightly as it cools and the fats solidify. We want to gently coax it back to bubbly perfection without scorching the edges or making the center grainy.
Cooling Completely Before Storage
Don’t even think about putting hot leftovers straight into the fridge! You need to let the dish cool down near room temperature first. Putting a hot dish into your refrigerator messes with the temperature of everything else in there, and it traps steam, which can make the dip watery or soft. Once it’s cool to the touch, cover that 8×8 dish tightly with plastic wrap, or scoop the remaining **corn dip** into a smaller airtight container. It should be good in the fridge for about three to four days max.
Reheating Options for Warm Corn Dip
When you’re ready for round two, you have a couple of options. The oven is usually the best way to restore that lovely baked texture we worked so hard to achieve in the first place.
- Oven Method (Best Texture): Pop the leftovers (in an oven-safe dish!) back into a 350°F oven. Let it bake until it’s hot throughout—this usually takes 15 to 20 minutes. If you saved the panko topping separately, sprinkle fresh breadcrumbs on top about five minutes before it’s done!
- Microwave Method (Fastest): If you’re just snagging a small serving, the microwave is fine. Use short 30-second bursts, stirring well between each session. Just be careful! Dairy heats unevenly, so stir frequently to avoid hot spots, even if the middle still looks a little cool.
If you happen to have leftover tortilla chips, you can always make a quick appetizer snack by serving the reheated dip alongside fresh, crispy ones!
Frequently Asked Questions About Making Corn Dip
I know when I’m making a new party recipe, my head fills with questions before I even start shopping! I’ve tried to cover every little thing in the steps above, but let’s tackle the most common issues I hear about when folks make this creamy appetizer. Getting answers to these few things upfront really helps you feel confident when you walk into the kitchen!
For more foundational recipe help, don’t forget to check out my tips for making great homemade tomato sauce—even simple recipes benefit from knowing the basics!
Can I make this Easy Corn Dip Recipe ahead of time?
Yes, you absolutely can! This is one of the reasons it’s such a great Easy Corn Dip Recipe for parties. You can mix everything—the whole corn, cream style corn, cheeses, spices, everything—in your baking dish up to 24 hours in advance. Cover it tightly with plastic wrap and stick it in the fridge. The only thing I tell folks NOT to do is add the panko breadcrumb topping until about 15 minutes before you plan to put it in the oven. If you add the crumbs too early, they’ll absorb moisture sitting in the fridge and won’t get that beautiful golden crunch when baked!
What cheese works best in a Cheesy Corn Dip?
For the best flavor and melting quality in this **Cheesy Corn Dip**, I lean on a blend, which is why the recipe calls for both. Monterey Jack is fantastic because it melts so smoothly and has a mild, buttery flavor that carries the corn sweetness. However, you absolutely need that sharp Cheddar! The sharpness adds a punch that keeps the dip from tasting too flat or just ‘creamy.’ If you have to substitute, stick with a good quality mild Colby Jack for the Jack component, but try not to ditch the sharpness from that Cheddar!
Is this a Cold Corn Dip or Hot Appetizer?
This specific recipe is formulated to be a **Hot Appetizer**! It relies on the heat of the oven to melt the cream cheese and combine the dairy into that thick, molten base, and it’s finished with a baked golden topping. While there are fantastic cold dips out there—like those Mexican Street Corn salads—this baked version must be served warm straight from the oven for the best experience. If you let it cool too long, it gets very stiff, so make sure you plan your oven time right before your guests arrive!
Estimated Nutritional Profile for This Corn Dip
Now, I want to be super clear about this part. When I’m cooking for my family and friends, the joy is in the flavor and the gathering—nutrition facts are usually the last thing on my mind! However, because we believe in giving you all the information you need to feel secure about what you’re serving, I ran the numbers on this recipe. Please remember that these figures are just estimates based on the ingredients listed and how many servings we get out of the dish. If you use different types of cheese or add extra jalapenos, these numbers will shift!
We made this recipe yield about 6 servings, keeping in mind that this is a rich appetizer best enjoyed in moderation with friends. If you’re looking for lighter fare, you might want to check out my recipe for an easy, moist lemon olive oil cake for dessert, which pairs nicely with lighter meals!
- Serving Size: 1/6 of recipe
- Calories: Approximately 380 per serving
- Total Fat: About 32g (With 18g as Saturated Fat)
- Carbohydrates: Roughly 15g
- Protein: Around 11g
- Sugar: About 5g
- Sodium: Be aware this is around 550mg due to the cheeses and added salt.
It’s definitely comfort food because of that fat content from the cream cheese and mayo, but every single calorie is worth it when you see that cheesy pull!
Share Your Game Day Dip Ideas
Phew! We’ve covered everything from ingredient prep to reheating, and now it’s your turn. Honestly, this is my favorite part of running The YumMagnet Recipe Box. Seeing the pictures and hearing your real-life game day stories is what keeps me experimenting in the kitchen!
This baked **corn dip** is famous in my circle, and I really hope it becomes famous in yours too. When you make this for your next busy gathering or Sunday football feast, please don’t be shy! Leave a star rating right here on the page—it really helps others decide if this is their next must-make appetizer.
Did you add the jalapenos? Did you serve it with sturdy crackers or tortilla chips? Tell me everything in the comments below! Your feedback and shared successes help build this community where we all figure out how to bring warmth to the table, even when life is moving at a million miles an hour.
If you’re curious about the mission behind taking these classic family flavors and adapting them for modern speed and convenience, you can always read more about our story here. Thanks for cooking with me, and happy dipping!
PrintThe Ultimate Cheesy Baked Corn Dip for Game Day

Make this creamy, cheesy baked corn dip for your next party or gathering. It is a simple crowd-pleaser that uses basic ingredients and comes out bubbly and hot.
- Prep Time: 10 min
- Cook Time: 25 min
- Total Time: 35 min
- Yield: 6 servings 1x
- Category: Appetizer
- Method: Baking
- Cuisine: American
- Diet: Vegetarian
Ingredients
- 1 (15 ounce) can whole kernel corn, drained
- 1 (15 ounce) can cream style corn, undrained
- 8 ounces cream cheese, softened
- 1 cup shredded Monterey Jack cheese
- 1 cup shredded sharp cheddar cheese
- 1/2 cup mayonnaise
- 1/4 cup sour cream
- 1/2 cup chopped green onion
- 1/4 cup chopped fresh cilantro (optional)
- 1 teaspoon chili powder
- 1/2 teaspoon cumin
- 1/4 teaspoon garlic powder
- 1/4 teaspoon salt
- 1/4 teaspoon black pepper
- 1/2 cup panko breadcrumbs (for topping)
Instructions
- Preheat your oven to 375 degrees Fahrenheit. Lightly grease an 8×8 inch baking dish.
- In a large bowl, combine the drained whole kernel corn, cream style corn, softened cream cheese, Monterey Jack cheese, cheddar cheese, mayonnaise, sour cream, green onion, cilantro, chili powder, cumin, garlic powder, salt, and pepper. Mix until all ingredients are fully incorporated and smooth.
- Spread the corn mixture evenly into the prepared baking dish.
- Sprinkle the panko breadcrumbs over the top of the dip mixture.
- Bake for 20 to 25 minutes, or until the dip is hot throughout and the topping is lightly golden brown.
- Let the dip cool for 5 minutes before serving warm with tortilla chips or crackers.
Notes
- For a spicy kick, add 1 small, seeded, and minced jalapeno to the mixture.
- If you prefer a slow cooker method, combine all ingredients (omit breadcrumbs) and cook on low for 2 hours or high for 1 hour, stirring halfway through. Top with breadcrumbs during the last 10 minutes of cooking.
- This dip is excellent served with sturdy tortilla chips or sturdy crackers.
Nutrition
- Serving Size: 1/6 of recipe
- Calories: 380
- Sugar: 5
- Sodium: 550
- Fat: 32
- Saturated Fat: 18
- Unsaturated Fat: 14
- Trans Fat: 0.5
- Carbohydrates: 15
- Fiber: 2
- Protein: 11
- Cholesterol: 75