
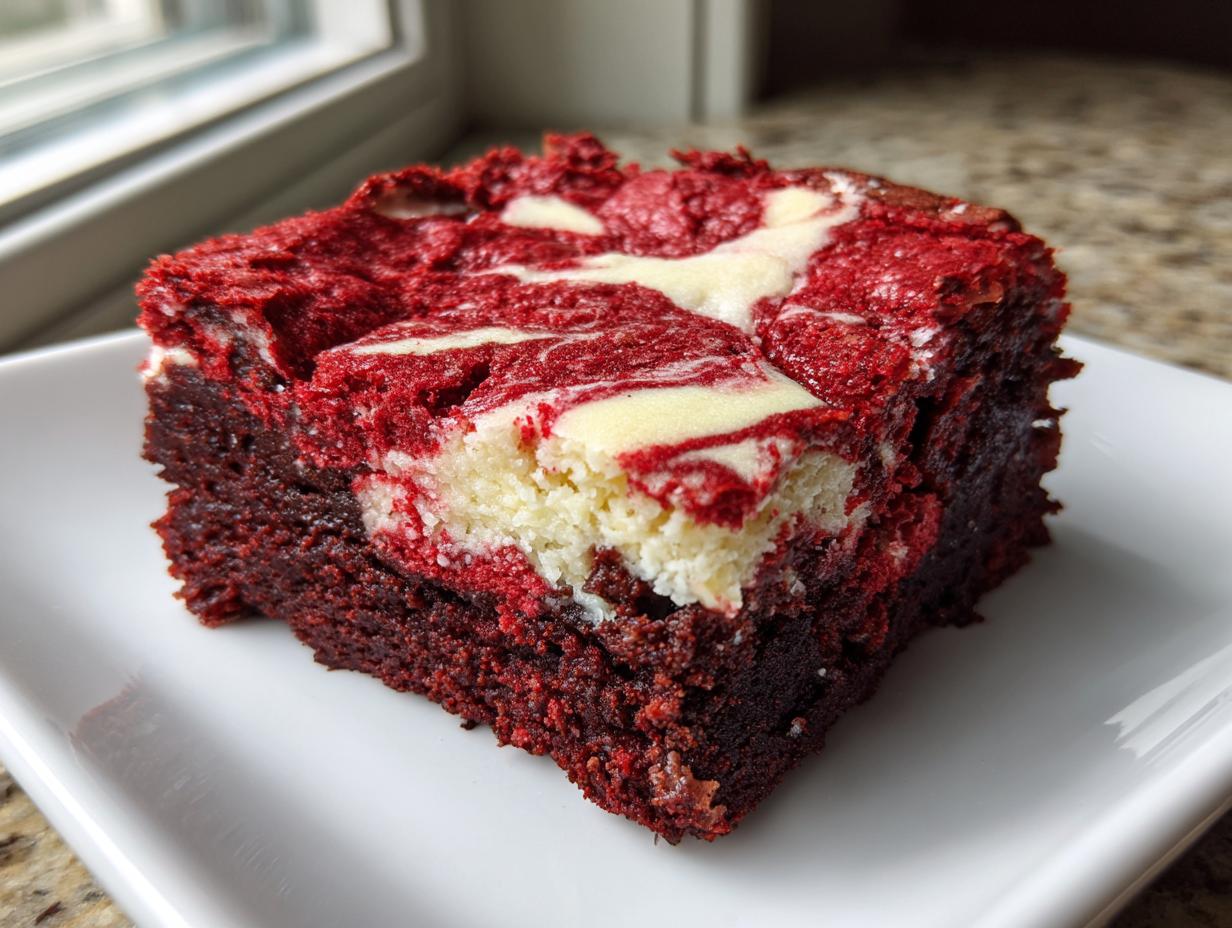
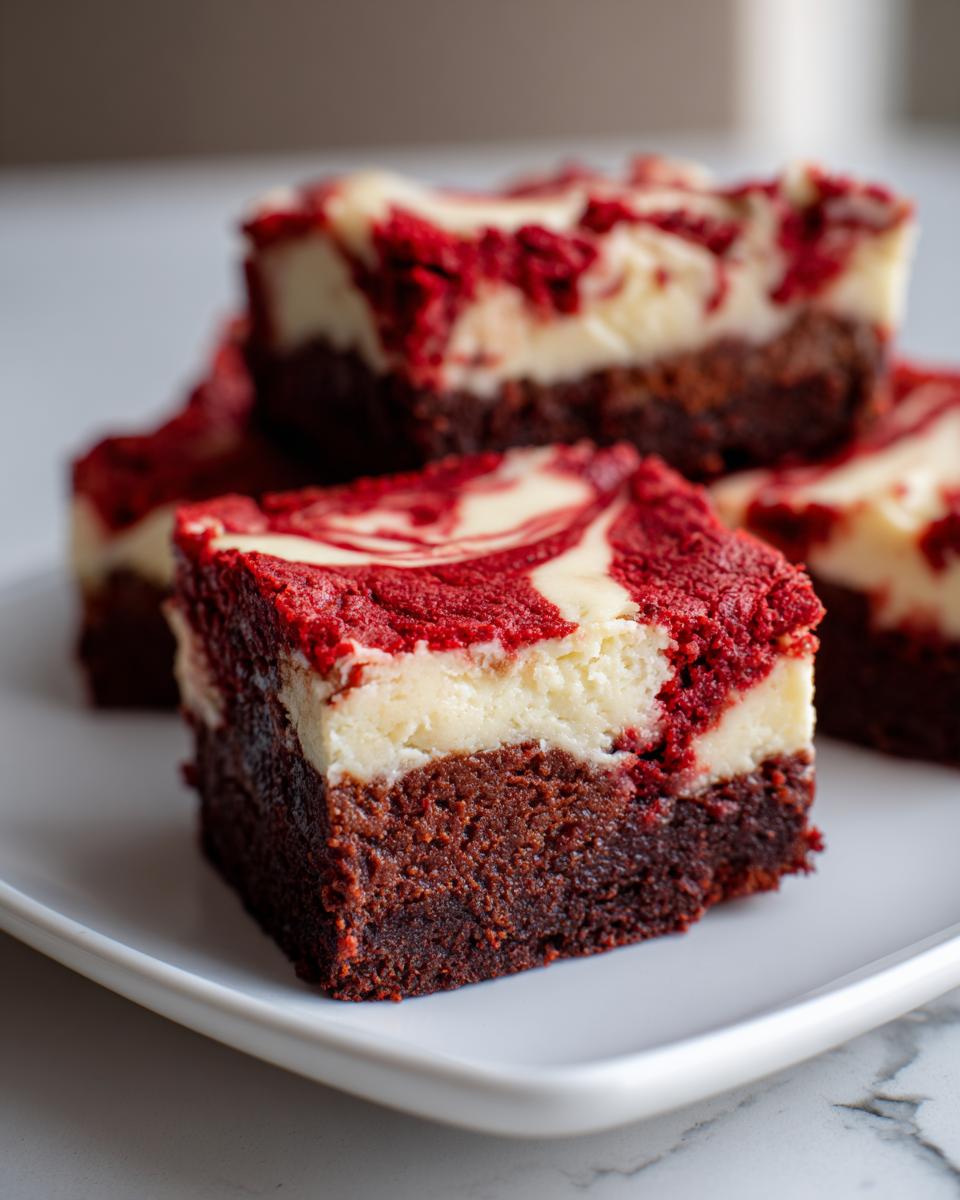
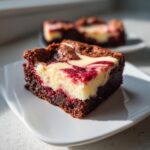
If you’re anything like me, standing in the kitchen trying to decide between a rich, fudgy brownie and a tangy, creamy slice of cheesecake feels like a genuine crisis! Why choose when you can have both? That’s the magic behind these red velvet cheesecake brownies. They’re truly the best of both worlds, blending that melt-in-your-mouth, chocolatey red velvet base with a gorgeous, tangy cream cheese ribbon running right through the middle.
When I started The YumMagnet Recipe Box, I knew I needed recipes that delivered big on flavor but respected the fact that we don’t all have hours to spend baking. My family legacy is built on taking comforting classics and making them practical for today’s kitchens. These decadent bars are a perfect example of that philosophy in action. They look incredibly fancy, making them the **Ultimate Dessert Bars** for any party, but the process is surprisingly straightforward. Trust me, once you master this beautiful marbled effect, this recipe will be a staple!
I can promise you, these red velvet cheesecake brownies are not only stunningly beautiful, but they’re packed with the satisfying flavor profile we all crave. Ready to see how easy it is to get that perfect swirl? You can find more of my practical, high-flavor recipes over at my main collection here!
- Why You Will Love These Red Velvet Cheesecake Brownies
- Essential Ingredients for Perfect Red Velvet Cheesecake Brownies
- How to Prepare the Ultimate Red Velvet Cheesecake Brownies
- Tips for Perfect Red Velvet Cheesecake Brownies Every Time
- Storage and Reheating for Your Red Velvet Cheesecake Brownies
- Serving Suggestions for These Decadent Bar Cookies
- Frequently Asked Questions About Red Velvet Cheesecake Brownies
- Nutritional Estimate for Red Velvet Cheesecake Brownies
- Share Your Decadent Red Velvet Cheesecake Brownies Creations
Why You Will Love These Red Velvet Cheesecake Brownies
I get asked all the time why I chose to put this recipe front and center on the blog, and honestly, it’s simple. These cheesecake swirl brownies check every single box a busy home cook needs. Here are the top reasons I know you are going to adore them as much as my family does:
- The Texture Contrast is Everything: Seriously, you hit that fudgy, slightly dense red velvet bottom layer, and then—BAM—you get that smooth, slightly tangy counterpoint from the cream cheese layer. It’s a two-for-one in mouthfeel heaven!
- They Are Stunningly Pretty: That marbled look? It screams ‘I spent all day baking!’ even though we both know it didn’t take long at all. They are instant showstoppers perfect for gifting or special gatherings.
- Super Quick Prep Time: We’re talking minutes on the brownie batter and minutes on the swirl batter. You mix two simple components, layer them up, and you’re done. It’s perfect when you need an impressive dessert fast.
- It’s a Flavor Powerhouse: The cocoa in the red velvet cuts through the richness of the cheesecake just enough. It’s not overly sweet, which is a huge win for me—that balance keeps you coming back for just one more.
Essential Ingredients for Perfect Red Velvet Cheesecake Brownies
Okay, for these red velvet cheesecake brownies, we aren’t using a million fancy things. That’s the beauty of this recipe—it relies on pantry staples plus a few key items to get that *rich chocolate cheesecake treats* flavor we’re aiming for. I’m listing everything out for you exactly as I use it to ensure you get that beautiful, fudgy bottom and the creamy swirl!
- 1/2 cup unsalted butter, melted
- 1 cup granulated sugar
- 2 large eggs, room temperature
- 1 1/2 teaspoons red food coloring
- 2 teaspoons vanilla extract
- 1/2 teaspoon salt
- 3/4 cup all-purpose flour
- 3 Tablespoons Dutch process cocoa powder
- 8 ounces cream cheese, room temperature
- 1 large egg, room temperature (for swirl)
- 1/3 cup granulated sugar (for swirl)
Listen up, the most crucial thing here is temperature control for the cheesecake part. If your cream cheese is cold, you’ll end up with chunky bits in your beautiful swirl. We want creamy, not lumpy! Make sure that 8 ounces of cream cheese and the extra egg for the swirl are sitting out on the counter for at least an hour before you start.
Ingredient Notes and Substitutions for Your Red Velvet Cheesecake Brownies
Now, let’s talk color and chocolate depth for your *Fudgy Red Velvet Dessert*. For the most vibrant, deep red, skip the thin liquid food coloring you might find near the sprinkles. You absolutely must use a high-quality, concentrated gel food coloring. A little goes a long way to get that true, dramatic red velvet look.
When it comes to the cocoa, I specify Dutch process cocoa powder. This kind is treated cocoa powder, which gives you a darker color and smoother, less acidic chocolate flavor. If you only have natural cocoa powder—say, the kind Hershey’s usually sells—it will still work, but your final brownie layer might be slightly lighter in color. Don’t sweat it if you have to substitute, but know the Dutch process gives the best result for those bakery-style brownies at home!
How to Prepare the Ultimate Red Velvet Cheesecake Brownies
Alright, let’s get baking! Preparing these stunning **red velvet cheesecake brownies** is all about keeping things layered and gentle—especially when you’re swirling. First things first: make sure your oven is humming along at 350°F (175°C). I always line my 9-inch square pan with parchment paper, letting the paper hang over two sides. Those overhangs become my built-in handles later, making it so easy to lift the whole slab out later. Seriously, don’t skip that hangover! If you want more ideas on making fudgy bars without the fuss, check out my tips for fudgy date brownies.
Mixing the Fudgy Red Velvet Brownie Batter
We start with the red velvet batter. Whisk your melted butter and the 1 cup of sugar until they’re happy together. Then, beat in those two room temperature eggs one by one! Once they’re blended, go ahead and stir in your vanilla and all that gorgeous red food coloring until you have a uniform color—it should look like a superhero cape!
In a separate bowl, quickly whisk your flour, salt, and cocoa powder together. Now, here’s the trust-building step: add the dry ingredients slowly to the wet. You want to mix this *just* until you don’t see any white streaks of flour left. I mean it! If you overwork this batter, you’ll end up with tough, cakey brownies instead of that dense, fudgy delight we are aiming for. Stop mixing before you think you should!
Creating the Cream Cheese Swirl Technique for Red Velvet Cheesecake Brownies
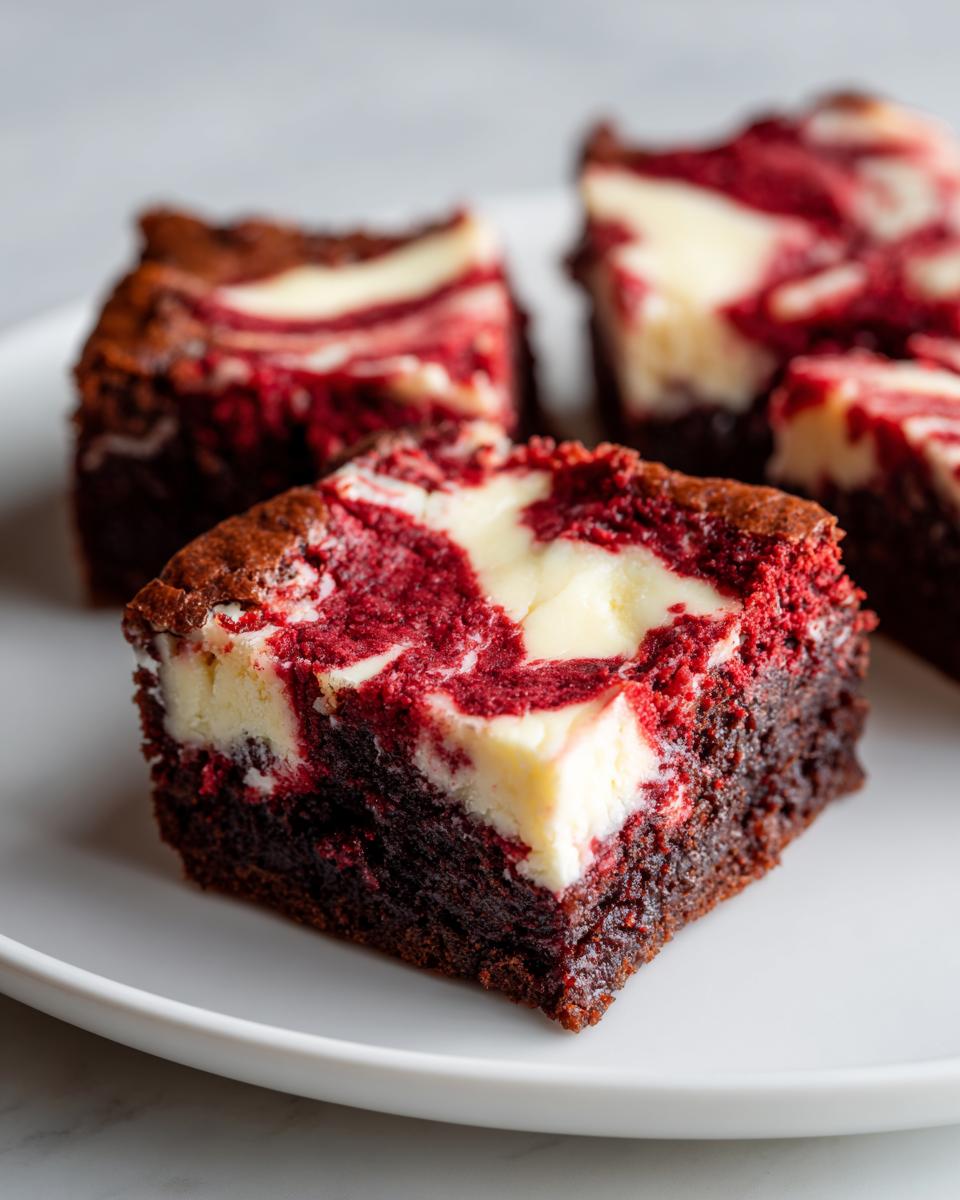
While the batter is resting, whip up your cheesecake layer until it’s totally smooth—no lumps means better marbling! Now, it’s time for assembly. Spread about half of that vibrant red batter into your prepared pan first. Then, drop spoonfuls of the cheesecake mixture right over the top. Finish by spreading the rest of the red batter over that.
For the swirl—this is where the magic happens! Take a butter knife or a thin skewer and gently drag it through both layers, making big, lazy figure-eights. Don’t keep dragging it back and forth like you are trying to clean a floor! Over-swirling is the number one reason people end up with a uniform pink mess rather than a *Marbled Brownie Recipe*. We want defined ribbons! This low-effort **easy swirl technique** is what makes these desserts so impressive.
Tips for Perfect Red Velvet Cheesecake Brownies Every Time
I’ve made this recipe dozens of times—for neighborhood potlucks, Valentine’s Day, and just because I needed a serious chocolate fix—and I’ve picked up a few critical things that take these red velvet cheesecake brownies from “really good” to “I need the recipe NOW.” These little tips make all the difference in getting that professional, bakery-style look and feel.
First, let’s talk about baking time. Fudgy vs. Cakey is often decided in the last five minutes of baking. You want a slightly underbaked center when you pull them out! The instructions call for moist crumbs, not wet batter, right? Well, if you wait until the toothpick comes out totally clean, you’ve waited too long, and your *Decadent Bar Cookies* will be dry the next day. Keep a close eye on them after the 30-minute mark.
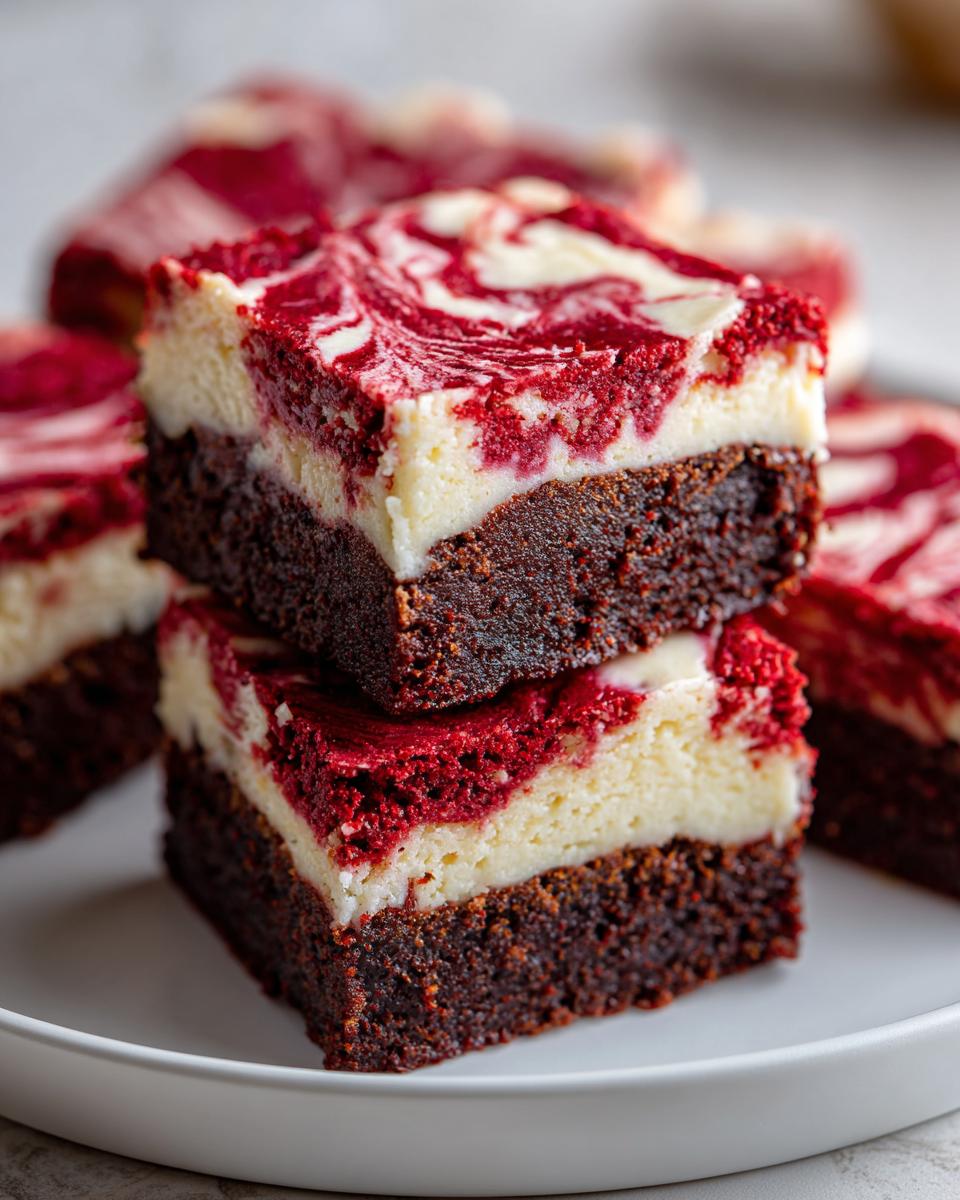
My secret to those impossibly clean slices—the secret that proves you made **Bakery Style Brownies at Home**—is patience after baking. I know you want to dive in while they’re warm and gooey, but you can’t cut them immediately. That cheesecake layer needs time to set up completely. Seriously, wrap them tightly in that parchment sling and stick them in the fridge for at least an hour, maybe two, before you slice them. Chilled brownies cut like butter, giving you those sharp, perfect edges.
Another thing that helps texture is ensuring you use room temperature eggs for *both* batters. I mentioned it above, but I have to repeat it because it’s that important for marrying the fat with the sugar and liquid without encouraging gluten development. When the cold egg hits the batter, it slows everything down, and you get a less cohesive texture.
And finally, for that beautiful, vibrant red, remember what I said about gel coloring versus liquid. If you are trying to boost the flavor profile, maybe you check out my ideas for zesty lemon brownies sometime for a bright contrast, but for red velvet, the color is key to the visual payoff here. Use the gel!
Storage and Reheating for Your Red Velvet Cheesecake Brownies
Since these gorgeous **red velvet cheesecake brownies** have that luscious cream cheese layer, they need a little more care than your average standard brownie—but don’t worry, it’s super easy! The most important thing to remember is that the cheesecake part prefers the cold. It really helps set everything up, which, as we discussed, is critical for getting those beautiful, clean slices.
For day-to-day enjoyment, if you plan on eating them over the next few days, keep them stored in an airtight container, preferably in the refrigerator. Because of the cream cheese, they’ll stay fresh and sturdy in the fridge for up to five days. If you leave them out on the counter, they might get a little too soft, and trying to slice them after they’ve warmed up will definitely result in a messy situation.
If you somehow manage to have leftovers even after that, these freeze like a dream! I usually cut them into squares first—this is much easier to do when they are totally chilled, remember that trick? Then, I wrap each square tightly in plastic wrap, and stack them in a freezer-safe bag. They can sit in the freezer for about two months. Trust me; having a frozen **homemade brownie recipe** stashed away is perfect for emergency dessert cravings!
What about reheating? Well, to be honest, I rarely reheat them! They are amazing right out of the fridge, slightly cold and firm. But, if you happen to prefer a gooier center, you can take one square out of the fridge, let it sit on the counter for about 15 to 20 minutes before eating. If you are absolutely dying for that warm, melty texture, zap it in the microwave for just 10 to 15 seconds max. Any longer and you risk making the brownie part overly soft and the cheesecake part weirdly runny. Keep it quick!
Serving Suggestions for These Decadent Bar Cookies
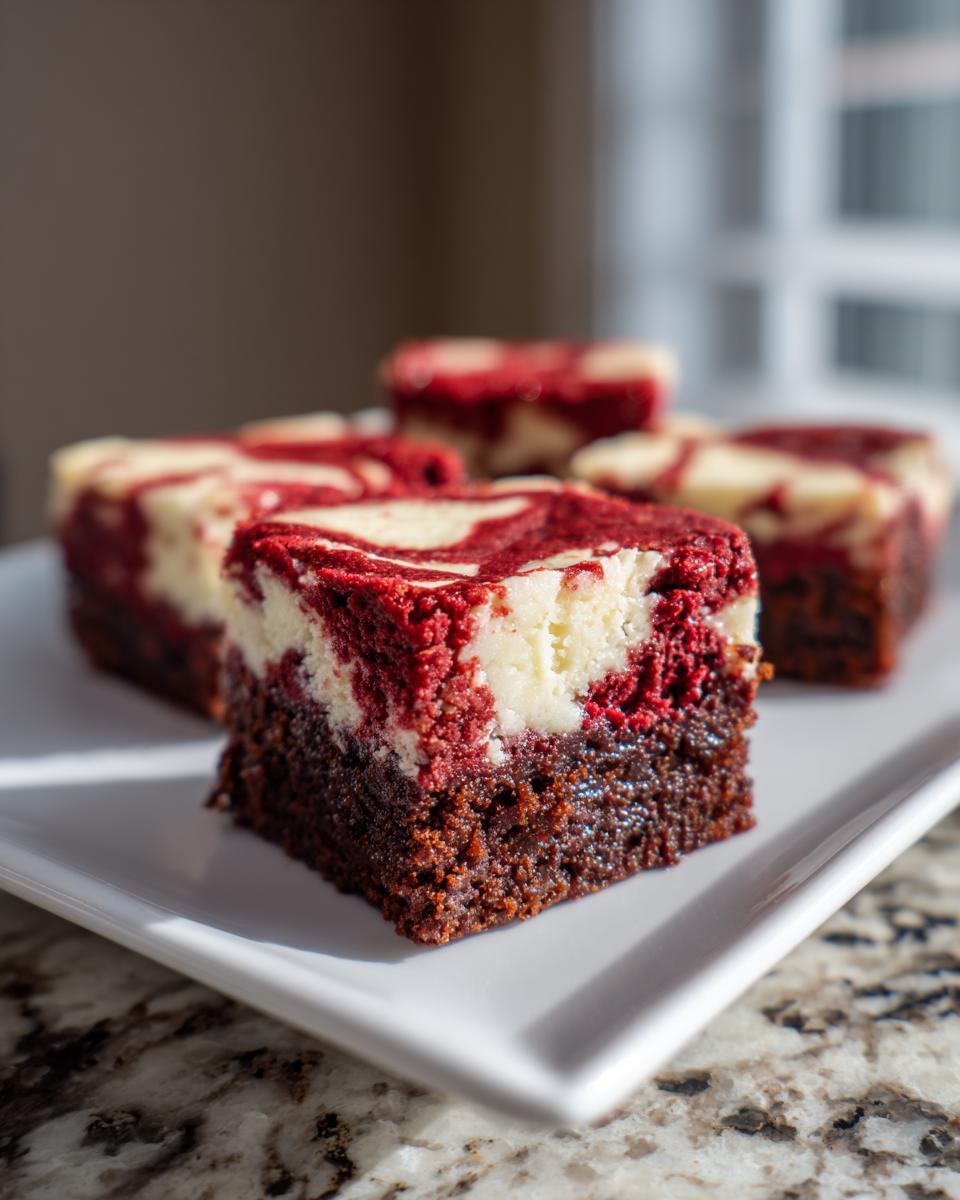
Part of the joy of bringing out a big pan of **red velvet cheesecake brownies** is seeing everyone’s face when they take that first bite. These **two-in-one dessert bars** are incredibly rich on their own, so I like to keep the accompaniments simple so the beautiful swirl and flavor really shine through. You’ve already put in the work to make these showstoppers, so let them take center stage!
If you are serving these immediately after baking (and letting them cool slightly, of course!), a simple dusting of powdered sugar on top is all they need. It looks elegant and gives a nice visual pop against that deep red color. For slicing, remember my advice to chill them first—a sharp knife and a cold brownie are your friends!
When thinking about drinks to serve alongside these **rich chocolate cheesecake treats**, I always reach for something that can cut through the richness. A strong, hot cup of coffee or a dark roast espresso is just perfect. The slight bitterness beautifully balances out the sweetness of both the brownie and the cheesecake components.
For a real fancy vibe, especially if you’re serving them as a *Valentine’s Day Brownies* dessert, consider a very light dollop of fresh, unsweetened whipped cream on the side. When I make something this decadent, I like to balance it out. If you’re looking for my go-to savory dishes to balance out all that sugar, you should check out my famous fried chicken recipe over at my chicken spot—it’s the perfect palate cleanser!
Honestly though, the best way to serve them is slightly chilled, cut into perfect squares, and maybe warmed just a tiny bit for about 10 seconds if you like that gooey center. Either way, get ready for the compliments to roll in!
Frequently Asked Questions About Red Velvet Cheesecake Brownies
It’s totally normal to have questions when you’re tackling a hybrid dessert like this! We want perfect color, perfect fudge factor, and those beautiful swirls. I’ve gathered up the most common things folks ask me when they are making these **red velvet cheesecake brownies** for the first time!
Can I make these red velvet cheesecake brownies without cocoa powder?
Oh, that’s a tricky one. For traditional brownie texture—that rich, slightly chewy, dense texture that sets these apart from cake—you absolutely need that cocoa powder. Red velvet gets its *red* color from the dye, but the *brownie* part gets its signature deep flavor and texture from the cocoa. If you completely skip it, you end up with something that tastes like a very dense, sweet red cake layer, not a fudgy bar.
If for some reason you are completely out, you could try replacing the cocoa with an equal amount of flour, but you might want to add just a tiny pinch of instant coffee granules if you have them—that can trick your brain into tasting more chocolate depth. But honestly? For the best **fudgy red velvet dessert**, keep the cocoa in there! If you enjoy a truly light cake, you might prefer checking out my easy lemon olive oil cake instead!
What is the secret to achieving a perfect cream cheese swirl in my brownies?
I call this the secret to perfect **cream cheese swirl baking**! The absolute key is room temperature everything. Not just the 8 ounces of cream cheese, but that extra egg going into the swirl, too. If your ingredients are cold, they will clump when you beat them together, and those clumps will just sit there looking sad when you try to swirl them into the batter.
Once the layers are in the pan, remember what I said: gentle, lazy figure-eights with a knife. Don’t overdo it! You are just trying to marry the two batters slightly so they swirl together beautifully. If you dig deep and make lots of passes, you’ll mix all the red right out of the cream cheese, and you won’t get that stunning marble effect that makes these **easy cheesecake brownies** so pretty.
Are these considered good Holiday Brownie Recipes?
Are you kidding me? They are practically mandatory for the holidays! Red velvet is the universal color for celebrations, especially around Christmas and Valentine’s Day. When you pull that pan out, and everyone sees that vibrant red color contrasting with that creamy white swirl, they stop talking about whatever else is on the dessert table. They look incredibly impressive, which is why they are frequently called **showstopping desserts**.
Because they hold up so well and are meant to be served at room temperature (or chilled!), they are perfect for setting out on a tray for a big party. They are easy to grab and eat without needing extra plates or spoons, which is the mark of a great **holiday brownie recipe** in my book!
Nutritional Estimate for Red Velvet Cheesecake Brownies
Okay, let’s talk real talk for a second. When we’re whipping up something this decadent, like these **red velvet cheesecake brownies**, we know we aren’t exactly aiming for a light salad! But I believe in knowing what’s in the food we lovingly prepare for our families. So, here is the estimated nutritional breakdown for one square of these glorious treats based on the ingredients we used in this recipe.
Please remember that since these are homemade, and depending on the exact brand of butter or sugar you use, these numbers are just a guideline. This gives us a good baseline for our **rich chocolate cheesecake treats**, but cooking is always a creative, slightly variable science!
| Component | Amount (per serving) |
|---|---|
| Serving Size | 1 square |
| Calories | 280 |
| Sugar | 25g |
| Total Fat | 16g |
| Saturated Fat | 9g |
| Carbohydrates | 32g |
| Protein | 4g |
| Sodium | 150mg |
We see a decent amount of sugar and fat here, which is what makes these **decadent bar cookies** so satisfying! The small amount of protein comes mostly from the eggs and cream cheese, which is nice when you are sneaking in a treat. Enjoy these responsibly, my friends!
Share Your Decadent Red Velvet Cheesecake Brownies Creations
Now that your kitchen smells like pure magic and you’ve got a pan full of these amazing **red velvet cheesecake brownies**, the best part is sharing them! Honestly, I live for hearing from you all. When you bake one of my family recipes, you become part of The YumMagnet story, and I really want to see how they turned out!
If you made these and they became your new favorite **Best Red Velvet Dessert**, please don’t keep that joy to yourself! Scroll right down and leave a star rating and a little comment below. Tell me how you liked the fudgy texture or if you mastered the swirl technique. Your feedback inspires me every single day as I work to bring practical, flavorful recipes to you.
And if you took a beautiful picture of those marbled squares—and I know you did!—snap a photo and tag me on social media! Seeing these treats out in the world, bringing joy to your family gatherings, is why I do this. It’s always fun comparing notes on styling or serving. If you needed a quick reference on my whole baking philosophy, you can learn more about me on the About Page.
If you’re sharing, make sure to tag us so I can feature your gorgeous bake! If you need some inspiration for an amazing neighbor gift or party contribution, you can always look at how others styled their treats, including some of my favorite tips found over at Just a Taste for holiday inspiration. Happy baking, and thank you for letting my family’s recipes become a treasured new part of yours!
PrintDecadent Fudgy Red Velvet Cheesecake Brownies with Perfect Cream Cheese Swirl
You get the best of both worlds with these fudgy red velvet cheesecake brownies. This recipe delivers a rich, chocolatey red velvet brownie base perfectly marbled with a tangy, creamy cheesecake swirl. It is a showstopping dessert perfect for holidays or any gathering.
- Prep Time: 20 min
- Cook Time: 35 min
- Total Time: 55 min
- Yield: 16 servings 1x
- Category: Dessert Bars
- Method: Baking
- Cuisine: American
- Diet: Vegetarian
Ingredients
- 1/2 cup unsalted butter, melted
- 1 cup granulated sugar
- 2 large eggs, room temperature
- 1 1/2 teaspoons red food coloring
- 2 teaspoons vanilla extract
- 1/2 teaspoon salt
- 3/4 cup all-purpose flour
- 3 Tablespoons Dutch process cocoa powder
- 8 ounces cream cheese, room temperature
- 1 large egg, room temperature (for swirl)
- 1/3 cup granulated sugar (for swirl)
Instructions
- Preheat your oven to 350°F (175°C). Line a 9-inch square baking pan with parchment paper, leaving an overhang for easy removal.
- Prepare the brownie batter: In a medium bowl, whisk together the melted butter and 1 cup of sugar until combined.
- Beat in the 2 room temperature eggs one at a time. Stir in the red food coloring and vanilla extract until the mixture is uniformly red.
- In a separate small bowl, whisk together the flour, salt, and cocoa powder. Gradually add the dry ingredients to the wet ingredients, mixing only until just combined. Do not overmix.
- Prepare the cream cheese swirl: In a separate bowl, beat the room temperature cream cheese until smooth. Add the remaining 1/3 cup of sugar and the second egg. Beat until the mixture is creamy and lump-free.
- Spread half of the red velvet brownie batter evenly into the prepared pan.
- Dollop spoonfuls of the cream cheese mixture over the brownie layer. Top with the remaining red velvet batter.
- Use a knife or skewer to gently swirl the cream cheese layer into the brownie batter to create a marbled effect. Do not over-swirl.
- Bake for 30 to 35 minutes, or until a toothpick inserted near the center comes out with moist crumbs attached, but not wet batter.
- Let the brownies cool completely in the pan on a wire rack before lifting them out using the parchment overhang. Cut into 16 squares.
Notes
- For the most vibrant red color, use a high-quality gel-based red food coloring.
- Ensure both the cream cheese and eggs for the swirl are at room temperature to prevent lumps.
- For bakery-style brownies, chill the cooled brownies for at least one hour before slicing cleanly.
Nutrition
- Serving Size: 1 square
- Calories: 280
- Sugar: 25
- Sodium: 150
- Fat: 16
- Saturated Fat: 9
- Unsaturated Fat: 7
- Trans Fat: 0.2
- Carbohydrates: 32
- Fiber: 1
- Protein: 4
- Cholesterol: 55